background image

40_


main menu

main menu

System Management

You can check the system version, update to a newer version, as well as data backup and initialization.

Checking the System Information

You can check the current system version, broadcasting system, MAC address. You can update the system.

           Using the mouse may help make setup easier.

1. 

Use the up/down buttons (

▲▼

) in <

System

> window to 

move to <

System Management

>, and press [

ENTER

button.

2. 

Check the Software Version, Broadcast Format, and MAC 

Address.

• 

System Information : Shows the current system’s 

information.

The values can not be changed by a user.

• 

S/W Upgrade : Updates the DVR’s software up to date.

• 

DVR Name : Assigned name will be displayed in Network 

Viewer, when connected to the DVR.

• 

Updating the Software

1. 

Connect a device storing the software to be updated.

(It may take about 10 seconds to recognize the device.)


`

Upgradeable devices include USB memory and network device.


`

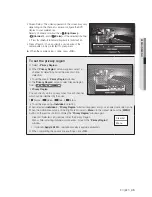
To update the network, the current DVR should have been 

connected to the network.

Upgrade via the proxy server may not be enabled due to the 

restricted access.

2. 

Select <

System Management

> from <

System

> window.

3. 

Select <

System Information

>.

4. 

When the recognized device appears, select <

Upgrade

>.


`

The <

Upgrade

> button will be activated only if the current <

Software Version

> of the <

System Information

> is 

same to or older than that of <

S/W Upgrade

>.

5. 

Press <

OK

> in the “

System Upgrade

” window.


`

While updating, it shows the progress.

 Software Version 

v1.0xh_yymmddhhmmss

 Broadcast Format 

NTSC

 MAC Address 

00:00:F0:54:FF:FF

System Management

System Information

Settings

Previous

 System Information

Search

OK

 Device 

Network

 Version 

No S/W Data

 DVR Name 

DVR

 S/W Upgrade

 Software Version 

v1.0xh_yymmddhhmmss

 Broadcast Format 

NTSC

 MAC Address 

00:00:F0:54:FF:FF

System Management

System Information

Settings

Previous

 System Information

Search

OK

 Device 

Network

 Version 

No S/W Data

 DVR Name 

DVR

 S/W Upgrade

System Upgrade

 OK 

Cancel

Current Version 

v1.0xh_yymmddhhmmss

New Version 

v1.0xh_yymmddhhmmss

Do you want to upgrade?

 Software Version 

V1.0xh_yymmddhhmmss

 Broadcast Format 

NTSC

 MAC Address 

00:00:F0:54:FF:FF

System Management

System Information

Settings

Previous


System Information

Upgrade

 Device 

USB2FlashStorage

 Version 

V1.0xh_yymmddhhmmss


S/W Upgrade

S/W Upgrade

Software upgrading...

Содержание SDS-P3042

Страница 1: ...4 8 16 CHANNEL DVR User Manual SDS P3042 P4042 P4082 P5082 P5102 P5122...

Страница 2: ...ded Use of this document and the subsequent results shall be entirely on the user s own responsibility Samsung Techwin reserves the right to change the contents of this document without prior notice D...

Страница 3: ...e blade or the third prong are provided for your safety If the provided plug does not fit into your outlet consult an electrician for replacement of the obsolete outlet 10 Protect the power cord from...

Страница 4: ...5 Do not place conductive objects e g screwdrivers coins metal parts etc or containers filled with water on top of the camera Doing so may cause personal injury due to fire electric shock or falling o...

Страница 5: ...like Risk of Explosion if Battery is replaced by an Incorrect Type Dispose of Used Batteries According to the Instructions System Shutdown Turning off the power while the product is in operation or u...

Страница 6: ...nvironment 15 Connecting External Devices 15 Connecting the USB 15 Connecting External SATA HDD 16 Connecting the Camera SDC 7340BC 18 Connecting the RS 485 Device 18 Connecting the Network live 20 20...

Страница 7: ...indows 92 Using Search Viewer 95 Viewer Setup 106 About 107 Connecting Web Viewer Mac 108 Using Live Viewer Mac 110 Mobile Viewer backup viewer 111 111 SEC Backup Viewer appendix 113 113 Product Speci...

Страница 8: ...eous Record and Playback of 4 8 16 channel video data Various Search Modes Search by Time Event Backup and Motion Detection Various Recording Modes Manual Event Scheduled Recording Alarm Interface Rem...

Страница 9: ...ble 1EA HDMI Cable 1EA Expansion pipe and Screw Manual CD 1EA Quick Start Guide 1EA Warranty Card 1EA Model SDC 7340BC Adapter Power cable Camera Cable Expansion pipe and Screw Camera Power cable SDS...

Страница 10: ...ontrol Receiver Input the remote control signal c LED Indicator POWER Displays the power ON OFF status REC Lights on when recording is in progress NETWORK Displays both network connection and data tra...

Страница 11: ...IN4 AUDIO IN VIDEO IN HDMI DC 12 V USB eSATA AUDIO OUT VGA LAN RS485 IN1 CH1 CH2 CH3 CH4 IN2 IN3 IN4 AUDIO IN VIDEO IN HDMI DC 12 V USB eSATA AUDIO OUT VGA LAN RS485 IN1 CH1 CH2 CH3 CH4 CH5 CH6 CH7 CH...

Страница 12: ...digits from 0 9 while pressing the ID Key SCROLL Moves the menu scroll RETURN Returns to the previous screen AUDIO Turns Audio on off ALARM Cancels the Alarm REC LOCK Selects the recording lock functi...

Страница 13: ...l is 00 2 Enter 2 digits of your selection in order while pressing the system ID button 3 When ID input is done press the system ID button again to check the setting M M If you want to change the remo...

Страница 14: ...ended that a fan motor is installed at the inlet and the outlet for air circulation Please fit a filter at the inlet to screen dust or foreign substances 6 Please maintain the temperature inside the r...

Страница 15: ...t it with FAT32 on PC if it is not formatted on the DVR ConneCTInG exTernAL SATA hdd eSATA External SATA port is provided on the rear panel If connected to the system the external SATA HDD eSATA can b...

Страница 16: ...not to fully expose the camera to rain The camera must be installed under a shelter to avoid exposure to excessive rain or moisture Name Description a IR LED These infrared LED s are controlled by the...

Страница 17: ...e wall using the supplied screws SDC 7340BC M4 X L20 3 Adjust the camera to target the video location and tighten the camera bracket handle on the camera bracket 4 Connect the camera cable to the came...

Страница 18: ...hange the polarity of the RS 485 device when connecting it Depending on camera s type connection polarity can be different For further information refer to the respective PTZ Camera s documentation Co...

Страница 19: ...UT VGA LAN RS485 IN2 HDMI DC 12 V USB eSATA VIDEO IN Broadband Router xDSL or Cable Modem External Remote PC DDNS Server Data Center NETWORK xDSL or Cable Modem IN1 IN3 IN4 AUDIO IN AUDIO OUT VGA LAN...

Страница 20: ...tem only if you have logged in to the DVR You require permission to shut down the system if you are not logged in as admin 1 Press the poWer button on the remote control or right click to display the...

Страница 21: ...ssword may expose your video data to potential threat Please change your password every three months to safely protect personal information and to prevent the damage of the information theft Please ta...

Страница 22: ...f a user with restricted access to the Record button tries to make manual recording Only the user with the applicable permission can release stop the recording d System Operation Displayed if the HDD...

Страница 23: ...contact the service center for assistance as this may cause a failure of recording playback or backup M If you see NO HDD HDD FAIL icons on the screen contact the service center for more details Live...

Страница 24: ...e standard recording f Play Plays the search result data Refer to Search Play Play Page 79 g Search Refer to Search Play Search Page 76 h Backup Refer to Main Menu Setting the Backup Page 58 i Main Me...

Страница 25: ...rom that of the Single mode Menu Description a Full Screen Select and click a desired channel in Split mode to switch to the full screen of the selected channel b Zoom In Enlarges the selected image P...

Страница 26: ...Time Page 32 b Screen Mode Press this button to switch the screen mode in sequence The current mode is highlighted in white c Menu Expansion Button Click to display the hidden menu to the right d Aud...

Страница 27: ...H14 CH15 CH16 CH1 CH4 CH5 CH2 CH6 CH1 CH3 CH7 CH8 CH9 CH13 CH14 CH11 CH15 CH10 CH12 CH16 CH1 CH3 CH2 CH4 CH5 CH6 CH1 CH2 CH15 CH11 CH16 CH12 CH7 CH3 CH8 CH4 CH13 CH9 CH14 CH10 CH5 CH1 CH6 CH2 CH1 CH2...

Страница 28: ...3 CH14 CH15 CH16 CH1 CH4 CH5 CH2 CH6 CH1 CH3 CH7 CH8 CH9 CH13 CH14 CH11 CH15 CH10 CH12 CH16 CH1 CH3 CH2 CH4 CH5 CH6 CH1 CH2 CH1 CH2 CH3 CH1 CH15 CH11 CH16 CH12 CH7 CH3 CH8 CH4 CH13 CH9 CH14 CH10 CH5 C...

Страница 29: ...4 CH11 CH15 CH10 CH12 CH16 CH1 CH2 CH3 CH1 CH15 CH11 CH16 CH12 CH7 CH3 CH8 CH4 CH13 CH9 CH14 CH10 CH5 CH1 CH6 CH2 CH15 CH11 CH16 CH12 CH1 CH3 CH8 CH4 CH13 CH9 CH14 CH10 CH5 CH7 CH6 CH2 CH5 CH6 CH7 CH8...

Страница 30: ...imply click in the launcher menu to release the zoom AudIo on off You can turn the sound on off corresponding to the channel in Live mode AudIo on off in Single mode Click the audio icon on the screen...

Страница 31: ...event occurs in CH 1 Ex If you set Event Display to 5 seconds and the second event occurs in CH 2 within the set time after the first event occurred in CH 1 M M Press the ALARM button to reset the al...

Страница 32: ...ge Using the mouse may help make setup easier 1 Press the MENU button on the remote control If not logged in it prompts with login window Refer to Login Page 21 2 Use the left right buttons _ to selec...

Страница 33: ...arlier than the GMT of its time zone by 1 hour during the set period Language Select your language Sets the language for the interface English French German Spanish Italian Chinese Simplified Russian...

Страница 34: ...2nd Wed to make every January 9th and 2nd Wednesday of January holidays 5 When the Holiday setup is done press OK Using the Calendar Using the mouse may help make setup easier Select year and month Se...

Страница 35: ...ging a password 4 When the administrator setup is done press OK Using Virtual Keyboard For alphanumeric inputs the virtual keyboard window appears Use direction buttons _ to move to a desired characte...

Страница 36: ...oard For entering a group name refer to Using Virtual Keyboard Page 35 Group Authority Sets permissions to access menu items of each group Users of a group can access checked functions 4 When the grou...

Страница 37: ...ed only the accessible context menus should appear To change the user password If you log in with a user account that is restricted to access the menu you can change your own password only 1 Log in wi...

Страница 38: ...ser window To change the user property use Edit User The Edit User window appears when you select a desired item to be changed in the User window Viewer If you select Use you will be given access to t...

Страница 39: ...setting If it is checked in Restricted Access a user can access the item only if the user has permission in Group Authority setting Restriction on Network Access Restricts remote access from a Restri...

Страница 40: ...ue to the restricted access 2 Select System Management from System window 3 Select System Information 4 When the recognized device appears select Upgrade The Upgrade button will be activated only if t...

Страница 41: ...the step 4 When you experience continued failure consult the service center for assistance When you perform S W update remotely using Smart Viewer it may take a max of 3 minutes to complete the update...

Страница 42: ...g and timestamp on every system start up system shutdown and changes on system settings Using the mouse may help make setup easier 1 Use the up down buttons in System window to move to Log Information...

Страница 43: ...to move to Log Information and press the ENTER button 2 Select Backup Log 3 Use the four direction buttons _ to move to a desired item 4 Specify a search term and select Search in the right corner Ba...

Страница 44: ...hing but an empty screen while the recording continues M If the channel is set to Covert1 or Covert2 mode the channel s sound is not hearable However the channel s sound is recorded if its Audio setti...

Страница 45: ...desired region from Privacy Region You can specify up to 4 privacy zones for each channel which can be identified by the color 1 Purple 2 Green 3 Blue 4 Yellow To set the area using Individual selecti...

Страница 46: ...choices RS 485 and Coaxial For the Coaxial type only SDR 5102 is supported ID Set the ID of the connected camera of each channel You can easily setup by using the numeric buttons on the remote contro...

Страница 47: ...Sets the storage device s usage USB memory is used only for backups External USB HDD SATA HDD are used for extension and backup A maximum of 2TB for each port is supported for backup on a high capacit...

Страница 48: ...vice to be formatted 4 Select Format on the bottom of the screen Press OK on the Manage confirmation window will start formatting the selected device 5 When the formatting is done press OK Storage Dev...

Страница 49: ...arm output port Replace Alarm Output Port If HDD generates replace alarm the alarm signal will output to the specified alarm output port Duration Sets the alarm duration for the alarm signal and beep...

Страница 50: ...e desired item and press ENTER button 3 Set the values of each communication setup of the remote device Baudrate Baud rate settings of the DVR PTZ camera and system keyboard should be matched for prop...

Страница 51: ...play video properly HDMI Resolution Auto Detection If the option is checked on and the HDMI is available DVR will automatically adjust optimized resolution based on monitor s setting If you need to co...

Страница 52: ...Mode 3 Use direction buttons _ to move to a desired item and set the value Live Screen Select split modes for the Live screen 16 9 and 4 split screens are included by default Play Screen Select split...

Страница 53: ...ach time cell and then select a type to start recording Apply to All CH If selected Apply to All CH Apply to All CH window appears Press OK to apply the setup to all channels 6 When the recording sche...

Страница 54: ...ctual end of an event If it is set to 5 seconds the recording ends in 5 seconds after an event 3 When the event recording duration setup is done press OK REC Quality Resolution You can set resolution...

Страница 55: ...ns _ to move to a desired item and set the value Disk End Mode If selected Overwrite recording will continue despite the HDD full while overwriting the oldest If selected Stop the recording will stop...

Страница 56: ...on and set the area of motion detection To set the area in Motion Region window In the Motion Region window select desired region from To set the area using Individual selection In the Motion Region w...

Страница 57: ...pears 2 Use direction buttons _ to move to a desired item and set the value Mode Set whether to use Tampering Detection or not Sensitivity Set the sensitivity level of tampering detection Alarm Set th...

Страница 58: ...m only when an event occurs M M When the alarm is generated on the scheduled time you can stop the alarm by canceling the schedule 3 When the Alarm Schedule setup is done press OK Backup You can check...

Страница 59: ...data on a same time according to the number of data It appears when one channel has multiple data on a certain time point due to changing of time or time zone settings etc Refer to time and time zone...

Страница 60: ...red Upload speed Options will vary depending on the selected connection mode For Static DHCP Select one from 50 kbps 2Mbps and Unlimited For PPPoE select one from 50 kbps 600 kbps IP Address Gateway S...

Страница 61: ...d UDP Unicast Transfers data packet to an individual client UDP Multicast Allows data communication to multiple clients causing no additional traffic to the network Multicast IP Address User can direc...

Страница 62: ...IP Address 192 168 1 200 Gateway 192 168 1 1 Subnet Mask 255 255 255 0 DNS Manual 168 126 63 1 Connection Mode Interface Port IP Type Static Transfer Bandwidth 2Mbps OK Cancel IP Address 192 168 1 202...

Страница 63: ...4520 4524 4520 4521 4522 4523 4524 SDR 5102 192 168 1 200 Port Forwarding is 80 SDR 5102 2nd Set Port Forwarding Setting Port Forwarding is 4525 4529 4525 4526 4527 4528 4529 SDR 5102 Port Forwarding...

Страница 64: ...et the Connection Mode in Interface menu of the connected DVR to DHCP PPPoE mode Internet connection An PPPoE modem is directly connected to the DVR where the PPPoE connection requires user ID and pas...

Страница 65: ...HCP range 192 168 0 2 192 168 0 99 and 192 168 0 201 192 168 0 254 3 Check the Gateway address and subnet mask are equal to those set in the Broadband Router Setting the DHCP IP Address of the Broadba...

Страница 66: ...keyboard to enter the Product ID Refer to Using Virtual Keyboard Page 35 If selected OFF input fields are deactivated If selected iPOLiS the server name field is disabled DDNS Site Set whether to use...

Страница 67: ...o the following Ex Protocol Type TCP Device Port 4520 4524 DDNS Site iPOLiS DDNS Settings of the Router Select the corresponding menu for the network transfer protocol of the router SETTING UP SAMSUNG...

Страница 68: ...DDNS DDNS Site iPOLiS Server Name www samsungipolis com Product ID Quick Connect Not Used Use DDNS Host Address http www samsungipolis com OK Cancel DDNS DDNS Site iPOLiS Server Name www samsungipolis...

Страница 69: ...ENTER button The Live Transfer window appears 2 Use direction buttons _ to move to a desired item and set the value Resolution Shows the selected network profile s resolution setting Quality Shows the...

Страница 70: ...Use direction buttons _ to move to a desired item and set the value ServerType Displays the connected server type Server Address Enter a server to connect to Port Sets the communication port Use Authe...

Страница 71: ...can add recipients for each group in the Recipient menu item The recipient is set separately from the DVR user group Using the mouse may help make setup easier 1 Use the up down buttons in Network wi...

Страница 72: ...select a recipient name e mail address or group You should have created a group in the Group menu item before you can add a user to the group For inputting the recipient name and email address refer t...

Страница 73: ...rol buttons Press the PTZ button on the remote control Using the launcher menu Click PTZ to display the live launcher Using the right click menu in Live mode Right click any area on the screen to disp...

Страница 74: ...right to rotate the lens clockwise Zoom You can use the Zoom function of the PTZ camera IRIS Adjusts the intensity of radiation incoming to the iris Focus Enables you to adjust the focus manually Swin...

Страница 75: ...presets M M If you replace the camera of the channel that stores the preset list with a new one you should reset the preset accordingly 3 Press OK The preset will be saved as a name that you entered C...

Страница 76: ...settings Using the mouse may help make setup easier 1 Select Time Search in the Search menu 2 Select a date to search Refer to Using the Calendar Page 34 3 The record data on the specific date will be...

Страница 77: ...to the event data playback mode Backup Search Searches for backup data in the connected backup device Only data in the format of DVR is included in the search Refer to Type in Backup Setting the Back...

Страница 78: ...e motion area manually Setup The Setup button will be activated only if you have set the motion area to Manual Press this button to display the area setting window Date Time The Date Time will be auto...

Страница 79: ...ck to set the current time to the start time of backup you can specify a backup area using the mouse yellow triangle Click again to set the current time to the end time of the backup and the Backup Ra...

Страница 80: ...up to 4 channels simultaneously at a low speed 1 2 1 8x speed In a split mode the real time playback may not be supported depending on the record quality resolution and number of channels And some fra...

Страница 81: ...mat compatible with popular media players needed the H 264 codec System Requirements The following lists the minimum suggested hardware and operating system requirements needed to run the Web Viewer O...

Страница 82: ...ult wireless router password may expose your video data to potential threat Please change your password every three months to safely protect personal information and to prevent the damage of the infor...

Страница 83: ...ow appears press the Install button to install the program 6 When the program installation is complete the Explorer window closes Open the web viewer window again to log in Live Viewer s main screen a...

Страница 84: ...into previous next channel or perform Auto Sequence Click Auto Sequence button to display the Time Interval Selection menu f CAPTURE Saves current video for selected channel in designated path PRINT...

Страница 85: ...ring is detected g Shows the recording status M M If you have set PTZ cameras for the DVR PTZ is displayed on the screen Select a PTZ camera channel and use the PTZ button for camera control Connected...

Страница 86: ...split mode selection button to switch to the corresponding screen mode To switch to full screen mode Click Current split screen appears in full screen Press the ESC key to exit the full screen mode S...

Страница 87: ...12 4th 4 channels 13 16 In NINE MODE the screens are changed from 9 channels 1 9 to 7 channels 10 16 When this button is clicked screens are switched at a preset interval In SINGLE MODE the channel nu...

Страница 88: ...the video ex GOM Player KM Player etc After saving an AVI file install the CODEC when playing it in Windows Media Player However the video may not played properly depending on the CODEC compliance of...

Страница 89: ...or camera framing and moves to designated preset position when selecting a desired preset d Swing Moves between the preset start point and end point e Group Moves in the path specified by combining th...

Страница 90: ...utton To activate the preset 1 Click button to display Preset window 2 Select a desired preset to activate from the list The camera s framing moves to the preset position To activate Swing Group Tour...

Страница 91: ...er camera s menu screen to change its settings Part Names Functions a Direction Adjustment You can go to a desired menu ENTER Selects a desired item b Menu On Off You can On Off camera s OSD menu sett...

Страница 92: ...d path PRINT Prints current video image for selected channel through designated printer AVI Save Records the live video in AVI file format in designated path and then stops recording Recording status...

Страница 93: ...sing calendar 1 Click or to select the year to search 2 Click or to select the month to search The date including data appears in blue and today appears in red 3 Click the date to search in calendar T...

Страница 94: ...nt playing point e Plays at doubled speed The playback speed is doubled up to 64x speed f Moves forward by 10 minutes from the current playing point g Moves to the recording start point on the corresp...

Страница 95: ...e in the System Setup menu Page 32 1 Select Date Time Language in the System menu 2 Configure the DVR settings according to your system environment Date Time Set the date and time Time Synchronization...

Страница 96: ...ion Management For more information refer to Permission Management in the System Setup menu Page 35 Admin You can change the admin ID or the password You can type the ID with alphanumeric characters o...

Страница 97: ...You can set the user permission System Management For more information refer to System Management in the System Setup menu Page 40 System Information You can see information of the current system Che...

Страница 98: ...screen For more information refer to Setting the Device Page 44 Camera Camera You can configure the settings of the camera that is connected to the DVR Privacy Region You can specify a certain area of...

Страница 99: ...ces that are connected to the DVR You can check the type used total usage and status of the device HDD Alarm You can set the alarm output channel and the alarm duration for an error Remote Device You...

Страница 100: ...100_ web viewer web viewer Monitor Monitor You can configure the monitoring screen settings and set the output system Mode You can switch between live mode and play mode...

Страница 101: ...chedule If you set a recording schedule for a specific date and time the recording will start at that specific time Apply to All CH Click Apply to All CH to display the confirmation window Event Recor...

Страница 102: ...ution frame rate and recording quality for each channel Record Option You can set the Disk End Mode Event For more information refer to Setting the Event Page 56 Motion Detection You can set the motio...

Страница 103: ...on Region Set the target motion detection area Video Loss Detection You can set the alarm output time if a video loss occurs Tampering Detection You can set whether to generate alarm and its dwell tim...

Страница 104: ...Event Sync which activates the alarm only if an event occurs Network For more information refer to Network Configuration Page 60 Connection Mode A remote user can access the DVR via the network to ch...

Страница 105: ...emote user can set the image resolution of the transferred data Mailing Service You can specify the SMTP server that sends a mail if an event occurs and set the recipient group and users SMTP You can...

Страница 106: ...o receive the mail if an event occurs and set the permission to receive the event mail for each group Recipient You can add a user or users who will receive the mail About Click About Displays the mod...

Страница 107: ...rsions available 10 6 or later version Silverlight 5 or later Safari 5 or later 1 Click Click now to Install to display the installation screen as shown 2 Double click the Silverlight pkg icon to disp...

Страница 108: ...ilable For more details on using the Web Viewer please refer to Connecting Web Viewer Windows Page 84 If you use Safari version 7 0 or later the silver light plugin usage will be restricted and won t...

Страница 109: ...f DVR Tim PC Time Select DVR Time or PC Time for the OSD time information display setting of the Live Viewer g Change Channel Switches into previous next channel or perform Auto Sequence Click Auto S...

Страница 110: ...ognition 1 split and 4 split modes supported in Live Viewer Supports single channel search function Switch channels using the touch sensitive LCD panel PTZ camera operations supported complies with th...

Страница 111: ...If you run the backup file viewer the backup data file will be automatically played Recommended System Requirements PCs with a lower specification than the recommended below may not fully support for...

Страница 112: ...information on the backup playback screen Information such as backup date day of the week time model name and channel number will be displayed on the screen g Enlarge Reduce Timeline Collapses the tim...

Страница 113: ...Resolution 720TVL 700TVL Min Illumination OLux IR LED S N Ratio Y Signal 50dB Lens Focus Length 3 6mm Max Aperture Ratio 2 Angular Field of View D 80 H 75 V 66 Operational Shutter Mode Auto Rolling Sh...

Страница 114: ...400fps 704x288 NTSC Up to 480fps 352x240 PAL Up to 400fps 352x288 y y SDR 4102 NTSC Up to 240fps 960x480 PAL Up to 200fps 960x576 NTSC Up to 240fps 704x480 PAL Up to 200fps 704x576 NTSC Up to 240fps...

Страница 115: ...IP UDP DHCP PPPoE SMTP NTP HTTP DDNS RTP RTSP Monitoring Smart viewer Webviewer Mobile Viewer Smart phone Smart Phone Android OS v 2 3 5 v4 0 3 v4 1 2 iOS OS v5 1 1 v6 0 v6 0 2 v6 1 Protocol support...

Страница 116: ...Panasonic Phillips AD VICON GE Coax Pelco C CCVC General Electrical Input Voltage Current 12V DC Adaptor 100 240V AC 50 60Hz Power consumption Max 36 W with 1x HDD Environmental Operating Temperature...

Страница 117: ...1 30fps PAL Manual Schedule Continuous Event Event Pre Post Time lapse 1 25fps Event Video Loss Motion Level 1 10 Tampering Overwrite modes Stop Continuous Pre Event Off 5 Sec POST Event Up to 6 hour...

Страница 118: ...0 User per 1 Group Data Authentication Watermark Interface Monitors VGA 1 VGA 1280x720 1280x1024 1920x1080 HDMI 1 HDMI 1280x720 1280x1024 1920x1080 Main Composite Spot Composite Loop Outputs Simulatne...

Страница 119: ...o 40 C 32 F to 104 F 20 to 85 RH Mechanical Dimension W x H x D H leg not included W315 x H52 x D235 mm 12 4 x 2 05 x9 25 Weight With hard disks 1 53 kg 3 37 lb Lauguage Korean Japanese Chinese Simpli...

Страница 120: ...120_ appendix appendix Product Overview SDR 5102 unit mm inches 57 2 24 52 2 05 315 12 4 235 9 25 224 8 82...

Страница 121: ...English _121 APPENDIX SDR 4102 unit mm inches 235 9 25 224 8 82 57 2 24 52 2 05 315 12 4...

Страница 122: ...122_ appendix appendix SDR 3102 unit mm inches 235 9 25 224 8 82 57 2 24 52 2 05 315 12 4...

Страница 123: ...any other problems caused by mismanaging a password Category Details Factory Default System Settings Date Time Language Date Time Language Date YYYY MM DD Time Format 24 hours Time Zone GMT Time Sync...

Страница 124: ...PRE Event OFF POST Event 1 min REC Quality Resolution Normal Recording Resolution CIF Frame Rate NTSC 7fps PAL 5fps Record Quality Level 4 Event Resolution 4CIF Frame Rate NTSC 7fps PAL 5fps Record Q...

Страница 125: ...1 Subnet Mask 255 255 255 0 DNS 168 126 63 1 Port Protocol Type TCP Device Port 4520 4524 HTTP Port 80 Secure Video Transmission OFF DDNS DDNS Site OFF Live Transfer Resolution CIF Quality Low Mailin...

Страница 126: ...work on the Live screen y y The Channel button does not work if the current screen is in the event monitoring mode In the event monitoring screen press the ALARM button to exit the screen and select a...

Страница 127: ...rnal storage devices to check if the connected device is supported by the DVR For the compatibility list contact the retailer where you purchased the DVR If I press the ESC key in full screen mode of...

Страница 128: ...otion detection video loss and Tampering Detection If there is no event found recording will not perform Continuous Event Record If there is no event found Continuous recording will perform Whereas if...

Страница 129: ...absence of any warranty and give any other recipients of the Program a copy of this License along with the Program You may charge a fee for the physical act of transferring a copy and you may at your...

Страница 130: ...if written in the body of this License 9 The Free Software Foundation may publish revised and or new versions of the General Public License from time to time Such new versions will be similar in spiri...

Страница 131: ...er activities as well To convey a work means any kind of propagation that enables other parties to make or receive copies Mere interaction with a user through a computer network with no transfer of a...

Страница 132: ...User Product is either 1 a consumer product which means any tangible personal property which is normally used for personal family or household purposes or 2 anything designed or sold for incorporation...

Страница 133: ...ess agreement or commitment however denominated not to enforce a patent such as an express permission to practice a patent or covenant not to sue for patent infringement To grant such a patent license...

Страница 134: ...holder Therefore we insist that any patent license obtained for a version of the library must be consistent with the full freedom of use specified in this license Most GNU software including some lib...

Страница 135: ...numerical parameters data structure layouts and accessors and small macros and small inline functions ten lines or less in length then the use of the object file is unrestricted regardless of whether...

Страница 136: ...R OR ANY OTHER PARTY WHO MAY MODIFY AND OR REDISTRIBUTE THE LIBRARY AS PERMITTED ABOVE BE LIABLE TO YOU FOR DAMAGES INCLUDING ANY GENERAL SPECIAL INCIDENTAL OR CONSEQUENTIAL DAMAGES ARISING OUT OF THE...

Страница 137: ...0 1 Definitions 1 1 Contributor means each individual or entity that creates or contributes to the creation of Modifications 1 2 Contributor Version means the combination of the Original Software pri...

Страница 138: ...n Microsystems Inc is the initial license steward and may publish revised and or new versions of this License from time to time Each version will be given a distinguishing version number Except as pro...

Страница 139: ...ill be interested in any kind of bug reports as is distribution You can use this software for whatever you want in parts or full form without having to pay us royalty free usage You may not pretend th...

Страница 140: ...do so subject to the following conditions The above copyright notice and this permission notice shall be included in all copies or substantial portions of the Software THE SOFTWARE IS PROVIDED AS IS...

Страница 141: ...ENT SHALL CMU OR THE REGENTS OF THE UNIVERSITY OF CALIFORNIA BE LIABLE FOR ANY SPECIAL INDIRECT OR CONSEQUENTIAL DAMAGES OR ANY DAMAGES WHATSOEVER RESULTING FROM THE LOSS OF USE DATA OR PROFITS WHETHE...

Страница 142: ...ing disclaimer in the documentation and or other materials provided with the distribution 3 Neither the name of Cisco Inc Beijing University of Posts and Telecommunications nor the names of their cont...

Страница 143: ...icense License URL miniupnpc 1 5 BSD 2 0 http miniupnp free fr For more additional information send email to help cctv samsung com Copyright c 2003 Paul Mackerras All rights reserved Redistribution an...

Страница 144: ...lowing conditions are met 1 Redistributions of source code must retain the above copyright notice this list of conditions and the following disclaimer 2 Redistributions in binary form must reproduce t...

Страница 145: ...t be mixed with other commercial wastes for disposal Correct disposal of batteries in this product Applicable in the European Union and other European countries with separate battery return systems Th...

Страница 146: ...AMERICA Inc 100 Challenger Rd Suite 700 Ridgefield Park NJ 07660 Toll Free 1 877 213 1222 Direct 1 201 325 6920 Fax 1 201 373 0124 www samsungcctvusa com SAMSUNG TECHWIN EUROPE LTD Samsung House 1000...

Отзывы: