Making Your First Recording
Before you begin!
-
Insert the Lithium Ion Battery (refer to page 28)
-
Charge your battery (refer to page 28)
-
Set the Clock (refer to page 38)
-
Insert a cassette tape (refer to page 47)
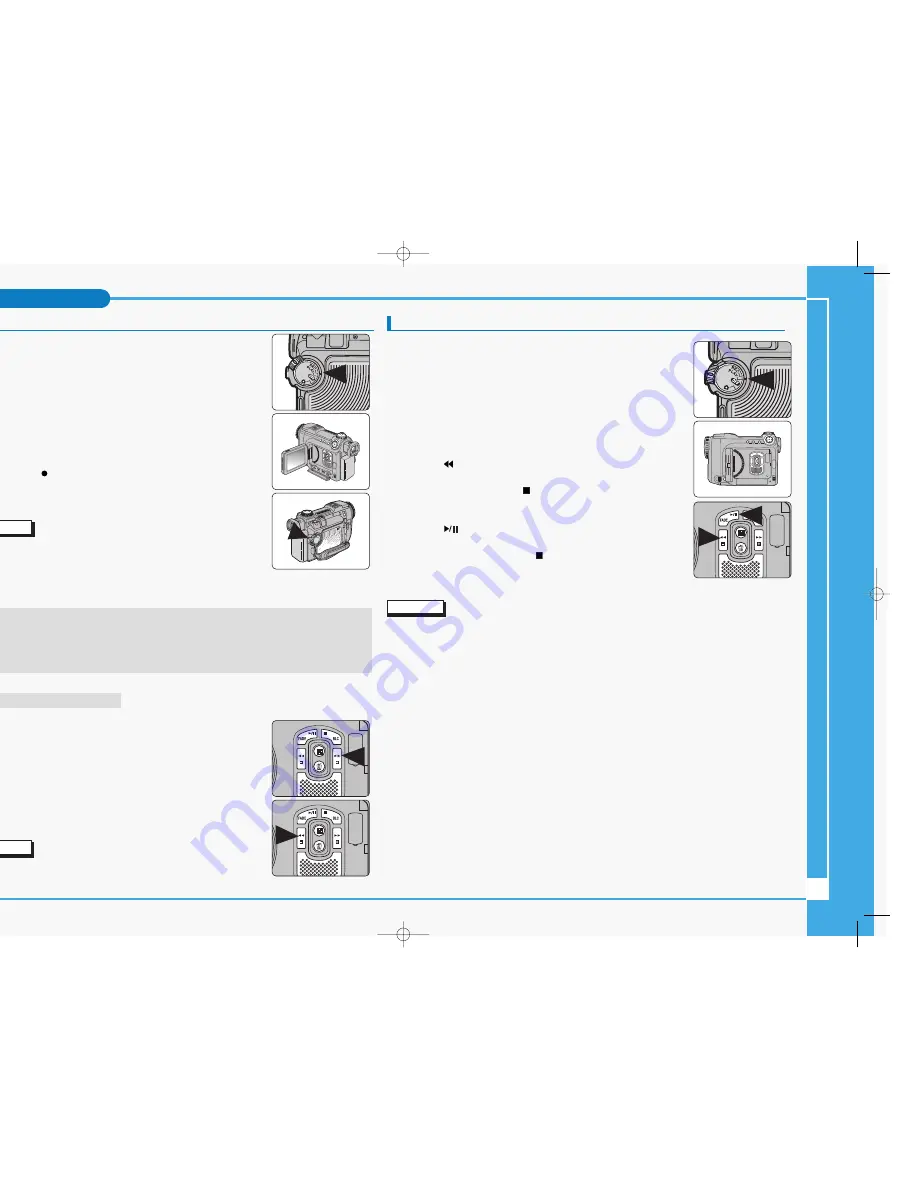
1. Turn on your camcorder and set the Power Switch to REC mode.
2. Open the LCD or viewfinder and frame your subject on the
screen.
3. To Start recording, press the START/STOP button.
■
The REC indicator is displayed on LCD.
4. To Stop recording, press the START/STOP button again.
■
The STBY indicator is displayed on LCD.
Note
✤
If the Write Protection Tab on the cassette tape is set to protect,
the “PROTECTION!” message appears on the screen. Release
the Write Protection Tab to record.
✤
Detach the Battery Pack when you are finished recording to prevent unnecessary battery
power consumption.
When a cassette is loaded and the camcorder is left in STBY under REC mode for more than
5 minutes without being used, it will switch off automatically.
To resume the camcorder, press the START/STOP button or set the Power Switch to off
shortly and then set it back to REC mode.
This Auto Power Cut feature is designed to save the battery power.
Record Search (REC SEARCH)
✤
You can view a recording using the REC , – function
while in STBY mode.
■
REC SEARCH – enables you to play the recording backwards
and
■
REC enables you to play it forwards, for as long as
you keep either button pressed down.
✤
If you press the REC SEARCH – button just once while in STBY
mode, your camcorder will play in reverse for 3 seconds and then
automatically return to the original position.
Note
✤
Mosaic shaped distortion may appear on the screen while in
Record Search mode.
Playing Back a Tape You Have Recorded Using the LCD Monitor
✤
You can monitor the recorded image on the LCD monitor.
1. Turn on your camcorder and set the Power Switch to PLAY mode.
2. Insert the tape you want to playback (refer to page 47).
3. Open the LCD monitor and adjust the angle of the screen.
Adjust the LCD Brightness or Color if necessary (refer to page 33).
4. Press the
(REW) button to rewind the tape to the desired viewing
point.
To stop rewinding, press the (STOP) button. The camcorder will
automatically stop rewinding when the tape is fully rewound.
5. Press the
(PLAY/STILL) button to start the playback.
You can view the recording on the LCD.
To stop the playback, press the (STOP) button.
Note
✤
You can also view the recording on a TV screen, by connecting the camcorder to a TV or
VCR (refer to page 145).
✤
For searching and viewing still images recorded onto tape, refer to page 76.
✤
Various functions are available in PLAY mode (refer to page 74).
8
Basic Recording
1
2
3
∞
£¥‹º
≥∏
̺
≠
(SCD6050) 11/19/04 8:45 AM Page 8


