background image

11

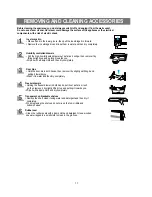
REMOVING AND CLEANING ACCESSORIES

Ice storage bin
• Place a hand in the lower groove, then pull the ice storage bin forward.
• Remove the ice storage bin and rinse them in water and then dry completely.

Humidity controlled drawers
• Pull the high-humidity salad drawer out as far as it will go, then remove it by

lifting it slightly up and pulling it towards you.

• Wipe it with a damp cloth and then dry completely.

Door bins
• Hold the door bin in both hands, then remove it by slightly up lifting it and

pulling it towards you.

• Wash it in water and then dry completely.

Freezer drawers
• Holding the freezer drawer in both hands, pull it out as far as it will

go, then remove it by slightly lifting it up and pulling it towards you.

• Wipe it with a damp cloth and dry completely.

Transparent, unbreakable shelves
• Remove the shelf, clean it using water and detergent and then dry it

completely.

• When replacing the shelves, do not mix up the top, middle and

bottom shelves.

Rubber seal
• Clean the rubber seals with a damp cloth and detergent. Use a wooden

skewer wrapped in a small cloth to clean in the grooves.

Before cleaning the appliance, you must always switch it off and unplug it from the wall socket.
Do not use a steam cleaner. Hot steam could damage the surface of the appliance or the electrical
components, with a risk of electric shock.

Содержание RB195BSBB

Страница 1: ...W RB215BSSB RB215BSVQ RB215BSBB OWNER S MANUAL DA99 00926A REV 0 0 In the U S for questions about features operation performance parts accesories or service call 1 800 726 7864 1 800 SAMSUNG www samsung com Register your product at www samsung com global register ...

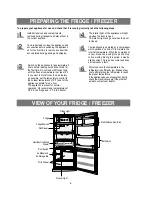
Страница 2: ... Cool Speeds up the cooling process in the fridge Door alarm When the refrigerator door is left open for more than two minutes a musical alarm is automatically triggered This feature helps you save electricity and preserve stored foods as a reminder to close the door Automatic defrosting in fridge freezer CONTENTS FEATURES WARNINGS SAFETY PRECAUTIONS INSTALLING THE FRIDGE FREEZER PREPARING THE FRI...

Страница 3: ...trical parts it may lead to fire or electric shock Do not install the fridge freezer in a damp place where it may come into contact with water Incorrect insulation of the electrical parts may cause an electric shock or fire Do not store volatile and inflammable substances in the refrigerator The storage of benzene thinner alcohol ether LP gas or other such substances may cause an explosion Do not ...

Страница 4: ... be stored in the refrigerator Do not touch any containers or food in the freezer with wet hands It may cause frostbite Remove any foreign matter or dust from the power plug pins Otherwise there is a risk of fire Do not insert your hand into the bottom area of the appliance Any sharp edges may cause personal injury After unplugging the appliance wait for at least five minutes before plugging it in...

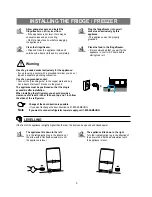
Страница 5: ...liance must be positioned so that the plug is accessible after installation When installing the refrigerator you should provide a clearance of at least 2 inch at the back top and 1 inch from the sides of the refrigerator If the front of the appliance is slightly higher than the rear the door can be opened and closed easier Place the food in the fridge freezer It is recommended that you wait for th...

Страница 6: ...ight of the appliance will light up when the door is open This interior light will go out when the door is closed Your appliance is operated by a compressor which switches on and off to maintain the internal temperature When the compressor is new it requires running for a period of up to five months During this period it may be slightly noisy This is quite normal and does not represent a fault Sto...

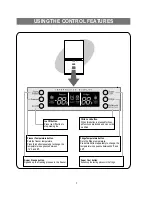
Страница 7: ...ts the fridge temperature Press this button repeatedly to change the temperature in sequence between 34 F and 46 F Super Cool button Speeds up the cooling process in the fridge Super Freeze button Speeds up the freezing process in the freezer Ice Off button Press Ice Off button to stop making Ice Child Lock button When this button is pressed for 3sec all functions are locked and can not be modifie...

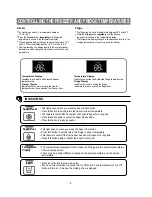
Страница 8: ...re is shown in the temperature display The temperature display changes in sequence and reverts to the average temperature in the same way as the freezer Super Freeze This light goes on when you press the Super Freeze button Press this button to quickly return the freezer to its set temperature This feature is useful if the freezer door has been left open for a long time Press this button again to ...

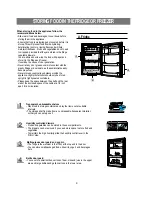
Страница 9: ...oof alcohol should only be stored upright in tightly sealed containers Please keep the space between the shelf and the rear wall of the enclosed space of the cabinet a 1 2 inch apart for air circulation A Fridge Transparent unbreakable shelves Place food in storage containers and lay the items out at suitable intervals The storage shelf is made from an unbreakable transparent material so that you ...

Страница 10: ...stic clips string freezer tape or similar Plastic film and bags may be heat sealed using a special sealing iron or press Before placing a package in the freezer it should be clearly labelled with the contents and the date of freezing Note Upper freezer drawer Lower freezer drawer ICE MAKER The ice maker will produce 8 cubes per cycle approximately 100 130 cubes in a 24 hour period depending on fre...

Страница 11: ... Freezer drawers Holding the freezer drawer in both hands pull it out as far as it will go then remove it by slightly lifting it up and pulling it towards you Wipe it with a damp cloth and dry completely Transparent unbreakable shelves Remove the shelf clean it using water and detergent and then dry it completely When replacing the shelves do not mix up the top middle and bottom shelves Rubber sea...

Страница 12: ...r the light bulb cover upward by pressing on it and pulling it towards you After removing the light bulb replace it with a new bulb by turning it in the direction of the arrow Watt and voltage must agree with the details on the type plate 15 watt light bulb with E17 base socket Insert the lower hanging sill after fitting the upper part of the light bulb cover Note Replacement bulbs for both the fr...

Страница 13: ...elow freezing When using any electrical device such as a power drill during installation be sure the device is insulated or wired in a manner to prevent electric shock All installations must be in a accordance with local plumbing code requirements Slip the compression nut through the plastic tube After inserting the compression nut into plastic tube tighten the compres sion nut onto 1 4 compressio...

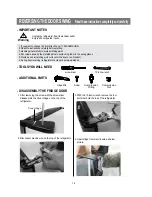
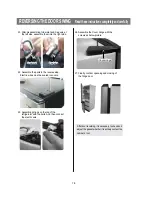
Страница 14: ...tor 2 Disconnect electric wire on the top of the refrigerator Warning 1 If you want to change the door direction call 1 800 SAMSUNG 2 Read the instructions carefully before starting 3 Handle parts carefully to avoid scrathing paint 4 Set screws down by their related parts to avoid using them in the wrong places 5 Provide a non scratching work surface for the doors ex blanket 6 During door reversin...

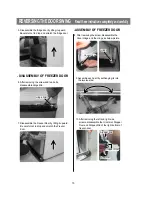
Страница 15: ...scratch the Freezer door 10 After removing the left and right side screws disassemble the Grommet Stopper Door and Stopper Mid of the right bottom of freezer door 8 After removing the screw disassemble the Cover Hinge and the Hinge as below picture 5 Disassemble the fridge door by lifting it upward Be careful not to drop and scratch the fridge door Hinge Mid Hinge Mid Cover Hinge Cover Hinge Hinge...

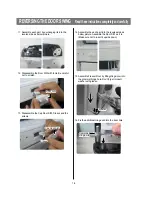
Страница 16: ... not to insert it upside down 15 Assemble Freezer Door by fitting Hinge Low into the grommet hinge hole Don t forget to insert washer with grease 16 Fix the additional Hinge mid into the door hole Door S W Door S W 13 Disassemble the Cap Door S W Sleeve and the screws Cap Door S W Cap Door S W Sleeve Sleeve Washer Washer Additional Hinge mid Additional Hinge mid 11 Assemble each part by exchanging...

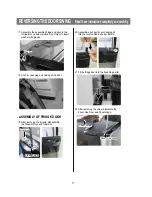
Страница 17: ...e REVERSINGTHE DOOR SWING Readtheseinstructionscompletelyandcarefully 22 After removing the screw dissemble the Cover Cap Door and Cover Hinge Cover Hinge Cover Hinge Cover Cap Door Cover Cap Door 17 Assemble the assembled hinge and door to the refrigerator as below picture Don t forget to insert washer with grease Washer Washer Grommet Grommet Stopper Door Stopper Door 21 Fit the fridge door into...

Страница 18: ...e left side assemble them into the right side 26 Assemble the Cover Hinge with the screws as below picture 27 Finally confirm openning and closing of the fridge door 24 Assemble the parts to the reverse side Electric wires must be sealed in covers After door reversing it is necessary to check and adjust the gasket whether it is entirely contact the cabinet or not Grommet Grommet Cap wire Cap wire ...

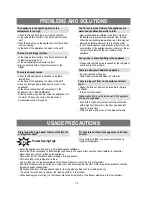
Страница 19: ...side the appliance this is normal This sound occurs when the various accessories contract or expand There are unusual noises Heat proof pipes are installed in the front corners of the appliance to prevent condensation from forming When the surrounding temperature rises this may not always be effective However this is not abnormal In very humid weather condensation may form on the outer surface of ...

Страница 20: ...uct or serial numbers cosmetic damage or exterior finish accidents abuse neglect fire water lightning or other acts of nature use of products equipment systems utilities services parts supplies accessories applications installations repairs external plumbing and leaks external wiring circuit breakers fuses or connectors not supplied and authorized by SAMSUNG or which damage this product or result ...

Страница 21: ...MEMO ...

Страница 22: ...MEMO ...

Страница 23: ...MEMO ...

Страница 24: ...ADDRESS SAMSUNG ELECTRONICS AMERICA INC SERVICE DIVISION 400 VALLEY ROAD SUITE 201 MT ARLINGTON NJ 07856 1 800 SAMSUNG 1 800 726 7864 ...

Отзывы: