


English - 5
Time Features
1
Press the
MENU
button to display the menu.
Press the ▲ or ▼ button to select
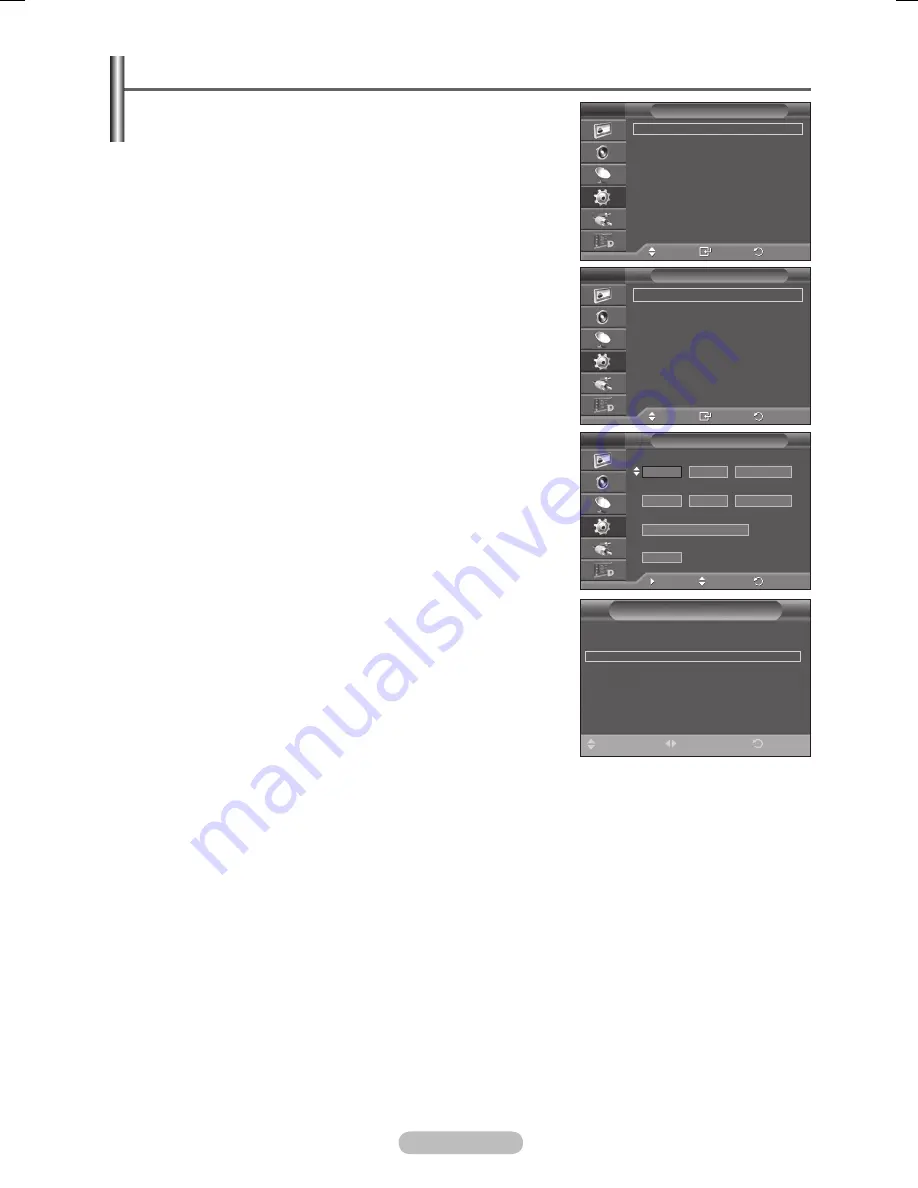
Setup
, then press the
ENTER
button.
Press the ▲ or ▼ button to select
Time
, then press the
ENTER
button.
4
Select the required option by pressing the ▲ or ▼ button, then
press the
ENTER
button.
Available options:
Clock Set
,
Sleep Timer
,
Timer 1
,
Timer
,
Timer
5
When you are satisfied with your setting, press the
ENTER
button.
Press the
EXIT
button to exit.
Clock Set
You can set the television clock so that the current time is
displayed when pressing the
INFO
button on the remote
control. You must also set the time if you wish to use the
automatic on or off timers.
− Press the ◄ or ► button to select
Month
,
Day
,
Year
,
Hour
,
or
Minute
. Set these by pressing the ▲ or ▼ button.
➢
You can set the
Month
,
Day
,
Year
,
Hour
, or
Minute
directly by pressing the numeric buttons on the remote
control.
➢
In the event of a power interruption or the set being turned
off at the supply, the settings for the Clock will be lost.
Sleep Timer
You can select a time period of between 30 and 180 minutes
after which the television automatically switches to standby
mode.
− Select the preset time interval (
Off
,
0
,
0
,
0
,
10
,
150
, or
10
) for staying on by pressing the ▲ or ▼ button.
Easy Setting
1
Press the
TOOLS
button on the remote control.
Press the ▲ or ▼ button to select
Sleep Timer
.
Press the ◄ or ► button to select the minute, then press the
ENTER
button.
Timer 1 / Timer / Timer
You can set the On/Off timers so that the television will switch on or off automatically at the time you
select.
☛
You must set the clock first.
− Press the ◄ or ► button to select the required item below.
Press the ▲ or ▼ button to adjust to the setting satisfied.
On Time
: Select hour, minute, and
On/Off
. (To activate timer with the setting satisfied, set to
On
.)
Off Time
: Select hour, minute, and
On/Off
. (To activate timer with the setting satisfied, set to
On
.)
Repeat
: Select
Once
,
Everyday
,
Mon~Fri
,
Mon~Sat
, or
Sat~Sun
.
Volume
: Select the required volume level.
➢
You can set the hour, minute, directly by pressing the number buttons on the remote control.
☛
Auto Power Off
When you set the timer “On”, the TV will eventually turn off, if no controls are operated for 3 hours
after the TV was turned on by timer. This function is only available in timer “On” mode and prevents
overheating, which may occur if a TV is on for too long time.
Move
Enter
Return
Clock Set
:
00 : 00
Sleep Timer
:
Off
Timer 1
:
Off
Timer
:
Off
Timer
:
Off
Time
T V
Move
Enter
Return
Plug & Play
Language
:
English
Time
Light Effect
: In Watching TV
Wall-Mount Adjustment
Melody
:
Off
Entertainment
:
Off
Energy Saving
:
Off
Setup
T V
Move
Adjust
Return
Timer 1
T V
00
00
Off
On Time
:
Off Time
Repeat
Once
10
Volume
00
00
Off
Tools
Picture Mode
: Standard
Sound Mode
: Custom
Sleep Timer
◄ Off
►
SRS TS XT
: Off
Energy Saving
: Off
Dual I-II
: Mono
Exit
Move
Adjust
BN68-01419D.indb 25
2008-04-30 오후 7:34:21
Содержание PS42A416C1D
Страница 51: ...This page is intentionally left blank...
Страница 53: ......


