(QJOLVK
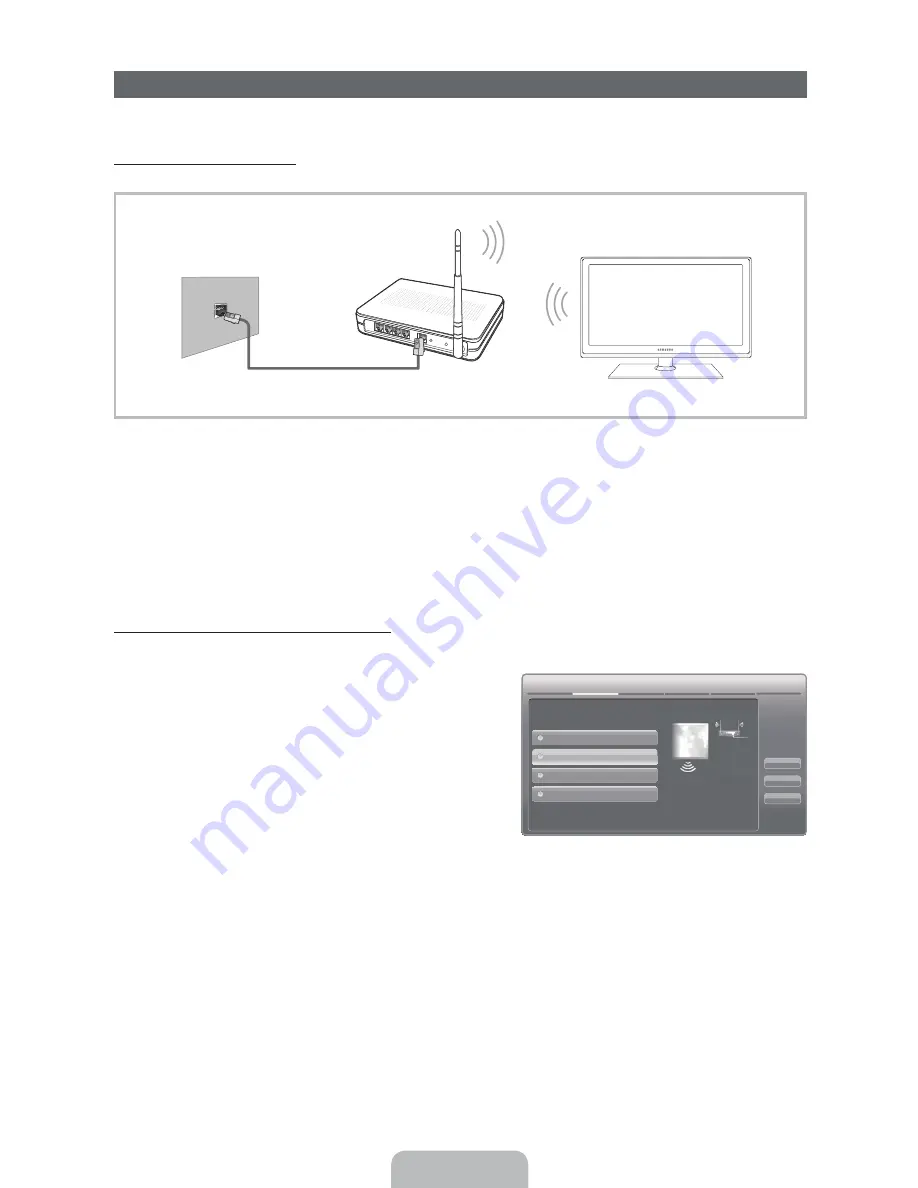
The LAN Port on the Wall
LAN Cable (Not Supplied)
Wireless IP Sharer
(AP having DHCP Server)
Network Connection
You can set up your TV so that it can access the Internet through your local area network (LAN) using a wired or wireless
connection.
Network Connection - Wireless
You can connect your TV to your LAN through a standard wireless router or modem.
This TV supports the IEEE 802.11a/b/g and n communication protocols. Samsung recommends using IEEE 802.11n. When
you play video over a IEEE 802.11b/g connection, the video may not play smoothly.
Most wireless network systems incorporate a security system that requires devices that access the network through an access
point or AP (typically a wireless IP Sharer - router or modem) to transmit an encrypted security code called an access key.
Your TV is compatible with the following security protocols:
y
Authentication Mode: OPEN, SHARED, WPAPSK, WPA2PSK
y
Encryption Type: WEP, TKIP, AES
If you select Pure High-throughput (Greenfield) 802.11n mode and the Encryption type is set to WEP, TKIP or TKIP AES
(WPS2Mixed) on your AP or wireless router, Samsung TVs will not support a connection in compliance with new Wi-Fi
certification specifications.
Configuring the Network Connection - Wireless
The instructions below are for networks that use the Dynamic Host Configuration Protocol (DHCP) to configure network
connections automatically. If your have a Static IP network, see your user’s manual for configuration instructions.
To configure your network connection for a network that uses DHCP,
follow these steps:
1.
Connect your TV to your network as shown in the illustration
above.
2.
Turn on your TV, press the
MENU
button on your remote, and the
select
Networks
ĺ
Network Settings
.
3.
Select the
Wireless (General)
, press
ENTER
(
, and then press
ENTER
(
again.
4.
The Network function searches for available wireless network.
When done, it displays a list of the available networks.
5.
In the list of networks, press the
Ÿ
or
ź
button to select a
network, select
Next
, and then press
ENTER
(
.
6.
If you have selected a wireless router that has security, the
Security Key screen appears. Enter the
Security key
(Security
key or PIN), select
Next
, and then press
ENTER
(
.
✎
When you enter the
Security Key
(Security key or PIN), the use the
Ÿ
/
ź
/
Ż
/
Ź
buttons on your remote to
select numbers and characters.
7.
The Network Connection screen appears and verifies the network connection. When the connection has been verified, the
“Internet connection successful.” message appears. Network set up is complete.
✎
For more detailed information, see “Wireless Network Connection” in the e-Manual.
1HWZRUN6HWWLQJV
:LUHG
3UHYLRXV
1H[W
&DQFHO
:LUHOHVV*HQHUDO
:363%&
2QH)RRW&RQQHFWLRQ
6HOHFWDQHWZRUNFRQQHFWLRQW\SH
6HWXSZLUHOHVVQHWZRUNE\
VHOHFWLQJ\RXU:LUHOHVV5RXWHU
\RXPD\QHHGWRHQWHUVHFXULW\
NH\GHSHQGLQJRQWKHVHWWLQJRI
WKH:LUHOHVV5RXWHU
✎
The displayed imange may differ depending
on the model.
Содержание PN64D7000FFXZA
Страница 26: ...1111111111111111111111111111111111111111111 BN68 03503A OO ...
Страница 74: ... English Reset Picture Yes No Resets your current picture mode to its default settings ...
Страница 172: ... English Anynet HDMI CEC For details on set up options refer to the What is Anynet instructions ...
Страница 316: ... t t ...
Страница 321: ...1111111111111111111111111111111111111111111 AA68 03242L 07 1111111111111111111111111111111111111111111 AA68 03242L 07 ...


