background image

 1. Firmware 

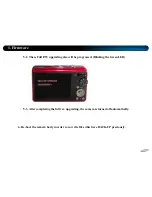
8. After completed the Back-up process, comes out to Power Off status.  

Содержание PL70

Страница 1: ...Technical Information Samsung camera samsung PL70 SAMSUNG...

Страница 2: ...Contents Part 1 Firmware Part 2 Adjustment Part 3 Disassembly...

Страница 3: ...1 Firmware Product Name Product Name Product Name Mondrian 125W VE Korean VLUU PL70 Abroad SAMSUNG PL70 For USA SAMSUNG SL720 Barrel Barrel Name E2 Applied Product _...

Страница 4: ...1 Firmware Checking Firmware Initialization 1 Turn on the Camera...

Страница 5: ...1 Firmware 2 Press and hold the WIDE Down and then press the Power OFF...

Страница 6: ...1 Firmware 3 Turn on the camera and check whether the camera is reset or not...

Страница 7: ...irmware Checking Firmware Checking version 1 Power source should be full charged battery 2 Remove the memory card from the camera turn off the camera 3 Press the Shutter Down and then press the Power...

Страница 8: ...1 Firmware 4 After checking Firmware version turn off the camera...

Страница 9: ...l kind of resources for camera driving Defective Pixel Lens shading adjustment data goes to save in Partition3 User Area Being saved all setting data while customer played their camera function and ot...

Страница 10: ...file Upgarding Script file Recommendation When do the upgrading process whole data should be back up before Otherwise whole data saved in Flash Memory will be deleted 2 Use the AC adapter or a fully c...

Страница 11: ...1 Firmware 4 F W ver which will be upgraded is shown on LCD automatically To start the upgrading process press the Shutter button...

Страница 12: ...1 Firmware 5 Upgrading process is doing while displayed the F W ver on LCD 6 After completing the upgrade the camera is turned off automatically...

Страница 13: ...ed all kind of resources for camera driving Defective Pixel Lens shading adjustment data goes to save in Partition3 User Area Being saved all setting data while customer played their camera function a...

Страница 14: ...e files are saved on Partition3 Do not forget to re adjust or do the back up process for adjustments so that previous adjustment files are restored While done the FULL F W upgrading adjustment files w...

Страница 15: ...file Upgarding Script file Recommendation When do the upgrading process whole data should be back up before Otherwise whole data saved in Flash Memory will be deleted 2 Use the AC adapter or a fully c...

Страница 16: ...1 Firmware 4 F W ver which will be upgraded is shown on LCD automatically...

Страница 17: ...tart the upgrading process press the Shutter button Then process will be done automatically 5 1 Before done the Full F W upgrading being done some adjustment files are back up to the external memory c...

Страница 18: ...F W upgrading also will be progressed Blinking the Green LED 5 3 After completing the full ver upgrading the camera is turned off automatically 6 Re boot the camera body in order to re write files whi...

Страница 19: ...1 Firmware 7 Press the SHUTTER S1 Button then back up process will be done...

Страница 20: ...1 Firmware 8 After completed the Back up process comes out to Power Off status...

Страница 21: ...1 Firmware 9 Check the adjustment data status whether recovered or not on Ver checking screen D0 D1 L0 contents OK...

Страница 22: ...which are being back up to the external memory card SD card B Insert the SD memory card with the saved adjustment data C While pressed SHUTTER Button DOWN Button then turn on the camera If these proc...

Страница 23: ...electronic item in the PL70 The following table represents necessary adjustments for each item replacement 2 Adjustment Basic Information of Adjustment Adjustment Caution 1 Adjust for each feature aft...

Страница 24: ...ustment Gray Chart for FLASH AWB adjustment 18 DARK BOX POWER SUPPLY 4 2V 2A 2 Adjustment 3 Adjustment program file For each of the adjustments copy the program for each of the adjustments into the Ex...

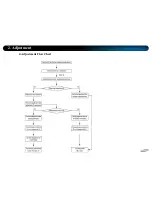
Страница 25: ...4 Adjustment Flow Chart 2 Adjustment...

Страница 26: ...l the External Memory card containing the program file and turn the camera on c The adjustment is conducted automatically Check the brightness value for the preview with the shutter closed and find an...

Страница 27: ...r the capture OB in the data file by referring to the CARD WRITE data Write the adjustment value for the preview in the EEPROM by referring to the EEPROM WRITE data Change the ISO and repeat steps 4 t...

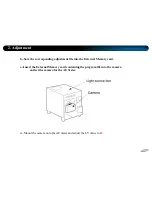
Страница 28: ...set since the brightness of the periphery of the lens per set is darker than the center Adjustment Procedures a Prepare the AE Tester The luminance specification for the Light Source Box is 12 LV The...

Страница 29: ...nt file into the External Memory card c Insert the External Memory card containing the program file into the camera and set the camera for the AE Tester 2 Adjustment d Mount the camera onto the AE met...

Страница 30: ...justment value in the EEPROM by referring to the EEPROM WRITE data Write the result of the adjustment value in the data file by referring to the CARD WRITE data Set the lower and upper specifications...

Страница 31: ...dividual camera is different The AWB Low item and CCD Gain item are adjusted simultaneously Adjustment Procedures a Prepare an AE Tester that supports LV 12 b Place the camera onto the AE Tester 2 Adj...

Страница 32: ...find the appropriate values for the specifications for brightness If the result of the line delay falls within the min to max range treat it as if it is OK Otherwise treat it as if it is NG Write the...

Страница 33: ...TESTER The luminance specification for the Light Source Box is 12 LV The position of the Light Box is 10mm 1mm when the lens barrel is opened The Colour Temperature of the Light Box is 3300K b Save th...

Страница 34: ...ra on the adjustment is progressed automatically Adjust the Gain adjustment Write the result of the adjustment value in the EEPROM by referring to the EEPROM WRITE data Write the result of the adjustm...

Страница 35: ...2 Adjustment f When the adjustment is complete the camera will automatically be turned off Adjustment Method Open and check a CSV file created in the memory card for adjustment...

Страница 36: ...identify cameras that are out permitted specification range and acquires the R and B gain of the flash AWB HIGH will be adjusted at the same time Adjustment Procedures a Put up a piece of 18 Reflecto...

Страница 37: ...between the Reflector Paper and the camera at 50cm 2 Adjustment d Save the corresponding adjustment file into the External Memory card e Put in the External Memory card containing the program file and...

Страница 38: ...ch standard brightness Determine whether or not it is good after checking the R and B gains with average value for 2 times flashing Write the R and B gains in the EEPROM if the R and B gains as well a...

Страница 39: ...ntrol of the barrel after replaced Main PCB Barrel Required Equipment Infinite Collimator Adjustment Procedures 1 Save the corresponding adjustment file into the External Memory card 2 Do the focus ad...

Страница 40: ...ndard for Infinite Collimator Set the brightness of Collimator as 6 LV Set the Camera Lens to infinite Collimator lens into 1cm less Do not touch the camera body while done the adjustment process 2 Ad...

Страница 41: ...d for Infinite object Set the camera body on the tripod Head the camera lens to an object put an infinite distance or over 500m Without Chart Choose the object having high contrast value building etc...

Страница 42: ...hole glass building or what having low contrast value as an object and do not operate focus adjustment at night If being operated the focus adjustment with upper condition then the result will not be...

Страница 43: ...2 Adjustment 3 Turn the camera on 4 The adjustment is conducted automatically Adjustment Method Open and check a CSV file created in the memory card for adjustment...

Страница 44: ...ower supply b Connect the power supply and the camera using the battery jig c Set the voltage to 4V Available Voltage 4 5V d Save the corresponding adjustment file into the External Memory card e Put...

Страница 45: ...n the tolerance range idle mode Min A D conversion value A D conversion value for supply voltage Max A D conversion value Carry out inspection by referring to warnings and specifications for prohibite...

Страница 46: ...ly Check the reference level and exposure time which has been set and compensate for defective pixels Carry out inspection by referring to the specifications max number of defective cells Write the nu...

Страница 47: ...ens barrel PI count error value can be obtained after completed lens barrel moving From Tele to initial status Get the average value from PI Count error value after repeated same process Check whether...

Страница 48: ...t functions Start booting Start the functions after checking the preset repetitive motions cycle and the number of functions testing function 1 function 2 and so on the number is unlimited Save the co...

Страница 49: ...ling and assembling camera where the blocking static electricity mat is on the table 2 When handling the major PCBs of camera please wearing the band which cuts off the electric current on the wrist 3...

Страница 50: ...3 Disassembly Disassemble Camera Procedure of disassembly 1 Remove 2 screws...

Страница 51: ...3 Disassembly 2 Remove 2 screws...

Страница 52: ...3 Disassembly 3 Remove 2 screws...

Страница 53: ...3 Disassembly 4 Separate the FRONT COVER ASSY...

Страница 54: ...3 Disassembly 5 Separate the BACK COVER ASSY...

Страница 55: ...3 Disassembly 6 Separate the SIDE COVER ASSY...

Страница 56: ...3 Disassembly 7 Separate the BARREL ASSY PCB CCD ASSY PCB from the connector Remove 3 screws as same below...

Страница 57: ...3 Disassembly 8 Separate the BARREL ASSY...

Страница 58: ...3 Disassembly 9 Separate the BUTTON PCB ASSY from the connector...

Страница 59: ...3 Disassembly 10 Remove the screws on BUTTON PCB ASSY Give attention to bottom side of PCB...

Страница 60: ...3 Disassembly 11 Separate the BUTTON PCB ASSY...

Страница 61: ...3 Disassembly 12 Separate the LCD ASSY PCB from connector...

Страница 62: ...3 Disassembly 13 Separate the LCD ASSY...

Страница 63: ...3 Disassembly 14 Separate the FLASH PCB ASSY from the connector Remove 2 screws on MAIN PCB ASSY...

Страница 64: ...3 Disassembly 15 Separate the MAIN PCB ASSY...

Страница 65: ...3 Disassembly 16 Remove the screws on FLASH PCB ASSY Give attention to left side of PCB...

Страница 66: ...3 Disassembly 17 Separate the FLASH PCB ASSY...

Страница 67: ...3 Disassembly Disassemble Barrel 1 Remove 3 screws for the CCD PCB ASSY...

Страница 68: ...3 Disassembly 2 Separate the CCD PCB ASSY...

Страница 69: ...3 Disassembly 3 Separate the Shutter PCB Connector...

Страница 70: ...3 Disassembly 4 Remove 2 screws on MOTOR ASSY...

Страница 71: ...3 Disassembly 5 Remove 3 screws on LENS BASE ASSY...

Страница 72: ...3 Disassembly 6 Separate the LENS BASE ASSY...

Страница 73: ...3 Disassembly 7 Separate the ZOOM GEAR...

Страница 74: ...3 Disassembly 8 Separate the SHUTTER ASSY PCB...

Страница 75: ...3 Disassembly 9 Separate the CAM BARRELASSY from OUTER CAM BARREL...

Страница 76: ...3 Disassembly 10 Separate the CAM BARREL ASSY...

Страница 77: ...3 Disassembly 11 Separate the INNER CAM BARREL ASSY from GUIDE BARREL...

Страница 78: ...3 Disassembly 12 Take apart INNER CAM BARREL ASSY...

Страница 79: ...3 Disassembly 13 Separate the 2ND 3RD BARRELASSY from INNER CAM BARREL...

Страница 80: ...3 Disassembly 14 Take apart 2ND 3RD BARREL ASSY...

Страница 81: ...3 Disassembly 15 Separate the SHUTTER ASSY from 2ND 3RD BARREL ASSY...

Страница 82: ...3 Disassembly 16 Take aparat 2ND 3RD BARREL from ZOOM RING...

Страница 83: ...3 Disassembly 17 Take apart 2ND 3RD BARREL...

Страница 84: ...3 Disassembly 18 Separate the 2ND 3RD BARREL from LENS CAP ASSY...

Страница 85: ...3 Disassembly 19 Take apart LENS CAP ASSY...

Страница 86: ...3 Disassembly Assemble Barrel 1 Caution for the LENS CAP ASSY 2ND 3RD BARREL Should be matched with A area a area Reference for assembling BARREL ass y...

Страница 87: ...3 Disassembly 2 Caution for the ZOOM RING 2ND 3RD BARREL ASSY Should be matched with C D c d...

Страница 88: ...3 Disassembly 3 Assemble the ZOOM RING ASSY...

Страница 89: ...3 Disassembly 4 Caution for the SHUTTER ASSY Should be matched with B b...

Страница 90: ...3 Disassembly 5 Should be matched with E F e f...

Страница 91: ...3 Disassembly 6 Assemble INNER CAM BARREL ASSY...

Страница 92: ...3 Disassembly 7 Caution for the GUIDE BARREL INNER CAM BARREL ASSY Should be matched with G H g h...

Страница 93: ...3 Disassembly 8 Assemble the CAM BARRELASSY...

Страница 94: ...3 Disassembly 9 Caution for the OUTER CAM BARREL CAM BARRELASSY Should be matched each points...

Страница 95: ...3 Disassembly 10 Assemble the OUTER CAM BARRELASSY...

Страница 96: ...Thank you...

Отзывы: