background image

30  English

Gas o

v

en

Gas oven

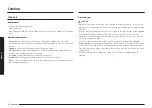
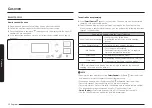
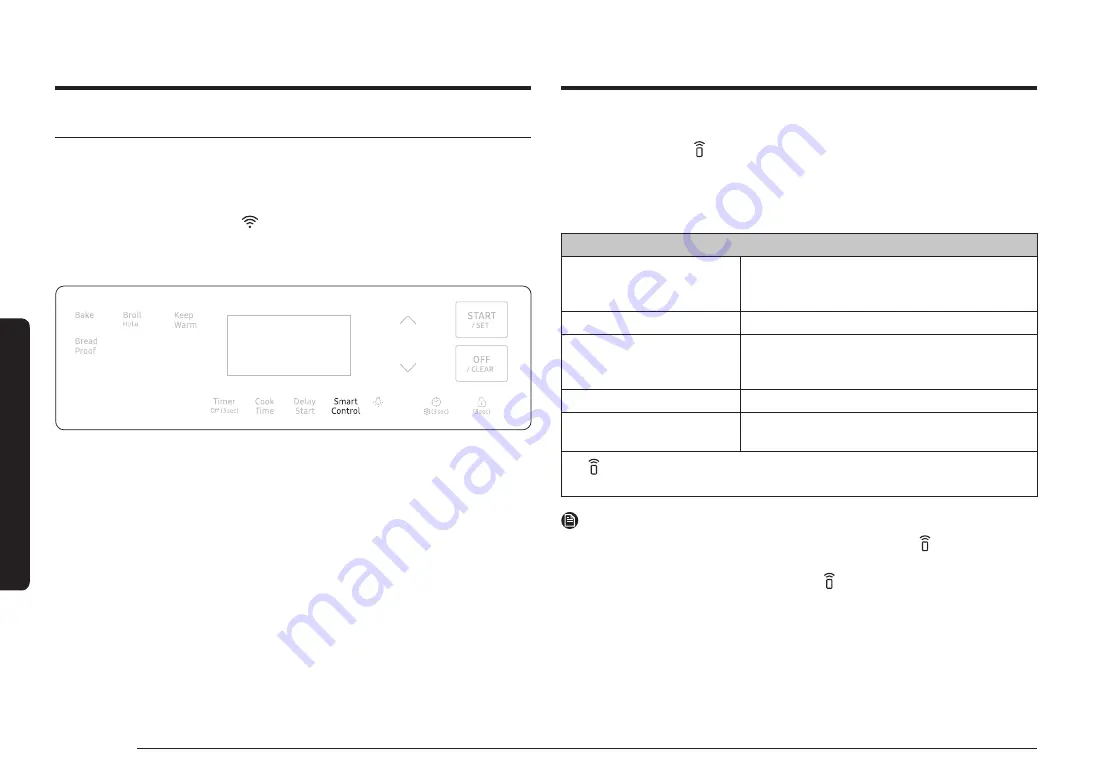
Smart Control

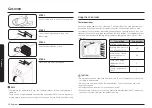
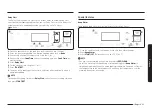
How to connect the oven

1. 

Download and open the SmartThings app on your smart device.

2. 

Follow the app's on-screen instructions to connect your range.

3. 

Once the process is complete, 

 icon appears in the display and the app will 

confirm you are connected.

4. 

If the connection icon does not turn on, follow the instruction on the app to 
reconnect.

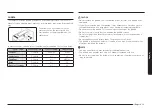
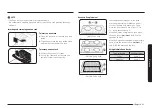
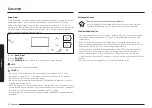
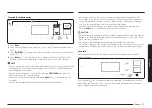
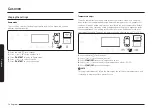
To control the oven remotely

1. 

Press 

Smart Control

   appears in the display. The oven can now be controlled 

remotely with a connected device.

2. 

Select the oven icon on the SmartThings app to open the Oven Control app. 
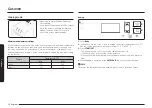
When the app is connected to the oven, you can perform the following functions 
through the application:

Oven remote control using the SmartThings app

Oven/ Cooktop Monitoring

• 

Check the status of the oven.

• 

Monitor the on/off status of each cooktop 
burner.

Oven Remote Control

• 

Set or adjust oven settings remotely.

My Cooking

• 

Turn the oven off remotely.

• 

Once cooking starts, change the set cooking 
time and temperature remotely.

Error Check

• 

Automatically recognize errors.

Temp Probe

• 

Monitor the current temperature and reset the 
probe setting. (For some available models.)

• 

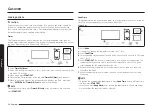
If   is not shown in the display, you are still able to monitor the oven and 
cooktop status and turn the oven off.

NOTE

• 

Opening the oven door or pressing 

Smart Control

 will delete   from the display 

and prevent most of the remote functions from operating.

• 

When oven cooking is finished or cancelled,   is removed from the display.

• 

For safety reasons, you cannot turn on the gas oven remotely.

• 

For safety reasons, you must specify the cooking time to enable remote control.

• 

The oven continues operating even if the Wi-Fi connection is lost.

• 

Smart Control

 will not work properly if the Wi-Fi Connection is unstable.

• 

See the SmartThings app manual for detailed information.

Содержание NX60A6111SS

Страница 1: ...GasFree StandingRange User manual NX60 61 S ...

Страница 2: ...an tip the range and be killed b Verify the Anti Tip device has been properly installed and engaged at right rear or left rear of the range bottom c If you move the range and then move it back into place ensure the Anti Tip device is re engaged at the right or left rear of the range bottom d Do not operate the range without the Anti Tip device in place and engaged e Failure to do so can result in ...

Страница 3: ...limits are designed to provide reasonable protection against harmful interference in a residential installation This equipment generates uses and can radiate radio frequency energy and if not installed and used in accordance with the instructions may cause harmful interference to radio communications However there is no guarantee that interference will not occur in a particular installation If thi...

Страница 4: ...lled and operated so there is at least 8 inches 20 cm between the radiator and your body This device and its antenna s must not be co located or operated in conjunction with any other antenna or transmitter 2 IC Notice The term IC before the radio certification number only signifies that Industry Canada technical specifications were met Operation is subject to the following two conditions 1 this d...

Страница 5: ...ty instructions This unit has been tested and found to comply with the limits for a class B digital device pursuant to Part 18 of the FCC rules These limits are designed to provide reasonable protection against harmful interference in a residential installation This unit generates uses and can radiate radio frequency energy and if not installed and used in accordance with the instructions may caus...

Страница 6: ... 17 Cookware 18 Griddle 19 Gas oven 20 Using the oven racks 20 Cooking mode 22 Cooking options 24 Special features 25 Chaging the settings 28 Smart Control 30 Voice Control 31 Maintenance 32 Cleaning 32 Replacing the oven light 37 Removing and reinstalling the oven door 37 Troubleshooting 39 Checkpoints 39 Information codes 44 Warranty U S A 44 Warranty CANADA 46 Open Source Announcement 48 ...

Страница 7: ...umber or gas fitter qualified or licensed by the State of Massachusetts When using ball type gas shut off valves you must use the T handle type Multiple flexible gas lines must not be connected in series General safety WARNING To reduce the risk of fire electric shock personal injuries and or death observe the following precautions Do not touch any part of the range including but not limited to ov...

Страница 8: ...ch as laundry an oven cover lighted candles lighted cigarettes dishes chemicals metal objects etc on the appliance Items such as a cloth may get caught in the door This may result in electric shock fire problems with the product or injury Take care not to hurt yourself when cleaning the appliance externally or internally You may hurt yourself on the sharp edges of the appliance Fire safety WARNING...

Страница 9: ...se power outlet Do not modify the power plug power cord or power outlet in any way Do not put a fuse in a neutral or ground circuit Use a dedicated 120 V 60 Hz 20 amp AC electrical circuit with a time delay fuse or circuit breaker for this range Do not plug more than one appliance into this circuit Do not connect the ground wire to plastic plumbing lines gas lines or hot water pipes This range mus...

Страница 10: ...ufacturer s instructions and all codes and requirements of the authority having jurisdiction The qualified agency performing this work assumes the gas conversion responsibility Installation of this range must conform with local codes or in the absence of local codes with the National Fuel Gas Code ANSI Z223 1 NFPA 54 latest edition In Canada installation must conform with the current Natural Gas I...

Страница 11: ...Do not place any objects other than cookware on the cooktop This cooktop is designed for use with a wok or wok ring attachment To flame food you must have a ventilation hood When you flame food the hood must be on Before removing or changing cookware turn off the burners Remove food and cookware immediately after cooking Before removing any parts of the burner for cleaning make sure the range is o...

Страница 12: ...ibility of being burned Do not put any combustible material or items around the range Take care that your hands do not touch the burners when they are on Turn off the burners when you change a pan or pot To warm liquid such as sauces stir it while warming Oven safety WARNING To reduce the risk of fire electric shock personal injuries and or death observe the following precautions Do not use the ov...

Страница 13: ...t put the lower drawer into the oven cavity when you run a self cleaning cycle When opening the door after a self cleaning cycle stand away from the oven If the self cleaning cycle malfunctions turn off the oven disconnect the power supply and contact a qualified service technician Storage drawer safety WARNING To reduce the risk of fire electric shock personal injuries and or death observe the fo...

Страница 14: ... pcs 05 Removable oven door 06 Storage drawer 07 Broil oven burner 08 Oven light 09 Oven rack system 10 Bake oven burner What s included Surface burner grates 2 and griddle 1 Surface burners and caps 5 Flat rack 2 NOTE If you need an accessory marked with an asterisk you can buy it from the Samsung Contact Center 1 800 SAMSUNG 726 7864 ...

Страница 15: ...d the door to prevent accidents 12 OFF CLEAR Cancel the current operation but not the timer 13 START SET Start a function or set the time Before you start You should know about the following features and components before you use your range for the first time Clock You must set the clock correctly to ensure the automatic features work properly To set the clock time 2 3 4 1 1 Press 2 Set the hours ...

Страница 16: ... each knob and show which burner the knob controls Each burner is designed for specific cooking purposes See the table below Position Purpose Food type Characteristics Right Front RF 17 000 BTU Power heating Boiling food Maximum output Right Rear RR 5 000 BTU Low simmering Chocolate casseroles sauces Delicate food that requires low heat for a long time Center C 10 000 BTU General heating Griddling...

Страница 17: ... gas to the range and call a qualified service technician NEVER use an open flame to locate a leak Ignition CAUTION 2 1 Make sure all surface burners are properly installed To light a burner 1 Push in the control knob and then turn it to the Lite position You will hear a clicking sound indicating the electronic ignition system is working properly 2 After the surface burner lights turn the control ...

Страница 18: ...tainers You may get severe burns if you touch the surfaces near the vent while the oven is operating Make sure you hold the handle of a wok or a small one handled pot while cooking Cookware Requirements Flat bottom and straight sides Tight fitting lid Well balanced with the handle weighing less than the main portion of the pot or pan Material characteristics Aluminum An excellent heat conductor So...

Страница 19: ...ing or removing the griddle NOTE You may need to adjust heat settings for the griddle over time The griddle may discolor over time as it becomes seasoned with use Do not let rust remain on the griddle If rust appears on the griddle remove it as soon as possible Griddle The removable coated griddle provides an extra cooking surface This is useful especially when cooking meat pancakes or other foods...

Страница 20: ...kes Small roasts 2 Turkey Large roasts Hams 1 CAUTION Do not cover an oven rack with aluminum foil This will hamper heat circulation resulting in poor baking Do not place aluminum foil on the oven bottom The aluminum can melt and damage the oven Arrange the oven racks only when the oven is cool When placing an oven rack in the top most rack position position 7 make sure the rack is situated stably...

Страница 21: ...d of the rack and remove it from the rack guide Rack and Pan placement or 4 3 Single Oven Rack 5 3 Multiple Oven Rack 5 3 Multiple Oven Rack Centering the baking pans in the oven as much as possible will produce better results If baking with more than 1 pan place the pans so each has at least 1 to 1 of air space around it When baking on a single oven rack place the oven rack in position 3 or 4 See...

Страница 22: ...the form of a long beep if the entered temperature or time is below the minimum or above the maximum setting for the feature Feature Temperature F Min Max Bake 175 500 Broil LO HI Baking 2 3 4 1 1 Press Bake 2 If necessary use the or pad to change the default temperature 350 F You can set the oven to any temperature from 175 F to 500 F 3 Press START SET The oven preheats until it reaches the tempe...

Страница 23: ...n will be very hot For information about broiler temperatures rack settings and cooking times for different foods see Broiling guide on page 23 Use the Broil Rack for the best results Broiling guide NOTE This is for reference only Preheating for 5 minutes before broiling is recommended The size weight thickness starting temperature and your doneness preference will affect broiling times This guide...

Страница 24: ...ff 3sec to delete the message NOTE To change the set time press Timer Off 3sec enter a different time and then press START SET Cook Time Timed cooking sets the oven to cook foods at a set temperature for a set length of time The oven automatically turns off when it finishes Mode Bake 2 4 5 1 3 1 Press Bake 2 If necessary change the temperature using the or 3 Press Cook Time 4 Set the cooking time ...

Страница 25: ...starting time using the or 7 Press START SET 8 The oven starts cooking at the set time and turns off automatically when it completes cooking NOTE To change the starting time press Delay Start and enter a new starting time and then press START SET Special features Keep Warm Keep cooked food warm at a low temperature for up to 3 hours 3 2 1 Place the container with the food on a rack and then close ...

Страница 26: ...a cloth or with plastic wrap You may need to anchor the plastic wrap underneath the container so that the oven does not blow it off the dough To avoid lowering the temperature and extending proofing time do not open the oven door The Sabbath Option K For use on the Jewish Sabbath and Holidays Use this option only for baking on the Jewish Sabbath and Holidays For more information visit the website ...

Страница 27: ...ume operation automatically SAb will appear in the control panel but the oven will not turn back on Food can be safely removed from the oven but you should not turn off the Sabbath option and turn the oven back on until after the Sabbath Holidays After the Sabbath observance turn off the Sabbath option by pressing and holding Bake and simultaneously for at least 3 seconds CAUTION Do not attempt to...

Страница 28: ...emperatures If it appears that the oven is too hot or too cool you can recalibrate the oven temperature Before recalibrating test a recipe by using a temperature setting that is higher or lower than recommended The baking results should help you decide how much of an adjustment is needed The oven temperature can be adjusted by 35 F 19 C 2 4 3 5 1 1 Press and hold for 3 seconds 2 Press or to set th...

Страница 29: ... 5 1 1 Press and hold for 3 seconds 2 Press or to set the number to 3 3 Press START SET to enter to Energy saving 4 Press or to select Off Hr or On 12Hr 5 Press START SET to save the change Sound Mute unmute the range 2 4 3 5 1 1 Press and hold for 3 seconds 2 Press or to set the number to 4 3 Press START SET to enter to Sound 4 Press or to select On or Off 5 Press START SET to save the change WI ...

Страница 30: ...or the on off status of each cooktop burner Oven Remote Control Set or adjust oven settings remotely My Cooking Turn the oven off remotely Once cooking starts change the set cooking time and temperature remotely Error Check Automatically recognize errors Temp Probe Monitor the current temperature and reset the probe setting For some available models If is not shown in the display you are still abl...

Страница 31: ... Turn off the range oven light Oven Timer Cook Time Set the timer on the range oven to 1 hour Amazon Alexa Google Assistant Samsung smart home appliances are supported by SmartThings skill in Alexa action in Google Assistant Installation Guide Here s how to link SmartThings account into Amazon Alexa or Google Assistant SmartThings App and Alexa App or Google Assistant App Should be installed on yo...

Страница 32: ...leansers of any kind These can scratch or damage the surface Stainless steel surface 1 Remove any spills spots and grease stains using a soft wet cloth 2 Apply an approved stainless steel cleanser to a cloth or paper towel 3 Clean one small area at a time rubbing with the grain of the stainless steel if applicable 4 When done dry the surface using a soft dry cloth 5 Repeat steps 2 through 4 as man...

Страница 33: ...cult to slide the racks on the guide rails Do not spray cooking oil or lubricant directly onto the racks Oven Wear the glove during cleaning Door Do not remove the inner gasket of the oven door for cleaning Don t hand Don t hand clean the clean the oven door oven door gasket gasket You may You may hand clean hand clean the door the door Use soap and water to thoroughly clean the top sides and fron...

Страница 34: ...lectrical systems creating a risk of electrical shock or high levels of carbon monoxide due to corrosion of the gas valves or ports Keep oven vent ducts unobstructed Clean vents frequently to avoid grease buildup Door outer side Outer surface Follow the cleaning instructions for the stainless steel surface in the previous section Outer glass Clean the outer glass using a glass cleanser or soapy wa...

Страница 35: ...if it operates properly After verifying that a burner operates normally turn it off NOTE After cleaning confirm that the burner port openings aren t plugged Shake out any excess water and then let burner heads and caps dry thoroughly Placing the center burner upside down will allow the water to drain out more easily Do not wash any burner components in a dish washer CAUTION The starter electrodes ...

Страница 36: ...ake sure the burner head lies flat on the stove top Burner cap 1 Match the burner caps to the burners by size and then reinstall the caps on the burner heads CAUTION Make sure each cap is reinstalled on the correct burner head is centered on the burner head and lies flat Burner Head Burner cap CAUTION Make sure all burner components heads and caps are reinstalled properly They will be stable and r...

Страница 37: ...ure the oven is turned off and cool before replacing the oven light NOTE The oven light does not operate during the self cleaning cycle Remove the racks if they prevent you from accessing the oven light Removing and reinstalling the oven door How to remove the door CAUTION The door is very heavy Be careful when removing and lifting the door Do not lift the door by the handle Turn the power OFF bef...

Страница 38: ...on Indentation 3 Open the door fully If the door will not open fully the indentations are not inserted correctly in the bottom edges of each slot 4 Push the hinge locks up against the front frame of the oven cavity into the locked position Hinge lock Locked position Unlocked position 5 Close the oven door How to remove and reinstall the Storage drawer 1 Slide open the drawer until it stops 2 Pull ...

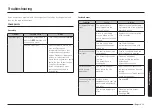
Страница 39: ...nob has been left in the Lite position After the burner lights turn the control knob to a desired setting If the burner still clicks contact a service technician The burners do not burn evenly Surface burner components and caps are not assembled correctly and level See page 35 The surface burners are dirty Clean the surface burner components See page 34 Troubleshooting If you encounter a problem w...

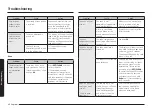
Страница 40: ...en will not turn on The oven is not completely plugged into the electrical outlet Make sure the electrical plug is fully inserted into a live properly grounded outlet A fuse in your home may be blown or the circuit breaker may have tripped Replace the fuse or reset the circuit breaker The oven temperature is too hot or cold The oven temperature needs to be adjusted and recalibrated See page 28 The...

Страница 41: ...age 23 Greasy buildup on oven surfaces Regular cleaning is necessary when broiling frequently Problem Cause Action Cooking is finished but the cooling fan is still running The fan automatically runs for a certain amount of time to ventilate the inside of the oven This is not a product malfunction The fan is designed to run automatically for a period of time to cool down the oven The oven will not ...

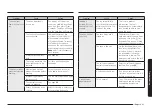
Страница 42: ...ing of excessive spillovers and food buildup before you start a self cleaning cycle Multiple self cleaning cycles may be necessary to completely clean the oven Problem Cause Action There is steam or smoke coming from under the control panel This is normal The oven vent is located there More steam is visible when you are using the convection functions or when baking or roasting multiple items at th...

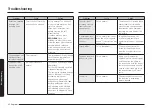
Страница 43: ...eeds to be reset Your digital control has been damaged Replace the fuse or reset the circuit breaker Problem Cause Action Food does not bake or roast properly in the oven The wrong cooking mode was selected See page 22 The oven racks have not been positioned properly for the foods being cooked See page 20 Incorrect cookware or cookware of improper size is being used See page 18 The oven temperatur...

Страница 44: ...hip for the limited warranty period starting from the date of original purchase of One 1 Year Parts and Labor This limited warranty is valid only on products purchased and used in the United States that have been installed operated and maintained according to the instructions attached to or furnished with the product To receive warranty service the purchaser must contact SAMSUNG at the address or ...

Страница 45: ...product Replacement parts and products are warranted for the remaining portion of the original product s warranty or ninety 90 days whichever is longer All replaced parts and products are the property of SAMSUNG and you must return them to SAMSUNG This limited warranty covers manufacturing defects in materials or workmanship encountered in normal household noncommercial use of this product and sha...

Страница 46: ...ing the one 1 year warranty period at no charge subject to availability within the contiguousCanada In home service is not available in all areas To receive in home service product must be unobstructed and accessible to the service agent If service is not available Samsung may elect to provide transportation of the product to and from an authorized service center SAMSUNG will repair or replace thi...

Страница 47: ... free operation of the product EXCEPT AS SET FORTH HEREIN THERE ARE NO WARRANTIES OR CONDITIONS ON THIS PRODUCT EITHER EXPRESS OR IMPLIED AND SAMSUNG DISCLAIMS ALL WARRANTIES AND CONDITIONS INCLUDING BUT NOT LIMITED TO ANY IMPLIED WARRANTIES AND CONDITIONS OF MERCHANTABILITY INFRINGEMENT OR FITNESS FOR A PARTICULAR PURPOSE NO WARRANTY OR GUARANTEE GIVEN BY ANY PERSON FIRM OR CORPORATION WITH RESPE...

Страница 48: ...o this product Registration Please register your product online at www samsung com register Questions For questions about features operation performance parts accessories or service call 1 800 SAMSUNG 726 7864 or visit our Web site at www samsung com ca support English or www samsung com ca_fr support French Model Serial Please attach your receipt or a copy to this manual You may need it along wit...

Страница 49: ...Memo ...

Страница 50: ...R COMMENTS COUNTRY CALL OR VISIT US ONLINE AT U S A Consumer Electronics 1 800 SAMSUNG 726 7864 www samsung com us support CANADA 1 800 SAMSUNG 726 7864 www samsung com ca support English www samsung com ca_fr support French DG68 01341A 01 Scan the QR code or visit www samsung com spsn to view our helpful How to Videos and Live Shows Requires reader to be installed on your smartphone ...

Страница 51: ...Estufa de pie de gas Manual del usuario NX60 61 S ...

Страница 52: ...ufa y morir b Verifique que el dispositivo antivuelco haya sido instalado y conectado correctamente en la parte posterior derecha o posterior izquierda de la base de la estufa c Si desplaza la estufa y luego vuelve a colocarla en su lugar asegúrese de que el dispositivo antivuelco esté acoplado en la parte posterior derecha o izquierda de la base de la estufa d No opere la estufa sin el dispositiv...

Страница 53: ...s digitales clase B de acuerdo con la sección 15 de las Normas de la FCC Estos límites están destinados a ofrecer una protección razonable contra interferencias perjudiciales en una instalación residencial Este equipo genera utiliza y puede irradiar energía de radiofrecuencia y si no se lo instala y utiliza de acuerdo con las instrucciones puede provocar interferencia perjudicial a las comunicacio...

Страница 54: ...o a una distancia mínima de 8 pulgadas 20 cm entre su cuerpo y el radiador Este dispositivo y su s antena s no deben ubicarse cerca ni utilizarse junto con ninguna otra antena o transmisor 2 Aviso de IC El término IC antes del número de certificación de radio indica que se cumplieron las especificaciones técnicas de Industry Canada El funcionamiento se encuentra sujeto a las siguientes dos condici...

Страница 55: ... elegante Instrucciones de seguridad generales Esta unidad ha sido sometida a pruebas y se ha determinado que cumple con los límites para un dispositivo digital clase B de acuerdo con la sección 18 de las Normas de la FCC Estos límites están destinados a ofrecer una protección razonable contra interferencias perjudiciales en una instalación residencial Esta unidad genera utiliza y puede irradiar e...

Страница 56: ...cocina 18 Comal 19 Horno de gas 20 Uso de las parrillas del horno 20 Modo de cocción 22 Opciones de cocción 24 Funciones especiales 25 Cambiar la configuración 28 Control inteligente 30 Control por voz 31 Mantenimiento 31 Limpieza 31 Reemplazo de la luz del horno 36 Cómo retirar y volver a instalar la puerta del horno 36 Resolución de problemas 38 Puntos de verificación 38 Códigos de información 4...

Страница 57: ...lado o con licencia del Estado de Massachusetts Cuando se utilicen válvulas de bola para el cierre del gas se debe usar una manija en forma de T No deben conectarse varios conductos flexibles de gas en serie Seguridad general ADVERTENCIA Para reducir el riesgo de incendio descarga eléctrica lesiones personales y muerte respete las precauciones siguientes No toque ninguna parte de la estufa incluye...

Страница 58: ...as para hornos velas encendidas cigarrillos encendidos platos productos químicos objetos metálicos etc Artículos tales como paños pueden quedar enganchados en la puerta Se pueden producir descargas eléctricas incendios problemas con el producto o lesiones personales Tenga cuidado de no lesionarse cuando limpie el electrodoméstico por dentro o por fuera Puede lesionarse con los bordes afilados del ...

Страница 59: ...ue el enchufe el cable de alimentación ni el tomacorriente de ninguna manera No coloque un fusible en el circuito neutral o de conexión a tierra Utilice un circuito eléctrico exclusivo de CA 120 V 60 Hz 20 A con un fusible de retardo o un disyuntor para esta estufa No conecte más de un artefacto a este circuito No conecte el cable a tierra a caños de plomería tuberías de gas o tuberías de agua cal...

Страница 60: ... y con todos los códigos y requisitos de la autoridad pertinente La agencia calificada que realice este trabajo asume toda la responsabilidad de la conversión del gas La instalación de esta estufa debe cumplir con los códigos locales o a falta de ellos con la versión más reciente del Código nacional de gas combustible ANSI Z223 1 NFPA 54 En Canadá la instalación debe cumplir con el Código de insta...

Страница 61: ...utensilios de cocina Esta cubierta está diseñada para usar con un wok o con el accesorio del aro para wok Para flambear alimentos debe tener una campana de ventilación Durante el flambeado la campana debe estar encendida Antes de retirar o cambiar recipientes de cocina apague los quemadores Retire los alimentos y los recipientes de inmediato después de la cocción Antes de retirar alguna pieza del ...

Страница 62: ...e del recipiente Asegúrese siempre de que los controles estén en OFF APAGADO y de que las rejillas estén frías antes de retirarlas para evitar cualquier posibilidad de sufrir quemaduras No coloque materiales combustibles ni otros productos alrededor de la estufa Tenga cuidado de que sus manos no toquen los quemadores cuando estén encendidos Apague los quemadores cuando cambie una sartén o una olla...

Страница 63: ...nciona mal apague el horno desconecte el suministro eléctrico y comuníquese con un técnico de servicio calificado NUNCA cubra ranuras orificios o pasajes en la parte inferior del horno ni cubra una parrilla completa con materiales como papel de aluminio Esto evita que el aire circule a través del horno y puede causar envenenamiento por monóxido de carbono Las envolturas de papel de aluminio tambié...

Страница 64: ...horno desmontable 06 Cajón de almacenamiento 07 Quemador del horno para asar a la parrilla 08 Luz del horno 09 Sistema de parrillas del horno 10 Quemador del horno para hornear Elementos incluidos Rejillas de los quemadores superiores 2 y comal 1 Quemadores superiores y tapas 5 Parrilla plana 2 NOTA Si necesita una pieza identificada con un asterisco puede adquirirla en el Centro de contacto de Sa...

Страница 65: ...ra evitar accidentes 12 OFF CLEAR APAGAR BORRAR Se utiliza para cancelar la operación actual pero no el temporizador 13 START SET INICIO CONFIGURAR Se utiliza para iniciar una función o configurar el tiempo Antes de comenzar Debe conocer las siguientes características y componentes antes de utilizar la estufa por primera vez Reloj Debe configurar correctamente el reloj para asegurar que las funcio...

Страница 66: ...stran qué quemador controla dicha perilla Cada quemador está diseñado para un propósito de cocción específico Consulte la tabla a continuación Posición Propósito Tipo de alimento Características Delantero derecho DD 17000 BTU Calentamiento potente Comida hervida Máxima potencia Trasero derecho TD 5000 BTU Cocción a fuego lento baja Chocolate guisos salsas Alimentos delicados que requieren fuego le...

Страница 67: ...cendido el quemador gire la perilla de control para ajustar el nivel de la llama Nivel de la llama Las llamas de los quemadores siempre deben permanecer debajo de los recipientes de cocción y no deben extenderse más allá del fondo del utensilio en ningún momento ADVERTENCIA Si las llamas son mayores que el fondo del recipiente pueden provocar un incendio o lesiones físicas Cuando coloque un quemad...

Страница 68: ...stufas o en el horno Limitaciones de tamaño PRECAUCIÓN No coloque una olla o sartén pequeña con un diámetro de fondo de alrededor de 6 pulgadas o menos No utilice un utensilio de gran tamaño Las llamas del quemador podrían esparcirse y causar daños en las inmediaciones Asegúrese siempre de que las manijas de los recipientes queden orientadas hacia un lado o hacia la parte posterior de la cubierta ...

Страница 69: ...mpo El comal puede decolorarse con el tiempo a medida que se cure con el uso No deje que se acumule óxido en el comal Si aparece óxido en el comal elimínelo lo antes posible Comal El comal recubierto desmontable proporciona una superficie de cocción adicional Esto resulta útil en especial al cocinar carne panqueques u otros alimentos que requieren una gran área de cocción El comal se puede utiliza...

Страница 70: ...pe que evita que se aflojen durante el funcionamiento del horno Cada parrilla tiene topes que requieren colocación correcta sobre las guías Los topes evitan que las parrillas se salgan accidentalmente del horno por completo al retirarlas 07 06 05 04 03 02 01 Tipo de alimento Posición de la parrilla Hamburguesas a la parrilla 6 Carnes o cortes pequeños de ave pescado a la parrilla 4 5 Panqués paste...

Страница 71: ...elantero de la parrilla y retírela de la guía Colocación de parrillas y recipientes o 4 3 Parrilla del horno simple 5 3 Múltiples parrillas de horno 5 3 Múltiples parrillas de horno Colocar los moldes o las charolas lo más cerca posible del centro del horno producirá los mejores resultados Si hornea con más de 1 recipiente colóquelos de manera tal que cada uno tenga de 1 a 1 de espacio libre a su ...

Страница 72: ...alor ajustable máximo para la función en cuestión sonará un tono de error en la forma de un sonido más prolongado Función Temperatura F Mín Máx Hornear 175 500 Asar a la parrilla BAJO ALTO Hornear 2 3 4 1 1 Presione Bake Hornear 2 De ser necesario utilice la tecla o para cambiar la temperatura predeterminada 350 F Puede configurar el horno en cualquier temperatura desde 175 F hasta 500 F 3 Presion...

Страница 73: ...horno estará muy caliente Para obtener información acerca de las temperaturas de cocción a la parrilla los ajustes de las parrillas y los tiempos de cocción para distintos alimentos consulte Guía para asar a la parrilla en la página 23 Use la parrilla para asar para obtener mejores resultados Guía para asar a la parrilla NOTA Esto es para referencia solamente Se recomienda precalentar 5 minutos an...

Страница 74: ...c Desactivar temporizador 3 seg para borrar el mensaje NOTA Para cambiar el ajuste de hora presione Timer Off 3 sec Desactivar temporizador 3 seg ingrese un tiempo distinto y luego presione START SET INICIO CONFIGURAR Tiempo de cocción La cocción programada configura el horno para cocinar los alimentos a una temperatura establecida durante un tiempo determinado El horno se apaga automáticamente cu...

Страница 75: ...l horno comienza a cocinar a la hora establecida y se apaga automáticamente cuando finaliza la cocción NOTA Para cambiar la hora de inicio presione Delay Start Retrasar el inicio ingrese la nueva hora de inicio y luego presione START SET INICIO CONFIGURAR Funciones especiales Mantener caliente Mantenga los alimentos cocinados calientes a una baja temperatura hasta 3 horas 3 2 1 Coloque el recipien...

Страница 76: ... resistente al calor en la posición 3 o 4 de la parrilla y cúbrala con un paño o con una envoltura de plástico Es posible que deba enganchar el plástico debajo del recipiente para que el horno no lo vuele fuera de la masa Para evitar reducir la temperatura del horno y extender el tiempo de levado no abra la puerta del horno La opción Sabbat K Para uso en el Sabbat y otras fechas sagradas judías Us...

Страница 77: ...rá el funcionamiento automáticamente SAb aparecerá en el panel de control pero el horno no se encenderá nuevamente Los alimentos se pueden retirar con seguridad del horno pero no se debe desactivar la opción Sabbat y encender el horno de nuevo hasta que finalice el Sabbat las fiestas Después de la celebración del Sabbat apague la opción Sabbat manteniendo presionados Bake Hornear y simultáneamente...

Страница 78: ...ara las recetas Si considera que el horno está demasiado caliente o demasiado frío puede recalibrar la temperatura Antes de recalibrarla pruebe una receta utilizando un ajuste de temperatura más alto o más bajo que el recomendado Los resultados de horneado de esa manera probablemente le sirvan de guía para decidir la magnitud del ajuste requerido La temperatura del horno puede ajustarse en 35 F 19...

Страница 79: ...ro a 3 3 Presione START SET INICIO CONFIGURAR para ingresar a Ahorro de energía 4 Presione o para seleccionar Desactivado Hr o Activado 12Hr 5 Presione START SET INICIO CONFIGURAR para guardar el cambio Sonido Desactivar activar el sonido 2 4 3 5 1 1 Mantenga presionado durante 3 segundos 2 Presione o para ajustar el número a 4 3 Presione START SET INICIO CONFIGURAR para ingresar a Sonido 4 Presio...

Страница 80: ... encendido apagado de cada quemador de la cubierta Control remoto del horno Configurar o ajustar remotamente los ajustes del hornos Mis platos Apagar el horno remotamente Una vez iniciada la cocción cambiar remotamente el tiempo de cocción y la temperatura Detección de errores Reconocer los errores automáticamente Sonda de temperatura Supervisar la temperatura actual y restablecer la configuración...

Страница 81: ...idable Rayará la superficie No rocíe ningún tipo de limpiador en los orificios de distribución El sistema de ignición se encuentra en esos orificios y debe mantenerse libre de humedad Control por voz Para utilizar la función de control por voz de la estufa debe instalar en su dispositivo móvil la aplicación Bixby Amazon Alexa o el Asistente de Google Consulte la tabla a continuación para ver todas...

Страница 82: ...e de cocina o lubricante directamente sobre las parrillas e Horno Use el guante durante la limpieza Puerta No retire la junta interna de la puerta del horno para realizar la limpieza No limpie No limpie manualmente la manualmente la junta selladora de la junta selladora de la puerta del horno puerta del horno La puerta se La puerta se puede limpiar puede limpiar manualmente manualmente Utilice agu...

Страница 83: ...ierta La superficie de la cubierta de porcelana esmaltada debe mantenerse limpia Recomendamos retirar los alimentos derramados inmediatamente después de que se hayan derramado 1 Apague todos los quemadores superiores 2 Espere hasta que se enfríen las rejillas de los quemadores y retírelas 3 Limpie la superficie de la cubierta con un paño suave Si se derraman alimentos en los huecos de los componen...

Страница 84: ...9 Encienda cada uno de los quemadores y verifique si funcionan correctamente Después de verificar que un quemador funciona con normalidad apáguelo NOTA Después de la limpieza confirme que las aberturas de los puertos de los quemadores no estén atascadas Sacuda para quitar el exceso de agua y deje que los cabezales del quemador y las tapas se sequen bien Si coloca el quemador central invertido perm...

Страница 85: ...ufa Tapa de los quemadores 1 Vuelva a instalar las tapas en los cabezales de los quemadores haciendo coincidir su tamaño con el de los quemadores PRECAUCIÓN Asegúrese de que cada tapa se vuelva a instalar en el cabezal correcto y que quede centrada y plana sobre el cabezal del quemador Cabezal de los quemadores Tapa de los quemadores PRECAUCIÓN Asegúrese de que todos los componentes de los quemado...

Страница 86: ... descargas eléctricas asegúrese de que el horno esté apagado y frío antes de reemplazar la luz del horno NOTA La luz del horno no funciona durante el ciclo de autolimpieza Retire las parrillas si obstaculizan el acceso a la luz del horno Cómo retirar y volver a instalar la puerta del horno Cómo retirar la puerta PRECAUCIÓN La puerta es muy pesada Tenga cuidado al retirarla y levantarla No levante ...

Страница 87: ... Muesca 3 Abra la puerta por completo Si la puerta no se abre completamente las muescas no se encuentran correctamente insertadas en los bordes inferiores de cada ranura 4 Empuje las trabas de bisagra hacia arriba contra el marco frontal de la cavidad del horno hasta que queden en la posición trabada Posición trabada Posición destrabada Traba de la bisagra 5 Cierre la puerta del horno Cómo retirar...

Страница 88: ...corriente alimentado con corriente y bien conectado a tierra Puede haberse quemado un fusible en su casa o haberse disparado el disyuntor Reemplace el fusible o reinicie el disyuntor El suministro de gas no está correctamente conectado o encendido Consulte las Instrucciones de instalación que vinieron con su estufa Los quemadores superiores no se encienden La perilla de control no se reguló correc...

Страница 89: ...mentación eléctrica a la estufa durante por lo menos 30 segundos y luego reconecte la alimentación eléctrica Si esto no soluciona el problema llame al servicio de reparaciones Problema Causa Acción El horno no se enciende El horno no está bien enchufado al tomacorriente Asegúrese de que el enchufe se encuentre completamente insertado en una toma con corriente y bien conectada a tierra Puede habers...

Страница 90: ...ar el interruptor de la luz y otros controles mantenga presionados Bake Hornear y simultáneamente durante 3 segundos Bombilla suelta o quemada Consulte la página 36 El interruptor de la luz del horno debe reemplazarse Llame a un técnico de servicio calificado Problema Causa Acción El horno emite demasiado humo cuando se asa a la parrilla Carne o alimentos no fueron preparados correctamente antes d...

Страница 91: ...occión y limpieza Problema Causa Acción Humo excesivo durante un ciclo de autolimpieza Esta es la primera vez que se ha limpiado el horno Esto es normal El horno siempre emitirá más humo la primera vez que se limpia Limpie toda la suciedad excesiva antes de iniciar el ciclo de autolimpieza Si el humo persiste presione OFF CLEAR APAGAR BORRAR Abra las ventanas para sacar el humo del lugar Una vez q...

Страница 92: ...a de papel y luego frote con ella los lados de las parrillas Las parrillas se vuelven opacas y difíciles de deslizar si se dejan en el horno durante un ciclo de autolimpieza Ruido del ventilador Esto es normal El ventilador de convección está encendido hasta que la función termina y la puerta se abre Otros Problema Causa Acción El producto no está nivelado El electrodoméstico fue instalado incorre...

Страница 93: ...ndos Si estas sugerencias no resuelven el problema comuníquese con un centro de servicio local de Samsung o llame al 1 800 SAMSUNG 1 800 726 7864 Problema Causa Acción Los alimentos no se hornean o asan como es debido en el horno Se seleccionó un modo de cocción incorrecto Consulte la página 22 Las parrillas del horno no se han ubicado correctamente para los alimentos que se están cocinando Consul...

Страница 94: ...n la guía de uso y cuidados El costo de reparación o remplazo bajo estas circunstancias excluidas le corresponderá al cliente Las visitas de un técnico de servicio autorizado para explicar las funciones el mantenimiento o la instalación del producto no están cubiertas por esta garantía limitada Comuníquese con SAMSUNG al número que figura a continuación si necesita asistencia en los anteriores cas...

Страница 95: ...RODUCTO O LA DEVOLUCIÓN DEL MONTO DE LA COMPRA SEGÚN DECIDA SAMSUNG DE ACUERDO A LO ESTIPULADO EN ESTA GARANTÍA LIMITADA SAMSUNG NO SERÁ RESPONSABLE DE DAÑOS IMPREVISTOS O DERIVADOS QUE INCLUYEN PERO NO SE LIMITAN AL TIEMPO Y FORMA DEL TRABAJO HOTELES Y O COMIDAS DE RESTAURANTES GASTOS DE REMODELACIÓN PÉRDIDA DE INGRESOS O GANANCIAS NO OBTENCIÓN DE AHORROS U OTROS BENEFICIOS SIN IMPORTAR LA TEORÍA...

Страница 96: ...TÍA LIMITADA NO SE EXTENDERÁ A NINGUNA PERSONA DISTINTA DEL COMPRADOR ORIGINAL DEL PRESENTE PRODUCTO ES INTRANSFERIBLE Y ESTABLECE SU EXCLUSIVA REPARACIÓN Garantía CANADÁ NO LA DESECHE ESTUFA DE GAS SAMSUNG GARANTÍA LIMITADA PARA EL COMPRADOR ORIGINAL El presente producto de la marca SAMSUNG tal como lo provee y distribuye SAMSUNG ELECTRONICS CANADA INC SAMSUNG y lo entrega como nuevo en su empaqu...

Страница 97: ...r asistencia Algunos estados o provincias no permiten limitaciones en cuanto al plazo de una garantía implícita o la exclusión o limitación de daños imprevistos o derivados por lo tanto las limitaciones o exclusiones antedichas pueden no aplicarse en su caso Esta garantía le otorga derechos legales específicos y además puede tener otros derechos que varían según el estado o la provincia en el que ...

Страница 98: ...e código abierto El software incluido en este producto contiene software de código abierto Consulte la información de licencia de origen relacionada con este producto a través de la siguiente URL http opensource samsung com opensource SMART_TP2_0 seq 0 ...

Страница 99: ...Notas ...

Страница 100: ...S O COMENTARIOS PAÍS LLAME AL O VISÍTENOS EN LÍNEA EN U S A Consumer Electronics 1 800 SAMSUNG 726 7864 www samsung com us support CANADA 1 800 SAMSUNG 726 7864 www samsung com ca support English www samsung com ca_fr support French DG68 01341A 01 Escanee el código QR o visite www samsung com spsn para ver nuestros útiles videos instructivos y programas en vivo Requiere un lector instalado en su t...

Страница 101: ...Cuisinière à gaz non encastrable Manuel d utilisation NX60 61 S ...

Страница 102: ...ulement a été correctement installé et fixé sur le côté arrière droit ou arrière gauche du dessous de la cuisinière c Si vous déplacez la cuisinière puis la remettez en place assurez vous que le dispositif anti basculement est emboîté sur le côté arrière droit ou gauche du dessous de la cuisinière d N utilisez pas la cuisinière si le dispositif anti basculement n est pas en place et bien emboîté e...

Страница 103: ... 15 de la réglementation de la FCC Ces limitations sont destinées à assurer une protection suffisante contre les interférences néfastes dans une zone résidentielle Cet appareil génère utilise et peut émettre de l énergie radioélectrique S il n est pas installé et utilisé selon les instructions il peut produire des interférences néfastes pour les communications radio Il n est toutefois pas garanti ...

Страница 104: ...ne distance d au moins 8 pouces 20 cm entre le radiateur et votre corps Cet appareil ainsi que son ou ses antenne s ne doivent pas être situés au même endroit et être utilisés conjointement à tout e autre antenne ou émetteur 2 Avis d IC Le terme IC placé avant le numéro de certification pour les radiofréquences signifie seulement que les spécifications techniques d Industry Canada ont été respecté...

Страница 105: ...égante Consignes générales de sécurité Cet appareil a été testé il est conforme aux limitations applicables aux appareils numériques de classe B conformément au paragraphe 18 de la réglementation de la FCC Ces limitations sont destinées à assurer une protection suffisante contre les interférences néfastes dans une zone résidentielle Cet appareil génère utilise et peut émettre de l énergie radioéle...

Страница 106: ...de cuisson 16 Allumage 17 Récipients 18 Gril 19 Four à gaz 20 Utilisation des grilles du four 20 Mode de cuisson 22 Options de cuisson 24 Fonctions spéciales 25 Modification des réglages 28 Commande intelligente 30 Commande vocale 31 Entretien 31 Nettoyage 31 Remplacement de l ampoule du four 36 Retrait et réinstallation de la porte du four 36 Dépannage 38 Points à contrôler 38 Codes d information...

Страница 107: ...mbier certifié ou un monteur d installations au gaz qualifié ou certifié par l État du Massachusetts Lorsque des vannes à bille sont utilisées pour la fermeture du gaz elles doivent être munies d une poignée en T Il ne faut pas connecter plusieurs canalisations de gaz flexibles en série Sécurité générale AVERTISSEMENT Pour réduire le risque d incendie de choc électrique de blessures et ou de mort ...

Страница 108: ...placez pas d objets ex linge couvercle de four bougies allumées cigarettes allumées plats produits chimiques objets métalliques etc dessus Des articles peuvent rester coincés dans la porte Cela pourrait entraîner un risque de choc électrique d incendie de défaillance de l appareil ou de blessures Lors du nettoyage de l appareil extérieur ou intérieur veillez à ne pas vous blesser Vous risquez de v...

Страница 109: ...ation mal fixée Ne modifiez d aucune manière la fiche le cordon d alimentation ou la prise murale Ne mettez pas de fusible dans un circuit neutre ou de terre Utilisez un circuit électrique dédié en courant alternatif de 120 V 60 Hz et 20 A équipé d un disjoncteur ou d un fusible à retardement pour cette cuisinière Ne branchez pas plusieurs appareils sur ce circuit Ne branchez pas le câble de mise ...

Страница 110: ...technicien de maintenance qualifié conformément aux instructions du fabricant et à l ensemble des codes et exigences des autorités compétentes L agence qualifiée effectuant ces travaux assume la responsabilité de la conversion au gaz L installation de cette cuisinière doit être conforme aux codes locaux ou en absence de codes locaux au Code national de gaz combustible ANSI Z223 1 NFPA 54 dernière ...

Страница 111: ...le de cuisine sur la surface de cuisson Cette surface de cuisson est conçue pour une utilisation avec un wok ou un anneau wok Pour faire flamber des aliments vous devez avoir une hotte d aspiration Lorsque vous faites flamber des aliments la hotte doit être allumée Avant de retirer ou de changer d ustensile de cuisson éteignez les brûleurs Retirez les aliments et les ustensiles de cuisson immédiat...

Страница 112: ...ourrait ainsi déborder de la poêle Avant de retirer les grilles vérifiez toujours que les commandes sont désactivées et que les grilles ont refroidi afin d éviter tout risque de brûlure Ne placez aucun objet ou matériau combustible autour de la cuisinière Veillez à ne pas toucher les brûleurs avec vos mains lorsqu ils sont allumés Éteignez les brûleurs lorsque vous changez une poêle ou casserole P...

Страница 113: ...le d auto nettoyage éteignez le four débranchez l alimentation et contactez un technicien de maintenance qualifié Ne couvrez JAMAIS les fentes orifices ou passages sur le fond du four et ne couvrez pas une grille entière avec des matériaux tels que du papier aluminium Sinon la circulation de l air à travers le four sera bloquée pouvant causer une intoxication au monoxyde de carbone Les habillages ...

Страница 114: ...le 06 Tiroir de rangement 07 Brûleur de four pour gril 08 Éclairage du four 09 Système de grille du four 10 Brûleur de four pour cuisson Accessoires fournis Grilles du brûleur de surface 2 et gril 1 Brûleurs de surface et chapeaux de brûleurs 5 Grille plate 2 REMARQUE Si vous souhaitez acheter un accessoire repéré par un astérisque vous pouvez le commander auprès du Centre d assistance Samsung 1 8...

Страница 115: ... tout accident 12 OFF CLEAR ARRÊT EFFACER pour annuler l opération en cours mais pas la minuterie 13 START SET DÉPART RÉGLAGE pour démarrer une fonction ou régler l heure Avant de commencer Vous devez connaitre les fonctions suivantes et les composants avant d utiliser votre cuisinière pour la première fois Horloge Vous devez régler l horloge correctement pour vous assurer que les fonctions automa...

Страница 116: ...haque bouton et indiquent le brûleur commandé par le bouton Chaque brûleur est destiné à un usage de cuisson spécifique Reportez vous au tableau ci dessous Emplacement Fonction Type d aliment Caractéristiques Avant droit AvD 17000 BTU Chauffage intensif Faire bouillir des aliments Puissance maximale Arrière droit ArD 5000 BTU Mijotage à basse température Chocolat casseroles sauces Aliments délicat...

Страница 117: ... allumer 3 Lorsque le brûleur est allumé tournez le bouton de commande pour ajuster le niveau de la flamme Niveau de flamme Les flammes des brûleurs doivent toujours rester sous l ustensile et ne doivent jamais s étendre en dehors du fond de l ustensile AVERTISSEMENT Des flammes dépassant le fond de l ustensile peuvent provoquer un incendie ou une blessure Lorsque vous réglez un brûleur sur mijota...

Страница 118: ...ATTENTION Ne placez pas de petite casserole ou plat avec un fond d un diamètre d environ 6 pouces ou moins N utilisez pas de casserole volumineuse Les flammes du brûleur peuvent s étendre provoquant des dommages au voisinage Vérifiez toujours que les manches d ustensiles sont dirigées vers les côtés ou l arrière de la table de cuisson et non au dessus des brûleurs de surface Cela minimisera le ris...

Страница 119: ... pour le gril Après un certain nombre d utilisations le gril peut se décolorer Ne laissez pas la rouille se former sur le gril Si de la rouille apparaît sur le gril éliminez la dès que possible Gril Le gril à revêtement amovible procure une surface de cuisson supplémentaire ce qui est particulièrement utile lorsque vous cuisinez de la viande des crêpes ou d autres aliments nécessitant un grand esp...

Страница 120: ...lle comporte une butée qui évite que la grille ne se libère pendant le fonctionnement du four Chacune comporte des butées qui doivent être correctement installées sur les guides de grille Les butées permettent d éviter que les grilles de sortent complètement du four par accident lorsque vous les tirez 07 06 05 04 03 02 01 Type d aliment Position de la grille Cuisson d hamburgers au gril 6 Cuisson ...

Страница 121: ...e en butée 2 Soulevez l extrémité avant de la grille et retirez la de son guide Emplacement de la grille et des plats ou 4 3 Grille unique 5 3 Plusieurs grilles de cuisson 5 3 Plusieurs grilles de cuisson Positionnez les moules à gâteaux le plus au centre possible du four pour assurer de meilleurs résultats Si vous utilisez plusieurs moules espacez les d au moins 1 à 1 Lorsque vous cuisinez sur un...

Страница 122: ...ur e au réglage minimum ou supérieur e au réglage maximum de la fonction est saisi e Fonction Température F Minimum Maximum Cuisson traditionnelle 175 500 Cuisson au gril FAIBLE ÉLEVÉE Cuisson traditionnelle 2 3 4 1 1 Appuyez sur Bake Cuisson traditionnelle 2 Si nécessaire utilisez la touche ou pour modifier la température par défaut 350 F Vous pouvez régler le four sur une température comprise en...

Страница 123: ...est très chaud Pour en savoir plus sur les températures du gril les réglages des grilles et les temps de cuisson de divers aliments consultez la section Guide de cuisson au gril à la page 23 Utilisez la grille du gril pour des résultats optimaux Guide de cuisson au gril REMARQUE Ces informations ne sont fournies qu à titre indicatif Il est recommandé de préchauffer pendant 5 minutes avant la cuiss...

Страница 124: ...ou Timer Off 3sec Arrêt de la minuterie 3 s pour supprimer le message REMARQUE Pour modifier le temps réglé appuyez sur Timer Off 3sec Arrêt de la minuterie 3 s saisissez un temps différent puis appuyez sur START SET DÉPART RÉGLAGE Temps de cuisson La cuisson minutée permet de régler le four pour cuire les aliments à une température réglée pendant un temps défini Le four s éteint automatiquement l...

Страница 125: ...START SET DÉPART RÉGLAGE 8 Le four démarre la cuisson à l heure réglée et s arrête automatiquement lorsque la cuisson est terminée REMARQUE Pour modifier l heure de départ appuyez sur Delay Start Départ différé saisissez une autre heure de départ puis appuyez sur START SET DÉPART RÉGLAGE Fonctions spéciales Maintien au chaud Conserve les aliments cuits au chaud à basse température jusqu à 3 heures...

Страница 126: ...pient résistant à la chaleur sur la grille à la position 3 ou 4 et couvrez la avec un chiffon ou un film plastique Il peut s avérer nécessaire d immobiliser le film plastique sous le récipient afin qu il ne soit pas soulevé par la ventilation du four Pour éviter d abaisser la température du four et d augmenter le temps de précuisson n ouvrez pas la porte du four L option Sabbat K À utiliser pour l...

Страница 127: ...e fonctionnement automatiquement SAb apparaît sur le tableau de commande mais le four ne redémarre pas Les aliments peuvent être retirés du four en toute sécurité mais vous ne devez pas désactiver l option Sabbat et redémarrer le four d ici la fin du sabbat des fêtes Après avoir respecté le sabbat désactivez l option Sabbat appuyant simultanément sur Bake Cuisson traditionnelle et sur pendant au m...

Страница 128: ...ératures de recette recommandés S il apparaît que le four est trop chaud ou trop froid vous pouvez réajuster la température du four Avant de réétalonner essayez une recette en sélectionnant une température supérieure ou inférieure à celle recommandée Les résultats de cuisson devraient vous indiquer si un nouveau réglage est nécessaire ou non La température du four peut être réglée à 35 F 19 C 2 4 ...

Страница 129: ...er en mode Économie d énergie 4 Appuyez sur ou sur pour sélectionner Désactivation Hr ou Activation 12Hr 5 Appuyez sur START SET DÉPART RÉGLAGE pour enregistrer les modifications Son Coupe Rétablit le son de la cuisinière 2 4 3 5 1 1 Appuyez sur pendant 3 secondes 2 Appuyez sur ou sur pour régler la valeur sur 4 3 Appuyez sur START SET DÉPART RÉGLAGE pour passer en mode Son 4 Appuyez sur ou sur po...

Страница 130: ...on Contrôle à distance du four Réglez ou ajustez à distance les réglages du four Mes cuissons Éteignez le four à distance Une fois que la cuisson a commencé modifiez à distance la température et le temps de cuisson réglés Détection d erreurs Cette fonction permet de détecter automatiquement des erreurs Sonde de température Surveillez la température actuelle et réinitialisez le réglage de la sonde ...

Страница 131: ...isez pas de tampon à récurer métallique ou de nettoyants abrasifs sur les surfaces en acier inoxydable La surface serait rayée Ne vaporisez aucun type d agent nettoyant dans les orifices de la coupelle Le système d allumage est situé dans ces orifices et doit rester hors humidité Commande vocale Pour utiliser la fonction de commande vocale de la cuisinière vous devez disposer des applications Bixb...

Страница 132: ...l humidité dans la porte Vitre intérieure La vitre intérieure est nettoyée automatiquement durant le cycle d auto nettoyage Grilles Pour conserver les grilles propres retirez les de la cavité et faites les tremper dans de l eau tiède savonneuse Puis éliminez l encrassement des grilles en utilisant une éponge à récurer en plastique Si les grilles ne glissent pas vers l intérieur ou l extérieur avec...

Страница 133: ... de la plaque de cuisson La surface de la plaque de cuisson en émail vitrifié doit être maintenue propre Nous vous recommandons de retirer immédiatement les aliments renversés 1 Éteignez tous les brûleurs de surface 2 Attendez que toutes les grilles des brûleurs aient refroidi avant de les retirer 3 Nettoyez la surface de la table de cuisson à l aide d un chiffon doux Si des aliments renversés s é...

Страница 134: ...ne correctement Après avoir vérifié qu un brûleur fonctionne normalement éteignez le REMARQUE Une fois le nettoyage terminé vérifiez que les ouvertures des orifices des brûleurs ne sont pas obstruées Essuyez l excès d eau et laissez les têtes de brûleurs et les chapeaux sécher complètement L eau s écoulera plus facilement si le brûleur central est placé à l envers Ne lavez aucun composant des brûl...

Страница 135: ...peau du brûleur 1 Faites correspondre les chapeaux des brûleurs avec les brûleurs par taille puis réinstallez les chapeaux sur les têtes des brûleurs ATTENTION Assurez vous que chaque chapeau est réinstallé sur la bonne tête de brûleur qu il est centré sur la tête du brûleur et qu il est bien à plat Tête du brûleur Chapeau du brûleur ATTENTION Assurez vous que tous les composants des brûleurs tête...

Страница 136: ...id avant de procéder au remplacement de son éclairage REMARQUE L éclairage est désactivé durant le cycle d auto nettoyage Retirez les grilles si elles vous empêchent d accéder à l éclairage du four Retrait et réinstallation de la porte du four Comment retirer la porte ATTENTION La porte est très lourde Soyez prudent lorsque vous retirez et soulevez la porte Ne soulevez pas la porte par la poignée ...

Страница 137: ... maximum Si la porte ne s ouvre pas complètement c est que les parties creuses ne sont pas correctement insérées dans les parties inférieures de chaque logement 4 Poussez les verrous de la charnière vers le haut contre le cadre de la cavité du four pour les mettre en position de verrouillage Verrou de la charnière Position de verrouillage Position de déverrouillage 5 Fermez la porte du four Procéd...

Страница 138: ...correctement mise à la terre Un fusible de votre habitation est peut être grillé ou le disjoncteur peut être déclenché Remplacez le fusible concerné ou réenclenchez le disjoncteur Le tuyau d arrivée de gaz n est pas correctement branché ou ouvert Reportez vous aux consignes d installation fournies avec votre cuisinière Les brûleurs de surface ne s allument pas Le bouton de commande n est pas corre...

Страница 139: ...ation de la cuisinière pendant au moins 30 secondes puis rétablissez la Si le problème n est pas résolu contactez le service technique Problème Cause Action Le four ne s allume pas Le four n est pas correctement branché à la prise électrique Assurez vous que la prise électrique est entièrement branchée sur une prise en état de marche et correctement mise à la terre Un fusible de votre habitation e...

Страница 140: ...uyez simultanément sur Bake Cuisson traditionnelle et sur pendant 3 secondes Une ampoule est desserrée ou grillée Reportez vous à la page 36 Le commutateur permettant d activer l éclairage du four doit être remplacé Contactez un technicien de maintenance qualifié Problème Cause Action Le four émet une fumée excessive durant la cuisson au gril Les aliments n ont pas été correctement préparés avant ...

Страница 141: ...ction Fumée excessive durant un cycle d auto nettoyage Le four a été nettoyé pour la première fois Ceci est tout à fait normal Lors du premier nettoyage du four la fumée dégagée sera plus importante Essuyez toute la saleté importante avant de commencer le cycle d auto nettoyage Si le problème de fumée persiste appuyez sur OFF CLEAR ARRÊT EFFACER Ouvrez les fenêtres pour évacuer la fumée de la pièc...

Страница 142: ...e papier absorbant imbibé d huile végétale essuyez les bords des grilles du four Les grilles ternissent et glissent plus difficilement si vous les laissez dans le four durant un cycle d auto nettoyage Bruit au niveau du ventilateur Ceci est tout à fait normal Le ventilateur de convection continuer de tourner jusqu à la fin de la fonction ou l ouverture de la porte Autres Problème Cause Action L ap...

Страница 143: ...F CLEAR ARRÊT EFFACER après avoir ouvert la porte du four pendant au moins 60 secondes Si ces solutions ne permettent pas de résoudre le problème contactez un centre de service Samsung local ou appelez le 1 800 SAMSUNG 1 800 726 7864 Problème Cause Action Les aliments ne cuisent pas ou ne sont pas rôtis correctement au four Le mode de cuisson sélectionné est incorrect Reportez vous à la page 22 Le...

Страница 144: ...boussures durcies de sucre ou de plastique fondu qui n auraient pas été nettoyées selon les instructions fournies dans le manuel d entretien et d utilisation Le coût des réparations ou du remplacement dans de telles circonstances exclues sera à la charge au client Les interventions par un réparateur agréé visant à expliquer les fonctions de l appareil ou les procédures de maintenance ou d installa...

Страница 145: ...RODUIT OU LE REMBOURSEMENT DE SON PRIX D ACHAT À LA SEULE DISCRÉTION DE SAMSUNG COMME PROPOSÉ DANS LA PRÉSENTE GARANTIE LIMITÉE SAMSUNG NE SAURA ÊTRE TENU RESPONSABLE EN CAS DE DOMMAGES ACCESSOIRES INDIRECTS OU SPÉCIAUX NOTAMMENT MAIS SANS POUR AUTANT S Y LIMITER LE TEMPS PRIS SUR LE TRAVAIL LES FRAIS D HÔTELS ET OU REPAS EN RESTAURANT LES DÉPENSES DE RÉNOVATION LA PERTE DE BÉNÉFICES DE REVENUS OU...

Страница 146: ...A PRÉSENTE GARANTIE LIMITÉE N EST VALABLE POUR PERSONNE D AUTRE QUE L ACHETEUR INITIAL DE L APPAREIL N EST PAS TRANSFÉRABLE ET ÉNONCE VOTRE RECOURS EXCLUSIF Garantie CANADA VEUILLEZ NE PAS JETER CUISINIÈRE À GAZ SAMSUNG GARANTIE LIMITÉE À L ACHETEUR INITIAL Ce produit de la marque SAMSUNG fourni et distribué par SAMSUNG ELECTRONICS CANADA INC SAMSUNG et livré neuf s accompagne d une garantie de SA...

Страница 147: ...tance Certains États ou certaines juridictions n autorisent pas de limitations quant à la durée d une garantie implicite ni l exclusion ou la limitation de dommages accessoires ou indirects il se peut par conséquent que les limitations et exclusions énoncées ci dessus ne s appliquent pas à votre cas La présente garantie vous confère des droits légaux spécifiques il est donc possible que vous bénéf...

Страница 148: ... Notes Annonce de contenu libre Le présent produit contient un logiciel libre L URL http opensource samsung com opensource SMART_TP2_0 seq 0 suivante permet d accéder aux informations sur la licence de source libre relatives à ce produit ...

Страница 149: ...Notes ...
Страница 150: ...NE QUESTION UN COMMENTAIRE PAYS N DE TÉLÉPHONE SITE INTERNET U S A Consumer Electronics 1 800 SAMSUNG 726 7864 www samsung com us support CANADA 1 800 SAMSUNG 726 7864 www samsung com ca support English www samsung com ca_fr support French DG68 01341A 01 Scannez le code QR ou rendez vous sur le site www samsung com spsn pour voir nos vidéos et démonstrations en direct d utilisation Requiert l inst...

Отзывы: