background image

English  45

Tr

ouble

shoo

ting

Problem

Cause

Action

There is steam 
or smoke coming 
from under the 
control panel.

This is normal.

The oven vent is located there. 
More steam is visible when 
you are using the convection 
functions or when baking or 
roasting multiple items at the 
same time.

A burning or oily 
odor coming from 
the vent.

This is normal for a new 
oven and will disappear 
within 

1

/

2

 hour of the first 

bake cycle.

To speed the process, set 
a self-cleaning cycle for a 
minimum of 3 hours. (See page 

38

.)

Strong odor.

This is temporary.

The insulation around the 
inside of the oven emits an 
odor the first few times the 
oven is used.

The oven racks are 
difficult to slide.

This is normal.

Apply a small amount of 
vegetable oil to a paper towel, 
and then wipe the edges of 
the oven racks with the paper 
towel. Racks become dull and 
hard to slide if they are left in 
the oven during a self-clean 
cycle.

Fan noise.

This is normal.

The convection fan runs until 
the function is over or the 
door is opened.

The convection fan 
is not working.

This is normal.

The fan starts automatically 
when the oven reaches the 
preheat temperature.

Problem

Cause

Action

Excessive smoking 
during a self-
cleaning cycle.

This is the first time the 
oven has been cleaned.

This is normal. The oven will 
always smoke more the first 
time it is cleaned.
Wipe up all excessive soil 
before starting the self-
cleaning cycle.
If smoke persists, press 

OFF/CLEAR

. Open the windows 

to clear the smoke from the 
room. After the oven has 
cooled and unlocked, wipe up 
excessive soil, and then reset 
the oven for self-cleaning.

The oven door will 
not open after a 
self-cleaning cycle.

This is normal.

The oven door will stay locked 
until the oven temperature 
drops below 400 °F.

The oven is not 
clean after a self-
cleaning cycle.

A fine dust or ash is 
normal.

This can be wiped clean with a 
damp cloth.
Set the self-cleaning cycle for 
a longer cleaning time.
The cycle was not long enough 
to burn off the dirt buildup.
Extremely dirty ovens 
require hand-cleaning of 
excessive spillovers and food 
buildup before you start a 
self-cleaning cycle. Multiple 
self-cleaning cycles may be 
necessary to completely clean 
the oven.

Содержание NX60 63 S

Страница 1: ...Gas Free Standing Range User manual NX60 63 S ...

Страница 2: ...an tip the range and be killed b Verify the Anti Tip device has been properly installed and engaged at right rear or left rear of the range bottom c If you move the range and then move it back into place ensure the Anti Tip device is re engaged at the right or left rear of the range bottom d Do not operate the range without the Anti Tip device in place and engaged e Failure to do so can result in ...

Страница 3: ... limits are designed to provide reasonable protection against harmful interference in a residential installation This equipment generates uses and can radiate radio frequency energy and if not installed and used in accordance with the instructions may cause harmful interference to radio communications However there is no guarantee that interference will not occur in a particular installation If th...

Страница 4: ...lled and operated so there is at least 8 inches 20 cm between the radiator and your body This device and its antenna s must not be co located or operated in conjunction with any other antenna or transmitter 2 IC Notice The term IC before the radio certification number only signifies that Industry Canada technical specifications were met Operation is subject to the following two conditions 1 this d...

Страница 5: ...ty instructions This unit has been tested and found to comply with the limits for a class B digital device pursuant to Part 18 of the FCC rules These limits are designed to provide reasonable protection against harmful interference in a residential installation This unit generates uses and can radiate radio frequency energy and if not installed and used in accordance with the instructions may caus...

Страница 6: ...kware 18 Griddle 19 Gas oven 20 Using the oven racks 21 Cooking mode 22 Cooking options 24 Special features 26 Changing settings 28 Smart control 31 Voice control 32 Maintenance 33 Cleaning 33 Self cleaning 38 Replacing the oven light 40 Removing and reinstalling the oven door 40 Troubleshooting 42 Checkpoints 42 Information codes 47 Warranty U S A 47 Warranty CANADA 49 Open Source Announcement 51...

Страница 7: ...umber or gas fitter qualified or licensed by the State of Massachusetts When using ball type gas shut off valves you must use the T handle type Multiple flexible gas lines must not be connected in series General safety WARNING To reduce the risk of fire electric shock personal injuries and or death observe the following precautions Do not touch any part of the range including but not limited to ov...

Страница 8: ...ch as laundry an oven cover lighted candles lighted cigarettes dishes chemicals metal objects etc on the appliance Items such as a cloth may get caught in the door This may result in electric shock fire problems with the product or injury Take care not to hurt yourself when cleaning the appliance externally or internally You may hurt yourself on the sharp edges of the appliance Fire safety WARNING...

Страница 9: ... power outlet Do not modify the power plug power cord or power outlet in any way Do not put a fuse in a neutral or ground circuit Use a dedicated 120 volt 60 Hz 20 amp AC electrical circuit with a time delay fuse or circuit breaker for this range Do not plug more than one appliance into this circuit Do not connect the ground wire to plastic plumbing lines gas lines or hot water pipes This range mu...

Страница 10: ...ufacturer s instructions and all codes and requirements of the authority having jurisdiction The qualified agency performing this work assumes the gas conversion responsibility Installation of this range must conform with local codes or in the absence of local codes with the National Fuel Gas Code ANSI Z223 1 NFPA 54 latest edition In Canada installation must conform with the current Natural Gas I...

Страница 11: ...b quickly Make sure the flame stays on Do not place any objects other than cookware on the cooktop This cooktop is designed for use with a wok or wok ring attachment To flame food you must have a ventilation hood When you flame food the hood must be on Before removing or changing cookware turn off the burners Remove food and cookware immediately after cooking Before removing any parts of the burne...

Страница 12: ...fore you remove them to prevent any possibility of being burned Do not put any combustible material or items around the range Take care that your hands do not touch the burners when they are on Turn off the burners when you change a pan or pot To warm liquid such as sauces stir it while warming Oven safety WARNING To reduce the risk of fire electric shock personal injuries and or death observe the...

Страница 13: ...t put the lower drawer into the oven cavity when you run a self cleaning cycle When opening the door after a self cleaning cycle stand away from the oven If the self cleaning cycle malfunctions turn off the oven disconnect the power supply and contact a qualified service technician Storage drawer safety WARNING To reduce the risk of fire electric shock personal injuries and or death observe the fo...

Страница 14: ... pcs 05 Removable oven door 06 Storage drawer 07 Broil oven burner 08 Oven light 09 Oven rack system 10 Bake oven burner What s included Surface burner grates 2 and griddle 1 Surface burners and caps 5 Flat rack 2 NOTE If you need an accessory marked with an asterisk you can buy it from the Samsung Contact Center 1 800 SAMSUNG 726 7864 ...

Страница 15: ...y connection 09 Oven Light Turn on Turn off the oven light 10 Numbers Use to set the times temperatures or presets 11 Clock Set the clock time 12 Lock Press and hold for 3 seconds to lock the control panel and the door to prevent accidents 13 OFF CLEAR Cancel the current operation but not the timer 14 START SET Start a function or set the time Before you start You should know about the following f...

Страница 16: ...nabled Oven vent cooling vent The oven vent is located under the oven Control panel Proper air circulation prevents oven burner combustion problems and ensures good performance Do not block the vent or its surroundings Use caution when placing items near the vent Hot steam can cause them to overheat or melt Cooktop STEP 1 Put all ingredients into a cooking container pan pot etc STEP 2 Place the co...

Страница 17: ... sauces Delicate food that requires low heat for a long time Center C 10 000 BTU General heating Griddling General food Pancakes fried eggs General purpose cooking Left Front LF 12 000 BTU Quick heating General General purpose cooking Left Rear LR 9 500 BTU General heating Low simmering General food casseroles General purpose cooking Ignition CAUTION 2 1 Make sure all surface burners are properly ...

Страница 18: ...knob Always turn off the surface burner controls before removing cookware All surface burner controls should be turned OFF when you are not cooking Always turn the burners off before you go to sleep or go out If you smell gas turn off the gas to the range and call a qualified service technician NEVER use an open flame to locate a leak Cookware Requirements Flat bottom and straight sides Tight fitt...

Страница 19: ...gnite plastic items or cause build up of dangerous pressure in closed plastic containers You may get severe burns if you touch the surfaces near the vent while the oven is operating Make sure you hold the handle of a wok or a small one handled pot while cooking Griddle The removable coated griddle provides an extra cooking surface This is useful especially when cooking meat pancakes or other foods...

Страница 20: ...asy foods The grease may spill over NOTE You may need to adjust heat settings for the griddle over time The griddle may discolor over time as it becomes seasoned with use Do not let rust remain on the griddle If rust appears on the griddle remove it as soon as possible Gas oven STEP 1 Put all ingredients in a heat safe container STEP 2 Select a cooking mode and then start preheating STEP 3 Place t...

Страница 21: ...p that prevents the rack from loosening during the oven s operation Each rack has stoppers that need to be placed correctly on the rack guides The stoppers prevent the racks from accidently coming out of the oven completely when you pull the racks out 07 06 05 04 03 02 01 Type of food Rack position Broiling hamburgers 6 Broiling meats or small cuts of poultry fish 4 5 Bundt cakes Pound cakes Froze...

Страница 22: ...eep if the entered temperature or time is below the minimum or above the maximum setting for the feature Feature Temperature F Min Max Bake 175 550 Broil LO HI Rack and Pan placement or 4 3 Single Oven Rack 5 3 Cake pan positions 5 3 Cookie sheet positions Centering the baking pans in the oven as much as possible will produce better results If baking with more than one pan place the pans so each h...

Страница 23: ...the low temperature setting for poultry or thick cuts of meat to prevent overbroiling In general to prevent overbroiling press Broil to switch from Hi to Lo Use caution when you open the oven door to turn over the food The air escaping from the oven will be very hot For information about broiler temperatures rack settings and cooking times for different foods see Broiling guide on page 24 Baking 3...

Страница 24: ... NOTE To change the programmed cooking time press Timer Off 3 sec enter a different time and then press START SET Broiling guide NOTE This is for reference only Preheating for 5 minutes before broiling is recommended The size weight thickness starting temperature and your doneness preference will affect broiling times This guide is based on meats at refrigerator temperature If you have covered the...

Страница 25: ...starting time and then press START SET Cook Time Cook Time sets the oven to cook foods at a set temperature for a set length of time The oven automatically turns off when it finishes Mode Bake 5 2 4 3 1 1 Press the pad corresponding to a desired cooking mode such as Bake 2 If necessary change the temperature using the number pad 3 Press Cook Time 4 Set the cooking time between 1 minute and 9 hours...

Страница 26: ...e Wait until the oven cools down Do not use Bread Proof for warming food The proofing temperature is not hot enough to keep food warm Place the dough in a heat safe container on rack position 3 or 4 and cover it with a cloth or with plastic wrap You may need to anchor the plastic wrap underneath the container so that the oven does not blow it off the dough To avoid lowering the temperature and ext...

Страница 27: ...and Oven Off Do not open the oven door or change the oven temperature for about 30 minutes after you have started the Sabbath option Let the oven reach the set temperature The oven fan operates only when the oven temperature increases The Sabbath Option K For use on the Jewish Sabbath and Holidays Use this option only for baking on the Jewish Sabbath and Holidays For more information visit the web...

Страница 28: ...en control to display temperatures in Fahrenheit or Celsius 3 Energy saving Automatically turns off the oven 12 hours after baking starts or 3 hours after broiling starts 4 Sound Turn the oven s sound beeps on or off 5 WI FI On Off Set the WI FI mode to ON Off Oven lock Lock the control panel and the door to prevent accidental operations and or product tipping Press and hold the for 3 seconds to l...

Страница 29: ...ure can be adjusted by 35 F 19 C 5 2 1 3 4 1 Press and hold for 3 seconds 2 Press 1 to enter Temperature adjust 3 Press to select a higher or lower temperature 4 Enter and adjusting temperature value 0 35 using the number pad 5 Press START SET to save the change NOTE This adjustment does not affect the broiling or the self cleaning temperature and is retained in memory after a power failure Demo m...

Страница 30: ...er broiling starts 4 1 2 3 1 Press and hold for 3 seconds 2 Press 3 to enter Energy saving 3 Press 1 or 2 to turn Energy saving on or off 1 to on 12Hr 2 to off Hr 4 Press START SET to save the change Sound Mute unmute the range 4 1 2 3 1 Press and hold for 3 seconds 2 Press 4 to enter Sound 3 Press 1 or 2 to turn Sound on or off 1 to on 2 to off 4 Press START SET to save the change WI FI On Off If...

Страница 31: ...f the Wi Fi Connection is unstable See the SmartThings app manual for detailed information Smart control Before using Smart control feature set Wi Fi mode to on See the Wi Fi On Off on page 30 How to connect the oven 1 Download and open the SmartThings app on your smart device 2 Follow the app s on screen instructions to connect your range 3 Once the process is complete the connected icon located ...

Страница 32: ...ook Time Set the timer on the range oven to 1 hour Amazon Alexa Google Assistant Samsung smart home appliances are supported by SmartThings skill in Alexa action in Google Assistant Installation Guide Here s how to link SmartThings account into Amazon Alexa or Google Assistant SmartThings App and Alexa App or Google Assistant App Should be installed on your phone 1 Setup the supported devices to S...

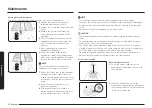
Страница 33: ... into place again Otherwise the range may tip over causing physical injuries Do not use steel wool or abrasive cleansers of any kind These can scratch or damage the surface Stainless steel surface 1 Remove any spills spots and grease stains using a soft wet cloth 2 Apply an approved stainless steel cleanser to a cloth or paper towel 3 Clean one small area at a time rubbing with the grain of the st...

Страница 34: ...d in this cycle can permanently peel off the rack coating and make it difficult to slide the racks on the guide rails Do not spray cooking oil or lubricant directly onto the racks Oven Wear the glove during cleaning Door Do not remove the inner gasket of the oven door for cleaning Don t hand Don t hand clean the clean the oven door oven door gasket gasket You may You may hand clean hand clean the ...

Страница 35: ...or product damage Cooktop surface The porcelain enameled cooktop surface needs to be kept clean We recommend that you remove food spills immediately after they take place 1 Turn off all surface burners 2 Wait until all burner grates cool down and then remove them 3 Clean the cooktop surface using a soft cloth If food spills run into gaps of the burner components remove the burner cap and the head ...

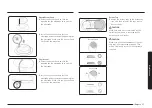
Страница 36: ...ck if it operates properly After verifying that a burner operates normally turn it off NOTE After cleaning confirm that the burner port openings aren t plugged Shake out any excess water and then let burner heads and caps dry thoroughly Placing the center burner upside down will allow the water to drain out more easily Do not wash any burner components in a dish washer CAUTION The starter electrod...

Страница 37: ...lines up with the electrode 2 Install the burner head so that the electrode passes through the opening for the electrode Make sure the burner head lies flat on the stove top Burner Cap 1 Match the burner caps to the burners by size and then reinstall the caps on the burner heads CAUTION Make sure each cap is reinstalled on the correct burner head is centered on the burner head and lies flat Burner...

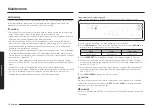
Страница 38: ...r is open Wipe off any excess spillage before using the self cleaning operation Do not use oven cleaners Commercial oven cleaners or oven liners should NEVER be used in or around any part of the oven Residue from oven cleaners will damage the inside of the oven during a self cleaning operation To perform the self cleaning cycle Make sure the door lock is released Remove all racks from the oven cav...

Страница 39: ...off the self cleaning cycle press OFF CLEAR The cycle turns off but the door remains locked and the Lock icon blinks until the oven temperature falls below 400 F 204 C After self cleaning The door stays locked until the internal oven temperature falls below 400 F When the oven has cooled down wipe the oven surfaces with a cloth to remove ash residue Stubborn stains can be removed using a steel woo...

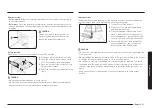
Страница 40: ...make sure the oven is turned off and cool before replacing the oven light NOTE The oven light does not operate during the self cleaning cycle Remove the racks if they prevent you from accessing the oven light Removing and reinstalling the oven door How to remove the door CAUTION The door is very heavy Be careful when removing and lifting the door Do not lift the door by the handle Turn the power O...

Страница 41: ...entation 3 Open the door fully If the door will not open fully the indentations are not inserted correctly in the bottom edges of each slot 4 Push the hinge locks up against the front frame of the oven cavity into the locked position Hinge lock Locked position Unlocked position 5 Close the oven door How to remove and reinstall the Storage drawer 1 Slide open the drawer until it stops 2 Pull the dr...

Страница 42: ...ontrol knob has been left in the Lite position After the burner lights turn the control knob to a desired setting If the burner still clicks contact a service technician The burners do not burn evenly Surface burner components and caps are not assembled correctly and level See page 36 The surface burners are dirty Clean the surface burner components See page 35 Troubleshooting If you encounter a p...

Страница 43: ...e range for at least 30 seconds and then reconnect the power If this does not solve the problem call for service Problem Cause Action The oven will not turn on The oven is not completely plugged into the electrical outlet Make sure the electrical plug is fully inserted into a live properly grounded outlet A fuse in your home may be blown or the circuit breaker may have tripped Replace the fuse or ...

Страница 44: ...operly See page 23 Greasy buildup on oven surfaces Regular cleaning is necessary when broiling frequently Problem Cause Action Cooking is finished but the cooling fan is still running The fan automatically runs for a certain amount of time to ventilate the inside of the oven This is not a product malfunction The fan is designed to run automatically for a period of time to cool down the oven The ov...

Страница 45: ...door is opened The convection fan is not working This is normal The fan starts automatically when the oven reaches the preheat temperature Problem Cause Action Excessive smoking during a self cleaning cycle This is the first time the oven has been cleaned This is normal The oven will always smoke more the first time it is cleaned Wipe up all excessive soil before starting the self cleaning cycle I...

Страница 46: ... 23 The oven door was not closed during broiling See page 23 The rack has not been properly positioned See the broiling guide on page 24 Others Problem Cause Action The product is not level The appliance has been installed improperly The leveling leg s is are damaged or uneven Make sure the floor is level strong and stable If the floor sags or slopes contact a carpenter Check and level the range S...

Страница 47: ... during the warranty period at no charge subject to availability of SAMSUNG authorized servicers within the customer s geographic area If in home service is not available SAMSUNG may elect at its option to provide transportation of the product to and from an authorized service center If the product is located in an area where service by a SAMSUNG authorized servicer is not available you may be res...

Страница 48: ...duct Replacement parts and products are warranted for the remaining portion of the original product s warranty or ninety 90 days whichever is longer All replaced parts and products are the property of SAMSUNG and you must return them to SAMSUNG This limited warranty covers manufacturing defects in materials or workmanship encountered in normal household noncommercial use of this product and shall ...

Страница 49: ... the one 1 year warranty period at no charge subject to availability within the contiguous Canada In home service is not available in all areas To receive in home service product must be unobstructed and accessible to the service agent If service is not available Samsung may elect to provide transportation of the product to and from an authorized service center SAMSUNG will repair or replace this ...

Страница 50: ...TAL OR CONSEQUENTIAL DAMAGES CAUSED BY THE USE MISUSE OR INABILITY TO USE THIS PRODUCT REGARDLESS OF THE LEGAL THEORY ON WHICH THE CLAIM IS BASED AND EVEN IF SAMSUNG HAS BEEN ADVISED OF THE POSSIBILITY OF SUCH DAMAGES NOR SHALL RECOVERY OF ANY KIND AGAINST SAMSUNG BE GREATER IN AMOUNT THAN THE PURCHASE PRICE OF THE PRODUCT SOLD BY SAMSUNG AND CAUSING THE ALLEGED DAMAGE WITHOUT LIMITING THE FOREGOI...

Страница 51: ...ng com ca support English or www samsung com ca_fr support French Model Serial Please attach your receipt or a copy to this manual You may need it along with your model and serial number when calling for assistance Open Source Announcement The software included in this product contains open source software The following URL http opensource samsung com opensource SMART_TP2_0 seq 0 leads to open sou...

Страница 52: ...R COMMENTS COUNTRY CALL OR VISIT US ONLINE AT U S A Consumer Electronics 1 800 SAMSUNG 726 7864 www samsung com us support CANADA 1 800 SAMSUNG 726 7864 www samsung com ca support English www samsung com ca_fr support French DG68 01340A 03 Scan the QR code or visit www samsung com spsn to view our helpful How to Videos and Live Shows Requires reader to be installed on your smartphone ...

Страница 53: ...Estufa de pie de gas Manual del usuario NX60 63 S ...

Страница 54: ...erifique que el dispositivo antivuelco haya sido instalado y conectado correctamente en la parte posterior derecha o posterior izquierda de la base de la estufa c Si desplaza la estufa y luego vuelve a colocarla en su lugar asegúrese de que el dispositivo antivuelco esté acoplado en la parte posterior derecha o izquierda de la base de la estufa d No opere la estufa sin el dispositivo antivuelco en...

Страница 55: ...os digitales clase B de acuerdo con la sección 15 de las Normas de la FCC Estos límites están destinados a ofrecer una protección razonable contra interferencias perjudiciales en una instalación residencial Este equipo genera utiliza y puede irradiar energía de radiofrecuencia y si no se lo instala y utiliza de acuerdo con las instrucciones puede provocar interferencia perjudicial a las comunicaci...

Страница 56: ...o a una distancia mínima de 8 pulgadas 20 cm entre su cuerpo y el radiador Este dispositivo y su s antena s no deben ubicarse cerca ni utilizarse junto con ninguna otra antena o transmisor 2 Aviso de IC El término IC antes del número de certificación de radio indica que se cumplieron las especificaciones técnicas de Industry Canada El funcionamiento se encuentra sujeto a las siguientes dos condici...

Страница 57: ... elegante Instrucciones de seguridad generales Esta unidad ha sido sometida a pruebas y se ha determinado que cumple con los límites para un dispositivo digital clase B de acuerdo con la sección 18 de las Normas de la FCC Estos límites están destinados a ofrecer una protección razonable contra interferencias perjudiciales en una instalación residencial Esta unidad genera utiliza y puede irradiar e...

Страница 58: ...a 18 Comal 19 Horno de gas 20 Uso de las parrillas del horno 21 Modo de cocción 22 Opciones de cocción 24 Funciones especiales 26 Cómo cambiar los ajustes 28 Smart Control 31 Control por voz 32 Mantenimiento 32 Limpieza 32 Autolimpieza 37 Reemplazo de la luz del horno 39 Cómo retirar y volver a instalar la puerta del horno 39 Resolución de problemas 41 Puntos de verificación 41 Códigos de informac...

Страница 59: ...lado o con licencia del Estado de Massachusetts Cuando se utilicen válvulas de bola para el cierre del gas se debe usar una manija en forma de T No deben conectarse varios conductos flexibles de gas en serie Seguridad general ADVERTENCIA Para reducir el riesgo de incendio descarga eléctrica lesiones personales y muerte respete las precauciones siguientes No toque ninguna parte de la estufa incluye...

Страница 60: ...as para hornos velas encendidas cigarrillos encendidos platos productos químicos objetos metálicos etc Artículos tales como paños pueden quedar enganchados en la puerta Se pueden producir descargas eléctricas incendios problemas con el producto o lesiones personales Tenga cuidado de no lesionarse cuando limpie el electrodoméstico por dentro o por fuera Puede lesionarse con los bordes afilados del ...

Страница 61: ...el enchufe el cable de alimentación ni el tomacorriente de ninguna manera No coloque un fusible en el circuito neutral o de conexión a tierra Utilice un circuito eléctrico exclusivo de CA 120 voltios 60 Hz 20 A con un fusible de retardo o un disyuntor para esta estufa No conecte más de un artefacto a este circuito No conecte el cable a tierra a caños de plomería tuberías de gas o tuberías de agua ...

Страница 62: ... los códigos y requisitos de la autoridad pertinente La agencia calificada que realice este trabajo asume toda la responsabilidad de la conversión del gas La instalación de esta estufa debe cumplir con los códigos locales o a falta de ellos con la versión más reciente del Código nacional de gas combustible ANSI Z223 1 NFPA 54 En Canadá la instalación debe cumplir con el Código de instalación para ...

Страница 63: ...utensilios de cocina Esta cubierta está diseñada para usar con un wok o con el accesorio del aro para wok Para flambear alimentos debe tener una campana de ventilación Durante el flambeado la campana debe estar encendida Antes de retirar o cambiar recipientes de cocina apague los quemadores Retire los alimentos y los recipientes de inmediato después de la cocción Antes de retirar alguna pieza del ...

Страница 64: ...r quemaduras No coloque materiales combustibles ni otros productos alrededor de la estufa Tenga cuidado de que sus manos no toquen los quemadores cuando estén encendidos Apague los quemadores cuando cambie una sartén o una olla Cuando caliente líquidos como salsas remueva todo el tiempo Seguridad del horno ADVERTENCIA Para reducir el riesgo de incendio descarga eléctrica lesiones personales y muer...

Страница 65: ...rior en el interior del horno cuando ejecute un ciclo de autolimpieza Al abrir la puerta después de un ciclo de autolimpieza aléjese del horno Si el ciclo de autolimpieza funciona mal apague el horno desconecte el suministro eléctrico y comuníquese con un técnico de servicio calificado Información de seguridad del cajón de almacenamiento ADVERTENCIA Para reducir el riesgo de incendio descarga eléc...

Страница 66: ...orno desmontable 20 Cajón de almacenamiento 21 Quemador del horno para asar a la parrilla 22 Luz del horno 23 Sistema de parrillas del horno 24 Quemador del horno para hornear Elementos incluidos Rejillas para los quemadores superiores 2 y comal 1 Quemadores superiores y tapas 5 Parrilla plana 2 NOTA Si necesita una pieza identificada con un asterisco puede adquirirla en el Centro de contacto de S...

Страница 67: ... Smart Control Activa la conexión fácil 09 Luz del horno Enciende apaga la luz del horno 10 Números Se utilizan para fijar la hora la temperatura o los ajustes 11 Reloj Se utiliza para configurar la hora del reloj 12 Bloqueo Mantenga presionado durante 3 segundos para bloquear el panel de control y la puerta para evitar accidentes 13 OFF CLEAR APAGAR BORRAR Se utiliza para cancelar la operación ac...

Страница 68: ...efrigeración La abertura de ventilación del horno está ubicada debajo del panel de control del horno La adecuada circulación de aire evita los problemas de combustión del quemador del horno y asegura un buen desempeño No bloquee los orificios de ventilación ni la zona alrededor Tenga cuidado al colocar elementos cerca de la ventilación El vapor caliente puede hacer que se sobrecalienten o se derri...

Страница 69: ...Chocolate guisos salsas Alimentos delicados que requieren fuego lento durante un tiempo prolongado Centro C 10000 BTU Calentamiento general Comal Alimentos en general Panqueques huevos fritos Cocción de uso general Delantero izquierdo DI 12000 BTU Calentamiento rápido General Cocción de uso general Trasero izquierdo TI 9500 BTU Calentamiento general Cocción a fuego lento baja Alimentos en general ...

Страница 70: ... los recipientes de cocción Los controles de todos los quemadores superiores deben estar en la posición OFF Apagado cuando no se cocine Siempre apague los quemadores antes de ir a dormir o salir Si huele gas corte el suministro de gas de la estufa y llame a un técnico de servicio calificado NUNCA utilice una llama para encontrar la pérdida Utensilios de cocina Requisitos Fondo plano y lados vertic...

Страница 71: ...de derretir o encender los elementos de plástico o causar una acumulación de presión peligrosa en recipientes de plástico cerrados Puede sufrir quemaduras graves si toca las superficies cercanas al ventilador mientras el horno está en funcionamiento Asegúrese de sujetar la manija de un wok o una olla pequeña de una sola asa mientras cocina Comal El comal recubierto desmontable proporciona una supe...

Страница 72: ...justar las configuraciones de calor del comal con el tiempo El comal puede decolorarse con el tiempo a medida que se cure con el uso No deje que se acumule óxido en el comal Si aparece óxido en el comal elimínelo lo antes posible Horno de gas PASO 1 Ponga todos los ingredientes en un recipiente resistente a la temperatura PASO 2 Seleccione un modo de cocción y luego comience el precalentamiento PA...

Страница 73: ...evita que se aflojen durante el funcionamiento del horno Cada parrilla tiene topes que requieren colocación correcta sobre las guías Los topes evitan que las parrillas se salgan accidentalmente del horno por completo al retirarlas 07 06 05 04 03 02 01 Tipo de alimento Posición de la parrilla Hamburguesas a la parrilla 6 Carnes o cortes pequeños de ave pescado a la parrilla 4 5 Panqués pasteles mol...

Страница 74: ...para la función en cuestión sonará un tono de error en la forma de un sonido más prolongado Función Temperatura F Mín Máx Hornear 175 550 Asar a la parrilla Baja Alta Colocación de parrillas y recipientes o 4 3 Única parrilla de horno 5 3 Posición de los recipientes para tortas 5 3 Posición de las bandejas para galletas Colocar los moldes o las charolas lo más cerca posible del centro del horno pr...

Страница 75: ...esos de carne vacuna a fin de evitar asarla demasiado En general para evitar el exceso de cocción presione la tecla Broil Asar a la parrilla para cambiar de Hi Alto a Lo Bajo Tenga cuidado al abrir la puerta del horno para dar vuelta los alimentos El aire que escapa del horno estará muy caliente Para obtener información acerca de las temperaturas de cocción a la parrilla los ajustes de las parrill...

Страница 76: ... Presione OFF CLEAR APAGAR BORRAR para borrar el mensaje NOTA Para cambiar el tiempo de cocción programado presione Timer Off 3 sec Desactivar temporizador 3 seg ingrese un tiempo distinto y luego presione START SET INICIO CONFIGURAR Guía para asar a la parrilla NOTA Esto es para referencia solamente Se recomienda precalentar 5 minutos antes de asar a la parrilla Los tiempos necesarios para asar a...

Страница 77: ... INICIO CONFIGURAR Tiempo de cocción El tiempo de cocción permite programar el horno para cocinar la comida a una temperatura establecida durante un tiempo determinado El horno se apaga automáticamente cuando finaliza Modo Bake Hornear 5 2 4 3 1 1 Presione la tecla correspondiente al modo de cocción que desee como Bake Hornear 2 Si es necesario cambie la temperatura usando el teclado numérico 3 Pr...

Страница 78: ...ce la función Levantamiento del pan para calentar comida La temperatura no estará lo suficientemente caliente como para mantener los alimentos calientes Coloque la masa en un recipiente resistente al calor en la posición 3 o 4 de la parrilla y cúbrala con un paño o con una envoltura de plástico Es posible que deba enganchar el plástico debajo del recipiente para que el horno no lo vuele fuera de l...

Страница 79: ... la temperatura del horno durante alrededor de 30 minutos después de haber iniciado la opción Sabbat Deje que el horno alcance la temperatura fijada El ventilador del horno funciona solamente cuando aumenta la temperatura del horno La opción Sabbat K Para uso en el Sabbat y otras fechas sagradas judías Use esta opción solo para hornear en el Sabbat y otras fechas sagradas judías Para obtener más i...

Страница 80: ...ra mostrar las temperaturas en Fahrenheit o Centígrados 3 Ahorro de energía Apaga automáticamente el horno 12 horas después del inicio del horneado o 3 horas después del inicio del asado a la parrilla 4 Sonido Apaga o enciende el sonido señal sonora del horno 5 Activar Desactivar Wi Fi Activa o desactiva el modo WI FI Bloqueo del horno Bloquee el panel de control y la puerta para evitar operacione...

Страница 81: ...tenga presionado durante 3 segundos 2 Presione 1 para ingresar a Ajuste de temperatura 3 Presione para seleccionar una temperatura más alta o más baja 4 Ingrese un valor de temperatura de ajuste 0 35 usando el teclado numérico 5 Presione START SET INICIO CONFIGURAR para guardar el cambio NOTA Este ajuste no afecta a la temperatura de asar a la parrilla o autolimpieza y se conserva en la memoria de...

Страница 82: ... 3 para ingresar a Ahorro de energía 3 Presione 1 o 2 para activar o desactivar Ahorro de energía 1 para activar 12Hr 2 para desactivar Hr 4 Presione START SET INICIO CONFIGURAR para guardar el cambio Sonido Desactiva activa el sonido 4 1 2 3 1 Mantenga presionado durante 3 segundos 2 Presione 4 para ingresar a Sonido 3 Presione 1 o 2 para activar o desactivar la opción Sonido 1 para activar 2 par...

Страница 83: ...plicación SmartThings para obtener información detallada Smart Control Antes de usar la función de control inteligente active la Wi Fi consulte Activar Desactivar Wi Fi a la página 30 Cómo conectar el horno 1 Descargue y abra la aplicación SmartThings en su dispositivo inteligente 2 Siga las instrucciones en pantalla de la aplicación para conectar la estufa 3 Una vez completado el proceso se muest...

Страница 84: ...ro inoxidable Rayará la superficie No rocíe ningún tipo de limpiador en los orificios de distribución El sistema de ignición se encuentra en esos orificios y debe mantenerse libre de humedad Control por voz Para utilizar la función de control por voz de la estufa debe instalar en su dispositivo móvil la aplicación Bixby Amazon Alexa o el Asistente de Google Consulte la tabla a continuación para ve...

Страница 85: ...idado de no permitir que la junta se humedezca ni que ingrese humedad en la puerta Vidrio interno El vidrio interno se limpia automáticamente durante el ciclo de autolimpieza Parrillas Para mantener las parrillas limpias retírelas de la cavidad y remójelas en agua tibia y jabón Luego quite la suciedad de las parrillas con una esponja de pulir plástica Si las parrillas no se deslizan hacia adentro ...

Страница 86: ... la cubierta La superficie de la cubierta de porcelana esmaltada debe mantenerse limpia Recomendamos retirar los alimentos derramados inmediatamente después de que se hayan derramado 1 Apague todos los quemadores superiores 2 Espere hasta que se enfríen las rejillas de los quemadores y retírelas 3 Limpie la superficie de la cubierta con un paño suave Si se derraman alimentos en los huecos de los c...

Страница 87: ...cada uno de los quemadores y verifique si funcionan correctamente Después de verificar que un quemador funciona con normalidad apáguelo NOTA Después de la limpieza confirme que las aberturas de los puertos de los quemadores no estén atascadas Sacuda para quitar el exceso de agua y deje que los cabezales del quemador y las tapas se sequen bien Si coloca el quemador central invertido permitirá que e...

Страница 88: ...stalar correctamente Si la instalación es correcta quedarán estables y planos Cabezal del quemador redondo 1 Oriente el cabezal del quemador de modo que la abertura para el electrodo y el electrodo queden alineados 2 Instale el cabezal del quemador de modo que el electrodo pase por la abertura Asegúrese de que el cabezal del quemador quede plano en la parte superior de la estufa Quemador ovalado 1...

Страница 89: ... Los limpiadores comerciales de hornos o los forros para hornos no deben utilizarse JAMÁS en el horno ni alrededor de ninguna de sus partes Los residuos de los limpiadores de hornos dañarán el interior del horno durante la operación de autolimpieza Para realizar el ciclo de autolimpieza Asegúrese de que el bloqueo de la puerta esté liberado Retire todas las parrillas de la cavidad del horno 3 2 6 ...

Страница 90: ...drían quemarlo NOTA Asegúrese de que todos los quemadores superiores estén apagados cuando el horno ejecute un ciclo de autolimpieza La autolimpieza no funcionará si hay algún quemador superior encendido Para retardar el inicio del ciclo de autolimpieza 5 3 4 2 1 Asegúrese de que la puerta del horno esté completamente cerrada y destrabada 2 Presione Self Clean Autolimpieza una vez Luego seleccione...

Страница 91: ...gas eléctricas asegúrese de que el horno esté apagado y frío antes de reemplazar la luz del horno NOTA La luz del horno no funciona durante el ciclo de autolimpieza Retire las parrillas si obstaculizan el acceso a la luz del horno Cómo retirar y volver a instalar la puerta del horno Cómo retirar la puerta PRECAUCIÓN La puerta es muy pesada Tenga cuidado al retirarla y levantarla No levante la puer...

Страница 92: ... para retirar deslice las muescas de los brazos de las bisagras hasta que encajen en el borde inferior de las ranuras para las bisagras Las muescas en el brazo de cada bisagra deben quedar completamente insertas en la parte inferior de cada ranura Brazo de la bisagra Brazo de la bisagra Borde inferior de la ranura Borde inferior de la ranura Muesca Muesca 3 Abra la puerta por completo Si la puerta...

Страница 93: ... Encender Una vez encendido el quemador gire la perilla de control hasta la posición deseada Si el quemador sigue haciendo clic llame a un técnico de servicio Los quemadores no arden en forma pareja Los componentes y las tapas de los quemadores superiores no están colocados correctamente y a nivel Consulte la página 35 Los quemadores superiores están sucios Limpie los componentes de los quemadores...

Страница 94: ...toda alimentación eléctrica a la estufa durante por lo menos 30 segundos y luego reconecte la alimentación eléctrica Si esto no soluciona el problema llame al servicio de reparaciones Problema Causa Acción El horno no se enciende El horno no está bien enchufado al tomacorriente Asegúrese de que el enchufe se encuentre completamente insertado en una toma con corriente y bien conectada a tierra Pued...

Страница 95: ...mpiar con regularidad si se asa a la parrilla con frecuencia Cuando termina la cocción el ventilador de enfriamiento sigue funcionando El ventilador comienza a funcionar automáticamente durante un tiempo determinado para ventilar el interior del horno No es un defecto del producto El ventilador está diseñado para funcionar automáticamente por un periodo de tiempo para enfriar el horno Problema Cau...

Страница 96: ...El ventilador de convección no funciona Esto es normal El ventilador comienza automáticamente cuando el horno llega a la temperatura de precalentamiento Problema Causa Acción Humo excesivo durante un ciclo de autolimpieza Esta es la primera vez que se ha limpiado el horno Esto es normal El horno siempre emitirá más humo la primera vez que se limpia Limpie toda la suciedad excesiva antes de iniciar...

Страница 97: ...te la página 23 La puerta del horno no se cerró durante el asado a la parrilla Consulte la página 23 La parrilla fue colocada en una posición incorrecta Consulte la guía para asar a la parrilla en la página 24 Otros Problema Causa Acción El producto no está nivelado El electrodoméstico fue instalado incorrectamente Las patas niveladoras están dañadas o desparejas Asegúrese de que el piso esté nive...

Страница 98: ...do de la garantía que comienza desde la fecha de la compra original de Un 1 año para piezas y mano de obra Esta garantía limitada solo es válida para productos comprados y utilizados en Estados Unidos de América que hayan sido instalados operados y mantenidos de acuerdo a las instrucciones que se adjuntaron o proporcionaron con el producto Para recibir el servicio técnico de la garantía el comprad...

Страница 99: ...ntía del producto original que resta o noventa 90 días el período que sea el más prolongado Todas las piezas y los productos reemplazados son propiedad de SAMSUNG y deben ser devueltos a SAMSUNG Esta garantía limitada cubre los defectos de fabricación de los materiales o la mano de obra durante el uso para fines domésticos no comerciales del producto y no cubrirá lo siguiente daños producidos dura...

Страница 100: ...l problema y los procedimientos del servicio El servicio técnico de la garantía solo puede ser prestado por un centro de servicio técnico autorizado de SAMSUNG y cualquier servicio no autorizado anulará esta garantía Se debe presentar la factura de compra original como prueba de compra a SAMSUNG o al centro de servicio técnico autorizado de SAMSUNG Samsung brindará servicio técnico a domicilio sin...

Страница 101: ...rrumpido o sin errores del producto SALVO LO ESTABLECIDO EN ESTE DOCUMENTO NO EXISTEN GARANTÍAS NI CONDICIONES RESPECTO DE ESTE PRODUCTO NI EXPRESAS NI TÁCITAS Y SAMSUNG DESCONOCE Y RECHAZA TODA GARANTÍA Y CONDICIÓN INCLUIDA AUNQUE NO TAXATIVAMENTE ENUMERADA TODA GARANTÍA Y CONDICIÓN TÁCITA DE COMERCIABILIDAD INFRACCIÓN O APTITUD PARA UN PROPÓSITO ESPECIAL NINGUNA OTRA GARANTÍA OTORGADA POR PERSON...

Страница 102: ...support English o www samsung com ca_fr support French Nro de modelo Serie Adjunte su recibo o una copia a este manual Es posible que lo necesite junto con su modelo y número de serie cuando llame para obtener asistencia Anuncio de código abierto El software incluido en este producto contiene software de código abierto Consulte la información de licencia de origen relacionada con este producto a t...

Страница 103: ...Notas ...

Страница 104: ...S O COMENTARIOS PAÍS LLAME AL O VISÍTENOS EN LÍNEA EN U S A Consumer Electronics 1 800 SAMSUNG 726 7864 www samsung com us support CANADA 1 800 SAMSUNG 726 7864 www samsung com ca support English www samsung com ca_fr support French DG68 01340A 03 Escanee el código QR o visite www samsung com spsn para ver nuestros útiles videos instructivos y programas en vivo Requiere un lector instalado en su t...

Страница 105: ...Cuisinière à gaz non encastrable Manuel d utilisation NX60 63 S ...

Страница 106: ...a été correctement installé et fixé sur le côté arrière droit ou arrière gauche du dessous de la cuisinière c Si vous déplacez la cuisinière puis la remettez en place assurez vous que le dispositif anti basculement est emboîté sur le côté arrière droit ou gauche du dessous de la cuisinière d N utilisez pas la cuisinière si le dispositif anti basculement n est pas en place et bien emboîté e Le non ...

Страница 107: ...he 15 de la réglementation de la FCC Ces limitations sont destinées à assurer une protection suffisante contre les interférences néfastes dans une zone résidentielle Cet appareil génère utilise et peut émettre de l énergie radioélectrique S il n est pas installé et utilisé selon les instructions il peut produire des interférences néfastes pour les communications radio Il n est toutefois pas garant...

Страница 108: ...ne distance d au moins 8 pouces 20 cm entre le radiateur et votre corps Cet appareil ainsi que son ou ses antenne s ne doivent pas être situés au même endroit et être utilisés conjointement à tout e autre antenne ou émetteur 2 Avis d IC Le terme IC placé avant le numéro de certification pour les radiofréquences signifie seulement que les spécifications techniques d Industry Canada ont été respecté...

Страница 109: ...égante Consignes générales de sécurité Cet appareil a été testé il est conforme aux limitations applicables aux appareils numériques de classe B conformément au paragraphe 18 de la réglementation de la FCC Ces limitations sont destinées à assurer une protection suffisante contre les interférences néfastes dans une zone résidentielle Cet appareil génère utilise et peut émettre de l énergie radioéle...

Страница 110: ...son 16 Allumage 17 Récipients 18 Gril 19 Four à gaz 20 Utilisation des grilles de cuisson 21 Mode de cuisson 22 Options de cuisson 24 Fonctions spéciales 26 Modification des réglages 28 Smart Control 31 Commande vocale 32 Entretien 32 Nettoyage 32 Auto nettoyage 37 Remplacement de l ampoule du four 39 Retrait et réinstallation de la porte du four 39 Dépannage 41 Points à contrôler 41 Codes d infor...

Страница 111: ...fié ou un monteur d installations au gaz qualifié ou certifié par l État du Massachusetts Lorsque des vannes à bille sont utilisées pour la fermeture du gaz elles doivent être munies d une poignée en T Il ne faut pas connecter plusieurs canalisations de gaz flexibles en série Sécurité générale AVERTISSEMENT Pour réduire le risque d incendie de choc électrique de blessures corporelles et ou d accid...

Страница 112: ... d objets ex linge couvercle de four bougies allumées cigarettes allumées plats produits chimiques objets métalliques etc dessus Des articles peuvent rester coincés dans la porte Cela pourrait entraîner un risque de choc électrique d incendie de défaillance de l appareil ou de blessures Lors du nettoyage de l appareil extérieur ou intérieur veillez à ne pas vous blesser Vous risquez de vous blesse...

Страница 113: ...gé e ou une prise d alimentation mal fixée Ne modifiez d aucune manière la fiche le cordon d alimentation ou la prise murale Ne mettez pas de fusible dans un circuit neutre ou de terre Utilisez un circuit électrique dédié de 120 V 60 Hz 20 A CA avec un disjoncteur ou un fusible à retardement ou un disjoncteur pour cette cuisinière Ne branchez pas plusieurs appareils sur ce circuit Ne branchez pas ...

Страница 114: ...instructions du fabricant et à l ensemble des codes et exigences des autorités compétentes L agence qualifiée effectuant ces travaux assume la responsabilité de la conversion au gaz L installation de cette cuisinière doit être conforme aux codes locaux ou en absence de codes locaux au National Fuel Gas Code Code national de gaz combustible ANSI Z223 1 NFPA 54 dernière édition Au Canada l installat...

Страница 115: ... la flamme reste allumée Ne placez aucun objet autre qu un ustensile de cuisine sur la surface de cuisson Cette surface de cuisson est conçue pour une utilisation avec un wok ou un anneau wok Pour faire flamber des aliments vous devez avoir une hotte d aspiration Lorsque vous faites flamber des aliments la hotte doit être allumée Avant de retirer ou de changer d ustensile de cuisson éteignez les b...

Страница 116: ...froidi afin d éviter tout risque de brûlure Ne placez aucun objet ou matériau combustible autour de la cuisinière Veillez à ne pas toucher les brûleurs avec vos mains lorsqu ils sont allumés Éteignez les brûleurs lorsque vous changez une poêle ou casserole Pour maintenir au chaud un liquide tel qu une sauce veillez à bien remuez pendant le processus de maintien au chaud Sécurité liée au four AVERT...

Страница 117: ...ns le four lorsque vous exécutez un cycle d auto nettoyage Lors de l ouverture de la porte après un cycle d auto nettoyage tenez vous éloigné du four En cas de dysfonctionnement du cycle d auto nettoyage éteignez le four débranchez l alimentation et contactez un technicien de maintenance qualifié Sécurité du tiroir de rangement AVERTISSEMENT Pour réduire le risque d incendie de choc électrique de ...

Страница 118: ...ovible 20 Tiroir de rangement 21 Brûleur de four pour gril 22 Éclairage du four 23 Système de grille de cuisson 24 Brûleur de four pour cuisson Accessoires fournis Grilles du brûleur de surface 3 Brûleurs de surface et chapeaux de brûleurs 5 Grille plate 2 REMARQUE Si vous souhaitez acheter un accessoire repéré par un astérisque vous pouvez le commander auprès du Centre d assistance Samsung 1 800 ...

Страница 119: ...a fonction Connexion facile 09 Éclairage du four pour allumer éteindre l éclairage du four 10 Pavé numérique pour régler le temps la température ou les préréglages 11 Horloge pour régler l heure 12 Verrouillage appuyez dessus pendant 3 secondes pour verrouiller le tableau de commande et la porte afin d éviter tout accident 13 OFF CLEAR ARRÊT EFFACER pour annuler l opération en cours mais pas la mi...

Страница 120: ...t La ventilation du four se situe sous le tableau de commande de celui ci Une bonne circulation de l air évite les problèmes de combustion des brûleurs du four et permet d obtenir de bonnes performances N obturez pas les orifices de ventilation ou leur pourtour Soyez prudent lorsque vous placez des objets près des orifices de ventilation De la vapeur chaude peut provoquer leur échauffement ou leur...

Страница 121: ... à basse température Chocolat casseroles sauces Aliments délicats qui nécessitent une faible température pendant une longue durée Centre C 10000 BTU Réchauffage général Cuisson sur plaque Aliments en général crêpes œufs au plat Cuisson en général Avant gauche AvG 12000 BTU Cuisson rapide Général Cuisson en général Arrière gauche ArG 9500 BTU Chauffage général Mijotage lent Aliments en général plat...

Страница 122: ...ant de retirer la casserole Toutes les commandes des brûleurs de surface doivent être désactivées lorsque vous ne cuisinez pas Éteignez toujours les brûleurs avant de vous coucher ou de quitter la maison Si vous sentez une odeur de gaz éteignez le gaz de la cuisinière et appelez un technicien de maintenance qualifié N utilisez JAMAIS de flamme nue pour localiser une fuite de gaz Récipients Exigenc...

Страница 123: ...s objets en plastique ou encore d augmenter dangereusement la pression dans les récipients en plastique fermés Vous risquez de vous brûler gravement si vous touchez les surfaces à proximité de l orifice de ventilation alors que la cuisinière fonctionne Lors de la cuisson veillez à tenir la poignée d un wok ou l anse d un petit récipient Gril Le gril à revêtement amovible procure une surface de cui...

Страница 124: ...order REMARQUE Avec le temps vous devrez peut être ajuster les réglages de chaleur pour le gril Après un certain nombre d utilisations le gril peut se décolorer Ne laissez pas la rouille se former sur le gril Si de la rouille apparaît sur le gril éliminez la dès que possible Four à gaz ÉTAPE 1 Mettez tous les ingrédients dans un récipient résistant à la chaleur ÉTAPE 2 Sélectionnez un mode de cuis...

Страница 125: ...de de grille comporte une butée qui évite que la grille ne se libère pendant le fonctionnement du four Chacune comporte des butées qui doivent être correctement installées sur les guides de grille Les butées permettent d éviter que les grilles de sortent complètement du four par accident lorsque vous les tirez 07 06 05 04 03 02 01 Type d aliment Position de la grille Cuisson d hamburgers au gril 6...

Страница 126: ...ture ou un temps inférieur e au réglage minimum ou supérieur e au réglage maximum de la fonction est saisi e Fonction Température F Minimum Maximum Cuisson traditionnelle 175 550 Cuisson au gril Faible Élevée Emplacement de la grille et des plats ou 4 3 Une seule grille de cuisson 5 3 Positions des plats à pâtisseries 5 3 Positions des plaques à cookies Positionnez les moules à gâteaux le plus au ...

Страница 127: ...température pour la volaille ou les tranches épaisses pour éviter la surcuisson De manière générale pour éviter une surcuisson appuyez sur Broil Cuisson au gril pour permuter entre les réglages Élevée et Faible Faites attention lorsque vous ouvrez la porte du four pour retourner les aliments L air qui s échappe du four est très chaud Pour en savoir plus sur les températures du gril les réglages de...

Страница 128: ... le message REMARQUE Pour modifier le temps de cuisson programmé appuyez sur Timer Off 3sec Arrêt de la minuterie 3 s saisissez un temps différent puis appuyez sur START SET DÉPART RÉGLAGE Guide de cuisson au gril REMARQUE Ces informations ne sont fournies qu à titre indicatif Il est recommandé de préchauffer pendant 5 minutes avant la cuisson au gril Les temps de cuisson au gril dépendent de la t...

Страница 129: ...is appuyez sur START SET DÉPART RÉGLAGE Temps de cuisson La fonction Temps de cuisson permet de régler le four pour cuire les aliments à une température réglée et pendant un temps défini Le four s éteint automatiquement lorsque la cuisson est terminée Mode Bake Cuisson traditionnelle 5 2 4 3 1 1 Appuyez sur la touche correspondant au mode de cuisson souhaité par exemple Bake Cuisson traditionnelle...

Страница 130: ...écuit pour maintenir des aliments au chaud La température de précuisson n est pas suffisamment élevée pour maintenir les aliments au chaud Placez la pâte dans un récipient résistant à la chaleur sur la grille à la position 3 ou 4 et couvrez la avec un chiffon ou un film plastique Il peut s avérer nécessaire d immobiliser le film plastique sous le récipient afin qu il ne soit pas soulevé par la ven...

Страница 131: ... traditionnelle Démarrage Réglage du four et Arrêt du four N ouvrez pas la porte du four et ne modifiez pas la température de ce dernier pendant environ 30 minutes après avoir démarré la fonction Sabbat Laissez le four atteindre la température réglée Le ventilateur du four fonctionne uniquement lorsque la température du four augmente L option Sabbat K À utiliser pour les fêtes juives et le sabbat ...

Страница 132: ...ahrenheit ou Celsius 3 Économie d énergie Éteint automatiquement le four 12 heures après le démarrage de la cuisson ou 3 heures après le démarrage du gril 4 Son Activez ou désactivez le son du four signal sonore 5 Activation Désactivation de la connexion Wi Fi Activez ou désactivez le mode Wi Fi Verrouillage du four Verrouille le tableau de commande et la porte pour éviter un fonctionnement accide...

Страница 133: ...des 2 Appuyez sur 1 pour passer en mode Réglage de la température 3 Appuyez sur pour sélectionner une température supérieure ou inférieure 4 Saisissez une valeur de réglage de la température entre 0 et 35 à l aide du pavé numérique 5 Appuyez sur START SET DÉPART RÉGLAGE pour enregistrer les modifications REMARQUE Ce réglage n affecte pas la température de cuisson au gril ou d auto nettoyage Il est...

Страница 134: ...nergie 3 Appuyez sur 1 ou 2 pour activer ou désactiver le mode Économie d énergie 1 pour l activer 12Hr 2 pour le désactiver Hr 4 Appuyez sur START SET DÉPART RÉGLAGE pour enregistrer les modifications Son Coupe Rétablit le son de la cuisinière 4 1 2 3 1 Appuyez sur pendant 3 secondes 2 Appuyez sur 4 pour passer en mode Son 3 Appuyez sur 1 ou 2 pour activer ou couper le Son 1 pour l activer 2 pour...

Страница 135: ...ication SmartThings pour obtenir des informations détaillées Smart Control Avant d utiliser la fonction Smart Control activez le mode Wi Fi reportez vous à la section Activation Désactivation de la connexion Wi Fi située à la page 30 Connexion du four 1 Téléchargez et ouvrez l application SmartThings sur votre appareil mobile 2 Suivez les instructions affichées à l écran de l application pour conn...

Страница 136: ...eindre des commandes intelligentes sont les mêmes que celles indiquées dans l application SmartThings Entretien Nettoyage ATTENTION Portez des gants pendant le nettoyage Tableau de commande Verrouillez d abord le tableau de commande et la porte pour éviter un fonctionnement accidentel et ou le basculement de l appareil 1 Appuyez sur pendant 3 secondes pour verrouiller simultanément le tableau de c...

Страница 137: ...rant ce cycle peut détacher de manière permanente le revêtement de la grille et rendre ensuite difficile le déplacement des grilles sur les rails de guidage Ne vaporisez pas d huile de cuisine ni de lubrifiant directement sur les grilles Four Portez des gants pendant le nettoyage Porte Ne retirez pas le joint intérieur de la porte du four pour le nettoyage Le joint de la porte Le joint de la porte...

Страница 138: ...rface de la plaque de cuisson La surface de la plaque de cuisson en émail vitrifié doit être maintenue propre Nous vous recommandons de retirer immédiatement les aliments renversés 1 Éteignez tous les brûleurs de surface 2 Attendez que toutes les grilles des brûleurs aient refroidi avant de les retirer 3 Nettoyez la surface de la table de cuisson à l aide d un chiffon doux Si des aliments renversé...

Страница 139: ...orrectement Après avoir vérifié qu un brûleur fonctionne normalement éteignez le REMARQUE Une fois le nettoyage terminé vérifiez que les ouvertures des orifices des brûleurs ne sont pas obstruées Essuyez l excès d eau et laissez les têtes de brûleurs et les chapeaux sécher complètement L eau s écoulera plus facilement si le brûleur central est placé à l envers Ne lavez aucun composant des brûleurs...

Страница 140: ...r afin que l électrode passe à travers l ouverture destinée à l électrode Assurez vous que la tête du brûleur porte bien à plat sur le dessus de la cuisinière Chapeau du brûleur 1 Faites correspondre les chapeaux des brûleurs avec les brûleurs par taille puis réinstallez les chapeaux sur les têtes des brûleurs ATTENTION Assurez vous que chaque chapeau est réinstallé sur la bonne tête de brûleur qu...

Страница 141: ...pour four N utilisez JAMAIS de nettoyant ni de revêtement de protection pour four disponibles dans le commerce pour nettoyer les surfaces intérieures et extérieures du four Des résidus provenant des nettoyants du four vont endommager l intérieur du four durant le cycle d auto nettoyage Pour effectuer le cycle d auto nettoyage Assurez vous que le verrouillage de la porte est relâché Retirez toutes ...

Страница 142: ...auto nettoyage appuyez sur OFF CLEAR ARRÊT EFFACER Le cycle s arrête mais la porte reste verrouillée et l icône du cadenas clignote jusqu à ce que la température du four chute en dessous de 400 F 204 C Après l auto nettoyage La porte reste verrouillée jusqu à ce que la température interne du four chute en dessous de 400 F Une fois le four refroidi essuyez les surfaces du four avec un chiffon pour ...

Страница 143: ...ant de procéder au remplacement de son éclairage REMARQUE L éclairage est désactivé durant le cycle d auto nettoyage Retirez les grilles si elles vous empêchent d accéder à l éclairage du four Retrait et réinstallation de la porte du four Comment retirer la porte ATTENTION La porte est très lourde Soyez prudent lorsque vous retirez et soulevez la porte Ne soulevez pas la porte par la poignée Coupe...

Страница 144: ...te au maximum Si la porte ne s ouvre pas complètement c est que les parties creuses ne sont pas correctement insérées dans les parties inférieures de chaque logement 4 Poussez les verrous de la charnière vers le haut contre le cadre de la cavité du four pour les mettre en position de verrouillage Position de verrouillage Position de déverrouillage Verrou de la charnière 5 Fermez la porte du four P...

Страница 145: ...mage Lorsque le brûleur s allume tournez le bouton de commande sur le réglage souhaité Si le brûleur continue à émettre un clic contactez un technicien de maintenance Les brûleurs ne brûlent pas de façon homogène Les composants et les caches des brûleurs de surface n ont pas été correctement assemblés et mis à niveau Reportez vous à la page 35 Les brûleurs de surface sont sales Nettoyez les compos...

Страница 146: ...tion de la cuisinière pendant au moins 30 secondes puis rétablissez la Si le problème n est pas résolu contactez un centre de dépannage Problème Cause Action Le four ne s allume pas Le four n est pas correctement branché à la prise électrique Assurez vous que la prise électrique est entièrement branchée sur une prise en état de marche et correctement mise à la terre Un fusible de votre habitation ...

Страница 147: ... Un nettoyage régulier est nécessaire en cas d utilisation répétée de la cuisson au gril Problème Cause Action La cuisson est terminée mais le ventilateur de refroidissement fonctionne toujours Le ventilateur fonctionne automatiquement pendant un certain laps de temps pour ventiler l intérieur du four Il ne s agit pas d un dysfonctionnement de l appareil Le ventilateur est conçu pour fonctionner a...

Страница 148: ...er jusqu à la fin de la fonction ou l ouverture de la porte Le ventilateur de convection ne fonctionne pas Ceci est tout à fait normal Le ventilateur se met automatiquement en marche lorsque le four atteint la température de préchauffage Problème Cause Action Fumée excessive durant un cycle d auto nettoyage Le four a été nettoyé pour la première fois Ceci est tout à fait normal Lors du premier net...

Страница 149: ...3 La porte du four n a pas été fermée pendant la cuisson au gril Reportez vous à la page 23 La grille n a pas été positionnée correctement Reportez vous au guide de cuisson au gril en page 24 Autres Problème Cause Action L appareil n est pas de niveau La cuisinière n a pas été installée correctement Le s pied s de mise à niveau est sont endommagé s ou inégaux Assurez vous que le sol est plan solid...

Страница 150: ...rantie de SAMSUNG contre tout vice de fabrication au niveau des pièces et de la main d œuvre pendant une période limitée commençant à la date d achat initial de Un 1 an pièces et main d œuvre La présente garantie limitée ne s applique qu aux produits achetés et utilisés au sein des États Unis et ayant été installés utilisés et entretenus conformément aux instructions jointes ou fournies avec le pr...

Страница 151: ...ue fondu qui n auraient pas été nettoyées selon les instructions fournies dans le manuel d entretien et d utilisation Le coût des réparations ou du remplacement dans de telles circonstances exclues sera à la charge au client Les interventions par un réparateur agréé visant à expliquer les fonctions de l appareil ou les procédures de maintenance ou d installation ne sont pas couvertes par la présen...

Страница 152: ...ntie ne peut être assuré que par un centre de dépannage agréé SAMSUNG et tout autre service non autorisé annule la présente garantie La facture datée et originale doit être présentée sur demande comme preuve d achat à SAMSUNG ou au centre de dépannage agréé SAMSUNG Samsung vous assure un service à domicile pendant la période de garantie d un 1 an sans frais supplémentaires en fonction des disponib...

Страница 153: ...t continu ou sans erreur de ce produit À L EXCEPTION DE CELLES EXPOSÉES PAR LA PRÉSENTE IL N EXISTE AUCUNE AUTRE GARANTIE SUR CE PRODUIT QU ELLE SOIT EXPRESSE OU IMPLICITE ET SAMSUNG REJETTE TOUTE AUTRE GARANTIE Y COMPRIS MAIS SANS S Y LIMITER TOUTE GARANTIE IMPLICITE RELATIVE À LA QUALITÉ MARCHANDE À L ABSENCE DE CONTREFAÇON OU À L ADAPTATION À UN USAGE PARTICULIER SAMSUNG NE SERA EN AUCUN TENUE ...

Страница 154: ... samsung com ca support English ou www samsung com ca_fr support French N de modèle N de série Veuillez joindre votre facture ou une copie à ce manuel Vous pouvez en avoir besoin ainsi que du numéro de modèle et de série si vous devez appeler l assistance Annonce de contenu libre Le présent produit contient un logiciel libre L URL http opensource samsung com opensource SMART_TP2_0 seq 0 suivante p...

Страница 155: ...Notes ...

Страница 156: ...NE QUESTION UN COMMENTAIRE PAYS N DE TÉLÉPHONE SITE INTERNET U S A Consumer Electronics 1 800 SAMSUNG 726 7864 www samsung com us support CANADA 1 800 SAMSUNG 726 7864 www samsung com ca support English www samsung com ca_fr support French DG68 01340A 03 Scannez le code QR ou rendez vous sur le site www samsung com spsn pour voir nos vidéos et démonstrations en direct d utilisation Requiert l inst...

Отзывы: