background image

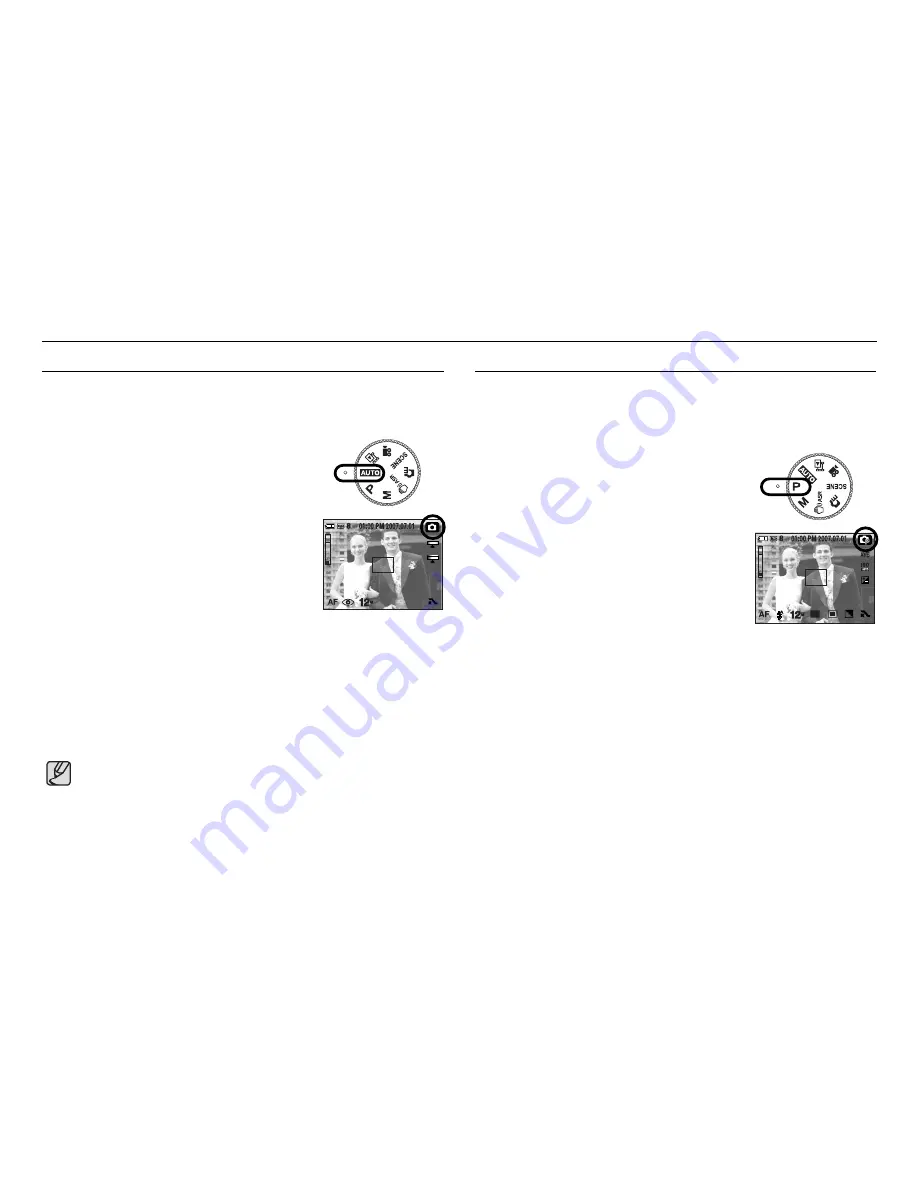
Starting the recording mode

ŝ

22

Ş

Please select this mode for quick and easy picture taking with minimal user
interaction.

1. Insert the battery (p.16) taking note of the correct

polarity (+ / -).

2. Insert the memory card (p.16). As this camera has a

20MB internal memory, it is not essential to insert
the memory card. If the memory card is not
inserted, an image will be stored in the internal
memory. If the memory card is inserted, an image
will be stored on the memory card.

3. Close the battery chamber cover.
4. Press the power button to turn on the camera. 

(If the date / time that is displayed on the LCD
monitor is incorrect, reset the date / time before
taking a picture.)

5. Select the AUTO mode by rotating the mode dial.
6. Point the camera towards the subject and compose the image by using the

LCD monitor.

7. Press the shutter button to capture an image.

How to use the AUTO mode

Selecting the program mode will configure the camera with optimal settings.
You can still manually configure all functions except the aperture value and
shutter speed.

1. Select the PROGRAM mode by rotating 

the mode dial.

2. Press the horizontal smart button to configure

advanced functions such as image size (p.36),
quality (p.39), metering (p.37) and continuous
shooting (p.36).

ſ

Refer to page 32-48 for more information about
the menus.

How to use the PROGRAM mode

ƃ

If the Auto focus area turns to red when you press the shutter button
down half way, it means that the camera cannot focus on the subject.
Should this be the case, the camera is unable to capture an image
clearly.

ƃ

Avoid obstructing the lens or the flash when you capture an image.

Содержание NV20 - Digital Camera - Compact

Страница 1: ...ung camera This manual will guide you through using the camera including capturing images downloading images and using the application software Please read this manual carefully before using your new...

Страница 2: ...sponsibility for loss or damage of images on the memory card due to the use of a card reader The contents and illustrations of this manual are subject to change without prior notice for upgrading the...

Страница 3: ...hen in use do not cover the camera or Charger This may cause heat to build up and distort the camera body or cause a fire Always use the camera and its accessories in a well ventilated area DANGER ind...

Страница 4: ...ore moving the camera Failure to do so may damage the cords or cables and cause a fire or electric shock Take care not to touch the lens or lens cover to avoid taking an unclear image and possibly cau...

Страница 5: ...30 Using the LCD monitor to set the camera 032 Colour tone 033 Brightness 033 Selecting focus type 034 Flash 036 Size 036 Continuous shot 037 Metering 037 Sharpness 038 Effect 038 Focus Area 039 Quali...

Страница 6: ...gement button 057 Starting the slide show 058 Protecting images 058 Deleting images 059 DPOF 059 DPOF Standard 060 DPOF Print size 060 DPOF Index 061 Rotating an image 061 Resize 062 Trimming PLAY 063...

Страница 7: ...e contacting a service centre 082 Specifications 084 Software Notes 085 System Requirements 085 About the software 086 Setting up the application software 088 Starting PC mode 091 Removing the removab...

Страница 8: ...ur nearest Samsung dealer or Samsung service centre SD SDHC MMC memory card see p 16 DPOF compatible printer see p 59 AC adapter SAC 46 USB cable SUC C2 External monitor see p 76 Rechargeable battery...

Страница 9: ...er button Built in flash Lens Lens cover Microphone Power button Speaker 8 Instructions for the Built in flash The flash opens automatically when you press the shutter button down half way Do not open...

Страница 10: ...ck Identification of features 9 LCD monitor Camera status lamp Eyelet for camera strap Zoom W button Thumbnail Zoom T button Digital zoom BACK button FR button Play mode button Smart button Smart butt...

Страница 11: ...Camera Status Lamp Bottom Status Description After taking a picture Power on The lamp blinks while saving the image and then turns off when ready to take another picture The lamp turns on and off when...

Страница 12: ...the program mode will configure the camera with optimal settings You can still manually configure all functions except the aperture value and shutter speed MANUAL mode You can manually configure all...

Страница 13: ...CHILDREN Icon MODE LANDSCAPE BIZ CLOSE UP Icon MODE TEXT SUNSET DAWN Icon MODE BACKLIGHT FIREWORKS BEACH SNOW Icon MODE SELF SHOT FOOD CAF Icon MOVIE mode A movie clip can be recorded for as long as t...

Страница 14: ...rgeable battery SLB 0837 B supplied with the camera Be sure to charge the battery before using the camera Important information about battery usage When the camera is not used turn off the camera powe...

Страница 15: ...USB cable Remove the AC adapter from the USB connector You can transmit data with a PC p 88 or charge the battery In the following cases the battery may not be charged When using the USB cable that wa...

Страница 16: ...h the camera power on the battery can t charge fully Turn the camera off while charging the battery If you insert the fully discharged battery to charge it do not turn on the camera at the same time T...

Страница 17: ...attery capacity Prepare to recharge or use spare battery Low battery capacity Prepare to recharge or use spare battery Battery empty Recharge or use spare battery There are 4 indicators for battery co...

Страница 18: ...ed use of the memory card will eventually reduce its performance Should this be the case you will need to purchase a new memory card Wear and tear on the memory card is not covered by the Samsung warr...

Страница 19: ...the data protection will be cancelled Slide the switch to the top of the SD SDHC memory card before taking a picture When using a 256MB MMC memory the specified shooting capacity will be as follows T...

Страница 20: ...nsion menu button This button is used for shifting the menu cursor to select or for confirming the selected menu To select a sub menu in some menus touch the button and slide your finger to the left r...

Страница 21: ...e vertical smart button 3 To change the date select the 2007 07 01 menu and press the vertical smart button 4 To select Year Month Day and Hour Minute press the horizontal smart button To change the n...

Страница 22: ...O p 42 23 White Balance p 43 24 Auto focus area 25 Face Recognition p 29 30 Optical Digital Zoom bar Digital Zoom rate Voice recording Voice memo Without Sound The LCD monitor displays information abo...

Страница 23: ...dial 6 Point the camera towards the subject and compose the image by using the LCD monitor 7 Press the shutter button to capture an image How to use the AUTO mode Selecting the program mode will conf...

Страница 24: ...ditions 1 Select the ASR mode by rotating the mode dial 2 Point the camera towards the subject and compose the image by using the LCD monitor 3 Press the shutter button to capture an image Things to w...

Страница 25: ...rotating the mode dial Refer to page 44 47 for more information about the effect menus How to use the EFFECT mode Use the menu to easily configure optimal settings for a variety of shooting situations...

Страница 26: ...lip without having to create multiple movie clips How to use the MOVIE mode A movie clip can be recorded for as long as the available recording time of the memory capacity allows 1 Select the MOVIE mo...

Страница 27: ...tering see page 37 or exposure compensation see page 42 Avoid obstructing the lens or the flash when you capture an image Compose the image by using the LCD monitor In some of the following conditions...

Страница 28: ...mode Pressing the shutter button down halfway activates the autofocus and checks the condition of the flash Pressing the shutter button down fully takes and stores the image If you select voice memo...

Страница 29: ...zoom 5X Pressing the ZOOM T button Pressing the ZOOM T button TELE zoom Optical zoom 2X WIDE zoom Pressing the ZOOM W button Pressing the ZOOM W button Digital zoom 5X TELE zoom WIDE zoom Pressing the...

Страница 30: ...ime for this to take place If the Zoom buttons are being pressed during the Movie clip shots the voice will not recorded You may notice a decrease in image quality when using the digital zoom To view...

Страница 31: ...ce and the gray colour focus frame will be displayed over the remaining faces up to 8 Press the shutter button halfway down to focus the face and the white focus frame turns green Total 9 Return to pr...

Страница 32: ...EGATIVE CUSTOM MULTI SPOT CENTER SOFT NORMAL VIVID MENU Page EFFECT SHARPNESS METERING p 38 p 37 p 37 QUALITY FRAME RATE COLOR p 32 BRIGHT p 33 OFF 10SEC 2SEC DOUBLE REMOTE OFF MEMO RECORD CENTER AF M...

Страница 33: ...ting the colour tone To select the colour tone touch the button and slide your finger to the left or right Emphasizing the Cool colour Emphasizing the Warm colour COLOR EV p 42 ISO p 42 WB p 43 SHUTTE...

Страница 34: ...Bright BRIGHT You can select the focus type in accordance with the subject distance The distance ranges are show below Normal Macro Auto Macro MACRO NORMAL AF Brightness Selecting focus type 33 Focus...

Страница 35: ...e The distance ranges are show below W 0 8 4 5 W 0 3 0 8 W 0 3 4 5 T 1 5 2 4 T 0 5 1 5 T 0 5 2 4 Macro Auto macro ISO AUTO Flash range W Wide T Tele Unit m FILL IN RED EYE AUTO OFF Selecting focus typ...

Страница 36: ...use damage to the flash Flash mode indicator Icon Flash mode Description If the subject or background is dark the camera flash will operate automatically If a subject or background is dark the camera...

Страница 37: ...he continuous shooting images are saved and the images play back on the Rear LCD The maximum number of shots is 20 and the image size is fixed as 1024X768 AEB Take three pictures in a series using dif...

Страница 38: ...rcumstance it is better to use exposure compensation PROGRAM mode CENTER SPOT MULTI PROGRAM mode You can adjust the sharpness of the picture you want to take You cannot check the sharpness effect on t...

Страница 39: ...e menus can be selected in the Special Effect mode only PROGRAM mode By using the camera s digital processor it is possible to add special effects to your images You can select your preferred Focus Ar...

Страница 40: ...ified time has elapsed and the self timer function will be cancelled Selecting a remote mode Pressing the shutter button of a separate remote control will allow an interval of 2 seconds before the ima...

Страница 41: ...ill be displayed on the LCD monitor Voice will still be recorded if the shutter button is released If you wish to stop recording press the shutter button again File type wav RECORD MEMO OFF RECORD MEM...

Страница 42: ...Select a recording mode with the exception of the Movie clip mode by rotating the mode dial 2 Select the Voice memo menu by using the smart button If the voice memo indicator is displayed on the LCD...

Страница 43: ...tor will appear white or you may not get good pictures AUTO The camera s sensitivity is automatically changed by variables such as lighting value or subject brightness 80 100 200 400 800 1600 3200 You...

Страница 44: ...nly white AUTO The camera automatically selects the appropriate white balance settings depending on the prevailing lighting conditions DAYLIGHT For taking images outside CLOUDY For taking images under...

Страница 45: ...of a person CHILDREN To take a picture of fast moving objects for example children LANDSCAPE To take pictures of distant scenery BIZ To take pictures of a visiting card CLOSE UP Close up shooting for...

Страница 46: ...Press the Motion GIF menu button 3 Select the image size and FPS Frame Per Second 4 Press the Shutter button to take pictures Max 50 images 5 Press the OK menu button to save the image The images will...

Страница 47: ...shot Capture SH Del Back Capture SH Del Back Pressing the BACK button Effect Composite shooting 46 Pressing theshutter button Selecting 2 composite shooting You can combine 2 3 or 4 different shots in...

Страница 48: ...mage is deleted 4 Press the Shutter button to take an image again 5 Press the OK button and the image is saved Effect Composite shooting Shutter Speed 47 This mode will set the shutter speed for autom...

Страница 49: ...ode 1 Select the Photo Gallery mode by rotating the mode dial 2 Press the Play type button and menus as shown will display Play back by album Play back by date 3 Press the Smart button to select a des...

Страница 50: ...to albums All images save in the memory play back Images saved in the Personal album play back Images saved in the Family album play back Images saved in the Friends album play back Images saved in th...

Страница 51: ...cle Repeat Play The slide show is repeated until cancelled Rotating an image Press the Edit button and the menus shown below will display You can rotate an image to a direction you want Press the hori...

Страница 52: ...eshow 4 Use the lower smart button to select preferable images 5 When an image is selected an option icon will be indicated at the upper right corner and on the lower corner the number of images selec...

Страница 53: ...ra can now play back the images stored in the memory If the memory card is inserted in the camera all the camera functions apply only to the memory card If the memory card is not inserted in the camer...

Страница 54: ...o stop extracting 3 A confirmation window will display 4 Press the smart button to select a desired sub menu Yes The extracted frames are saved as a new file name No The movie trimming will cancel If...

Страница 55: ...utton Playing back a recorded voice memo The LCD monitor displays shooting information about the displayed image MEMO PLAY ISO 100 AV F2 8 TV 1 30 FLASH ON 4000X3000 2007 07 01 No Description Icon Pag...

Страница 56: ...ous thumbnail page Move button move the images on LCD monitor Play Pause button play or pause voice memo voice recording movie clip or images Move button move to the next thumbnail page Play mode butt...

Страница 57: ...ge that you want to enlarge and press the enlargement button 2 Different parts of the image can be viewed by using the smart button 3 Pressing the thumbnail button will zoom back to the original full...

Страница 58: ...d noise to an image to add a more classic feel to your photo Memories The film is aged to make it seem like an old movie Rhythmic Images are displayed with various effects Delight Images are displayed...

Страница 59: ...dicator An image in LOCK mode will be protected from the delete function but will NOT be protected from the format function ONE ALL Protect Lock Unlock This is used to delete the displayed image YES d...

Страница 60: ...ngle print 8 of the left and right side of the image may not be printed Check that your printer can support the wide angle image when you print the image When you print the image at a photo lab reques...

Страница 61: ...dary menu Cancel 3X5 4X6 5X7 8X10 You can specify the print size when printing images stored on the memory card The SIZE menu is available only for DPOF 1 1 compatible printers 100 0001 100 0001 Cance...

Страница 62: ...ack of the rotated picture is finished it will be saved in its rotated state 1 Press the Edit button 2 Press the ROTATE menu button 3 Select a desired sub menu by pressing the smart button 4 If you di...

Страница 63: ...message will appear on the LCD monitor and the resized image will not be stored You can extract part of the image that you want and save it separately 1 Select an image that you want to enlarge 2 Pre...

Страница 64: ...ess the M GIF menu button Captured images will be stored in black and white Captured images will be stored in a sepia tone a range of yellowish brown colours Captured images will be stored in a blue t...

Страница 65: ...the start menu button OK Save OK Exit BACK When a shot with red eye is played back pressing this button can correct the red eye 1 Select a picture that has red eye 2 Press the Edit button 3 Press the...

Страница 66: ...Movie clips and voice files cannot be printed Setting up the camera for connection to a printer 1 Connect the camera to a printer s USB port with the supplied USB cable 2 Select the Printer menu by us...

Страница 67: ...hanged in the automatic manual setting the setting values are automatically kept Custom Set You can select the Paper Size Print Format Paper Type Print Quality Date Print and File Name Print menus for...

Страница 68: ...Full Basic Hide File Series Reset 2007 07 01 yy mm dd mm dd yy dd mm yy Off OSD set Recording mode OSD set Playback mode Setup menu 1 Language Date Time p 69 p 69 p 70 p 70 71 p 70 ENGLISH FRAN AIS D...

Страница 69: ...k Normal Bright AF Lamp Off On Power Off 1 3 5 10 min Quick View Off 0 5 1 3 sec London Cape Verde Mid Atlantic Buenos Aires Newfoundland Caracas La Paz New York Miami Chicago Dallas Denver Phoenix LA...

Страница 70: ...ay OSD may be displayed by using the camera buttons except for the shutter button LCD save If the camera is not used for about 30 seconds the power and camera status lamps blink and the LCD monitor tu...

Страница 71: ...assigned in the Biz mode will be set SB1ZXXXX File name This function allows the user to select the file naming format Language There is a choice of languages that can be displayed on the LCD monitor...

Страница 72: ...d summer time select the icon on the right side 4 To select a city select a desired city by using the horizontal smart button For more information about the available cities refer to the page 68 2 If...

Страница 73: ...in a low light condition Sub menus Auto Dark Normal Bright If the Auto menu is selected the LCD brightness will be set automatically according to the shooting conditions If the Auto menu is selected i...

Страница 74: ...ge will not be deleted by Delete All or Format menu The User images will be deleted by Reset menu Quick view If you enable Quick View before capturing an image you can view the image you just captured...

Страница 75: ...und You can select the shutter sound Operation Sound If you set sound to On various sounds will be activated for camera startup when buttons are pressed so that you can be aware of the camera operatio...

Страница 76: ...ure to download important images to your PC before formatting the memory Delete All Of all the files stored in the memory card the unprotected files in the DCIM subfolder will be deleted Always format...

Страница 77: ...elect the Copy To Card menu but the menu can t be run If there is not enough space available in the memory card to copy saved images in the internal memory 20MB the Copy To Card command will copy only...

Страница 78: ...l be a digital noise on the external monitor but it is not a malfunction If the image is not in the centre of the screen use the TV controls to centre it When the camera is connected to an external mo...

Страница 79: ...as exposed to severe changes in temperature and humidity Areas exposed to dust and dirt Areas exposed to direct sunlight or the inside of a vehicle in hot weather Environments where there is high magn...

Страница 80: ...not work lens cleaning paper with lens cleaning fluid can be used Clean the camera body with a soft cloth Do not allow this camera to come into contact with solvent materials such as benzol insecticid...

Страница 81: ...the polarities reversed Insert the battery according to the polarity marks The rechargeable battery is not inserted Insert the battery and turn on the camera The camera power ceases while in use The b...

Страница 82: ...ppropriate White balance and effect Camera does not take images when pressing the Shutter button There is insufficient memory capacity Delete unnecessary image files The memory card has not been forma...

Страница 83: ...SB Storage Driver Image Sensor Type 1 1 72 CCD Effective Pixel Approx 12 1 Mega pixel Total Pixel Approx 12 4 Mega pixel Lens Focal Length Schneider Lens f 7 3 21 9mm 35mm film equivalent 34 102mm F N...

Страница 84: ...10 sec Double 10 sec 2 sec Remocon optional Movie Clip With Audio or without Audio recording time max 4GB or 6 hours Size 640x480 320x240 Frame rate 30 fps 15 fps 3X Optical Zoom and Mute in Zooming M...

Страница 85: ...without prior notice All trademarks are the property of their respective owners Please ensure that you read this instruction manual carefully before use The attached software is a camera driver and im...

Страница 86: ...Driver for MAC is not included with the Application CD You can use the camera with Mac OS 9 0 10 4 XviD codec This allows movie clips MPEG 4 recorded with this camera to be played back on a PC To play...

Страница 87: ...e with Windows Be sure to check the system requirements before installing the driver To play back the movie taken with this camera on the computer DirectX 9 0 must be installed You should allow 5 10 s...

Страница 88: ...R EXPRESSED OF MERCHANTABILITY OR FITNESS FOR A PARTICULAR PURPOSE provided however that you have to follow the GNU General Public License whenever you are distributing this codec or modification ther...

Страница 89: ...e you can download stored images to your PC through the USB cable The LCD monitor is always turned off in PC mode Connecting the camera to a PC 1 Connect the PC to the camera with the USB cable 2 Sele...

Страница 90: ...You can download the still images stored on the camera to your PC s hard disk and print them or use a photo editing software to edit them 1 Connect the camera to your PC with the USB cable 3 Select a...

Страница 91: ...r move the image files 5 Click a folder where you want to paste the file We recommend that you should copy the images to the PC to view them Opening images directly from the removable disk may be subj...

Страница 92: ...he illustrations may differ from those shown depending on the Windows O S 1 Check whether the camera and PC are transferring a file If the camera status lamp blinks please wait until the lamp has fini...

Страница 93: ...Mac OS 10 0 or later First complete uploading from computer to camera and then remove the removable disk with the Extract command Setting up the USB Driver for MAC 1 Double click a new icon on the de...

Страница 94: ...ers Folder names can be made in order of date and images will be downloaded Folder name will be made as you want and images will be downloaded After selecting a folder that was made before images will...

Страница 95: ...Image display window Images in the selected folder are displayed Refer to the Help menu in Samsung Master for further information Image edit You can edit the still image Image edit functions are list...

Страница 96: ...recognize the information on business card like name company telephone number e mail and so on It offers the more effective businesss information management solution with digital camera This software...

Страница 97: ...image files will then be displayed File names assigned in the Biz mode will be set SB1ZXXXX 3 Downloading camera s namecard images Refer to page 89 Downloading stored images Recognizing namecard image...

Страница 98: ...to the Help menu in Samsung Biz Reader for further information Partial recognizing Partial recognition function can be used when mis recognition 1 Select the namecard to partial editing 2 Drag the are...

Страница 99: ...to the USB port located on the back of the computer When the movie clip doesn t play back on the PC When the movie clip recorded by the camera doesn t play back on the PC the causes are most likely d...

Страница 100: ...install only the Samsung Master the problems mentioned above occasionally happen Close the Samsung Master program by clicking the Samsung Master icon on the Taskbar Install all the application progra...

Страница 101: ...Class B digital device pursuant to part 15 of the FCC Rules These limits are designed to provide reasonable protection against harmful interference in a residential installation This equipment genera...

Страница 102: ...rufeausDeutschland DieAdressenIhrerKundendienstesowiedie GarantiebestimmungenentnehmenSiebitteausdem beiliegendenFaltblatt SAMSUNGINTERNATIONAL WARRANTYCERTIFICATE INTERNET www samsungcameras de TIANJ...

Отзывы: