background image

GB

10

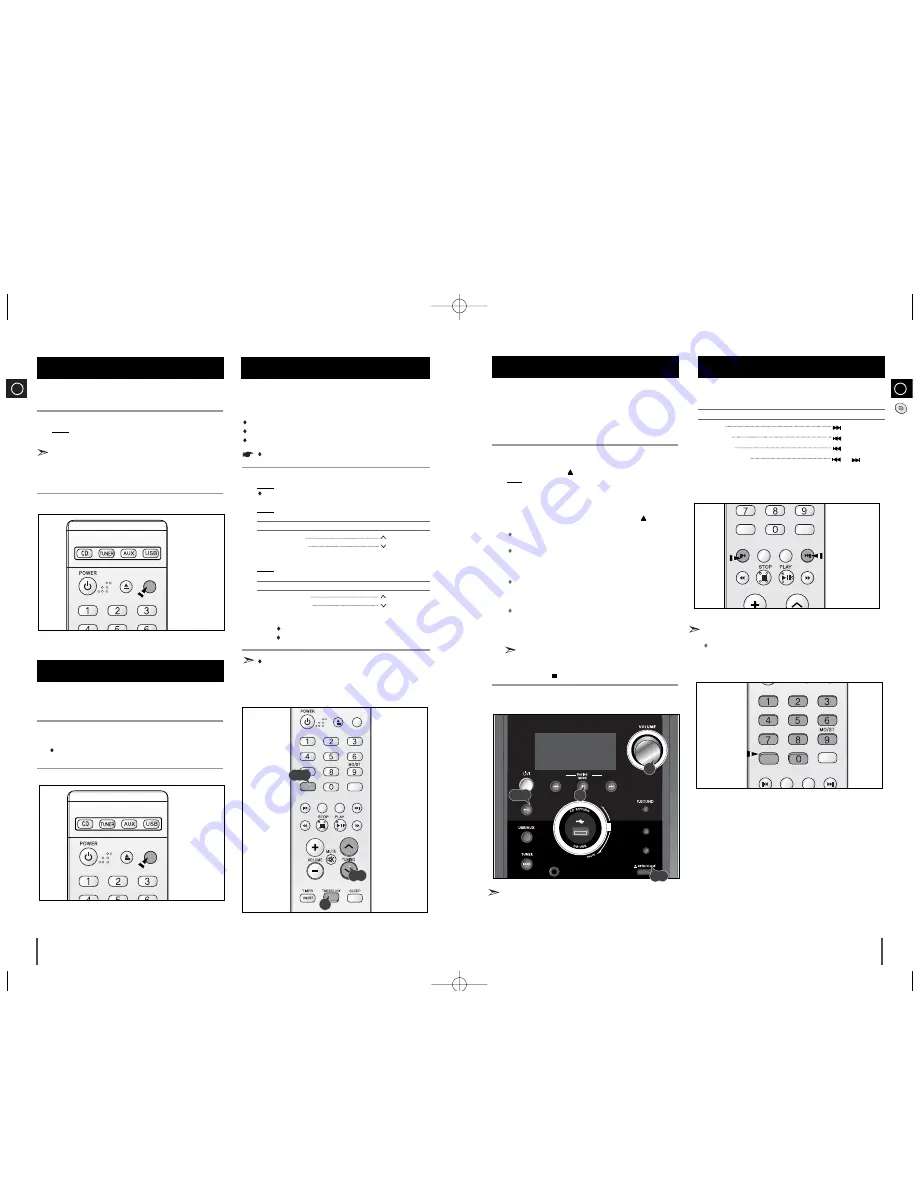
Your system is equipped with a clock which allows you to turn your
system on and off automatically. 
You should set the clock:

When you first purchase the micro component system

After a power failure

After unplugging the unit

For each step, you have a few seconds to set the required options.
If you exceed this time, you must start again.

Press 

TIMER/CLOCK

twice.

Result:

CLOCK

is displayed.

Press TIMER/CLOCK once,displayed the current time.

Press 

SET

.

Result: The hour flashes.

To...

Press...

Increase the hours

Decrease the hours

When the correct hour is displayed, press 

SET

.

Result: The minutes flash.

To...

Press...

Increase the minutes

Decrease the minutes

When the correct time is displayed, press 

SET

.

Result: "

TIMER

" appears in the display.

The current time is now set.

You can display the time, even when you are using another func-
tion, by pressing 

TIMER/CLOCK

once. 

Setting the Clock

1

2

3

4

5

6

You can view the various functions available on your system.

Press the 

DEMO /DIMMER button

.

Result: The avaiable functions available are listed in turn on the 

display.

All these functions are described in detail in this booklet.
For instructions on how to use them, refer to the appropriate sec-
tions.

To cancel this function, press any button.

2

1

DEMO Function

You can adjust the brightness display depending on the surrounding
lighting conditions.

Press the 

DEMO/DIMMER

button.

Your selection switches each time the button is pressed:

DIMMERON(Dim)

➞ 

DIMMER OFF(Bright)

.

1

DIMMER Function

GB

11

You can play 12 cm or 8 cm compact discs without an adapter.

This unit has been designed to playback the following CDs: Audio CD,
CD-R, CD-RW and MP3/WMA,-CD.

Continued use of irregular shape CDs (heart-shape, octagonal, etc.)
can damage the unit.

Select the CD function by pressing 

MP3-CD/CD

(

√»

) button.

Press the 

Open/Close

(

)  button. 

Result: The compartment opens.

Place your disc in the compartment, with the label on the disc facing
upwards.

Close the compartment by pressing the 

Open/Close

(

)  button

again.

Your CD Player will take a few moment  to scan through all the
tracks recorded on a particular MP3/WMA-CD

The English name of the song may be indicated on the display
only if directly downloaded from the PC or if the purchased
MP3/WMA-CD is sorted according to titles(directory). 
(Other languages besides English may not be indicated.)

The English name of the track may not be indicated depending on
the characteristics of the MP3/WMA-CD.

Adjust the volume .

Turn the

VOLUME

control of the main unit.

The volume level can be adjusted as follows: VOL MIN,VOL 1- VOL
49,and VOL MAX.

To pause playback temporarily, press the 

MP3-CD/CD

(

√»

) button.

Pressed (

/

»

) again to continue playing the disc.

If the unit is paused for more than 3 minutes,it will automatically   

change for STOP.

Press the 

STOP

(

) button when you have finished.

1

2

3

4

5

7

6

To play the CD/MP3/WMA-CD

NEXT
/UP

PREVIOUS
/DOWN

DEMO/DIMMER

DSP/EQ

FULL C

D

MP3-CD/CD

7

1,6

You can select the track you wish to listen to,  when a disc is playing. 

To start playback at the beginning of the...

Press...

Next track

once

Current track

once

Previous track

twice

Track of your choice

or 

the

appropriate number
of times.

Selecting a Track

5

1,3

TUNER MEMORY

    CD
RIPPING

DSP/EQ

REPEAT

SET

TUNER MEMORY

    CD
RIPPING

EQ

REPEAT

SET

RDS DISPLAY

TA

PTY-

PTY SEARCH

PTY+

You also can use the number buttons to select the
track.

Press the number buttons t choose the track  that you want      
and then press 

SET 

button.

SET

TUNER MEMORY

    CD
RIPPING

EQ

REPEAT

SET

DEMO
/DIMMER

OPEN/
CLOSE

RDS DISPLAY

TA

PTY-

PTY SEARCH

PTY+

SET

3,5

2,4,6

1

Connected the USB and then play the CD disc or When CD disc play-
ing connect the USB, CD disc will be pause 3~5 seconds(according
the USB’s memory,the pause time maybe different).

BAND

DEMO
/DIMMER

OPEN/
CLOSE

RDS DISPLAY

TA

PTY-

PTY SEARCH

PTY+

BAND

DEMO
/DIMMER

OPEN/
CLOSE

RDS DISPLAY

TA

PTY-

PTY SEARCH

PTY+

MM-X8(GB)-ELS-9.28  9/28/07  11:22  Page 10

Содержание MM-X8

Страница 1: ...Instruction Manual MICRO COMPONENT AUDIO SYSTEM CD MP3 WMA CD CD R RW PLAYBACK MM X8 MM X8 GB ELS 9 28 9 28 07 11 22 Page 1 ...

Страница 2: ... 20 MUTE Function 20 Connecting Headphones 20 RECOMMENDATIONS FOR USE Safety Precautions 21 Cleaning Your Micro Component System 21 Precautions When Using Compact Discs 22 Troubleshooting 22 Technical Specifications 23 USB Feature Supported Player 24 CD Ripping Feature Supported Player 24 Wiring the Mains Power Supply Plug UK Only IMPORTANT NOTICE The mains lead on this equipment is supplied with ...

Страница 3: ...BY ON 2 MP3 CD CD 3 USB AUX 4 TUNER BAND 5 HEADPHONE JACK CONNECTOR 6 CD DOOR OPEN CLOSE 7 USB JACK 8 DSP EQ 9 DEMO DIMMER 10 POWER SOUND 11 CD RIPPING DIAL 12 SEARCH FUNCTION BUTTONS TUNING MODE OR STOP BUTTON 13 VOLUME CONTROL DEMO DIMMER NEXT UP PREVIOUS DOWN DSP EQ FULL CD MP3 CD CD 1 2 3 4 5 7 6 8 9 10 11 12 13 1 2 3 4 5 6 7 16 8 9 10 11 12 13 14 15 22 21 20 19 18 17 TUNER MEMORY CD RIPPING E...

Страница 4: ...e placed at an equal distance above the floor Where to Install Your Micro Component System Connecting your System to the Power Supply 2 GB 6 Rear Panel View 1 Voltage 2 Loudspeaker Connector Terminals 3 AUX Input 4 FM Antenna Connector Terminal 5 AM Antenna Connector Terminals Inserting Remote Control Batteries Insert or replace remote control batteries when you Purchase the micro component system...

Страница 5: ... you need an RCA connection cable Set the system to standby mode and disconnect it and the external source from the main socket Connect the audio cable to the rear of the micro component system Connect the To the connector marked Red jack R right White jack L left For optimum sound quality do not invert the right and left channels Plug the system back into the main socket and press to switch it on...

Страница 6: ...lace your disc in the compartment with the label on the disc facing upwards Close the compartment by pressing the Open Close button again Your CD Player will take a few moment to scan through all the tracks recorded on a particular MP3 WMA CD The English name of the song may be indicated on the display only if directly downloaded from the PC or if the purchased MP3 WMA CD is sorted according to ti...

Страница 7: ...c is 740MB Normally an MP3 file has a capacity of 4MB therefore approximately 180 files can be stored on a single disc Regarding the playback of CD R RW In the case of an original CD R Recordable recorded in audio CD format CD RW Rewritable and editing by the user playback is processed on the respective completed status The player may not be played back according to the characteristics of the CD o...

Страница 8: ...ease the frequency respectively To scroll through the frequencies faster when searching manually hold down the or buttons The automatic search procedure may stop on a frequency that does not correspond to a radio station If this happens use the manual search mode If you do not want to store the radio station found revert to Step 4 and search for another station Otherwise a Press TUNER MEMORY Resul...

Страница 9: ...ldren s programmes Social affairs Religion Phone in Travel Leisure Jazz Music Country Music National Music Oldies Music Folk Music Documentary Alarm Test This unit has the RDS Radio Data System function which enables for the various information such as broadcasting station radio text time and 30 types of programs News Rock Classic etc to be received from the FM RDS station together with normal rad...

Страница 10: ...TY PTY SEARCH PTY SET 8 2 3 4 5 6 7 1 3 4 5 6 Don t disconnected USB and AC Cord during CD Ripping This may cause the file damage If you want to stop CD Ripping during CD Ripping you must press stop Key first and after the CD Stopped then you can remove the USB device If you disconnected USB device when CD Ripping the main unit will be power off and you may not delete the ripped file In this case ...

Страница 11: ... CD To obtain the best possible results from your micro component sys tem you must clean the following elements regularly The outer casing The compact disc player Always unplug the system from the wall outlet Before cleaning it If you are not going to be using it for a long time Outer Casing Clean the outer casing regularly using a soft cloth and a light detergent Do not use abrasive powders liqui...

Страница 12: ... a note of The model and serial numbers normally printed on the rear of the system Your warranty details A clear description of the problem Then contact your local dealer or SAMSUNG authorized service Troubleshooting Problem The system does not work There is no sound The Timer does not work The unit does not work even after following Troubleshooting steps above The compact disc player does not sta...

Страница 13: ...ayer YP Z5F Samsung MP3 Player YP T9 Samsung MP3 Player iAUDIO U2 Cowon MP3 Player iAUDIO G3 Cowon MP3 Player iAudio M3 Cowon HDD MP3 Player SI M500L Sharp 256MB MP3 Player H10 Iriver MP3 Player YP K5 Samsung MP3 Player YP K3 Samsung MP3 Player YV 150 Samsung MP3 Player YP U3 Samsung MP3 Player Product Company Type MP3 Player USB External HDD Contact SAMSUNG WORLD WIDE If you have any questions or...

Страница 14: ...THIS APPLIANCE IS MANUFACTURED BY AH68 02014B MM X8 GB ELS 9 28 9 28 07 11 22 Page 26 ...

Отзывы: