background image

2

1

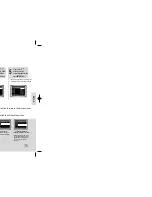
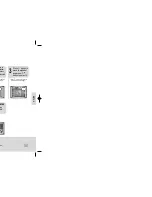
Load a DVD-OK
discs.

Press 

MENU

button.

3

• 

Each time the button is pressed,
the selection changes as follows: 

ON 

➝ 

OFF

.

4

Press Cursor    ,
button to move to
‘Shadow’.

Press 

ENTER

button to select
the desired item.

SETUP

59

60

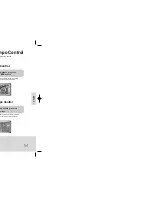
You can set the lyrics to be displayed in the black strips.

Setting the Shadow

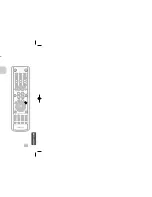
You can display the time, even when you are using another function, by pressing 

CLOCK

once. 

CLOCK

is displayed.

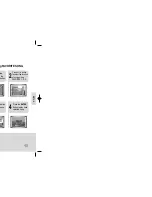
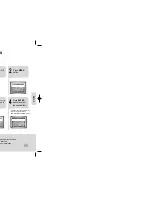
2

Press

TIMER/CLOCK

twice.

1

Switch the system
on by pressing

POWER

button.

"

TIMER

" appears in the display.

The current time is now set.

5

When the correct
time is displayed,
press 

ENTER

.

Increase the minutes : 

Decrease the minutes :

4

When the correct
hour is displayed,
press 

ENTER

.

The minutes flash.

Increase the hours : 

Decrease the hours :

3

Press 

ENTER

The hour flashes.

Note

For each step, you have a few seconds to set the required options. 
If you exceed this time, you must start again.

Setting the Clock

 33P~78P(KT10)- GB  2006.5.18  4:44 PM  Page 58

Содержание MM-KT10

Страница 1: ...T URN MENU VOLME DSP EQ TUNER MEMORY P SCAN TUNING OPEN CLOSE CANCEL DVD OK DVD USB TUNER RESERVE VIDEO SEL TUNER DVD OK AUX USB SLEEP BAND REPEAT SUBTITLE ZOOM SLOW MO ST EZ VIEW AUDIO TEMPO KEY CONTROL FEMALE MALE MELODY STEP REMAIN TIMER ON OFF NT PAL LOGO REP A B DEMO DIMMER TIMER CLOCK ...

Страница 2: ...or continuous use Switching off the DVD player to o disconnect the player completely from the power supply for a long period of time Do not expose the unit to direct sunlight or other heat sources This could lead to overheating and malfunction of the unit The battery used with this product contain chemicals that are harmful to the environment Do not dispose of batteries in the general household tr...

Страница 3: ...4 1 2 3 5 9 10 12 13 14 15 16 17 19 21 21 22 23 24 25 27 28 28 29 30 31 32 33 34 35 37 39 40 41 43 44 45 46 47 49 54 55 56 57 58 59 60 61 62 63 64 66 67 68 69 70 71 73 74 75 77 78 PREPARATION ...

Страница 4: ...enna Song list book 6 PREPARATION 6 7 8 3 4 AUX Input Scart Connector Connect to a TV with scart input connector COMPONENT VIDEO OUTPUT jacks Connect a TV with component video inputs to these jacks DVD KARAOKE DISC ...

Страница 5: ...in a straight line It can also be control sensor ontrol 5V AAA ying he correct and Replace the battery cover 3 or cracking cells y match the polarity to and to hat look similar may differ in voltage time PREPARATION ...

Страница 6: ...10 T N od Quality Quality CONNECTIONS d before moving or installing this unit TV ...

Страница 7: ... line n entire image is drawn at one time as opposed to the erlaced scanning process by which a video image is awn in a series of passes e progressive scanning method is desirable for dealing th moving objects Progressive Scan FULL FRAME Interlaced Scanning component video inputs Y Pr Pb that support h conventional component inputs i e non progressive this function may not work ure information alt...

Страница 8: ...reception is poor connect an outdoor single vinyl covered wire to the AM terminal Keep the AM loop antenna connected Snap the tabs on the loop into the slots of the base to assemble the AM loop antenna AM Loop Antenna supplied If AM reception is poor connect an outdoor AM antenna not supplied M AM Antennas ...

Страница 9: ...rts automatically on a list of MP3s on appear on the TV To resume playback press PLAY PAUSE button again o temporarily pause playback ress PLAY PAUSE during playback OPERATION hat is CSS Content Scrambling System e CSS is a copy protection device that prevents e content of a DVD from being copied into the DD of the PC as it is unlike other media ecutable directly from the PC And it is also a data ...

Страница 10: ... and audio formats are not s broken images or no sound n and editing in order to use this feature properly mi in the same file name as that of the DivX media 1 avi 1 smi aracters 2 byte characters such as Korean and AC3 DTS bps 128 384kbps 1 5Mbps 44 1 48khz 44 1khz ed in the DTS format can only support up to 6Mbps s 640 480 pixels 4 3 this product supports up to her than 800 will not be supported...

Страница 11: ...it to a computer are not supported s that support USB2 0 or USB1 1 when you connect a USB1 1 device wer cord to the USB HDD for proper operation eader and Multi slot USB card reader may not be supported reader you may experience problems SB device might not be recognized Version Pixel Sampling Frequency 640 480 bps 32k 44 1k 48kHz ps V8 32k 44 1k 48kHz pported does not support all USB devices evic...

Страница 12: ...eld down during playback changes as follows button n is pressed during playback changes as follows OPERATION VCD DivX Reverse slow playback does not work with VCDs and DivX Note 22 ack back DVD VCD CD MP3 yback ...

Страница 13: ...button to move to ANGLE display button 1 3 is pressed the angle changes as follows or buttons or numeric buttons e desired angle 2 3 3 3 1 3 1 3 nction works only with discs on which multiple angles corded OPERATION gles ...

Страница 14: ...ct Repeat Play play screen scs you can select Repeat Play in 2 Press Cursor button to move to REPEAT PLAYBACK display button 4 Press ENTER button r ect the eat ode Repeat Playback Mode Information Screen OPERATION FO button ...

Страница 15: ...or ns to e area o enlarge Each time the button is pressed the zoom level changes as follows 3 Press ENTER button en On and utton ra built 28 OPERATION DVD VCD played image large Function DVD n ...

Страница 16: ...R button 01 05 028 040 1 30 00 1 1 Moving to a Specific Time 3 Press Cursor buttons to move to Chapter display Moving to a Chapter 1 17 30 1 1 or move to y cific Time You can press on the remote control to move directly to the desired title chapter or track Depending on the disc you may not be able to move to the selected title or time Note OPERATION o a Scene Song ...

Страница 17: ...or ove to 3 Press ENTER button The title menu appears 32 utton to exit the setup screen OPERATION ch movie Menu ...

Страница 18: ...ove to Audio and then press ENTER button 4 You can set the audio delay time between 0 ms and 300 ms Set it for the best sync up with audio Press Cursor buttons to select the Delay Time of AV SYNC and then press the ENTER button to a digital TV e video 34 ...

Страница 19: ...plete if the language was set to English OSD will be displayed in English Selecting the ubtitle Language orded on the disc Selecting the Disc Menu Language recorded on the disc 5 ct OSD d then button Press Cursor button to select the desired language and then press ENTER button N button to return to the previous level button to exit the setup screen SETUP ...

Страница 20: ...recorded in different ur TV or monitor ture in the full screen V pect ure in the letter box nd bottom of the screen ure in the pan scan the screen only with the widescreen formats they will look different depending on ratio setting en Size option according to personal preference ...

Страница 21: ...ious level een rsor move to nd then TER button word a new nfirm new password plete 3 Press Cursor button to move to PASSWORD and then press ENTER button e password press button SETUP 40 level setting word ...

Страница 22: ...ton Press Cursor button to move to LOGO and then press ENTER button ENU o exit the reen ETURN button to return to the previous level ENU button to exit the setup screen 42 ion code to register this player on demand format To learn more ...

Страница 23: ...SETUP 44 2 Turn the MIC VOL to adjust the voicd volume of the micro phone wling while using the Karaoke he speakers Turning down the is also effective phone ...

Страница 24: ...SE button u can have the song you want to sing to be played first SETUP n is pressed the selection changes as follows PT TRACK REPT DISC REPT RAND EPEAT button OK Repeat Play nction is set 46 he song you want to sing to be played first ompaniment Music ...

Страница 25: ...SETUP 2 4 top s the button Press button to select the location of song among FAVORITE 1 2 3 button song Press the ENTER button to play back selected song g FAVORITE SONG 48 ...

Страница 26: ...u want to tage on to tailed press o select ENTER ay ed on SETUP 3 Press button if you want to move to the previous stage Press button to move to alphabet and press button to select it 50 ...

Страница 27: ...utton to select the genre you want n to move on the n press o select ant Press the ENTER button to play back selected song hing by Genre button u want to stage button to n the bottom You can select the genre among ROCK CHANSON FOLK BARD ROMANCES Press button if you want to move to the previous stage 52 ...

Страница 28: ...creased b button is pressed the key is playback press the TROL buttons Control ton is pressed the tempo gets faster button is pressed the tempo gets e playback press the buttons po Control SETUP 54 g the song list book mpo Control ...

Страница 29: ...ress MENU button Each time the button is pressed the selection changes as follows LOW MIDDLE HIGH OFF 4 or ove to Press ENTER button to select the desired item a song with supporting e released g on information 56 s ...

Страница 30: ...SETUP 2 D OK Press MENU button Each time the button is pressed the selection changes as follows LOW MIDDLE HIGH OFF 4 or ove to core Press ENTER button to select the desired item 58 in advance ge Score ...

Страница 31: ...SETUP 60 er function by pressing CLOCK once yed CLOCK s in the display is now set e correct splayed NTER Increase the hours Decrease the hours 3 Press ENTER The hour flashes ons k ...

Страница 32: ...cating that the timer has been set The system will switch on and off automatically at the required times 9 TER to e timer Press POWER to set the system to standby mode 62 SETUP yer is in standby FF once OFF again the TIMER indication on the display ...

Страница 33: ... on page 63 to automatically or manually tune in to a station 2Press TUNING to select 89 10 You can select between 1 and 15 Press to select preset number kHz MHz kHz MHz PROGRAM RADIO OPERATION 64 ns ency Modulation um Wave ...

Страница 34: ...beat EQ button on is only available in STEREO mode orks with CDs MP3 CDs 2 channel DVD Audio DivX and iscs a DVD disc encoded with two or more channels mode will be selected automatically and DSP EQ function o simulate different acoustic environments nd for the genre of music you are playing EQ Function 66 ...

Страница 35: ...MISCELLANEOUS 68 all ...

Страница 36: ...or dirt on the disc clean it gent diluted in water and wipe with a gently from the inside to the outside of the disc e contaminated with dirt d discs m if warm air comes into contact with cold parts n condensation forms inside the player the player ctly If this occurs remove the disc and let the hours with the power on d picture quality or cause skipping ndling them g and Storing Discs ...

Страница 37: ...ds INTIALIZE y and all settings will return to the default values ton tion will erase all stored settings necessary nd hold the STOP button on the main unit onds tion will erase all stored settings necessary cted properly signal is weak install an external FM ith good reception Check Remedy VDs in 16 9 WIDE mode 4 3 LETTER BOX CAN mode but 4 3 DVDs can be seen in 4 3 he DVD disc jacket and then se...

Страница 38: ...Nepali 1525 Tegulu Dutch 1527 Tajik Norwegian 1528 Thai Occitan 1529 Tigrinya Afan Oromo 1531 Turkmen Oriya 1532 Tagalog Punjabi 1534 Setswana Polish 1535 Tonga Pashto Pushto 1538 Turkish Portuguese 1539 Tsonga Quechua 1540 Tatar Rhaeto Romance 1543 Twi Kirundi 1557 Ukrainian Romanian 1564 Urdu Russian 1572 Uzbek Kinyarwanda 1581 Vietnamese Sanskrit 1587 Volapuk Sindhi 1613 Wolof Sangro 1632 Xhosa...

Страница 39: ...7 IN 1 CARD READER UC 601R B2 0 Card Reader Billionton Taiwan USB 2 0 Card Reader for SD MMC RS MMC 3 in 1 Product Company Type Multi Card Reader TIE serotech POCKET HARD DISK DRIVE OMOBAY UX 2 DVICO USB2 0 Product Company Type USB External HDD ...

Страница 40: ...MISCELLANEOUS 78 ...

Страница 41: ... fi FRANCE 08 25 08 65 65 0 15 Min www samsung com fr GERMANY 01805 121213 0 12 Min www samsung de HUNGARY 06 40 985 985 www samsung com hu ITALIA 199 153 153 www samsung com it LUXEMBURG 02 261 03 710 www samsung lu NETHERLANDS 0900 20 200 88 0 10 Min www samsung com nl NORWAY 231 627 22 www samsung com no POLAND 0 801 801 881 www samsung com pl PORTUGAL 80 8 200 128 www samsung com pt SLOVAKIA 0...

Отзывы: