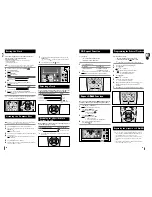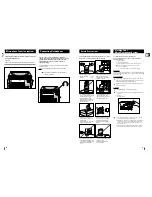
You can record a radio program of your choice.
You do not need to adjust the volume, as it has no effect on
the recording.
Switch the system on by pressing
On/Standby ( )
.
Insert a blank cassette in Deck.
Select the TUNER function by pressing
TUNER/Band
.
Select the radio station that you wish to record by pressing
or button .
Press
REC/Pause.
Result:
REC
is displayed and recording starts.
To stop recording, press
Stop
(
) button.
GB
15
14
B
Listening to a Cassette
TAPE
Band
CD
Tape Counter
EQ
Down
Mute
Counter
Reset
Repeat
A B
Tuning Mode
REC/Pause
CD Sync.
Up
S.Bass
Power
Sound
CD
AUX
TUNER
TAPE
Band
When playing a cassette, a counter is displayed to enable you to take
note of the counter value at the start of each track and thus start
playback at the beginning of the track to which you wish to listen.
The counter is only displayed when a cassette is being played.
Before starting to record a cassette for which you wish to take note of the
counter values at the beginning of each track, reset the counter by pressing
Counter Reset
.
Switch the system on by pressing
On/Standby ( )
.
Select the TAPE function by pressing
TAPE
on the front panel.
Open the cassette deck by pushing on the corner of the cover marked
Push Eject
until you hear a click and then releasing it.
Insert the pre-recorded cassette with the open edge of the tape facing
downwards.
Close the deck by pushing on it until it clicks into place.
Press the
TAPE
button.
Result: The cassette starts playing.
Press any of the following buttons during playback, as required.
To...
Press...
Listen to the same track again
once
Listen to the next track
once
Listen to the previous track
twice
Listen to the track of your choice
or
the appropriate
number of times
Listen to the other side of the cassette
/
once (option)
If there are very quiet passages on a track, the automatic search
function may stop before the end of the track. Also, a very short
silence between two tracks may not be detected.
When the cassette is stopped, select one of the following functions as
required.
To...
Press...
Rewind the cassette
Fast-forward the cassette
The cassette player stops automatically when the beginning or
end of the cassette is reached.
To stop the playback or search, press
Stop
(
) button.
1
2
3
4
5
6
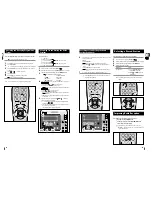
The direct recording mode enables you to start recording
with any track on the compact disc.
You do not need to adjust the volume, as it has no effect on the recording.
Switch your system on by pressing
On/Standby ( )
.
Insert a blank cassette in Deck.
Load a compact disc.
Press the
CD
(
) button.
Use the CD selection (
,
) buttons to select the desired song.
Press the
REC/Pause
button.
Result: Recording will begin.
To stop recording, press
Stop
(
) button.
EQ
Down
Mute
Counter
Reset
Repeat
A
B
Tuning Mode
REC/Pause
CD Sync.
Up
S.Bass
Volume
Power
Sound
CD
AUX
TUNER
TAPE
Band
Recording a Radio Program
EQ
Down
Mute
Counter
Reset
Repeat
A B
Tuning Mode
REC/Pause
CD Sync.
Up
S.Bass
Volume
Power
Sound
CD
AUX
TUNER
TAPE
Band
1
3
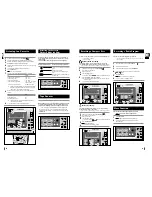
You can record a compact disc on a cassette in two different ways:
Synchronised recording
Direct recording
This feature enables you to synchronize the start of the
recording with the start of the disc or track of your choice.
You do not need to adjust the volume, as it has no effect on the recording.
Switch the system on by pressing
On/Standby ( )
.
Insert a blank cassette in Deck.
Load a compact disc.
Press the
CD
(
) button.
Use the CD selection (
,
) buttons to select the desired song.
Press the
CD Sync.
button on the front panel.
When stopped, press the button to start the recording from the
first piece of music.
To stop recording, press
Stop
(
) button.
Synchronised recording
1
2
3
4
5
6
1
2
3
4
5
6
Direct recording
Recording a Compact Disc
1
5
EQ
Down
Mute
Counter
Reset
Repeat
A B
Tuning Mode
REC/Pause
CD Sync.
Up
S.Bass
Volume
Power
Sound
CD
AUX
TUNER
TAPE
Band
1
4
4
EQ
Down
Mute
Counter
Reset
Repeat
A B
Tuning Mode
REC/Pause
CD Sync.
Up
S.Bass
Power
Sound
CD
AUX
TUNER
TAPE
Band
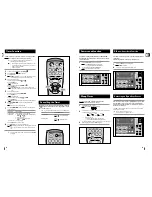
Mute Function
You can turn the sound off temporarily on your system.
Example: You wish to answer a telephone call.
Press the
Mute
button.
Result:
MUTE
is displayed and the sound is switched off.
To switch the sound back on at the same volume as before,
press Mute again.
1
2
3
4
5
6
7
8
9
EQ
Down
Mute
Counter
Reset
Repeat
A B
Tuning Mode
REC/Pause
CD Sync.
Up
S.Bass
Volume
Power
Sound
Push Eject
CD
AUX
TUNER
TAPE
Band
1
2,6
7,8
9
7,8
7,8
7,8
9
3,5
Your micro-component system has three cassette playback
modes which enable you to listen to both sides of a cassette
automatically.
Press REV.Mode until the appropriate symbol is displayed.
When the display indicates...
The micro-component system plays back...
One side of the selected cassette and then
stops.
One side of the cassette.
The other side of the cassette and then
stops.
Both sides of the cassette indefinitely until
you press stop.
Selecting the Cassette
Playback Mode
(OPTION)
Down
Mute
Counter
Reset
REV. Mode
Repeat
A B
Tuning Mode
REC/Pause
CD Sync.
Up
Power
Sound
Band
6
4
5
6
4
6
1
2
4
5
4

