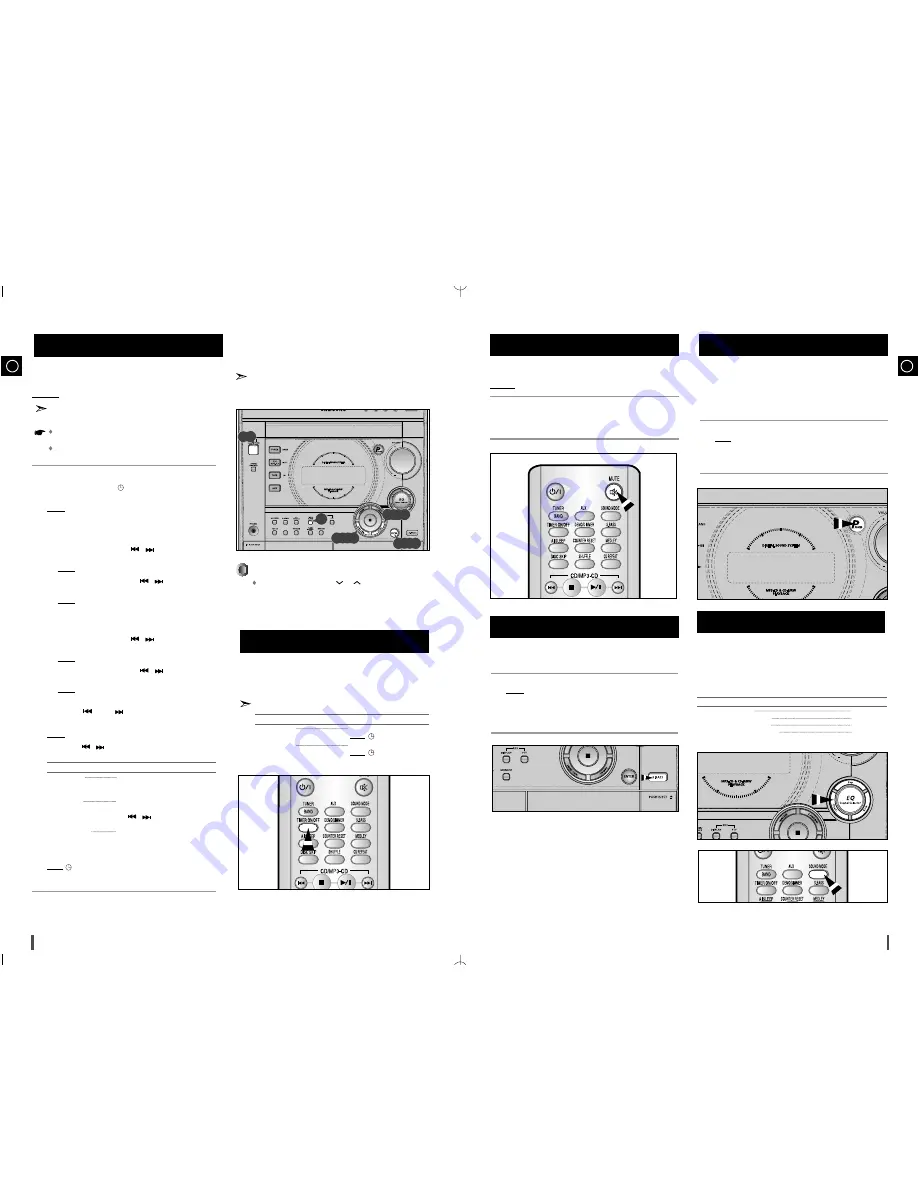
The timer enables you to switch the system on or off at spe-
cific times.
Example: You wish to wake up to music every morning.
If you no longer want the system to be switched on or off auto-
matically, you must cancel the timer.
Before setting the timer, check that the current time is cor-
rect.
For each step, you have a few seconds to set the required
options. If you exceed this time, you must start again.
Switch the system on by pressing STANDBY/ON.
Press TIMER/CLOCK until
TIMER
is displayed.
Press ENTER.
Result:
ON TIME
is displayed (instead of the equalizer symbols)
for a few seconds, followed by any switch-on time already
set; you can set the timer switch-on time.
Set the timer switch-on time.
a
Set the hour by pressing the
/ buttons.
b Press ENTER.
Result: The minutes flash.
c Set the minutes by pressing the
/ buttons.
d
Press ENTER.
Result:
OFF TIME
is displayed (instead of the equalizer sym-
bols) for a few seconds, followed by any switch-off time
already set; you can now set the timer switch-off time.
Set the timer switch-off time.
a
Set the hour by pressing the
/ buttons.
b
Press ENTER.
Result: The minutes flash.
c
Set the minutes by pressing the
/ buttons.
d
Press ENTER.
Result:
VOL XX
is displayed, where
XX
corresponds to the vol-
ume already set.
Press DOWN
and UP
to adjust the volume level and
press
ENTER.
Result: The source to be selected is displayed.
pressing the
/ buttons
to
select the source to be played
when the system switches on .
If you select...
You must also...
TAPE (cassette)
Insert a recorded cassette in one of the
decks before setting the system to stand-
by.
TUNER (radio)
a Press
ENTER
.
b Select a preset station by
pressing the
/ buttons
.
CD (compact disc)
Load one or more compact discs.
Press ENTER to confirm the timer.
Press STANDBY/ON to set the system to standby mode.
Result:
appears on the front panel display next to the time, indi-
cating the timer has been set. The timer automatically turns
the system on or off at a designated time.
If the timer switch on and off times are identical, the word
ERROR
is displayed.
Timer Function
COUNT
RESET
7
8
9
5
6
1
2
3
4
1,9
2
3,4,5,6,7,8
Your mini-compact system is equipped with the function
of Power Sound .
The function of Power Sound amplifies bass and improves
high key or bass twice as much for you to appreciate
powerful real sound.
Press the P(POWER SOUND) button on the front panel.
Result: Press P(POWER SOUND) button on the front panel,
“P
,
SOUND” is displayed.
To cancel this function, press P(POWER SOUND) button again .
1
2
GB
21
You can turn the sound off temporarily on your system.
Example:
You wish to answer a telephone call.
Press MUTE.
To switch the sound back on , press MUTE again or the VOLUME
buttons.
Mute Function
GB
20
After having set the timer, it will start automatically as shown
by the TIMER indication on the display. If you no longer wish
to use the timer, you must cancel it.
You can stop the timer at any time (system on or in standby mode).
To...
Press TIMER ON/OFF...
Cancel the timer
Once.
Result: is no longer displayed.
Restart the timer
Twice.
Result: is displayed again.
Cancelling the Timer
2
1
Power Sound Function
4,5,6,7
4,5,6,7
Selecting an Equalizer Preset
Your mini-compact system is equipped with a preset equalizer
that allows you to choose the most appropriate balance
between treble and bass frequencies, according to the type of
music you are listening to.
Press EQ Preset (POP/ROCK/CLASSIC) on the front panel or SOUND
MODE on the remote control until the required option is selected.
To obtain a...
Select...
Normal balance (linear)
PASS
Balance suitable for pop music
POP
Balance suitable for rock music
ROCK
Balance suitable for classic music
CLASSIC
Your mini-compact system has a bass amplification function
called SBS (Super Bass Sound). This function makes the
sound more powerful and real.
Press the S.BASS button.
Result:
S. BASS
is displayed and “SBS ON” is displayed for a few
seconds.
To cancel this function, press S.BASS again, “OFF” is displayed for
a few seconds.
1
2
S.BASS Function
To set the timer function
You may use TUNING ALBUM
or
on the remote control
to adjust in step 4, 5, 6, 7.


