4-46
4. Troubleshooting
4-6. Servicing Information
4-6-1. USB Download Method (Main SW & e-Manual)
Samsung may offer upgrades for TV’s firmware in the future.
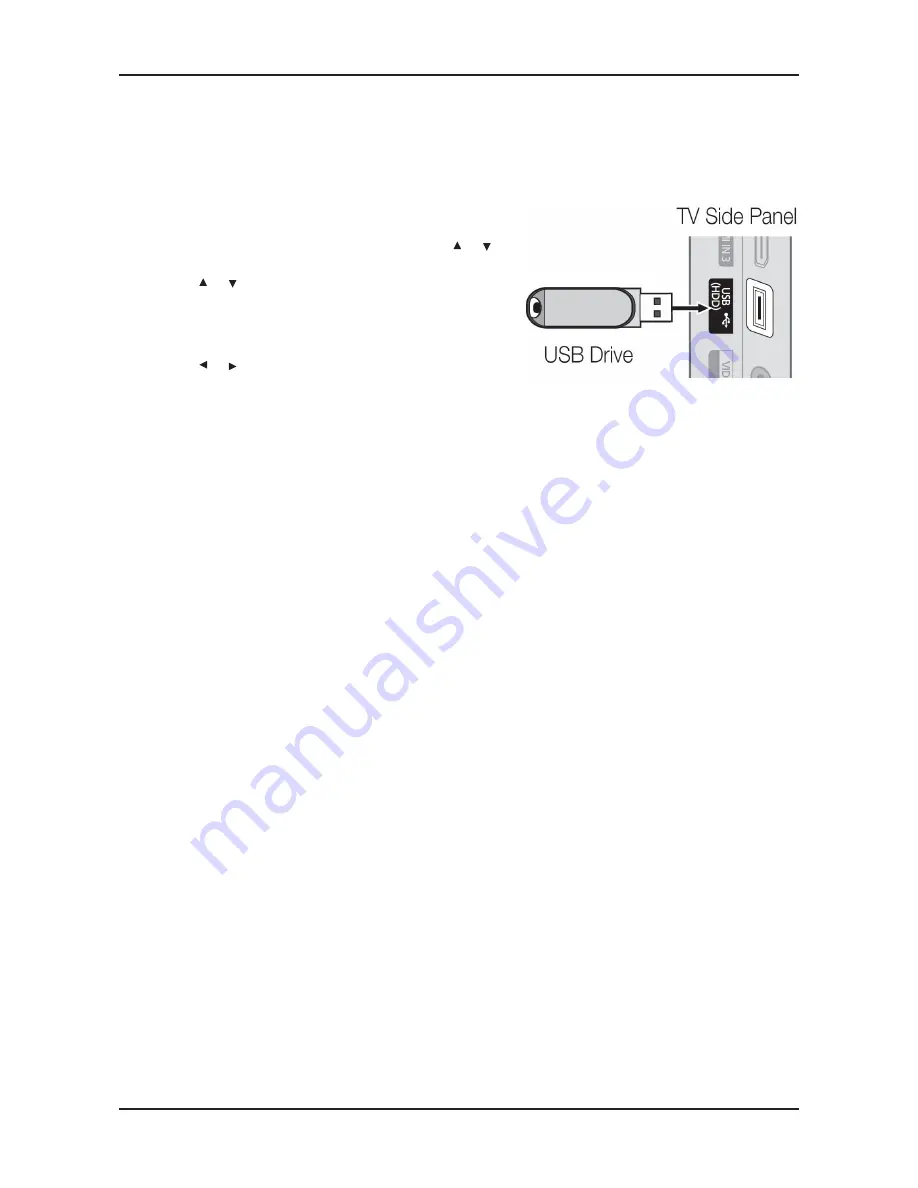
Upgrades will be possible by connecting a USB drive to the USB port located on your TV.
Insert a USB drive containing the firmware (
1.
T-MSU4DEUC
)
upgrade into the USB port on the rear of the TV.
Press the
2.
MENU
button to display the menu. Press the
or
button to select "Support", then press the
ENTER
button.
Press the
3.
or
button to select "Software Upgrade", then
press the
ENTER
button to select "By USB". The message
"Scanning for USB. It may take up to 1 minute." is displayed.
The message "Upgrade version XXXX to version XXXX?
4.
The system will be reset after upgrade." is displayed.
Press the or
to select the "OK", then press the
ENTER
button.
Please be careful to not disconnect the power or remove the
USB drive while upgrades are being applied. The TV will turn off
and turn on automatically after completing the firmware upgrade.
Please check the firmware version after the upgrades are
complete. When software is upgraded, video and audio settings
you have made will return to their default (factory) settings.
We recommend you write down your settings so that you can
easily reset them after the upgrade.
Содержание LE32D400E1W
Страница 20: ...2 14 2 Product specifications 2 4 2 e Manual How to view the e Manual ...
Страница 21: ...2 15 2 Product specifications ...
Страница 31: ...4 3 4 Troubleshooting Main Board_Bottom ...
Страница 33: ...4 5 4 Troubleshooting Main Board_Top ...
Страница 34: ...4 6 4 Troubleshooting WAVEFORMS 3 HDMI input RX_Data RX_Clk 2 LVDS output ...
Страница 36: ...4 8 4 Troubleshooting Main Board_Top ...
Страница 37: ...4 9 4 Troubleshooting WAVEFORMS 2 LVDS output ...
Страница 39: ...4 11 4 Troubleshooting Main Board_Top ...
Страница 40: ...4 12 4 Troubleshooting WAVEFORMS 2 LVDS output ...
Страница 42: ...4 14 4 Troubleshooting Main Board_Top ...
Страница 43: ...4 15 4 Troubleshooting WAVEFORMS 4 CVBS OUT Grey Bar 2 LVDS output ...
Страница 45: ...4 17 4 Troubleshooting Main Board_Bottom ...
Страница 46: ...4 18 4 Troubleshooting WAVEFORMS 7 Speaker out ...
Страница 48: ...4 20 4 Troubleshooting Main Board_Bottom ...
Страница 50: ...4 22 4 Troubleshooting Main Board_Top ...
Страница 51: ...4 23 4 Troubleshooting WAVEFORMS 3 HDMI input RX_Data RX_Clk 2 LVDS output ...
Страница 53: ...4 25 4 Troubleshooting Main Board_Top ...
Страница 54: ...4 26 4 Troubleshooting WAVEFORMS 2 LVDS output ...
Страница 56: ...4 28 4 Troubleshooting Main Board_Top ...
Страница 57: ...4 29 4 Troubleshooting WAVEFORMS 2 LVDS output ...
Страница 59: ...4 31 4 Troubleshooting Main Board_Top ...
Страница 60: ...4 32 4 Troubleshooting WAVEFORMS 4 CVBS OUT Grey Bar 2 LVDS output ...
Страница 62: ...4 34 4 Troubleshooting Main Board_Bottom ...
Страница 63: ...4 35 4 Troubleshooting WAVEFORMS 7 Speaker out ...
Страница 78: ...4 50 4 Troubleshooting TOP BOTTOM INNER 1 INNER 2 ...
Страница 79: ...4 51 4 Troubleshooting Non Filp UE22D5003BW UE19D4003BW PCB ...
Страница 80: ...4 52 4 Troubleshooting TOP BOTTOM INNER 1 INNER 2 ...
Страница 83: ...4 55 4 Troubleshooting UD5003 40 Model Inch CODE P N UD5003 40 BN44 00473A PSLF121A03S ...
Страница 85: ...4 57 4 Troubleshooting SMPS_LD503 32 Model Inch CODE P N LD503 32 BN44 00469B IV40F1_BHS ...
Страница 87: ...5 2 5 Wiring Diagram 19 22 Main Board SMPS TCON Function IR SPEAKER SPEAKER CN1201 CN302 CN1601_HD CN201 ...


