Samsung i8 Скачать руководство пользователя страница 58

057

Starting play mode

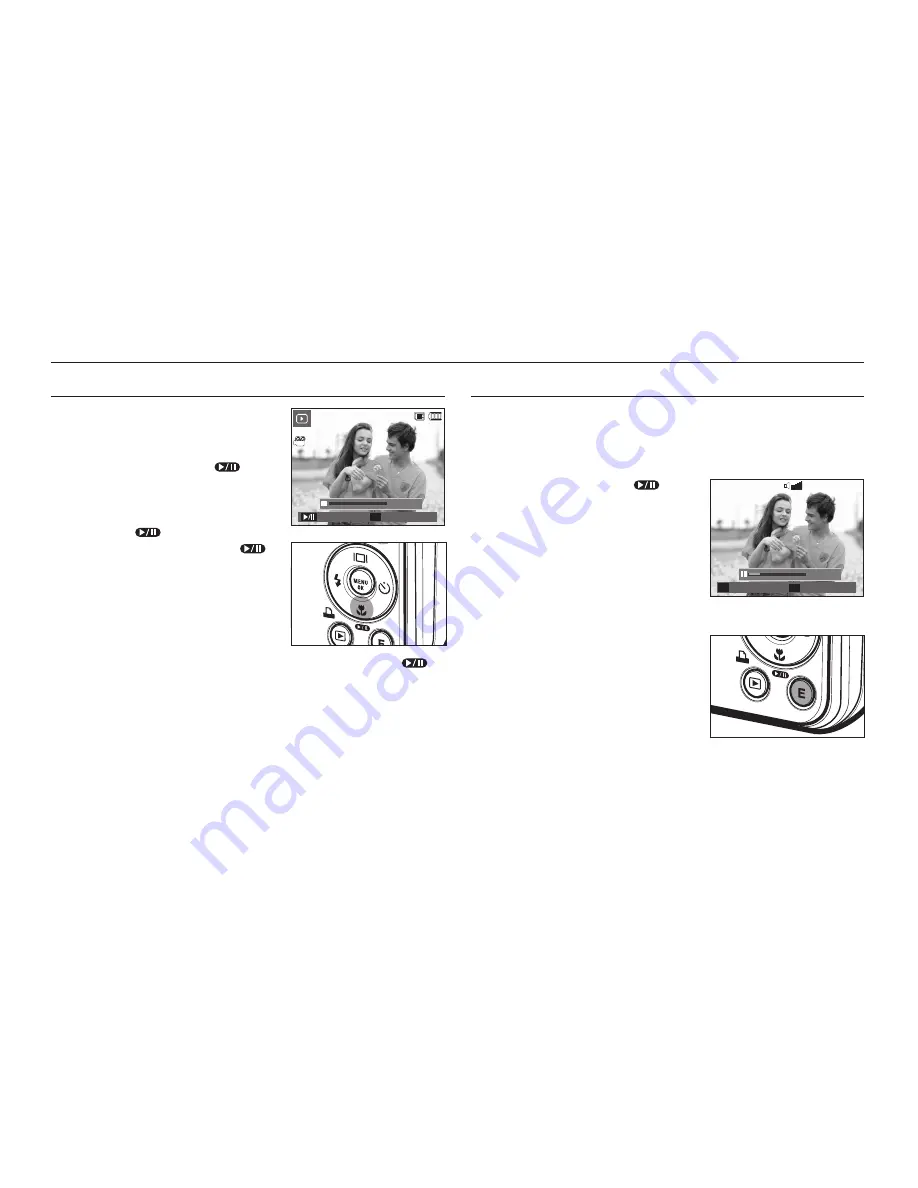
Playing back a movie clip

1. 

Select the recorded movie clip that 
you want to play back by using the 

Left

/

Right

 button.

2. 

Press the 

Play & Pause

 (

) button 

to playback a movie clip 

fi

 le.

– To pause a movie clip 

fi

 le while 

playing it back, press the 

Play & 

Pause

 (

) button again.

– Pressing the 

Play & Pause

 (

button again will cause the movie clip 

fi

 le to restart.

– To rewind the movie clip while it is 

playing, press the 

Left

 button. To 

fast forward the movie clip, press the 

Right

 button.

– To stop playback of the movie clip, press the 

Play & Pause

 (

button, and then press the 

Left

 or 

Right

 button.

Movie clip capture function

You can capture still images from the movie clip. 


How to capture the movie clip

1. 

Press the 

Play & Pause

 (

) button 

while playing the movie clip. Then press 
the 

E

 button.

2. 

The paused movie clip is saved in a 
new 

fi

 le name.


The captured movie clip 

fi

 le is the same 

size as the original movie clip (800x592, 
640x480, 320x240).


When you press the 

button at the 

beginning of the movie clip, the 

fi

 rst 

frame of the movie clip will be saved as 
a still image.

<Press the 

E

 button>

<Paused>

Capture

E

00:00:24

Trim

T

Play

Capture

E

00:00:02

100-0016

100-0016

Содержание i8

Страница 1: ......

Страница 2: ...nt to avoid disappointment Samsung camera takes no responsibility for any loss or damages that may result from camera malfunction Keep this manual in a safe place The contents and illustrations of this manual are subject to change without prior notice for upgrading the camera functions If you use a card reader to copy the images on the memory card to your PC the images could be damaged When transf...

Страница 3: ... shock DANGER WARNING WARNING indicates a potentially hazardous situation which if not avoided could result in death or serious injury Do not use the flash in close proximity to people or animals Positioning the flash too close to your subject s eyes may cause eyesight damage For safety reasons keep this product and accessories out of reach of children or animals to prevent accidents e g Swallowin...

Страница 4: ...e lens or the flash when you capture an image When using this camera in low temperatures the following cases may be found These are not camera malfunctions and usually recover at normal temperature It takes more time to turn on the LCD monitor and the colour may differ from the subject When changing the composition there may be an after image on the LCD monitor Credit cards may be demagnetized if ...

Страница 5: ...hoto Style Selector 044 E Effect button Image editing 044 Colour 045 Saturation 045 Contrast 045 Sharpness 046 E Effect button Cartoon 048 E Effect button Pre set focus frame 049 E Effect button Composite shooting 051 E Effect button Photo Frame 052 E Effect button Colour Mask 053 Using the LCD monitor to adjust the camera settings 053 Focus Area 054 ACB 054 Voice Memo 055 Voice recording 056 Reco...

Страница 6: ...electing Images 077 Configure slide show effects 078 Setting play interval 078 Setting Background Music 079 Playback 079 Voice memo 079 Protecting images 079 Deleting images 080 DPOF 082 Copy To Card 083 Sound menu 084 Sound 084 Volume 084 Start up sound 084 Shutter sound 084 Beep Sound 084 AF sound 084 Self Portrait 085 Setup menu 086 SETUP1 086 Language 086 Setting up the Date Time Date type 087...

Страница 7: ...l 103 Frame search 104 Display setting 104 Information of DRM file 104 Setting up the recording function in the MP3 mode 104 Auto Scroll 105 MP3 BGM Setting 105 Language setting 105 World tour guide MULTIMEDIA 105 Download the tour guide information 106 World Tour Guide mode 108 Important notes 110 Warning indicator 111 Before contacting a service centre 113 Specifications 116 Software notes 117 S...

Страница 8: ... To buy the optional equipment contact your nearest Samsung dealer or Samsung service centre Package Contents Camera User manual Product warranty Camera strap AV cable Rechargeable battery SLB 0937 AC adapter SAC 47 USB cable SUC C3 Software CD see p 117 118 Earphones 20 Pin Gender Sold Separately SD SDHC memory card MMC see p 17 Camera case ...

Страница 9: ...008 Identification of features Front Top Shutter button Flash AF sensor Self timer lamp Lens POWER button Microphone Speaker FD Face Detection button MP3 PMP hold button ...

Страница 10: ...k Camera status lamp LCD monitor Fn Delete button M Mode button E Effect button 5 function button Zoom T button Digital zoom Zoom W button Thumbnail Play mode Print button Camera strap USB AV DC Earphones connection terminal Open Close ...

Страница 11: ...m 5 Function button Battery holder Battery chamber slot Battery chamber cover Memory card slot Function Description Information Up button Macro Play Pause Down button Self timer Right button Flash Left button MENU OK button Tripod socket ...

Страница 12: ...e saving the image data and turns off when the camera is ready to take another picture When the USB cable is inserted to a PC The lamp lights up LCD monitor turns off after initializing the device Transmitting Data with a PC The lamp blinks LCD monitor turns off When the USB cable is inserted to a printer The lamp blinks and turns off when the printer is ready to print a picture When the printer i...

Страница 13: ...e fully charged battery 640x480 image size 30fps frame rate Battery life Number of images Conditions Multimedia MP3 Approx 300 MIN Using the fully charged battery LCD Off PMP Approx 220 MIN Using the fully charged battery These figures are measured under Samsung s standard conditions and shooting conditions and may vary depending on the user s methods Important information about battery usage When...

Страница 14: ...es to your PC p 123 or supply the power to your camera through the USB cable Important information about USB cable usage Use a USB cable SUC C3 with the correct specification If the camera is connected to the PC through a USB hub connect the camera directly to the PC If the camera and other devices are connected to the PC at the same time remove other device If the USB cable is connected to a port...

Страница 15: ...e charging the battery Charging LED of the AC Adapter Charging LED Being Charged Red LED is on Charging is complete Green LED is on Charging error Red LED is off or blinking Being discharged Using the AC adapter Orange coloured LED is on If you insert the fully discharged battery to charge it do not turn on the camera at the same time This is because of the low battery capacity Charge the battery ...

Страница 16: ...tery status The battery is fully charged Low battery capacity Prepare to recharge or use spare battery Low battery capacity Prepare to recharge or use spare battery Battery empty Recharge or use spare battery Inserting the battery Inserting the memory card Insert the memory card as shown Turn off the camera s power before inserting the memory card Have the front of the memory card facing toward th...

Страница 17: ...this happen clean the memory card with a soft cloth Please keep the memory card in its case when not in use During and after periods of extended use you may notice that the memory card is warm This is perfectly normal Do not use a memory card that is used in another digital camera To use the memory card in this camera format the memory card using this camera Do not use a memory card formatted by a...

Страница 18: ... SD memory card before taking a picture When using a 256MB MMC memory the specified shooting capacity will be as follows These figures are approximate as image capacities can be affected by variables such as subject matter and memory card type Recorded image size Super Fine Fine Normal 30FPS 20FPS 15FPS Still image 53 94 135 60 107 171 71 133 202 86 161 220 134 226 306 434 520 600 Movie clip About...

Страница 19: ...Chinese Japanese Russian Portuguese Dutch Danish Swedish Finnish Thai Bahasa Malay Indonesian Arabic Czech Polish Hungarian and Turkish Setting up the date time and date type 1 Select the Date Time menu by pressing the Up Down button and press the Right button 2 Select the desired sub menu by pressing the Up Down Left Right button and press the OK button Right button Selects world time year month ...

Страница 20: ...age 5 Image Size p 38 6 Image Quality Frame Rate p 38 7 Metering p 39 8 Drive mode p 39 9 ISO p 40 10 White Balance p 40 11 Exposure compensation LongTime Shutter LT p 41 42 12 Date Time 2008 01 01 01 00 PM p 86 13 Saturation p 45 14 Sharpness Mic off p 45 23 15 Contrast p 45 16 Macro p 31 32 17 Self timer p 35 36 18 Flash p 32 34 19 Face Detection Self Portrait Photo Style Selector Colour p 27 28...

Страница 21: ...ompose the image 7 Press the Shutter button to capture an image If the auto focus frame turns to red when you press the Shutter button down half way it means that the camera cannot focus on the subject Should this be the case the camera is less likely to capture an image clearly Avoid obstructing the lens or the flash when you capture an image 00016 00016 01 00 PM 01 00 PM 2008 01 01 2008 01 01 00...

Страница 22: ...zoom will not operate in the DIS mode If the lighting conditions are brighter than fluorescent lighting conditions the DIS will not activate If the lighting conditions are darker than in fluorescent lighting conditions camera shake warning indicator will be displayed For best results only take pictures in situations where the camera shake warning indicator is not displayed If the subject is moving...

Страница 23: ... Next Guide List Guide List Features to use when the image is ou 2 Features to counter camera shake 3 Features to use in low light conditions 4 Features to use when adjusting bright 5 Features to use when adjusting colours Back Next 1 Features to use when the image is ou 1 Features to use when the image is ou Half press shutter button to focus b To focus on a subject 80cm or more a c To focus on a...

Страница 24: ...y pressing the Left Right button 6 Press the Down button to select the Voice Mute menu and press the Right button 7 Select the On menu by pressing the Up Down button 8 Press the OK button You can record a movie without sound Pausingwhilerecordingamovieclip SuccessiveRecording This camera allows you to temporarily stop during unwanted scenes while recording a movie clip Using this function you can ...

Страница 25: ...tions Portrait To take a picture of a person Children To take a picture of fast moving objects for example children Landscape To take pictures of distant scenery Text Use this mode to shoot a document Close up Close up shooting for small objects such as plants and insects Sunset For taking pictures of sunsets Dawn Daybreak scenes Backlight Portrait without shadows caused by backlight Firework Fire...

Страница 26: ...g so may make the picture dark To take a picture against the light please use the Backlight in the scene shooting mode see page 24 fill in flash see page 33 spot metering see page 39 or exposure compensation see page 41 Avoid obstructing the lens or the flash when you capture an image Compose the image by using the LCD monitor Under certain conditions the auto focus system may not perform as expec...

Страница 27: ...to focus frame lights up it means the camera is focused on the subject Be careful not to press the Shutter button all the way down to avoid taking an unwanted picture 3 With the Shutter button still pressed down only halfway move the camera to recompose your picture as desired and then press the Shutter button completely to take the picture If you release your finger from the Shutter button the fo...

Страница 28: ... finished storing the image data This mode detects the face position of the subject automatically and then sets the focus and exposure Select this mode for quick and easy face picture In MP3 and PMP mode this button will lock the camera buttons Selectable modes Auto Program DIS FUN Photo Help Guide Scene modes Portrait Children Beach Snow Self shot Café 1 Press the FD Face Detection button in the ...

Страница 29: ...on range is 3m Wide The nearer the subject the faster the camera can recognize the subject FD Face Detection button Self Portrait When taking pictures of yourself the area of your face is automatically detected so that you can take self pictures more easily and quickly Selectable modes Auto Program DIS FUN Photo Help Guide Scene modes Portrait Children Beach Snow Self shot Café 1 When pressing the...

Страница 30: ...subject will appear nearer Digital zoom TELE When the maximum 3X optical zoom is selected pressing the Zoom T button activates the digital zoom software Releasing Zoom T button stops the digital zooming at the required setting Once the maximum digital zoom 5X is achieved pressing the Zoom T button will have no effect Optical zoom Digital zoom X 5 0 00016 00016 01 00 PM 01 00 PM 2008 01 01 2008 01 ...

Страница 31: ... a decrease in image quality when using the digital zoom To view a clearer digital zoom image press the Shutter button halfway at the maximum optical zoom position and press the Zoom T button again The digital zoom can t be activated in some Scene modes Nightscene Children Text Close up Fireworks Food Face Detection mode DIS mode the Movie Clip mode and FUN recording mode Take care not to press th...

Страница 32: ...picture within 30cm Wide zoom or 50cm Tele zoom in the Macro mode select the FLASH OFF mode When you take a picture within the 5cm Super macro range the autofocus on the camera will take longer to set the correct focus distance Macro Down button While the menu is showing press the Down button to move from the main menu to a sub menu or to move down the sub menu When the menu is not showing you can...

Страница 33: ...he Flash button Selecting the flash mode 1 Press the Mode button to select a Recording mode with the exception of the Movie clip mode or the DIS mode p 20 2 Press the Flash button until the desired flash mode indicator is displayed on the LCD monitor 3 A flash mode indicator will be displayed on the LCD monitor Use the correct flash to suit the environment Flash range Unit m ISO Normal Macro Auto ...

Страница 34: ...the the flash light reflecting off atmospheric dust Flash mode indicator Icon Flash mode Description Auto flash If the subject or background is dark the camera flash will operate automatically Auto Red eye eduction If a subject or background is dark the camera flash will work automatically and will reduce the red eye effect by using the red eye reduction function Fill in flash The flash fires rega...

Страница 35: ...utton This function is used when the photographer would also like to be in the image If you operate the Self timer button during the self timer operation the self timer function is cancelled Use a tripod to prevent camera shake In Movie Clip mode only the 10SEC self timer will work When you select 2SEC self timer with flash the delay 2 seconds can be extended according to the flash charging status...

Страница 36: ...detects the subject s movement 6 seconds after pressing the Shutter button and the picture is taken when the movement is stopped Motion Timer Motion Icon Self timer lamp Pressing the Shutter button after setting the Motion Timer Blink 1 second interval Detecting the subject s movement Blink 0 25 second interval No movement is detected Turn on and the image is taken after 2 seconds The Motion Timer...

Страница 37: ... data MENU OK button Self timer Right button In the following cases the Motion Timer may not operate The focus distance is over 3m The exposure is too bright or dark In backlight conditions The movement is insignificant The movement is detected out of the center part 50 of the sensor where the movement is recognized If the camera doesn t sense any movement for 30 seconds or the camera doesn t sens...

Страница 38: ... 1 p 42 1 This menu is only available in the Night scene mode How to use the Fn menu 1 Press the Fn button in an available mode 2 Select a desired menu by pressing the Up Down button And then a sub menu will be displayed on the left side of the LCD monitor 3 Select a desired menu by pressing the Left Right button and then press the OK button SIZE QUALITY SIZE 7M P 3264x2176 Up Down button Left Rig...

Страница 39: ...e captured images The higher the compression ratio the lower the picture quality Mode Still image Mode Movie clip mode Icon Sub menu Super Fine Fine Normal 30FPS 20FPS 15FPS File Format jpeg jpeg jpeg avi avi avi This file format complies with the DCF Design rule for Camera File system JPEG Joint Photographic Experts Group JPEG is the image compression standard developed by the Joint Photographic ...

Страница 40: ...take brighter pictures Icon Metering Mode Description Multi Exposure will be calculated based on an average of light in each image area divided into multiple regions However the calculation will be biased towards the centre of the image area This is suitable for general use Spot Only the rectangular area in the centre of the LCD monitor will be metered for light This is suitable when the subject i...

Страница 41: ...conditions may cause a colour cast on your images You can select the ISO sensitivity when taking pictures The speed or specific light sensitivity of a camera is rated by ISO numbers Icon ISO Mode Description Auto The camera s sensitivity is automatically changed by variables such as lighting value or subject brightness ISO 80 ISO 100 ISO 200 ISO 400 ISO 800 ISO 1600 ISO 3200 You use a faster short...

Страница 42: ...mera automatically adjusts the exposure according to the ambient lighting conditions You can also select the exposure value by using the Fn button Compensating Exposure 1 Press the Fn button and then use the Up Down button to select the exposure compensation icon The exposure compensation menu bar will appear as shown 2 Use the Left Right button to set the desired exposure compensation factor 3 Pr...

Страница 43: ...ce Changing the Shutter speed and Aperture value 1 Select the Nightscene mode p 24 2 Press the Fn button and Long Time shutter menu will be displayed 3 Configure the Long Time shutter value with the 5 function button 4 Press the Fn button again The value you set will be saved and the mode will switch to Night scene mode 1 S LONG TIME SHUTTER F 3 5 Aperture Value Wide Auto F3 5 6 2 Tele Auto F4 5 8...

Страница 44: ...ware Press the E button in an available mode 1 Select the desired Photo style selector by pressing the Left Right button and press the OK button 2 Press the Shutter button to take an image Icon Style mode Description Normal No style effect is added to the image Soft The image will be applied with the soft colours Vivid The image will be applied with the vivid colours Forest The image will be appli...

Страница 45: ...es will be stored in black and white Sepia Captured images will be stored in a sepia tone a gradient of yellowish brown colours Red Captured images will be stored in a red tone Green Captured images will be stored in a green tone Blue Captured images will be stored in a blue tone Negative Save the image in negative mode Custom Color Captured image will be saved in set RGB tone Custom colour You ca...

Страница 46: ...rast 1 Select the Contrast menu by pressing the Up Down button and a bar for selecting the contrast will be displayed 2 Change the contrast by pressing the Left Right button 3 Press the Shutter button to take an image Sharpness 1 Select the Sharpness menu by pressing the Up Down button and a bar for selecting the sharpness will be displayed 2 Change the sharpness by pressing the Left Right button ...

Страница 47: ...text box position of the third image with the same procedure and take the third image Press the Shutter button to take an image Press the Fn button and select a desired text box position by pressing the Left Right button Press the OK button and the file is saved as a new file name Move Exit E FUN Frame Set OK Cartoon 00016 00016 Capture Edit SH Fn 00016 00016 Capture Balloon SH 00016 00016 Capture...

Страница 48: ...ress the Fn button and the image deletes 3 To take a new image press the Shutter button You can select the menu by pressing the MENU button when the cartoon image is taken but not saved in the memory If the Yes is selected menu will is displayed on the LCD monitor and the cartoon image which is not saved will be deleted Pressing the Fn button 00016 00016 Capture Edit Fn SH Save Delete Fn OK 00016 ...

Страница 49: ...s frame after selecting a Range menu Point the camera towards the subject and compose the image by using the LCD monitor The range is activated The focus frame is changed to a solid line Pressing the Shutter button After changing the range Final image Pressing the Up Down Left Right button Range 1 Range 2 Range 3 Range 4 Pressing the Fn button Pressing the Fn button Select High Light 00016 00016 C...

Страница 50: ... timer Macro Focus and the Zoom W T button during the composite shooting If you press the Play mode MENU E button or M Mode button during the composite shots each camera working mode is executed The previously captured images will be deleted Composite 1 Composite 3 Composite 4 Ready for taking First shot The final picture Second shot Pressing the OK button Pressing the Shutter button Pressing the ...

Страница 51: ... appear Press the Up Down Left Right button to select the frame 2 Press the Fn button and an image will be deleted The composite frame will be activated 3 Press the Shutter button You can take other images again by using the Press the Up Down Left Right button and Fn button 4 Press the OK button again to save the captured image Before taking the 3rd shot Moving backward to the 2nd shot After takin...

Страница 52: ...printed on the stored image taken with Photo Frame menu The size of Photo Frame image is fixed to under 5M Press the E button in the FUN recording mode 1 The selected photo frame will be displayed by pressing Left Right button Pressing the Fn button Pressing the OK button Select Photo Frame Move Exit E FUN Frame Set OK Photo Frame 00016 00016 Capture Edit Fn SH Capture Move SH 00016 00016 ...

Страница 53: ... on the LCD monitor Press the Fn button You can change the size and location of the mask Press the Shutter button and the mask added image is taken Pressing the Fn button Zoom W T button Changing the Mask size Up Down Left Right button Moving the mask Mask added image Final image Back E Set OK Capture Edit Fn SH Move Size T W Move Size T W Move Size T W Capture Edit Fn SH Color Mask 00016 00016 00...

Страница 54: ...bject to change without prior notice Focus Area You can select your preferred FocusArea according to the shooting conditions Focus Area Description Center AF The rectangular area in the center of the LCD monitor will be focused Multi AF This camera selects all available AF points of the LCD monitor When the camera focuses on the subject the auto focus frame turns to green When the camera doesn t f...

Страница 55: ...ith big exposure difference i e backlight or contrast This function adjusts the brightness automatically and allows the subject to be photographed clearly ACB Sub menus Off On When using the Auto Program mode and Portrait scene mode the ACB function will operate ACB function always operates in the Auto recording and Portrait scene mode When using the Continuous Motion Capture or AEB menu the ACB f...

Страница 56: ...is function you can record your favourite voice clips into a voice recording file without having to create multiple voice recording files 1 Press the Play Pause button to pause recording 2 Press the Play Pause button again to resume the recording 3 If you wish to stop recording press the Shutter button again A distance of 40cm between you and the camera microphone is the best distance to record so...

Страница 57: ...n the memory If the memory card is inserted in the camera all the camera functions apply only to the memory card If the memory card is not inserted in the camera all the camera functions apply only to the internal memory Playing back a still image 1 Select the Play mode by pressing the Play mode button 2 The last image stored on the memory is displayed on the LCD monitor 3 Select an image that you...

Страница 58: ...ght button To stop playback of the movie clip press the Play Pause button and then press the Left or Right button Movie clip capture function You can capture still images from the movie clip How to capture the movie clip 1 Press the Play Pause button while playing the movie clip Then press the E button 2 The paused movie clip is saved in a new file name The captured movie clip file is the same siz...

Страница 59: ... trimming will be cancelled Yes The extracted frames are saved as a new file name If you don t specify the ending point of the movie clip the trimming confirmation window will be displayed at the point of the last frame Playing back a recorded voice 1 Select the recorded voice that you want to play back by using the Left Right button 2 Press the Play Pause button to play back a recorded voice file...

Страница 60: ...g information about the displayed image No Description Icon Page 1 Playback mode p 56 2 Folder name File name 100 0010 p 89 3 Internal memory icon Memory card icon indicator 4 Battery p 15 5 ISO 80 3200 p 40 6 Aperture value F3 5 F8 0 p 42 7 Shutter speed 16 1 2000 p 42 8 Flash On Off p 32 9 Image size 3264x2448 320x240 p 38 10 Recording date 2008 01 01 p 86 11 DPOF p 80 82 12 Protect p 79 13 Movi...

Страница 61: ...n the camera to conveniently set up the Play mode functions Play mode button If you have turned on the camera by pressing the POWER button you can press the Play mode button once to switch to Play mode and press it again to switch to Recording mode You can turn the power on with the Play mode button The camera is turned on in play mode Press the Play mode button again to turn off the camera Manner...

Страница 62: ... is enlarged a loss of quality may occur The maximum enlargement rate in proportion to the image size Image size Maximum enlargement rate X10 2 X9 1 X8 5 X8 1 X6 4 X3 2 Trimming You can extract part of the image that you want and save it separately 1 Select an image that you want to enlarge and press the enlargement button Press the MENU OK button and a message will be displayed 2 Select a desired...

Страница 63: ...cursor If a still image with a voice memo a voice file or a movie clip is playing In Stop mode Plays a still image with a voice memo a voice file or a movie clip During playback Temporarily stops playback In Pause mode Resumes playback Info button Info button Info button Voice recording is stopped Voice recording is playing Voice recording is paused 100 0016 100 0016 3264x2448 3264x2448 2008 01 01...

Страница 64: ...anged by using the 5 function button Print button When the camera is connected to a PictBridge printer you can print images by pressing the Print button Delete button This deletes images stored on the memory card 1 Select an image that you want to delete by pressing the Left Right button and press the Delete button 2 To add images to delete press the T button Left Right button Selects images T but...

Страница 65: ... a smaller sized image but not vice versa Only JPEG images can be resized Movie clip AVI Voice recording WAV files can t be resized You can change the resolution of only those files compressed in the JPEG 4 2 2 format The resized image will have a new file name The Start Image image is stored not on the memory card but on the internal memory If a new user image is saved one of the two user images ...

Страница 66: ...enu by pressing the Up Down button and press the OK button Icon Effect Mode Description B W Captured images will be stored in black and white Sepia Captured images will be stored in a sepia tone a gradient of yellowish brown colours Red Captured images will be stored in a red tone Green Captured images will be stored in a green tone Blue Captured images will be stored in a blue tone Negative Save ...

Страница 67: ...an automatically adjust the brightness of the region with big exposure difference from the captured image 1 Select by pressing the Up Down button and press the OK button 2 The Processing message displays and the image is saved as a new file name Red eye removal Red eye effect can be removed from the captured image 1 Select by pressing the Up Down button and press the OK button 2 The Processing mes...

Страница 68: ... 3 Press the OK button and the image will be saved as a new file name Saturation control You can change the saturation of the image 1 Select by pressing the Up Down button and a bar for selecting the saturation will be displayed 2 Change the saturation by pressing the Left Right button 3 Press the OK button and the image will be saved as a new file name Noise effect You can add noise to an image t...

Страница 69: ...OK button and the image is saved Press the OK button again to open a new image to save Change the location of the text box by pressing the Left Right button Select the position of image and text box with the same procedure Select an image by pressing the Up Down Left Right button and press the OK button Select the third image with the same procedure Press the OK button and the file is saved as a n...

Страница 70: ...ter selecting desired images press the OK button to save the image as a new file name Pressing the Fn button Photo Frame You can add 9 types of frame like borders to a still image you want to capture Date Time information will not be printed on the stored image taken with Photo Frame menu 1 Select by pressing the Up Down button and press the OK button Select Photo Frame Delete Search Fn OK Move Ex...

Страница 71: ...elect a desired frame by pressing the Left Right button and press the OK button Range 1 Range 3 Range 4 Range 2 2 Select a desired photo frame by pressing the Left Right button and press the OK button to save the image E Effect button FUN Select High Light 100 0020 100 0020 Range Set OK Range Set OK High Light Range Set OK High Light Range Set OK High Light Range Set OK Move Exit E FUN High Light ...

Страница 72: ...button Pressing the OK button Pressing Up Down Left Right button After changing the frame position Composite image You can combine 2 4 different shots in a still image The composite image is saved as under 5M image size If you press the Shutter and Play mode button a capture mode is executed The composite image is saved according to the minimum image size among the original images Press the OK but...

Страница 73: ... previous image will be deleted Press the OK button and you can select a new image After selecting an image press the Fn button again and the image will be deleted again 3 Press the OK button and you can select an image again Before selecting the last composite image you can change a part of composite image 1 Select the image you want to delete and press the Fn button 2 The selected composite imag...

Страница 74: ...Left Right button and press the OK button Select a location of sticker by pressing the Up Down Left Right button Select You can add additional stickers Max 2 stickers by pressing the Fn button Press the OK button to store the image Sticker You can add various stickers to the image The Sticker image is saved as 1M image size E Effect button FUN Add Fn Save OK Move Add Fn Save OK Move Sticker Set OK...

Страница 75: ...size and location of the part Pressing the OK button and the colour mask image will be saved as a new file name You set the size and location of the part by pressing the E button Pressing the OK button W T button Changing size of part Up Down Left Right button Changing the location Final image Size T W Set OK Move Size T W Set OK Move Size T W Set OK Move s e Back E Save OK Back E Set OK 100 0020 ...

Страница 76: ...elight Interval 1 3 5 10 sec p 78 Music Off Panorama First smile Remembrance My Music p 78 PLAY BACK Voice Memo Off p 79 On Protect Select Unlock Lock p 79 All Delete Select p 79 All No Yes DPOF Standard Select All Cancel p 80 82 Index No Yes Size Select All Cancel Copy To Card No p 82 Yes This menu is available while the camera is connected to a PictBridge supporting printer direct connection to ...

Страница 77: ... the SLIDE SHOW menu tab Start the slide show The slide show can start only in the Show Start menu 1 Use the Up Down button to select the Show Start menu and press the Right button 2 Select a desired sub menu by pressing the Up Down button Play The slide show is closed after one cycle Repeat Play The slide show is repeated until cancelled 3 Press the OK button and the slideshow will be started To ...

Страница 78: ...ed as Select 1 Select 2 and Select 3 3 Press the OK button and the settings are saved Starting the slide show Configure slide show effects Unique screen effects can be used for the slide show 1 Select the Effect sub menu by pressing the Up Down button and press the Right button 2 Use the Up Down button to select the type of effect 3 Press the OK button to confirm the setting When the effect is sel...

Страница 79: ...ailable when the effect is set to Off Basic Classic in the slide show It is unavailable when the effect is set to Memories Rhythmic Delight in the slide show Setting Background Music Set the slide show music 1 Select the Music sub menu by pressing the Up Down button and press the Right button 2 Use the Up Down button to select the desired Music 3 Press the OK button to save the configuration Off B...

Страница 80: ...protect icon will be displayed on the LCD monitor An unprotected image has no indicator An image in Lock mode will be protected from the delete function or Delete functions but will NOT be protected from the Format function Deleting images This deletes images stored on the memory card 1 Press the Up Down button and select the Delete menu tab And then press the Right button 2 Select a desired sub m...

Страница 81: ...ard and it will not be deleted even if you delete all files on the memory card DPOF DPOF Digital Print Order Format allows you to embed printing information on your memory card s MISC folder Select the pictures to be printed and how many prints to make The DPOF indicator will display on the LCD monitor when an image that has DPOF information plays back Images can then be printed on DPOF printers o...

Страница 82: ...Select a number of prints Cancel Cancel the print setup 4 Press the OK button to confirm the setting If an image carries DPOF instructions the DPOF indicator will show Index Images except for movie clips and voice file are printed as index type 1 Press the Up Down button and select the DPOF menu tab And then press the Right button 2 Press the Right button again and Index sub menu will be displayed...

Страница 83: ...ncel Cancel all of the print size settings DPOF Size secondary menu Cancel 3X5 4X6 5X7 8X10 Depending on the manufacturer and print model cancelling the printing may take a little longer for the printer to process Copy To Card This enables you to copy image files movie clips and voice recording files to the memory card 1 Select the Copy To Card menu tab by pressing the Up Down button And then pres...

Страница 84: ...l be created in the card to avoid duplication of the file name When the Reset of the File setup menu is set The copied file names start from after the last stored file name When the Series of the File setup menu is set The copied file names start from after the last captured file name After completing Copy To Card the last stored image of the last copied folder is displayed on the LCD monitor Soun...

Страница 85: ...he Shutter button is pressed down half way so that you can be aware of the camera operation status AF Sound sub menu Off On Self Portrait This feature automatically detects the location of the face and optimises the camera settings to ensure a great self portrait This feature can be set by using the Off and On buttons Back Set OK Off Low Medium High SOUND Volume Start Sound Shutter Sound Beep Soun...

Страница 86: ...andu Almaty Yangon Bankok Jakarta Beijing Hong Kong Seoul Tokyo Darwin Adelaide Setup menu Menu tab Main menu Sub menu Page SETUP1 Date Time World Time Guam Sydney Okhotsk p 86 Wellington Auckland Samoa Midway Honolulu Hawaii Alaska LA San Francisco Denver Phoenix Chicago Dallas New York Miami Caracas La Paz Newfoundland Buenos Aires Mid Atlantic Cape Verde Start Image Off Logo p 87 User Image LCD...

Страница 87: ...able cities London Cape Verde Mid Atlantic Buenos Aires Newfoundland Caracas La Paz New York Miami Chicago Dallas Denver Phoenix LA San Francisco Alaska Honolulu Hawaii Samoa Midway Wellington Auckland Okhotsk Guam Sydney Darwin Adelaide Seoul Tokyo Beijing Hong Kong Bankok Jakarta Yangon Almaty Kathmandu Mumbai New Delhi Tashkent Kabul Abu Dhabi Teheran Moscow Athens Helsinki Rome Paris Berlin DS...

Страница 88: ...ith still images Sub menus Off The quick view function can t be activated 0 5 1 3 sec The captured image is briefly displayed during the selected time LCD save If you set the LCD save to On and the camera isn t operated during the specified time the LCD monitor will be turned off automatically Sub menus Off The LCD monitor will not be turned off On If the camera isn t operated during the specified...

Страница 89: ...hat has a file this camera can t recognise or one that has been taken from another camera Always format the memory card using this camera If you insert a memory card that has been formatted using other cameras memory card readers or PCs you will get a Card Error message Initialisation All camera menu and function settings will be restored to their default values However values for Date Time Langua...

Страница 90: ...r formatting or after deleting all pictures The first stored folder name is 100SSCAM and the first file name is SDC10001 File names are assigned sequentially from SDC10001 SDC10002 SDC19999 The folder number is assigned sequentially from 100 to 999 as follows 100SSCAM 101SSCAM 999SSCAM Maximum numbers of files in a folder are 9999 The files used with the memory card conform to the DCF Design rule ...

Страница 91: ...ate There is an option to include DATE TIME on still images Sub menus Off The DATE TIME will not be imprinted on the image file Date Only the DATE will be imprinted on the image file Date Time The DATE TIME will be imprinted on the image file The Date Time are imprinted at the bottom right side of the still image The imprint function is applied only to still images except for the images taken in P...

Страница 92: ...e button sound may not function Selecting video out type The Movie output signal from the camera can be NTSC or PAL Your choice of output will be governed by the type of device monitor or TV etc to which the camera is connected PAL mode can support only BDGHI Connecting to an external monitor When the camera is connected to an external monitor the image and menus on the LCD monitor will be visible...

Страница 93: ...Connect the camera and printer with USB cable 2 Select the Printer menu by pressing Up Down button and press the OK button Connecting the Camera to a Printer SETUP2 Auto focus lamp You can turn on and off the Auto Focus lamp Sub menus Off The AF lamp will not light up in low light conditions On The AF lamp will light up in low light conditions Confirm OK Select USB Computer Printer Back Set OK SET...

Страница 94: ...Use the Up Down button to select the Images menu and press the Right button 3 Use the Up Down button to select a desired sub menu and press the OK button Select One Pic or All Pics A screen where you can set the number of copies to print will appear as shown below Press the Up Down button to select the number of prints When One Pic is selected Use the Left Right button to select another picture Af...

Страница 95: ...o Draft Normal Fine Date Set whether to print the date Auto Off On File Name Set whether to print the file name Auto Off On Some menu options are not supported on all printers If not supported the menus are still displayed in the LCD but are not selectable PictBridge Reset Initialises user changed configurations 1 Use the Up Down button to select the Reset menu tab And then press the Right button ...

Страница 96: ...ver 120 Including 1 Byte 2 Byte language Korean Chinese etc characters the file or folder name doesn t appear on the play list Downloading files To use MP3 PMP and TEXT VIEWER functions MP3 PMP multimedia files and TEXT files must be saved in the internal memory or memory card of this camera 1 Save the desired files on your PC 2 Connect the camera to your PC with the USB cable and turn on the came...

Страница 97: ...lication of MP3 multimedia files It violates various copyright laws Without permission of Samsung you cannot copy modify and or distribute any part or all of MP3 PMP file provided in the internal memory This camera can only play back MP3 files in the MP3 mode and SDC files modified XviD MPEG4 video MPEG Layer2 audio type in the PMP mode If a file can not be played back on this camera convert it in...

Страница 98: ...mount of output data in each time segment based on the complexity of the input the data in that segment When the VBR encoded files are played back the LCD will appear as shown The VBR icon will be displayed instead of the Bit rate icon Playing time will display but the whole running time doesn t display For about 2 seconds of the start and end frames of the PMP file no camera button except the POW...

Страница 99: ...LCD monitor indicator for MP3 PMP TEXT VIEWER mode Thank you for buying a Samsung Camera This manual will guide you through using the camera including capturing images downloading images and using the application software Please read this manual carefully before using your new camera TEST TXT Who bent my camera Equalizer p 100 Battery p 15 Lock p 100 Mute p 99 Title of file MP3 mode Play Pause Con...

Страница 100: ...X 32X TEXT VIEWER mode When the text list menu is displayed select a text file by pressing the Up Down button When the text is displayed press the Up Down button and previous next page of the file will be displayed Press and hold the Up Down button and it will skip 10 pages at a time Delete button This deletes files stored on the memory 1 Select a desired file to delete on the browsing menu and pr...

Страница 101: ...ive Classic Jazz Rock or Dance Playlist button While a multimedia file is playing back you can select a desired file by using the browsing menu 1 While a multimedia file is playing back press the Playlist button 2 A playlist that is currently playing will be highlighted 3 Move the cursor to a desired list by pressing the Control button Pressing the OK button the selected file is played back Pressi...

Страница 102: ... Delete All No Yes p 103 Information of DRM file p 104 PMP Resume On Off p 102 Seeking Normal 30 sec p 103 1 min 3 min 5 min 10 min Player Display 5sec On p 104 Off Delete All No Yes p 103 Menu tab Main menu Sub menu Page TEXT VIEWER Resume On Off p 102 Auto Scroll Off 0 8 sec p 104 1 1 sec 1 4 sec 1 7 sec 2 0 sec 2 3 sec MP3 BGM Off On p 105 Language ENGLISH 한국어 FRANÇAIS p 105 DEUTSCH ESPAÑOL ITA...

Страница 103: ...p the playback function using the LCD monitor Play mode You can set various repeat and shuffle options This function is adopted only in the selected folder Play All Plays a single track once Repeat One Plays a single track repeatedly Repeat All Plays all tracks in the folder repeatedly Shuffle Randomly plays all tracks in the folder repeatedly Skin of MP3 player You can set the skin of MP3 player ...

Страница 104: ...mode only multimedia files are deleted In the TEXT VIEWER mode TEXT files are deleted No Cancels Delete files Yes A confirmation window will display Select Yes and press the OK button All files will be deleted Frame search You can set the time of skip range when you search the movie by pressing the Left Right button You can search a frame you want easily Normal 30 sec 1 3 5 10 min This will skip a...

Страница 105: ...be captured The camera settings are fixed to default setting of Auto mode The settings can t be changed If the memory card is not inserted this function will not operate Occasionally the next file will be played back when you press the Shutter button even though a memory card is inserted To cancel the recording mode of the MP3 mode press the E button or do not operate any buttons for about 10 seco...

Страница 106: ...nd the world useful travel information The travel information supports Korean English Chinese German French and Russian and the language can vary depending on sales region You can download the tour guide information from Samsung Camera website Download the tour guide information In order for you to use the World Tour Guide function the tour information file should be stored on the memory If there ...

Страница 107: ...Up Down Left Right button and press the OK button Select the tour place by pressing the Left Right Up Down button Check the images by pressing the T button Check the information of the site by pressing the W button Check other tour places by pressing Left Right button Select the picture by pressing the Up Down button and press the OK button You can see the picture of the desired tour site on the s...

Страница 108: ...nguage Select the Language on the menu bar and the language list will appear SOUND SOUND Select the SOUND on the menu bar and the sound list will appear World tour guide Move Select MENU Exit 이동 선택 Move Select MENU Move Select MENU BOOKMARK Do you want to bookmark this region No Yes Move Confirm OK BOOKMARK LIST USA California Los Angeles Japan Kyoto Nago Pineapple Park Japan Okinawa Korea Jejudo ...

Страница 109: ...st and dirt Areas exposed to direct sunlight or the inside of a vehicle in hot weather Environments where there is high magnetism or excessive vibration Areas with high explosives or highly flammable materials Do not leave this camera in places subject to dust chemicals like naphthalene and mothballs high temperature and high humidity Keep this camera with silica gel in a hermetically sealed box w...

Страница 110: ...he memory card Camera Maintenance Use a soft brush available from photo stores to gently clean the lens and LCD assemblies If this does not work lens cleaning paper with lens cleaning fluid can be used Clean the camera body with a soft cloth Do not allow this camera to come into contact with solvent materials such as benzol insecticide thinners etc This may damage the body shell of the camera and ...

Страница 111: ...camera power and turn it on again No Image There are no images stored on the memory Take images Insert a memory card that is holding some images Warning indicator File Error File error Delete the file Memory card error Contact a camera service centre Low Battery There is low battery capacity Insert fresh batteries Low Light When taking pictures in dark places Take pictures in Flash Photography mod...

Страница 112: ...a service centre Camera does not take images when pressing the Shutter button There is insufficient memory capacity Delete unnecessary image files The memory card has not been formatted Format the memory card p 88 The memory card is exhausted Insert a new memory card The memory card is locked Refer to Card Locked error message The camera s power is off Turn the camera power on The battery is exhau...

Страница 113: ...orrect file name Violation of DCF format Do not change the image file name Before contacting a service centre Colour of image is different to the original scene White balance or effect setting is incorrect Select appropriate White balance and effect Images are too bright Exposure is excessive Reset exposure compensation No image on external monitor The external monitor has not been connected prope...

Страница 114: ...Self Shot Total 14 modes Shooting Single Continuous AEB 0 3 step unto 3cut Motion Capture Self timer 2 sec 10 sec Double 10 sec 2 sec Motion Timer Image Sensor Type 1 2 5 CCD Effective Pixel Approx 8 2 Mega pixel Total Pixel Approx 8 3 Mega pixel Lens Focal Length Samsung Lens f 6 3 18 9mm 35mm film equivalent 38 114mm F No F3 5 W F4 5 T Digital Zoom Still Image mode 1 0X 5 0X Play mode 1 0X 10 2X...

Страница 115: ...and Capacity 256 MB Size These figures are measured under Samsung standard conditions and may vary depending on shooting conditions and camera settings Special E Button Recording Effect Photo Style Selector Normal Vivid Soft Forest Retro Cool Calm Classic Color Effect Normal B W Sepia Red Blue Green Negative Custom Color Image Adjust Saturation Contrast Sharpness Fun Cartoon Photo Frame High Light...

Страница 116: ...ft 40mW Right 40mW 16Ω Noise Ratio 88 dB with 20 KHz LPF File File Format MP3 MPEG 1 2 2 5 Layer 3 Bit Rate 48 320kbps Including VBR Sound Effect SRS Normal Classic Dance Jazz Live Rock Play Mode All Repeat One Repeat All Random Random Repeat Skipping in Play Auto Skipping Slide Show On Off User Selectable MP3 Capturing Capturing Mode is Auto Default 3M Auto reload function Remember both the last ...

Страница 117: ... is not covered by the Samsung warranty Before reading this manual you should have a basic knowledge of computers and O S Operating Systems Text Specification File TXT extension name up to 99999 pages File format Window ANSI Windows 98 or later Unicode Unicode Big Endian UTF 8 Windows 2000 XP Mac ANSI Unicode UTF 16 Function Auto Scroll 0 8 sec 2 3 sec Skipping by 1 page 10 pages Auto reload funct...

Страница 118: ...to the CD ROM drive the following window should automatically display Before connecting the camera to the PC you should first install the camera driver Camera driver This enables images to transfer between the camera and PC This camera uses the USB Storage Driver as the camera driver You can use the camera as a USB card reader After installing the driver and connecting this camera to the PC you ca...

Страница 119: ...r computer If the frame does not appear run the Windows Explorer and select Installer exe in the CD ROM Drive root directory Setting up the application software To use this camera with a PC install the application software first After this has been done the stored images in the camera can be moved to the PC and can be edited by an image editing program You can visit the Saung web site through the ...

Страница 120: ...ed according to the GNU General Public License and everyone can copy distribute and change this codec This License applies to any program or other work which contains a notice placed by the copyright holder saying it may be distributed under the terms of this General Public License For more information see the License documents http www gnu org copyleft gpl html ...

Страница 121: ...120 Setting up the application software 4 Install the software by following instructions on the monitor ...

Страница 122: ...led the camera driver the Found New Hardware Wizard may not open On a Windows 98SE system the Found New Hardware Wizard dialog box opens and a window asking you to select a driver file may appear In this case specify USB Driver in the CD supplied PDF documents of the user manual are included in the Software CD ROM supplied with this camera Search the PDF files with Windows explorer Before opening ...

Страница 123: ...r are connected 4 External device selection menu will display on the LCD monitor 5 Select the Computer by pressing the Up Down button and press the OK button Starting PC mode Connecting the camera to a PC If you selected Printer in Step 5 when you connect the camera to your computer the Connecting Printer message will be displayed and the connection will not be established In this case disconnect ...

Страница 124: ...uter s desktop display select My computer and double click Removable Disk DCIM 100SSCAM The image files will then be displayed 3 Select an image and press the right mouse button 4 A pop up menu will open Click the Cut or Copy menu Cut cuts a selected file Copy copies files 5 Click a folder where you want to paste the file 6 Press the right mouse button and a pop up menu will open Click Paste 7 An ...

Страница 125: ...dows 98SE 1 Check whether the camera and PC are transferring a file If the camera status lamp blinks please wait until the lamp has finished blinking and is constantly on 2 Unplug the USB cable Windows 2000 ME XP Vista The illustrations may differ from those shown depending on the Windows O S 1 Check whether the camera and PC are transferring a file If the camera status lamp blinks please wait unt...

Страница 126: ...rsion during start up This camera is compatible with MAC OS 10 1 10 4 3 Connect the camera to the Macintosh and turn the camera power on 4 A new icon will be displayed on the desktop after connecting the camera to the MAC Using the USB Driver for MAC 1 Double click a new icon on the desktop and the folder in the memory will be displayed 2 Select an image file and copy or move it to MAC For Mac OS ...

Страница 127: ... compatible with Windows How to use the Samsung Converter 1 Double click the Samsung Converter icon on the desktop 2 Click the Add icon and select a file that you want to add 3 If you want to add a caption check Use subtitles from file smi 4 Select settings that you want and click the Convert button Output format You can set the output format Frame size You can set the width and height of output m...

Страница 128: ...ns please check the following Any codecs compatible with the files were not installed or installed incorrectly In this case find a compatible codec and install it If you do not find any compatible codecs install a multi codec If you installed various multi codecs on your computer it may cause converting problems In this case remove all codecs and install a proper multi codec Install a latest Windo...

Страница 129: ... All button You can save captured images and selected folder If you click the Cancel button downloading will be cancelled 3 Click Next button 4 Select a destination and make a new folder in which to save downloaded images and folders Folder names can be made in order of date and images will be downloaded Folder name will be made as you want and images will be downloaded After selecting a folder th...

Страница 130: ...selected image Image display window Images of the selected folder are displayed Refer to the Help menu in Samsung Master for further information Image edit You can edit the still image Image edit functions are listed below Edit menu You can select the following menus Tools You can resize or crop the selected image See the Help menu Adjust You can modify image quality See the Help menu Retouch You ...

Страница 131: ...ur and saturation Effects You can insert an effect Set Text You can insert texts Narrate You can insert a narration Produce You can save the edited multi media as a new file name You can select AVI Windows media wmv and Windows media asf file types Frame display window You can insert multi media in this window Some movie clips that were compressed with a codec that is not compatible with the Samsu...

Страница 132: ...e other USB cable and connect only one USB cable to the camera Case 6 When I open the Device Manager by clicking Start Settings Control Panel Performance and Maintenance System Hardware Device Manager there are Unknown Devices or Other Devices entries with a yellow question mark beside them or devices with an exclamation mark beside them Right click on the entry with the question or exclamation ma...

Страница 133: ... Mac OS 1 Visit the following site for downloading the codec http www divx com divx mac 2 Click the Free Download menu on the top right side of the window then download windows appears 3 Check the version of Mac OS and click the Download button to download the file and save it to a desired folder 4 Run the downloaded file and the codec for playing back the movie clip will be installed If the movie...

Страница 134: ...ountries with separate collection systems This marking shown on the product or its literature indicates that it should not be disposed of with other household wastes at the end of its working life To prevent possible harm to the environment or human health from uncontrolled waste disposal please separate this from other types of wastes and recycle it responsibly to promote the sustainable reuse of...

Страница 135: ... by one or more of the following measures Reorient or relocate the receiving antenna Increase the distance between the equipment and receiver Connect the equipment into an outlet on a circuit different from that to which the receiver is connected Consult the dealer or an experienced radio TV technician for help CAUTION Changes or modifications not expressly approved by the manufacturer responsible...

Страница 136: ......

Отзывы: