background image

Extended functions

  34

Using the Aperture Priority, Shutter Priority, or Manual mode

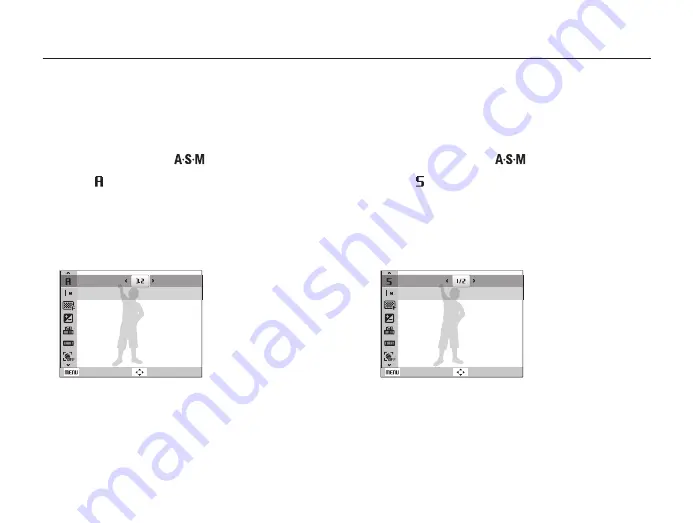
Using the Shutter Priority mode

The Shutter Priority mode allows you to manually set the shutter 
speed while the camera automatically selects an appropriate 
aperture value.

Rotate the mode dial to 

.

Select  

  and press [

o

].

Press [

m

].

Select 

Shooting


¢


Shutter Speed

 and then adjust the 

shutter speed.

See page 33 for more information about the shutter speed.

t

Shutter Speed

Back

Move

Set options. (For a list of options, refer to “

Shooting 

options.”)

Align your subject in the frame and half-press [

Shutter

to focus.

Press [

Shutter

] to take the photo.

Using the Aperture Priority mode 

The Aperture Priority mode allows you to manually set the 
aperture value while the camera automatically selects an 
appropriate shutter speed.

Rotate the mode dial to 

.

Select  

  and press [

o

].

Press [

m

].

Select 

Shooting


¢


Aperture

 and then adjust the 

aperture value.

See page 33 for more information about the aperture value.

t

Aperture

Back

Move

Set options. (For a list of options, refer to “

Shooting 

options.”)

Align your subject in the frame and half-press [

Shutter

to focus.

Press [

Shutter

] to take the photo.  

Содержание HZ35W

Страница 1: ...s detailed usage instructions for your camera Please read this manual thoroughly Quick reference Contents Basic functions Extended functions Shooting options Playback Editing Appendixes Index Click a...

Страница 2: ...ngs Prevent damage to subjects eyesight Do not use the ash in close proximity closer than 1 m 3 ft to people or animals Using the ash too close to your subject s eyes can cause temporary or permanent...

Страница 3: ...era cause injury or void your warranty Handle and store your camera carefully and sensibly Do not allow your camera to get wet liquids can cause serious t damage Do not handle your camera with wet han...

Страница 4: ...amera in the normal position Avoid contact with your camera s internal antenna Important usage information Protect your camera s lens Do not expose the lens to direct sunlight as this may discolor t t...

Страница 5: ...ntenance tips Copyright information Microsoft Windows and the Windows logo are registered trademarks of the Microsoft Corporation Mac is a registered trademark of the Apple Corporation HDMI the HDMI l...

Страница 6: ...manual Icon Function Additional information Safety warnings and precautions Camera buttons for example Shutter represents the shutter button Page number of related information The order of options or...

Страница 7: ...t of a scene such as a person animal or still life Background t the objects around the subject Composition t the combination of a subject and background Background Subject Composition Exposure Brightn...

Страница 8: ...Shutter halfway down to make sure the subject is focused p 25 Photos are blurred when shooting at night As the camera tries to let in more light the shutter speed slows This can make it dif cult to st...

Страница 9: ...ity to light t f 49 EV to adjust exposure t f 59 ACB to compensate for subjects against bright t backgrounds f 59 Metering t f 60 AEB to take three photos of the same scene with t different exposures...

Страница 10: ...stance 50 Using tracking auto focus 51 Using selection focus 52 Adjusting the focus area 53 Basic functions 11 Unpacking 12 Camera layout 13 Icons 15 Inserting the battery and memory card 16 Charging...

Страница 11: ...ideo 73 Playing voice memos 74 Editing a photo 75 Resizing photos 75 Rotating a photo 75 Applying photo styles 76 De ning your own RGB tone 76 Correcting exposure problems 77 Applying smart lens effec...

Страница 12: ...ry 17 Turning on your camera 17 Performing the initial setup 18 Selecting options 19 Setting the display and sound 21 Changing the display type 21 Setting the sound 21 Taking photos 22 Zooming 23 Redu...

Страница 13: ...differ from your actual items Camera AC adapter USB cable AD44 00146A AD39 00165A Rechargeable battery 4302 001226 Strap Silver AD63 02596A Black AD63 02604A User Manual CD ROM AD46 00316A Quick Star...

Страница 14: ...camera select a scene mode as it detects a Auto Take a photo quickly and easily with minimal settings p Program Take a photo by setting options Aperture Priority Shutter Priority Manual Set the apert...

Страница 15: ...mode Function Access options in Shooting mode t Delete les in Playback mode t Display See below Status lamp Blinking t When saving a photo or video being read by a computer or printer or out of focus...

Страница 16: ...Voice muted Burst type Optical Image Stabilization OIS Icons The icons displayed will change according to the mode you select or the options you set A Information Icon Description Selected shooting m...

Страница 17: ...Removing the battery and memory card Push gently until the card disengages from the camera and then pull it out of the slot Push the lock up to release the battery The internal memory can be used as...

Страница 18: ...Press P The camera turns on and accesses Playback mode immediately Press and hold P to mute camera sounds Charging the battery and turning your camera on Charging the battery Before using the camera f...

Страница 19: ...to select Time Zone and press t or o Press 5 F or t to select a time zone and press o To set the daylight saving time press t D Back DST Press 6 D or M to select Date Time and press t or o Press 7 F...

Страница 20: ...f but some options are not available Going back to the previous menu Press m again to go back to the previous menu Press Shutter to return to Shooting mode In Shooting mode press 1 m Press the naviga...

Страница 21: ...Edit Exit Back Press 5 F or t to select to a white balance option Daylight Back Move Press 6 o E g Selecting a white balance option in the P mode Rotate the mode dial to 1 p Press 2 m Shooting Movie...

Страница 22: ...amera emits a speci ed sound when you operate your camera In Shooting or Playback mode press 1 m Select 2 Sound Beep Sound an option Option Description Off The camera does not emit any sounds 1 2 3 Th...

Страница 23: ...photos easily and quickly in the Smart Auto mode Rotate the mode dial to 1 S Align your subject in the frame 2 Half press 3 Shutter to focus A green frame means the subject in focus t Press 4 Shutter...

Страница 24: ...nd v modes and when used with Face Detection It may take longer to save a photo when using the digital zoom t The zoom sound may be recorded if you use the zoom while t recording a video Zooming You c...

Страница 25: ...a tripod your images may be blurred t by the vibration of the OIS sensor Deactivate the OIS function when you use a tripod If the camera is impacted the display will be blurry In this case turn t off...

Страница 26: ...en longer and it may be harder to hold the camera still Use a tripod or set the ash t option to Fill in p 48 Set ISO speed options t p 49 Tips for getting a clearer photo Holding your camera correctly...

Страница 27: ...motion capture function p 62 Preventing your subject from being out of focus It may be dif cult to get your subject in focus when there is little contrast between the subject and background When your...

Страница 28: ...am mode 32 Using the Aperture Priority Shutter Priority or Manual mode 33 Using the Aperture Priority mode 34 Using the Shutter Priority mode 34 Using the Manual mode 35 Using GPS 36 Taking pictures w...

Страница 29: ...cognize a proper scene mode t S will not change and the default settings will be used Even if there is a face detected the camera may not select a portrait t mode depending on the subject s position o...

Страница 30: ...in this mode t The photo will be corrected optically only when taken with a light t source that is brighter than uorescent light If your subject is moving rapidly the photo may be blurry t Set the Op...

Страница 31: ...Move To hide 5 facial imperfections press m Rotate the mode dial to 1 s Select a scene 2 Frame Guide This mode is appropriate for taking pictures with pre composed scenes To change the scene mode pre...

Страница 32: ...person to take a photo of you you can compose the scene with the frame guide feature The frame guide will help the other person take a photo of you by showing the part of the pre composed scene Rotat...

Страница 33: ...t for shutter speed and aperture value in the Program mode Rotate the mode dial to 1 p Set options For a list of options refer to 2 Shooting options Photo Size Back Move Align your subject in the fram...

Страница 34: ...through which light is admitted You can adjust the aperture value to control how much light reaches the lens when you capture a photo By decreasing the aperture value opening the aperture wider more l...

Страница 35: ...list of options refer to 5 Shooting options Align your subject in the frame and half press 6 Shutter to focus Press 7 Shutter to take the photo Using the Aperture Priority mode The Aperture Priority m...

Страница 36: ...aperture value and the shutter speed Rotate the mode dial to 1 Select 2 and press o Press 3 m Select 4 Shooting Manual EV and then adjust the aperture value and shutter speed Manual EV Back Move Set...

Страница 37: ...n Display Display current location in Shooting mode Displayed in Korean if it is set in Korean and in English if it is set in other languages GPS Reset Select this if you wish to make a new search for...

Страница 38: ...n GPS signal reception may take longer depending on the GPS satellite t condition GPS signal reception may take longer depending on the surrounding t conditions between buildings low lying area areas...

Страница 39: ...hina Canada France and Korea For the 55 countries for which the location information is supported GPS data can be downloaded from the Samsung website In China however location information can be check...

Страница 40: ...lect a desired picture by pressing 4 F t The location the picture was taken in is displayed A desired location can be viewed by pressing D M F t to move Viewing the map by enlarging Turn the dial to t...

Страница 41: ...movie recording function press the movie recording button one more time Recording a video Record videos of up to 20 minutes in length in high de nition The recorded video is saved as an H 264 MPEG 4...

Страница 42: ...e t mode icon will appear at the top left of the screen Appears when recording videos of landscapes Appears when recording videos of clear skies Appears when recording videos of forested areas Appears...

Страница 43: ...ting Voice Memo Align your subject in the frame and take a photo 3 You will begin recording a voice memo right after taking the t photo Record a short voice memo 10 seconds maximum 4 Press t Shutter t...

Страница 44: ...detection 54 Detecting faces 54 Taking a self portrait shot 55 Taking a smile shot 55 Detecting eye blinking 56 Using smart face recognition 56 Registering faces as your favorites My Star 57 Adjusting...

Страница 45: ...ption Option Description Super Fine Fine Normal a p A h n d s Selecting a resolution As you increase the resolution your photo or video will include more pixels so it can be printed on larger paper or...

Страница 46: ...imer Depending on the selected face detection option the timer is not t available or some timer options are not available In Shooting mode press 1 t Off Select an option 2 Option Description Off The t...

Страница 47: ...e more than 3 m away from the camera t your movements are too subtle t there is too much light or backlight t Using the motion timer 1 In Shooting mode press t Select 2 Press 3 Shutter Stand within 3...

Страница 48: ...will not re t Camera shake warning t will be displayed when shooting in low light Auto The camera will select a proper ash setting for the detected scene in the S mode Red eye Fix The ash res when th...

Страница 49: ...ent light to t reveal more details in the background Use a tripod to prevent your photos from blurring t Fill in The ash always res t Light intensity is adjusted automatically t Red eye The ash res wh...

Страница 50: ...r camera becomes With a higher ISO speed you can get a better photo without using the ash In Shooting mode press 1 m Select 2 Shooting ISO an option Select t to use an appropriate ISO speed based on t...

Страница 51: ...hen using zoom Macro Focus on a subject 3 80 cm 1 2 m when using zoom Auto Macro Focus on a subject farther than 3 cm farther than 1 m when using zoom Manual Focus Focus on a subject by manually adjus...

Страница 52: ...camera The white frame means that your camera is tracking the t subject The green frame means that your subject is in focus when you t half press Shutter Press 4 Shutter to take the photo Press t o to...

Страница 53: ...face detection options are not available p A h n d Tracking a subject may fail when t the subject is too small or the subject moves excessively the subject is backlit or you are shooting in a dark pla...

Страница 54: ...scene In Shooting mode press 1 m Select 2 Shooting Focus Area an option Option Description Center AF Focus on the centre suitable when subjects are located in the centre Multi AF Focus on one or more...

Страница 55: ...The focus frame will appear orange for Smile Shot and Blink Detection it is too bright or too dark the subject is not facing the camera the subject is wearing sunglasses or a mask the subject is in b...

Страница 56: ...lect 2 Shooting Face Detection Smile Shot When your subject smiles broadly your camera can detect t the smile more easily Taking a self portrait shot Take photos of yourself The focus distance will be...

Страница 57: ...her photo Using smart face recognition The camera automatically registers faces that you frequently photograph up to 10 people This feature will automatically prioritize the focus on those faces and f...

Страница 58: ...the front t to the left side to the right side from above or from below Take photos of one person at a time when registering faces t Back Set Back Set When you are nished taking the photos the face l...

Страница 59: ...Face List To change the ranking of the favorite faces press t f and select Edit Ranking p 68 To cancel the favorite faces press t f and select Delete My Star p 68 You can register up to 8 favorite fac...

Страница 60: ...ys on in the t a mode You cannot set burst options when this feature is on t p A h n Adjusting the exposure manually EV Depending on the intensity of the ambient light your photos may be too bright or...

Страница 61: ...ss and lighting of your photos will vary depending on the metering mode you select In Shooting mode press 1 m Select 2 Shooting Metering an option Option Description Multi Your camera divides the scen...

Страница 62: ...on Auto WB Use automatic settings depending on the lighting conditions Daylight Select when taking outdoor photos on a sunny day Cloudy Select when taking outdoor photos on a cloudy day or in shadows...

Страница 63: ...ilable In Shooting mode press 1 m Select 2 Shooting Drive an option Option Description Single Take a single photo Continuous While you are pressing t Shutter the camera takes photos continuously The m...

Страница 64: ...the selected color 4 less or more Applying photo styles Apply a different photo style to your photos such as Soft Vivid or Forest Soft Vivid Forest In Shooting mode press 1 m Select 2 Shooting Photo...

Страница 65: ...the retro looking colors high contrast and strong vignette effect Fish eye 1 Distort close objects to imitate the visual effect of a sheye lens Fish eye 2 Blacken the edges of the frame and distort ob...

Страница 66: ...and saturation of your photos In Shooting mode press 1 m Select 2 Shooting Image Adjust Select an adjustment option 3 Contrast t Sharpness t Saturation t Select a value to adjust the selected item 4...

Страница 67: ...79 Viewing les on a TV or HDTV 80 Transferring les to your computer for Windows 82 Transferring les using Intelli studio 83 Transferring les by connecting the camera as a removable disk 85 Disconnect...

Страница 68: ...ASH Flash option SIZE Photo resolution DATE Shooting Date and time Starting Playback mode View photos or play videos and voice memos stored in your camera Press 1 P The most recent le you have taken o...

Страница 69: ...elect 5 Yes Ranking your favorite faces You can change the ranking of your favorite faces or delete them This feature is available only when you use a memory card In Playback mode press 1 m Select 2 F...

Страница 70: ...ng les by category in Smart Album View and manage les by categories such as date le type week color face or location In Playback mode rotate 1 Zoom left Press 2 m Select a category 3 Type Date Color W...

Страница 71: ...ltiple Delete Select les you want to delete and press 3 o Press t o again to cancel your selection Press 4 f Select 5 Yes To delete all les In Playback mode press 1 m Select 2 File Options Delete All...

Страница 72: ...not be sent to the recycle bin To activate the recycle bin In Playback mode press 1 m Select 2 File Options Recycle Bin On To restore les from the recycle bin In Playback mode press 1 m Select 2 File...

Страница 73: ...erval between photos t This is available when t Off is selected in the effect option When used with effect options other than t Off the interval will be set to 1 sec Music Select a background audio Ef...

Страница 74: ...Press 3 o at the point where you want the new video to end and rotate Zoom right Select 4 Yes The original video should be at least 10 seconds long t The edited video will be saved as a new le t Set t...

Страница 75: ...at the point where you want to save a still image Press 6 M A captured image will have the same le size as the original video le and will be saved as a new le Playing voice memos Playing a voice memo...

Страница 76: ...o In Playback mode select a photo and press 1 m Select 2 Edit Rotate an option Back Right 90 Move Depending on the original photo size the rotated photo may be resized to a lower resolution Resizing p...

Страница 77: ...color R Red G Green B Blue 3 Back Move Adjust the amount of the selected color 4 less or more Applying photo styles Apply a different photo style to the photo such as Soft Vivid or Forest Soft Vivid...

Страница 78: ...m Select 2 Edit Image Adjust Red eye Fix Hiding facial imperfections In Playback mode select a photo and press 1 m Select 2 Edit Image Adjust Face Retouch Select a level 3 As the number increases the...

Страница 79: ...ng smart lens effects Apply various lens effects to your photos to create unique images Miniature Vignetting Fish eye 1 Fish eye 2 1 In Playback mode select a photo and press m Select 2 Edit Smart Fil...

Страница 80: ...nt order DPOF Select photos to be printed and set options such as number of copies or paper size The memory card can be taken to a print shop that supports DPOF t Digital Print Order Format or you can...

Страница 81: ...and uncompressed photos or videos on an HDTV using the optional HDMI cable HDMI High De nition Multimedia Interface is supported by most HDTVs In Shooting or Playback mode press 1 m Select 2 Settings...

Страница 82: ...ur camera to your HDTV using the optional 5 HDMI cable HDMI cable Turn on your camera 6 The HDTV will be powered on automatically and the camera t screen will be displayed View les using the buttons o...

Страница 83: ...am t You must use Windows XP Vista 7 or Mac OS 10 4 or later to t connect the camera as a removable disk Using a self assembled PC or a PC and OS that are not supported may void your warranty Requirem...

Страница 84: ...puter with the USB 4 cable You must plug the end of the cable with the indicator light T into your camera If the cable is reversed it may damage your les The manufacturer is not responsible for any lo...

Страница 85: ...am If you install Intelli studio on your computer the program will launch more quickly To install the program select t Menu Install Intelli studio on PC You cannot edit les directly on the camera Tran...

Страница 86: ...r any loss of data Iteam Requirements 1 Open menus 2 Display les in the selected folder 3 Change to the Photo edit mode 4 Change to the Video edit mode 5 Change to the Sharing mode You can send les by...

Страница 87: ...100PHOTO Select the les you want and drag or save them to your 7 computer Disconnecting the camera for Windows XP The way to disconnect the USB cable for Windows Vista 7 is similar If the status lamp...

Страница 88: ...files to your computer for Mac When you connect the camera to a Macintosh computer the computer will recognize the device automatically You can transfer les directly from the camera to the computer wi...

Страница 89: ...mbnail prints Type Select the type of paper Quality Set the printing quality Date Set to print the date File Name Set to print the name of the le Reset Reset the print options Some options are not sup...

Страница 90: ...1 Settings 92 Error messages 95 Camera maintenance 96 Cleaning your camera 96 About memory cards 97 About the battery 98 Before contacting a service centre 101 Camera speci cations 104 Index 109 Appen...

Страница 91: ...vious screen Accessing the settings menu In Shooting or Playback mode press 1 m Select a menu 2 Shooting Movie Geotagging Sound Display Exit Change Volume Start Sound Shutter Sound Beep Sound AF Sound...

Страница 92: ...ing to Shooting mode Off 0 5 sec 1 sec 3 sec Power Save If you perform no operations for 30 seconds the camera automatically switches to Power save mode press any button to deactivate the Power save m...

Страница 93: ...ed t in one folder is 9999 The camera de nes le names according to t the Digital rule for Camera File system DCF standard If you change the names of les intentionally the camera may not play back the...

Страница 94: ...ra with an HDTV remote control Off t View les without using an HDTV remote control Default Item Description Imprint Set whether to display the date and time on your photos when printing Off Date Date...

Страница 95: ...n the HDTV automatically selects the next lower resolution USB Set the function to use via a USB connection with a computer or printer Computer t Connect your camera to a computer for transferring les...

Страница 96: ...es do not match the DCF standard Transfer the les on the memory card to your computer and format the card p 92 File Error Delete the damaged le or contact a service centre Low Battery Insert a charged...

Страница 97: ...solutions can damage the camera or cause it to malfunction Do not press on the lens cover or use a blower brush on the lens t cover Cleaning your camera Camera lens and display Use a blower brush to r...

Страница 98: ...V i d e o s 12 49 23 23 14 27 26 04 25 00 48 02 50 54 73 27 94 20 The recordable time may vary if you use the zoom Several videos were recorded in succession to determine the total recording time Abo...

Страница 99: ...or out 3 Perform steps 1 and 2 for 30 seconds and repeat for 5 minutes Then turn off the camera for 1 minute 4 Repeat steps 1 to 3 Videos Approx 100 min Record videos at 1280 X 720 HQ resolution and 3...

Страница 100: ...the indicator light is off make sure that the battery is inserted t correctly Turn off your camera when charging t Turn on your camera after charging the battery for more than 10 t minutes Using the...

Страница 101: ...per battery handling The battery can ignite or explode if not handled properly If you t notice any deformities cracks or other abnormalities in the battery immediately discontinue use of the battery a...

Страница 102: ...work The ash option may be set to t Off p 47 You cannot use the ash in the t d v or some s modes The ash res unexpectedly The ash may re due to static electricity This is not a malfunction of the cam...

Страница 103: ...ake sure that your memory card t contains photos Situation Suggested remedies The date and time are incorrect Set the date and time in the display settings menu The display or buttons do not work Remo...

Страница 104: ...er Intelli studio iStudio exe on your computer Situation Suggested remedies Your computer does not recognize your camera Make sure that the USB cable is t connected correctly Make sure that your camer...

Страница 105: ...S Optical Image Stabilization OIS Digital Image Stabilization DIS Image sensor Type 1 2 3 Approx 1 10 cm CCD Effective pixels Approx 12 0 mega pixels Total pixels Approx 14 2 mega pixels Lens Focal le...

Страница 106: ...t Brightness Contrast Saturation Add Noise Smart Filter Normal Miniature Vignetting t Fish eye 1 Fish eye 2 Effect Shooting mode Photo Style Selector Normal Soft Vivid Forest t Retro Cool Calm Classi...

Страница 107: ...erface Digital output connector USB 2 0 20 pin Audio output Mono Internal speaker Stereo Microphone Video output AV NTSC PAL selectable t HDMI 1 4 NTSC PAL selectable t DC power input connector 20 pin...

Страница 108: ...B 11A 1 130 mAh The power source may differ depending on your region Dimensions W x H x D 106 6 x 60 5 x 28 mm Weight 214 6 g without battery and memory card Operating temperature 0 40 C Operating hum...

Страница 109: ...eception which can be determined by turning the equipment off and on the user is encouraged to try to correct the interference by one or more of the following measures Reorient or relocate the receivi...

Страница 110: ...2 C Camera shake 25 Capturing an image 74 Cleaning Body 96 Display 96 Lens 96 D Date and time 92 Deleting les 70 Digital Image Stabilisation 29 Digital zoom 23 Display brightness 91 Display type 21 DP...

Страница 111: ...Centre weighted 60 Multi 60 Spot 60 Motion timer 46 Movie mode 40 Muting Video 40 O Optical Image Stabilisation OIS 24 29 P Photo quality 44 Photo styles 63 Playback button 14 Playback mode 67 Printin...

Страница 112: ...d 33 Slide show 72 Smart Album 69 Smart Auto mode 22 28 Smart Filter Fish eye 64 Miniature 64 Vignetting 64 Smart Scene Detection 41 Smile shot 55 Start image 91 T Timer 45 V Video Playing 73 Recordin...

Страница 113: ...Please refer to the warranty that came with your product or visit our website http www samsung com for after sales service or inquiries...

Отзывы: