background image

084

Starting the Multi Slide Show ( 

 )

You can select image to view
 1.  Use the Up / Down buttons to select the 

[Images] menu and press the Right button.

 2.  Select a desired sub menu by pressing 

the Up / Down button.
 [All] 

:   All images saved in the 

Memory are played back.
Press the OK button and the settings are saved.

 [Date]  :  Images taken in a specified date are played back.

Press the OK button and the settings are saved.

 [Select] :  Play only the selected images. If you press the Up / 

Down button, you can select the desired images to play 
back. The selected image can be saved as [Select1], 
[Select2] and [Select3]. If you save the selected image 
with the [New Select] command, it will be saved as 
[Select1]. But when a new image is saved again using 
[New Select], the former image which had been saved 
as [Select1] will be saved as [Select2] automatically.
You can change and cancel the images which were 
saved as [Select1], [Select2] and [Select3]. Press the 
Fn button and the settings are saved.

 3.  Select [Play] or [Repeat] in the [Start] menu to start the multi 

slide show.

Selecting Images

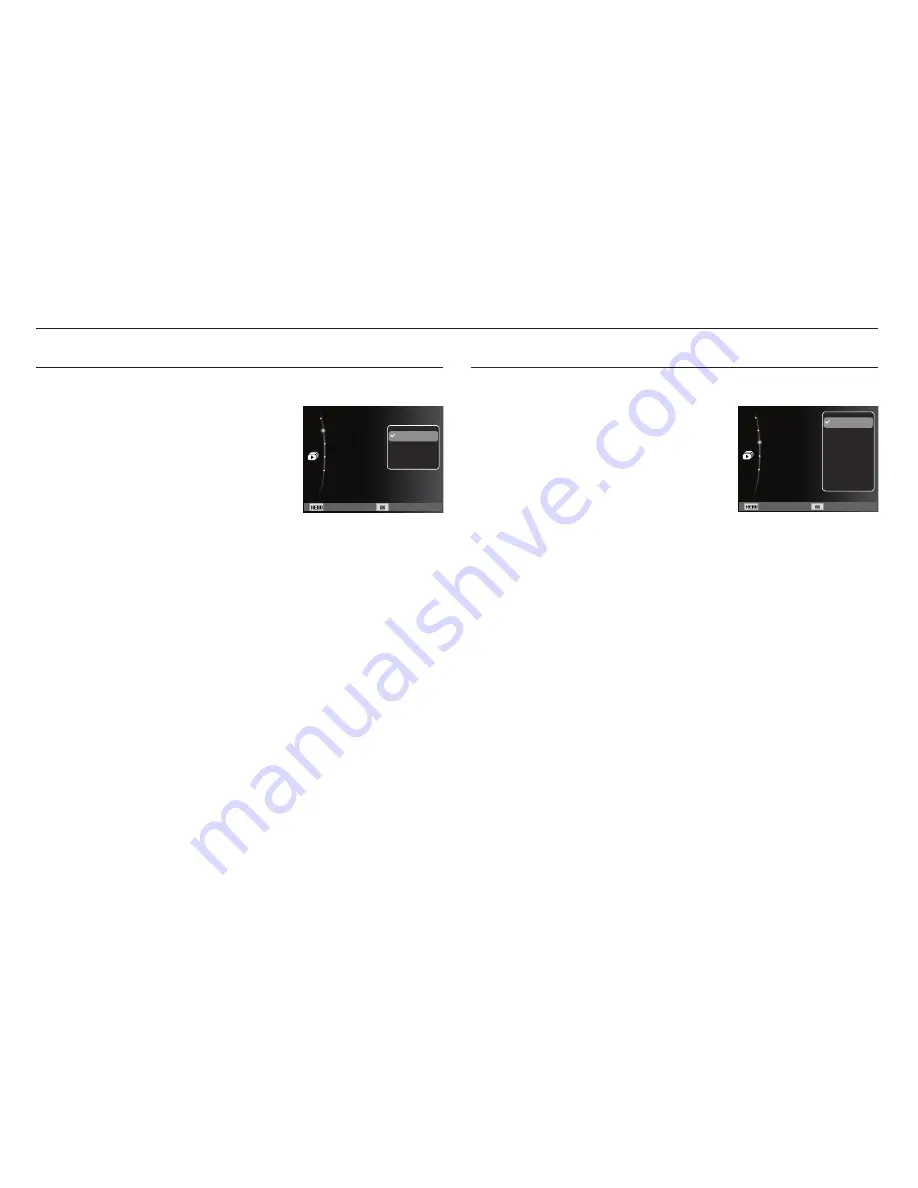
Unique screen effects can be used for the Multi Slide Show.
 1.  Select the [Effect] sub menu by pressing 

the UP / DOWN button and press the 
RIGHT button.

 2.  Use the Up / Down button to select 

the type of effect.

 3.  Press the OK button to confirm the 

setting.

Con

fi

 gure Multi Slide show effects

Back Set

Images :All

Effect :Off

Interval :1 

sec

Music :Off

Start 

All
Date

Select

Back Set

Images :All

Effect :Off

Interval :1 

sec

Music :Off

Start 

Off
Calm
Sweet

Lively
Shine

Содержание HZ25W - Digital Camera - Compact

Страница 1: ...nual Thank you for buying a Samsung Camera This manual will help you learn to capture images share or print your photos and edit photos with the accompanying software Please read this manual thoroughly WB5000 ...

Страница 2: ...change without prior notice for upgrading the camera functions Ä Microsoft Windows and Windows logo are registered trademarks of Microsoft Corporation incorporated in the United States and or other countries Ä Apple Mac and QuickTime logo are registered trademarks of Apple computer Ä Adobe and Reader are either trademarks or registered trademarks in the United States and or other countries Ä All b...

Страница 3: ... in use do not cover the camera or Charger This may cause heat to build up and distort the camera body or cause a re Always use the camera and its accessories in a well ventilated area Danger DANGER indicates an imminently hazardous situation which if not avoided will result in death or serious injury Do not attempt to modify this camera in any way To do so may result in re injury electric shock o...

Страница 4: ...possibly causing camera malfunction Avoid obstructing the lens or the Àash when you capture an image When using this camera in low temperatures you may experience the following These are not camera malfunctions and usually recover at normal temperature It takes longer to turn on the LCD monitor and the colour may differ from the subject When changing the composition there may be an after image on ...

Страница 5: ...ter sound 061 Beep Sound 062 AF sound 062 Self Portrait 062 Setupmenu 027 How to use the Movie clip mode 028 Recording HD High De nition movie clips 028 Recording the movie clip without sound 029 ThingstoWatchOutforWhenTaking Pictures 030 Focuslock 030 Usingthecamerabuttonstosetthecamera 030 POWERbutton 031 SHUTTERbutton 031 ZoomW TLever 033 Diopteradjustmentlever 033 AEL Imageprotectionbutton 033...

Страница 6: ...Card 092 PictBridge 093 PictBridge PictureSelection 093 PictBridge PrintSetting 062 Display 062 Language 063 Setting the Grid Line 063 Function Description 063 Start up image 063 Display Bright 064 Quick view 064 Display SAVE 065 Settings 065 Formatting a memory 065 Initialisation 066 Setting up the Date Time Date type 066 Time Zone 066 File name 067 Imprinting the recording date 067 Auto power of...

Страница 7: ...ayer 7 6 H 264 MPEG4 AVC playback Requirements 103 Aboutthesoftware 104 Settinguptheapplicationsoftware 107 StartingPCmode 109 Removingtheremovabledisk 110 SamsungMaster 113 UsingtheSamsungRAWConverter 114 Correcting the exposure 115 Handling the JPEG TIFF les as you edit RAW les 115 Saving the RAW les into JPEG or TIFF format 116 SettinguptheUSBDriverforMAC 116 UsingtheUSBDriverforMAC 117 FAQ ...

Страница 8: ...ional equipment contact your nearest Samsung dealer or Samsung service centre Parts and accessories illustrated below may differ from exact appearance Package Contents Camera Rechargeable battery AC adapter USB cable Neck strap see p 10 Lens cap see p 10 Software CD see p 103 User manual Product warranty Sold Separately SD SDHC memory card see p 16 AV cable ...

Страница 9: ...crophone AF sensor Self timer lamp Lens Flash pop up button p 33 Built in Àash p 33 Speaker Hook for neck strap p 10 Diopter adjustment lever p 33 Terminal cover USB AV DC terminal Zoom T Lever Digital zoom Zoom W Lever Thumbnail Shutter button ...

Страница 10: ...View nder EVF p 35 Play mode button Smart dial p 11 EVF LCD button p 34 Video shooting button MENU button Mode Dial POWER button Fn Delete button Hook for neck strap AE lock image protection button p 33 Exposure compensation button p 34 OK AF point button p 36 ...

Страница 11: ...sert the lens cap string into the hole in the lens cap 2 Attach the lens cap to the neck strap 3 Attach the lens cap as shown in the image Ŷ Attaching the neck strap Attach the neck strap as shown below Ensure that the neck strap is attached correctly or the camera may fall ...

Страница 12: ...Battery chamber Smart dial Ŷ When pressing the Smart Dial Move UP DOWN LEFT RIGHT Execute options in the shooting mode 1 Change the display 2 Change the timer option 3 Change the close up shooting option 4 Change the Àash option Ŷ When turning the Smart Dial Move option or menu Adjust the shutter speed aperture value exposure value and set the automatic exposure bracketing AEB area in the shooting...

Страница 13: ...hen Àash battery is charging The lamp blinks When the USB cable is inserted to a PC The lamp lights up LCD monitor turns off after initializing the device Transmitting Data with a PC The lamp blinks LCD monitor turns off When the USB cable is inserted into a printer The lamp blinks When the printer is printing The lamp blinks When the AF activates The lamp turns on The camera focus on the subject ...

Страница 14: ...e Ä These gures are measured under Samsung s standard conditions and shooting conditions and may vary depending on the user s methods Important information about battery usage When camera is not in use turn off the power Please remove the battery if the camera will not be used for long periods Batteries can lose power over time and are prone to leaking if kept inside the camera Low temperatures be...

Страница 15: ... time remove other device Camera can not be detected using the front side USB port of computer In this case use the back side USB port of computer If the USB port of the PC doesn t meet the Power output standard 5V 500mA the camera may not be charged Charging LED of the AC Adapter Charging LED Being Charged Red LED is on Charging is complete Green LED is on Charging error Orange LED is off or blin...

Страница 16: ...nt from the actual battery status Insert the battery as shown If the camera does not turn on after you have inserted battery please check whether the battery When the battery chamber cover is opened do not force it This may cause damage to the battery chamber cover Connecting to a Power Source Insert the memory card as shown Turn off the camera s power before inserting the memory card Have the fro...

Страница 17: ...different camera Turn off the camera power whenever the memory card is being inserted or removed Repeated use of the memory card will eventually reduce the mem ory card s performance Should this be the case you will need to purchase a new memory card Wear and tear on the memory card is not covered by the Samsung warranty The memory card is an electronic precision device Do not bend drop or subject...

Страница 18: ... The recording times can be changed by the zoom operation The Zoom W T lever doesn t function during the movie recording Several videos were recorded in succession to determine the total recording time When using a 1GB SD memory the speci ed shooting capacity will be as follows These gures are approximate as image capacities can be affected by variables such as subject matter and memory card type ...

Страница 19: ...splayed again after setting up the date time and language Set up the date time and language before using this camera Setting up the language 1 Select the Language menu by pressing the Up Down button and press the Right button 2 Select the desired sub menu by pressing the Up Down button and press the OK button Setting up the Time Zone 1 Select the Time Zone menu by pressing the Up Down button and p...

Страница 20: ...ery p 15 7 Flash p 40 8 Self timer p 42 9 Macro p 37 10 Dynamic Range p 51 11 Photo Style Selector p 54 12 Face Detection p 47 13 Camera shake compensation Without Sound p 56 59 14 Date Time 2009 01 01 PM 01 00 p 66 15 Camera shake Warning p 29 16 Auto Focus Frame p 53 17 Auto Focus type p 53 18 Drive mode p 52 19 Metering p 51 20 Image Quality Frame Rate p 50 21 Image Size p 50 22 ISO Face Retouc...

Страница 21: ...ium Off Low Medium High Start Sound Off Shutter Sound 1 Beep Sound 1 AF Sound On Self Portrait On Volume Medium Exit Back Functions Sound Display Settings Start Sound Shutter Sound Beep Sound AF Sound Self Portrait Volume Exit Change Functions Sound Display Settings Function Description Start Image Display Brightness Quick View Power Save Language Exit Change Functions Sound Display Settings Start...

Страница 22: ...ons can be set manually Aperture Shutter Priority Aperture values or shutter speed can be set manually Manual Various shooting options including the shutter speed and the aperture values can be set manually User Frequently used shooting options can be preset Night This mode can be used at night or in poor lighting conditions Beauty Shot The skin tone of a subject can be corrected Scene The appropr...

Страница 23: ...ts such as camera shake lighting and distance to the subject The Night mode recognizes scenes only when the Àash is set to off The camera operates the Tripod mode after checking the shooting condition on the tripod for a certain time Despite using a tripod the camera may not select a tripod mode depending on the subject s movement Each scene is recognized in the following conditions Landscape When...

Страница 24: ...automatically When the user con gures an aperture value the camera adjusts the shutter speed automatically When the user selects the shutter speed the camera selects an aperture value for optimal exposure 1 Select the Aperture Shutter Priority mode by using the Mode dial p 21 2 Select an aperture value or shutter speed by turning the Smart Dial An icon will appear on the selected item 3 Select the...

Страница 25: ...Dial 4 Point the camera towards the subject and compose the image by using the LCD monitor 5 Press the Shutter button to capture an image Starting the recording mode How to use the User Setting shooting mode The user s own shooting mode can be used by saving the shooting options which are con gured in the Program Aperture Shutter Priority and Manual modes See page 60 to see how to set the User mod...

Страница 26: ...he Nightscene modes Starting the recording mode Take a photo of portraits by setting options to clear facial imperfections 1 Select the Beauty Shot mode by using the Mode dial p 21 2 Press the Up Down button in Functions menu to select Face Tone or Face Retouch 3 Press the Left Right button to select a desired level of Face Tone or Face Retouch features And then press the OK button 4 Press the Shu...

Страница 27: ...rework Firework scenes Beach Snow For ocean lake beach and snowscape scenes Starting the recording mode Use the menu to easily con gure optimal settings for a variety of shooting situations 1 Select the Scene mode by using the Mode dial p 21 2 Press the Left Right button to select the desired mode 3 Point the camera towards the subject and compose the image by using the LCD monitor 4 Press the shu...

Страница 28: ...pose the image by using the LCD monitor 3 Press the shutter button once and mov ie clips are recorded for as long as the available recording time allows Movie clips will still be recorded if the shutter button is released If you wish to stop recording press the shutter button again Ä The user can shoot movies when press ing the movie shooting button in the shooting mode and the playback mode When ...

Страница 29: ...tails Recording the movie clip without sound What is H 264 MPEG4 part10 AVC With its high compression rate and the small le size it is a standard for the digital video codec It supports the recording functions in a high resolution You can record HD High De nition movie clips 1280X720HQ 30 fps H 264 MPEG4 AVC is a standard for the digital video codec It supports a high quality movie clip in a small...

Страница 30: ...ACB see page 81 function Things to Watch Out for When Taking Pictures Pressing the shutter button down half way Lightly press the shutter button to con rm focus and Àash battery charge Press the shutter button all way down to take the picture Avoid obstructing the lens or the Àash when you capture an image Compose the image by using the LCD monitor Under certain conditions the auto focus system ma...

Страница 31: ...ure and fully depress the SHUTTER button 1 The image to be captured 2 Press the SHUTTER button halfway and focus on the subject Using the Focus Lock 1 Ensure the subject is in the centre of the autofocus frame 2 Press the SHUTTER button halfway When the green auto focus frame lights up it means the camera is focused on the subject Be careful not to press the SHUTTER button all the way down to avoi...

Страница 32: ...isabled even if you operate the Zoom W T lever Used for taking an image or recording voice in the RECORDING mode In MOVIE CLIP mode Pressing the shutter button down fully starts the process for record ing a movie clip Press the shutter button once and the movie clip is recorded for as long as the available recording time in the memory al lows If you wish to stop recording press the shutter button ...

Страница 33: ... operation sound of the Zoom W T lever Select Zoom Mute from the recording menu during video recording to disable the recording of zoom sound You may notice a decrease in image quality when using the digital zoom To view a clearer digital zoom image press the shutter button halfway at the maximum optical zoom position and move the Zoom W T lever to the right again The digital zoom can t be activat...

Страница 34: ... see page 57 for setting procedure In the playback mode this button can be used as an image protec tion button p 86 When a background is brighter than a subject or when intentionally turning on the Àash e g backlight shooting or shooting in poor lighting conditions the user must pop up the Àash by pressing the Àash pop up button See page 40 to set the desired Àash mode for a shooting situation whe...

Страница 35: ...pensation button in the shooting mode 2 Set a desired exposure compensation value by using the LEFT RIGHT but tons or the Smart Dial 3 Press the OK button to save a con gured value and the setting for exposure compensation is complete The exposure com pensation icon appears on the LCD monitor after setting the exposure compensation if the exposure compensation value is not 0 0EV Ä Note that the LC...

Страница 36: ...y as the LCD monitor and is used when it is dif cult for the user to see the LCD monitor due to bright lighting Pressing the EVF LCD button will switch between the electronic view nder and the LCD moni tor The display remains the same when the camera is turned off or when the user selects another mode with the Mode Dial When the electronic view nder is out of focus turn the diopter adjustment leve...

Страница 37: ...the sub menu or for con rming data This button is used when moving to or saving the changed data on the menu screen Press the UP DOWN LEFT RIGHT buttons to shift the AF points OK AF point button Histogram Grid Window Histogram is not displayed when setting the Face Detection function Pressing the OK button Functions Sound Display Settings WB Fine tuning ISO Face Detection Photo Size Quality White ...

Страница 38: ...ded images If the bars in the histogram are higher towards the right the image may be too bright If the bars are higher on the left the image may be too dark If the light ing conditions are too bright to check the subject by using the LCD checking the histogram will enable more precise exposure control for the shots Grid If you focus on the subject using a variety of horizontal or vertical grids y...

Страница 39: ...nity 10 80 Tele Tele Tele 170 Infinity 170 Infinity 80 150 Note that the picture may be blurred if manual focusing is not performed properly How to Set Focus Manually If it is difficult to get the automatic focus to work for example in low light you can manually control the focus 1 Press the Macro button to enable manual focus Then the control bar for manual focus will appear 2 Press the Left Righ...

Страница 40: ...focus range Macro Down button Mode Normal Auto Macro Macro Super Macro Manual Focus o o o o o o o o o o o o o o o o o o o o o o o o o Mode SCENE Normal Auto Macro Macro Super Macro Manual Focus o o o o o o o o o o Focus range is automatically selected in Smart Auto mode ...

Страница 41: ... The speck is caused by the flash light reflecting off atmospheric dust If flash doesn t pop up can not use the flash Flash Left button When the menu is displayed on the LCD monitor pressing the LEFT button makes the cursor shift to the left tab When the menu is not displayed on the LCD monitor the flash LEFT button operates as the flash button Selecting the flash mode 1 Press the Flash pop up but...

Страница 42: ...ates with a slow shutter speed to obtain a balanced correct exposure In poor lighting conditions the camera shake warning indicator à will display on the LCD moni tor Red eye reduction When a shot with red eye is detected this mode will reduce the red eye effect automatically Flash off The Àash does not re Select this mode when capturing images in a place or situation where Àash photography is pro...

Страница 43: ...ice recording mode p 21 2 Press the SELF TIMER RIGHT button until the desired mode indicator displays on the LCD monitor A 10 second 2 second or Double Self timer icon appears on the LCD monitor 3 When you press the SHUTTER button the picture will be taken after the speci ed time has elapsed Selecting the 10 SEC self timer Self timer mode indicator Icon Mode Description 10SEC self timer Pressing t...

Страница 44: ...ection p 47 49 Face Tone p 49 Face Retouch Photo Size Movie Size p 50 Quality Frame Rate p 50 D Range Exp p 51 Metering p 51 Drive p 52 AEB Area p 52 Focus Area p 53 Flash EVC p 53 Photo Style Selector p 54 Image Adjust p 55 Image Stabiliser p 56 Functions Mode Menu Available mode Page Functions Key mapping p 57 Voice p 57 59 Distortion Control p 59 User Mode Set p 60 Stabilizer p 60 ...

Страница 45: ...nctions faster 4 Select a desired menu by pressing the Left Right button and then press the OK button Left Right button Up Down button Right OK button WB Fine tuning ISO Face Detection Photo Size Quality White Balance D Range Exp Exit Back WB Fine tuning ISO Face Detection Photo Size Quality White Balance D Range Exp Exit Back WB Fine tuning ISO Face Detection Photo Size Quality White Balance D Ra...

Страница 46: ...lb lighting Custom Set Allows the user to set the white balance ac cording to the shooting condition Color Temperature Allows the user to set the desired colour tem perature according to the shooting condition Ä Different lighting conditions may cause a colour cast on your images Using the Custom White Balance White balance settings may vary slightly depending on the shooting environment You can s...

Страница 47: ...et below 5M and 3M respec tively You can select the ISO sensitivity when taking pictures The speed or speci c light sensitivity of a camera is rated by ISO numbers Functions Fine tuning the white balance Press the UP DOWN LEFT RIGHT buttons to adjust the desired white balance Seven levels 196 patterns are available on the G M and B A axis G Green A Amber M Magenta B Blue Red light Blue light Candl...

Страница 48: ...cognises many people at the same time it will focus on the nearest person The Digital zoom is not activated in this mode When the camera detects a target face the white colour focus frame will be displayed over the target face and the grey colour focus frame appears over the remaining faces Press the shutter button halfway down to focus on the face and the white focus frame turns green Return to p...

Страница 49: ...nal memory card When a registered face is not detected operates the same as with the face detection function When a registered face is detected a priority level is indicated on the detected face When more than two registered faces are detected order of priority is indicated on the detected faces Ɣ The same person can be recognised as a different person and vice versa depending on glasses brightnes...

Страница 50: ...ect although you don t press the shutter button If you press the Shutter button the picture is taken in the normal way When taking a picture of smile shot showing teethes or keeping the smiley face of your subject helps detecting the smile face of the subject Blink Detection If the eyes of the subject are closed when the shutter button is pressed the camera takes 2 continuous shots and then the im...

Страница 51: ...n compress the les ef ciently Quality Frame rate You can select the compression ratio appropriate for your application of the captured images The higher the compression ratio the lower the picture quality Mode STILL IMAGE mode Icon Sub menu RAW RAW S Fine RAW Fine RAW Normal Super Fine Fine Normal File Format DNG DNG JPEG DNG JPEG DNG JPEG jpeg jpeg jpeg Mode MOVIE CLIP mode Icon Sub menu 60 FPS 3...

Страница 52: ...e calculated based on an average of the available light in the image area However the calculation will be biased towards the centre of the im age area This is suitable for taking a picture of small object like a Àower or insects Ä If the subject is not the centre of the focus area do not use the spot metering as this may result in an exposure error In this circumstance it is better to use exposure...

Страница 53: ...ge size is xed as 640X480 AEB Take three consecutive photos with varying exposure values Use this mode if it is hard to decide exposure of the object High resolution and picture quality increases le saving time which increases stand by time If the Continuous High speed Motion Capture AEB sub menu is selected the Àash will be off automatically If less than 3 pictures are available in the memory the...

Страница 54: ...desired position Press the shutter button to enable Selection AF Once setting is complete the focus mark will be xed at the position set Press the OK button once again to change the location of the focus frame and the focus frame will appear again Ä Even if you turn off the power and turn on it again the previous set ting will be maintained Ä Selection AF is not available when operating the Face D...

Страница 55: ...ption Normal No style effect is applied Soft Soft style is applied Vivid Vivid style is applied Forest Forest style is applied Retro Sepia style is applied Cool Cool style is applied Calm Calm style is applied Classic Black white effect is applied Negative Negative effect is applied Custom RGB De ne an RGB tone to create your own photo style Photo Style Selector When picture style is set face dete...

Страница 56: ...e Up Down button 2 Change the Sharpness by pressing the Left Right button 3 Press the Shutter button to take an image When Negative in photo style is set contrast is not available 2 1 0 1 2 2 1 0 1 2 2 1 0 1 2 Back Move Contrast Sharpness Saturation Image Adjust Saturation You can change the saturation of the image 1 Select Saturation by pressing the Up Down button 2 Change the saturation by press...

Страница 57: ...s in situations where the camera shake warn ing indicator is not displayed If the subject is moving the captured image may be blurred As the DUAL IS DIS uses the camera s digital signal processor it may take a little longer for the camera to process and save the images OIS function may not work suf ciently in the following cases To take pictures of a moving subject To take pictures with higher zoo...

Страница 58: ...rom the moment the picture is stored In the middle of the sound recording pressing the shutter button will stop the voice memo Key mapping A desired AEL button can be set AEL Shooting is available while the exposure is being locked AFL Shooting is available while the focus is being locked AEL AFL Shooting is available while the exposure and the focus are locked AF On This function is a replacement...

Страница 59: ...utter button again File type wav Voice recording mode Functions Pausing while recording a voice Using this function you can record your favourite voice clips into a voice recording le without having to create multiple voice recording les 1 Press the OK button to pause recording 2 Press the OK button again to resume the recording 3 If you wish to stop recording press the shutter button again A dist...

Страница 60: ...llows without voice Distortion compensation Distortion of the centre of an image due to a wide angle lens can be compensated for If you use the distortion compensation function the size of the photo will be smaller than one taken with normal shooting Off Distortion is not compensated for On Distortion is compensated for Ɣ Even though the Distortion Control function is set the Blink Detection funct...

Страница 61: ... user mode You can use your own shooting mode by saving the shooting options which are set in the Program Aperture Shutter Priority and Manual modes Set a desired option and save the setting information Ŷ How to set the user mode 1 Select a mode from Program Aperture Shutter Priority or Manual modes 2 Select the desired mode 3 Select User Mode Set in the Functions menu 4 Select User Mode 1 or User...

Страница 62: ...gh you may have set these to on Start up sound You can select the shutter sound Shutter sound Off 1 2 3 Shutter sound Sound menu If you set sound to ON a beep will sound when buttons are pressed letting you know the camera operation status Beep Sound sub menu Off 1 2 3 Beep Sound Sound Back Set Start Sound Off Shutter Sound 1 Beep Sound 1 AF Sound On Self Portrait On Volume Medium Off Low Medium H...

Страница 63: ...d again the language setting will be preserved Language Setup menu In this mode you can set up basic settings You can use the setup menu in all camera modes except Voice Recording mode The items indicated by are default settings Ä Menus are subject to change without prior notice Display Sound Back Set Start Sound Off Shutter Sound 1 Beep Sound 1 AF Sound On Self Portrait On Volume Medium Off On Ba...

Страница 64: ...r the start up image with the Start Image in the Resize menu in the play mode The start up image will not be deleted by Delete or Format menu The User images will be deleted by Reset menu Start up image 3 X 3 X 2 X 2 Back Set Function Description On Start Image Off Display Brightness Auto Quick View 0 5sec Power Save Off Language English Grid Line 2 X 2 3 X 3 X 2 X 2 Back Set Function Description ...

Страница 65: ...g the speci ed time the LCD monitor will be turned off automatically Sub menus Off The LCD monitor will not be turned off On If the camera isn t operated during the speci ed time about 30 SEC the camera power will be idle Camera status lamp Blinking automatically Ä You can t set the Power Save menu of Playback Mode Display SAVE Back Set Function Description On Start Image Off Display Brightness Au...

Страница 66: ... formatted Yes A window for con rming the selection displays Select the Yes menu A Formatting message appears and the memory will be formatted If you run FORMAT in Play mode a Format is completed message will appear Be sure to run Format on the following types of memory card A new memory card or an unformatted memory card A memory card that has a le this camera can t recognise or one that has been...

Страница 67: ... London Cape Verde Mid Atlantic Buenos Aires Newfoundland Caracas La Paz NewYork Miami Chicago Dallas Denver Phoenix LA San Fran cisco Alaska Honolulu Hawaii Samoa Midway Wellington Auckland Okhotsk Guam Sydney Darwin Adelaide Seoul Tokyo Beijing Hong Kong Bankok Jakarta Yangon Almaty Kathmandu Mumbai New Delhi Tashkent Kabul Abu Dhabi Teheran Moscow Athens Helsinki Rome Paris Berlin Ä DST Dayligh...

Страница 68: ... after a set amount of time in order to prevent unnecessary battery drainage Sub menus Off The power off function will not operate 1 min 3 min 5 min 10 min The power will turn off automatically if not used for the period of time speci ed After replacing the battery the power off setting will be preserved Note that the automatic power off function will not operate if the camera is in the PC Printer...

Страница 69: ...n external monitor the image and menus on the LCD monitor will be visible on the external monitor and the LCD monitor of the camera Selecting Video out type Yellow Video White Sound You can turn on and off the Auto Focus lamp Sub menus Off The AF lamp will not light up in low light conditions On The AF lamp will light up in low light conditions Auto Focus lamp Settings Back Set Video Out NTSC USB ...

Страница 70: ...itor some parts of the image may not be displayed When the camera is connected to an external monitor the menu will be visible on the external monitor and the menu functions are the same as those indicated on the LCD monitor Setting the USB If the camera is set to connect automatically to a PC or a printer using a USB cable you can manually set Computer or Printer USB sub menus Auto Automatically ...

Страница 71: ...sing the POWER button Playing back a still image 1 Select the PLAY mode by pressing the play mode button Î Playing back a movie clip 1 Select the recorded movie clip that you want to play back by using the Left Right button 2 Press the OK button to play back a movie clip file To pause a movie clip file while playing it back press the OK button again Pressing the OK button again will cause the movi...

Страница 72: ...lip file is the same size as the original movie clip 1280x720HQ 640x480 320x240 Ä When you press the down button at the beginning of the movie clip the first frame of the movie clip will be saved as a still image Playing back a recorded voice 1 Select the recorded voice that you want to play back by using the Left Right button 2 Press the OK button to play back a recorded voice file To pause a rec...

Страница 73: ...Playback mode Î p 70 2 Voice Memo p 88 3 DPOF p 89 4 Protect p 86 5 Folder name File name 100 0010 p 66 6 Memory card indicator 7 Battery p 15 8 Histogram p 37 9 ISO 64 6400 p 46 10 Aperture value F2 8 F8 0 11 Shutter speed 16 1 2 000 12 Flash On Off p 40 13 Image size 4000x3000 320x240 p 50 14 Recording date 2009 01 01 p 66 ...

Страница 74: ...ever you turn the lever categories and files are displayed on the Smart Album screen 3 Select the file by pressing the Up Down Left Right buttons 4 Press the Delete Õ button to delete the selected file Highlighted image 9 Thumbnail Window 20 Thumbnail Window When Smart Album feature runs or a category is selected it may take few seconds depends on recorded data volume However it is not a malfuncti...

Страница 75: ... You can tell whether the image displayed is an enlarged view by checking the image enlargement indicator shown at the top left of the LCD monitor If the image is not an enlarged view the indicator will not be displayed You can also check the area of enlargement Movie clips and WAV files can t be enlarged If an image is enlarged a loss of quality may occur The maximum enlargement rate in proportio...

Страница 76: ...image with a voice memo a voice file or a movie clip During playback Temporarily stops playback In Pause mode Resumes playback Info DISP Up button When the menu is displayed on the LCD monitor the UP button operates as a direction button When the menu is not displayed on the LCD monitor pressing the Info button will display image information on the LCD monitor Info DISP button Info DISP button Inf...

Страница 77: ...ENU buttons activate the following LEFT button While the menu is showing the LEFT button operates as a direction button While the menu is not showing press the LEFT button to select the previous image RIGHT button While the menu is showing the RIGHT button operates as a direction button While the menu is not showing press the RIGHT button to select the next image DOWN button If the menu is display...

Страница 78: ...e changed by using the LCD monitor In the PLAY mode pressing the MENU button displays the menu on the LCD monitor The menus you can set up in Play mode are as fol lows To capture an image after setting up the play menu press the PLAY mode button or shutter button Menu Tab Main Menu Sub Menu Page Edit Resize 2592x1944 2048x1536 p 79 1024X768 2592X1728 1800X1200 2592X1458 1920X1080 Start Image Rotat...

Страница 79: ...the camera is connected to a PictBridge supporting printer direct connection to the camera sold separately with a USB cable Setting up the play back function using the LCD monitor Ä Menus are subject to change without prior notice Menu Tab Main Menu Sub Menu Secondary Menu Page Type Auto p 93 Plain Photo FastPhoto Quality Auto Draft Normal Fine Date Auto Off On File Name Auto Off On Reset Yes p 94...

Страница 80: ...ed to a smaller sized image but not vice versa Only JPEG images can be resized Movie clip H 264 Voice recording WAV files can t be resized You can change the resolution of only those files compressed in the JPEG 4 2 2 format The resized image will have a new file name The Start Image image is stored not on the memory card but on the internal memory If a new user image is saved one of the two user ...

Страница 81: ...y mode button and press the MENU button 2 Click the Up Down button from the Edit menu to select Photo Style Selector menu tab and press the OK button 3 Select a desired sub menu by pressing the Left Right button and press the OK button Rotating an image Photo Style Selector Style mode Icon Description Normal No style effect is applied Soft Soft style is applied Vivid Vivid style is applied Forest ...

Страница 82: ...n Change the values Custom colour You can change the R Red G Green and B Blue values of the image Face Retouch You can make the skin in an image appear clear and beautiful 1 Select by pressing the Left Right button and press the OK but ton Then a bar for selecting the face retouch will be displayed 2 Change the face retouch by pressing the Left Right button 3 Press the OK button and the image will...

Страница 83: ...tion by pressing the Left Right button 3 Press the OK button and the image will be saved as a new file name Contrast control You can change the contrast of the image 1 Select by pressing the Left Right button and press the OK button Then a bar for selecting the contrast will be displayed 2 Change the contrast by pressing the Left Right button 3 Press the OK button and the image will be saved as a ...

Страница 84: ...ide Show is closed after one cycle Repeat The Slide show is repeated until cancelled 3 Press the OK button and the slideshow will be started To pause the slide shown while playing it back press the OK button again Pressing the OK button again will cause the Multi Slide Show restart To stop playback of the Multi Slide Show press the OK button and then press the Left or Right button View You can vie...

Страница 85: ... it will be saved as Select1 But when a new image is saved again using New Select the former image which had been saved as Select1 will be saved as Select2 automatically You can change and cancel the images which were saved as Select1 Select2 and Select3 Press the Fn button and the settings are saved 3 Select Play or Repeat in the Start menu to start the multi slide show Selecting Images Unique sc...

Страница 86: ...e screen will be changed to the play mode screen This deletes images stored on the memory 1 Press the play mode button and press the menu button 2 Press the Up Down button and select the File Options menu tab and press the OK button Setting play interval Set the Multi Slide Show play interval 1 Select the Interval sub menu by pressing the UP DOWN button and press the RIGHT button 2 Use the Up Down...

Страница 87: ... UP DOWN button and press the OK button Select Selection window for an image to be protected released is displayed Up Down Left Right Select an image OK button Protect release the image Fn button Your changes will be saved and the menu will disappear File Options All Protect release all saved images If you protect an image the protect icon will be displayed on the LCD monitor An unprotected image ...

Страница 88: ...essing the OK button For a group shot Steps 1 to 3 are identical to the proce dure for a portrait shot 4 When using the OK button a focus frame and a check box appear on a face which can be registered 5 Select the desired face for registration by pressing the LEFT RIGHT buttons and then press the OK button 6 A registration window for face detection appears when pressing the Fn button 7 Select Yes ...

Страница 89: ...press the OK button Off Do not want to use the Recycle Bin function On Deleted photos are saved in the Recycle folder Retrieve You can restore the deleted photos from the Recycle folder 3 Press the OK button to save the changed setting The Recycle Bin function only works with photos When you delete all files at once the files are not saved in the Recycle Bin When the Recycle bin is full of space i...

Страница 90: ...function allows you to embed printing quantity information on a stored image 1 Press the Up Down button and select the DPOF menu tab And then press the Right button 2 Press the Right button again and Standard sub menu will display 3 Select a desired sub menu by pressing the Up Down button and press the OK button Select Selection window for an image to print is displayed Up Down Left Right Select a...

Страница 91: ...t button again Sub menu will display 3 Select a desired sub menu by pressing the UP DOWN button and press the OK button Select Selection window to change the printed size of the image is displayed Up Down Left Right Select an image Zoom W T Button Change the print size Fn button Your changes will be saved and the menu will disappear All Change print size of all saved images Up Down button Select a...

Страница 92: ...o Card command will copy only some of the images and display Memory Full message Then the system will return to the playback mode Please be sure to delete any unnecessary files to free up space before inserting the memory card into the camera When you move the images that are stored in the internal memory by doing Copy To Card to the card the next number of file names will be created in the card t...

Страница 93: ...SB cable 2 Once the camera is turned on the camera automatically recognizes the printer and is connected to it Ä If automatic connection fails set the USB menu to Printer p 69 Ä For a printer that can enable removable disks set the USB menu to Printer Easy printing When you connect the camera to printer in the Play back mode you can print a picture easily Pressing the Left Right button Selects a p...

Страница 94: ... Date Print and File Name Print menus for printed pictures 1 Press the Menu button and the PictBridge menu will display 2 Use the Up Down buttons to select the desired menu and then press the Right button 3 Use the Up Down buttons to select the desired sub menu value and then press the OK button Ä Some menu options are not supported on all printers If not supported the menus are still displayed in...

Страница 95: ...osives or highly flammable materials Do not leave this camera in places subject to dust chemicals like naphthalene and mothballs high temperature and high humidity Keep this camera with silica gel in a hermetically sealed box when not planning to use the camera for a long period of time Sand can be particularly troublesome to cameras Do not let sand get inside the camera when using it on beaches c...

Страница 96: ... LCD assemblies If this does not work lens cleaning paper with lens cleaning fluid can be used Clean the camera body with a soft cloth Do not allow this camera to come into contact with solvent materials such as benzol insecticide thinners etc This may damage the body shell of the camera and also affect its performance Rough handling can damage the LCD monitor Take care to avoid damage and keep th...

Страница 97: ...ge File There are no images stored on the memory Take images Insert a memory card that is holding some images File Error File error Delete the file Memory card error Contact a camera service centre Low Battery There is low battery capacity Insert fresh batteries Power turns off automatically to prevent malfunction due to high temperatures Wait a minute before use The power is automatically tuned o...

Страница 98: ...g the Shutter button There is insufficient memory capacity Delete unnecessary image files The memory card has not been formatted Format the memory card p 65 The memory card is exhausted Insert a new memory card The memory card is locked Refer to Card Locked error message The camera s power is off Turn the camera power on The battery is exhausted Insert fresh batteries p 15 Battery is inserted inco...

Страница 99: ...external monitor has not been connected properly with the camera Check the connection cables There are incorrect files in the memory card Insert a memory card that has correct files When using the PC s explorer the Removable Disk file does not show Cable connection is incorrect Check the connection The camera is off Turn the camera on The operating system is not Windows 2000 XP Vista Mac OS 10 4 A...

Страница 100: ...al 16 1 2 000 sec Continuous AEB 1 4 1 2 000 sec Exposure Control Program AE Metering Multi Spot Center Weighted Face Detection Compensation 2EV 1 3EV steps ISO Auto 64 100 200 400 800 1600 3200 5M 6400 3M Flash Modes Auto Auto Red eye reduction Fill in flash Slow sync Flash off Red Eye Fix Range Wide 0 3 6 0 m Tele 0 8 3 0 m ISO Auto Recharging Time Approx 5 sec Sharpness Soft Soft Normal Vivid V...

Страница 101: ...ze 45 33 37 39 134 152 179 201 318 502 751 1833 222 250 295 331 519 820 1198 2833 333 375 442 494 769 1198 1731 3896 Ä These figures are measured under Samsung standard condi tions and may vary depending on shooting conditions and camera settings Effect Effect Photo Style Selector Image Adjust Sharpness Contrast Saturation Distortion Control Editing Resize Rotate Photo Style Selector Image Adjust ...

Страница 102: ...ject to change without prior notice All trademarks are the property of their respective owners Software Notes Please ensure that you read the instruction manual carefully before use Under no circumstances should all or part of either the software or the user manual be reproduced Copyrights for software are licensed only for use with a camera In the unlikely event of a manufacturing fault we will r...

Страница 103: ... 110MB of available hard disk space Software Support Speci cations Ä It is not compatible with Windows XP and Vista 64 bit Edition Ä Samsung is not responsible for any defects or damages caused by the use of unauthorized computer including an assembled PC For Windows For Macintosh Intel Pentium 4 3 2GHz or later AMD Athlon 64FX 2 6GHz or later 1 8GHz Power Mac G5 or 1 83GHz Intel Core Duo or later...

Страница 104: ...are is only compatible with Windows QuickTime Player 7 6 The movie viewing program QuickTime Player is a movie viewing program and is provided for the Windows OS only Samsung RAW Converter RAW data editing program Files in a RAW dng format can be converted to JPEG or TIFF file formats You should allow 5 10 seconds for running the automatic setup program according to the capability of your computer...

Страница 105: ... You can visit the Samsung web site through the internet 1 The auto run frame will display Click the Samsung Digital Camera Installer menu in the Auto run frame 2 Install the DirectX by selecting a button shown on the monitor If a latest version of DirectX was installed on your computer DirectX may not be installed 3 Install the Samsung Master in the order shown http www samsungcamera com English ...

Страница 106: ...Setting up the application software 4 Install the QuickTime Player 7 6 in the order shown Ú QuickTime Player 7 6 cannot be installed under Windows 2000 5 Install the Samsung RAW Converter in the order shown ...

Страница 107: ...ed with this camera Search the PDF files with Windows explorer Before opening the PDF files you must install the Adobe Reader included in the Software CD ROM Install Adobe Reader from the CD provided If the Internet is not enabled install Adobe Reader by using the executable file located in the CD To install the Adobe Reader 6 0 1 correctly Internet Explorer 5 01 or later has to be installed Visit...

Страница 108: ...ur PC through the USB cable Camera settings for connection 1 Turn on the camera 2 Connect the camera and computer with the supplied USB cable 3 Once the camera is turned on the camera automatically recognizes the computer and is connected to it Ä If automatic connection fails set the USB menu to Computer p 69 Connecting the camera to a PC Disconnecting the camera and PC Refer to page 109 Removing ...

Страница 109: ... you want to paste the file 6 Press the right mouse button and a pop up menu will open Click Paste 7 An image file is transferred from the camera to your PC By using Samsung Master you can see the stored images in the memory directly on the PC monitor and you can copy or move the image files We recommend that you should copy the images to the PC to view them Opening images directly from the remova...

Страница 110: ...those shown depending on the Windows O S 1 Check whether the camera and PC are transferring a file If the camera status lamp blinks please wait until the lamp has finished blinking and is constantly on 4 The Stop a Hardware device window will open Select the USB Mass Storage Device and click the OK button 3 The Unplug or Eject Hardware window will open Select the USB Mass Storage Device and click ...

Страница 111: ...the Start button to download the images 7 Downloaded images will be displayed You can download view edit and save your images and movies with this software This software is only compatible with Windows To start the program click Start Programs Samsung Samsung Master 3 Click Next button Downloading images 1 Connect the camera to your PC 2 A window for downloading images will be displayed after conn...

Страница 112: ...elected image Image display window Images of the selected folder are displayed Ä Refer to the Help menu in Samsung Master for further information Image edit You can edit the still image Image edit functions are listed below Ì Edit menu You can select the following menus Tools You can resize or crop the selected image See the Help menu Adjust You can modify image quality See the Help menu Retouch Y...

Страница 113: ...sert a narration Produce You can save the edited multi media as a new file name You can select AVI Windows media wmv and Windows media asf file types Í Frame display window You can insert multi media in this window Ä Some movie clips that were compressed with a codec that is not compatible with the Samsung Master can t play back in the Sam sung Master Ä Refer to the Help menu in Samsung Master for...

Страница 114: ...k Start ĺ All Programs ĺ Samsung RAW Converter ĺ Samsung RAW Converter Developing the RAW files Image edit functions are listed below Ì Menu bar Í Image editing tools Exposure bias Compensates the exposure value White balance Adjusts the white balance value Tone Adjusts the contrast Colour Changes the colour Sharpness Adjusts the sharpness Development Previewing is available for the final output H...

Страница 115: ...lt whichever you change first The following images show how you can change the exposure to the image using the Samsung RAW Converter You can adjust the exposure by using the menu option as shown in the picture Ÿ Original image P Mode Aperture f 8 Shutter Speed 1 15sec ISO 64 Ÿ Changed image after correcting the exposure You can see the changed results in the histogram windows as shown images Ÿ Ori...

Страница 116: ...es Using the Samsung RAW Converter you can handle the JPEG TIFF files as you edit RAW files You can adjust the white balance sharp ness and reducing the noise is also available The following images show how the contrast was changed on the TIFF image using the Samsung RAW Converter You can adjust the contrast by using the menu option as shown in the picture Menu option for adjusting the contrast Sa...

Страница 117: ...m patible with MAC OS 10 4 3 Connect the camera to the Macintosh and turn the camera power on 4 A new icon will be displayed on the desktop after connecting the camera to the MAC 1 Double click a new icon on the desktop and the folder in the memory will be displayed 2 Select an image file and copy or move it to MAC First complete uploading from computer to camera and then remove the removable disk...

Страница 118: ... connected to the USB port located on the front of the computer the computer may not recognise the camera Connect the camera to the USB port located on the back of the computer Case 1 USB cable is not connected or it is not the supplied USB cable Connect the supplied USB cable Case 2 The camera is not recognised by your PC Sometimes the camera may appear under Unknown Devices in Device Manager Tur...

Страница 119: ... full version should be installed in Windows ServicePack2 or later Ä Although the computer is guaranteed as operated the playback might be intermittent depending on an user s computer When the DirectX 9 0c or later is not installed Install the DirectX 9 0c or later 1 Insert the CD provided with the camera 2 Run the windows explorer and select the CD ROM drive DirectX folder and click the DXSETUP e...

Страница 120: ...posal of batteries in this product Applicable in the European Union and other European countries with separate battery return systems This marking on the battery manual or packaging indicates that the batteries in this product should not be disposed of with other house hold waste at the end of their working life Where marked the chemi cal symbols Hg Cd or Pb indicate that the battery contains merc...

Страница 121: ...stainable re use of material resources Household users should contact either the retailer where they purchased this product or their local government office for details of where and how they can take this item for environmentally safe recycling Business users should contact their supplier and check the terms and conditions of the purchase contract This product should not be mixed with other commer...

Страница 122: ......

Отзывы: