Samsung HW-R650 Скачать руководство пользователя страница 5

ENG - v

ABOUT THIS MANUAL

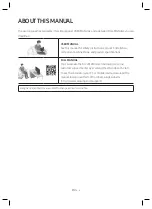
The user manual has two parts: this simple paper USER MANUAL and a detailed FULL MANUAL you can 
download.

USER MANUAL

See this manual for safety instructions, product installation, 

components, connections, and product specifications.

FULL MANUAL 

You can access the FULL MANUAL on Samsung’s on-line 
customer support center by scanning the QR code on the left. 
To see the manual on your PC or mobile device, download the 
manual in document format from Samsung’s website.  

(http://www.samsung.com/support)

Design and specifications are subject to change without prior notice.

Содержание HW-R650

Страница 1: ...USER MANUAL HW R650...

Страница 2: ...educe the risk of fire or electric shock do not expose this appliance to rain or moisture To prevent injury this apparatus must be securely attached to the floor wall in accordance with the installati...

Страница 3: ...g has two blades with one wider than the other A grounding type plug has two blades and a third grounding prong The wide blade or the third prong are provided for your safety If the provided plug does...

Страница 4: ...sunlight or other heat sources This could lead to overheating and cause the unit to malfunction 4 Protect the product from moisture i e vases and excess heat e g a fireplace or equipment creating str...

Страница 5: ...tallation components connections and product specifications FULLMANUAL You can access the FULL MANUAL on Samsung s on line customer support center by scanning the QR code on the left To see the manual...

Страница 6: ...en the Subwoofer and the Soundbar 5 Manually connecting the Subwoofer if automatic connection fails 6 Connecting an SWA 8500S Sold Separately to your Soundbar 7 04 ConnectingtoyourTV 9 Method 1 Connec...

Страница 7: ...he Remote Control 17 Adjusting the Soundbar volume with a TV remote control 20 09 InstallingtheWallMount 21 Installation Precautions 21 Wallmount Components 21 10 Troubleshooting 24 11 License 25 12 O...

Страница 8: ...1 2 3 For more information about power connections see page 4 To purchase additional components or optional cables contact a Samsung Service Center or Samsung Customer Care Depending on the region th...

Страница 9: ...urce input mode D IN AUX HDMI BT USB To turn on BTPAIRING mode change the source to BT mode and then press and hold the Source button for more than 5 seconds D IN Connect to the digital optical output...

Страница 10: ...ation about the required electrical power and power consumption refer to the label attached to the product Label Bottom of the Soundbar Main Unit POWER RearofSubwoofer 1 PowerCord Connecting Electrica...

Страница 11: ...ofer LED Status Description Resolution Blue On Successfully connected normal operation Blinking Recovering the connection Check if the power cable attached to the main Soundbar unit is connected prope...

Страница 12: ...the subwoofer turns off and the blue indicator blinks 5 Sec RearofSubwoofer 2 Press and hold the Upbutton on the remote control for at least 5 seconds The IDSET message appears on the display of the...

Страница 13: ...3 SURROUND RIGHT SURROUND LEFT SURROUND RIGHT 2 Check the standby status of the Wireless Receiver Module after plugging it into an electrical outlet The LINK LED indicator blue LED on the Wireless Re...

Страница 14: ...ec CAUTION If your Soundbar was playing music when it connects to the SWA 8500S you may hear some stuttering from the woofer as the connection finalizes 4 Check if the LINK LED is solid blue connectio...

Страница 15: ...When the audio in a broadcast is encoded in Dolby Digital and the Digital Output Audio Format on your TV is set to PCM we recommend that you change the setting to Dolby Digital When the setting on th...

Страница 16: ...MI IN HDMI IN ARC HDMICable notsupplied BottomoftheSoundbar ConnecttotheHDMIOUT TV ARC portoftheSoundbarmainunit RightSideoftheSoundbar TVARC 1 With the Soundbar and TV turned on connect the HDMI cabl...

Страница 17: ...ss and hold the Source button on the right side panel of the Soundbar for more than 5 seconds to display BTPAIRING 2 Select Bluetooth mode on the TV For more information see the TV s manual 3 Select A...

Страница 18: ...utton on the remote control or press and hold the Source button on the right side of the Soundbar for more than 5 seconds while the Soundbar is in BT mode NOTES If asked for a PIN code when connecting...

Страница 19: ...ble notsupplied BD DVDplayer Set topbox Gameconsole RightSideoftheSoundbar 1 OpticalCable X X Connect DIGITALAUDIOIN OPTICAL on the main unit to the OPTICAL OUT jack of the Source Device using a digit...

Страница 20: ...I cable not supplied from the HDMIIN jack on the back of the product to the HDMI OUT jack on your digital device 2 Connect an HDMI cable not supplied from the HDMIOUT TV ARC jack on the back of the pr...

Страница 21: ...f the adapter cable 3 Press the Source button on the right side panel or on the remote control and then select USB 4 USB appears in the display screen 5 Play music files from the USB storage device th...

Страница 22: ...and hold the Source button on the right side panel of the Soundbar for more than 5 seconds to display BTPAIRING 2 On your device select AV SamsungSoundbarR6 Series from the list that appears When the...

Страница 23: ...SURROUNDSOUND GAME or SMART Select the STANDARD mode if you want to enjoy the original sound DRC DynamicRangeControl Lets you apply dynamic range control to Dolby Digital tracks Press and hold the SOU...

Страница 24: ...to select the next music file Press the Left button to select the previous music file Anynet AutoPowerLink You can turn Anynet and Auto Power Link on or off Anynet and Auto Power Link are turned on an...

Страница 25: ...OOFER SOUND MODE PAIR WOOFER S O U N D M O D E V O L W O O F E R S O U N D B A R S O U N D M O D E V O L W O O F E R S O U N D B A R V O L W O O F E R S O U N D B A R S O U N D M O D E V O L W O O F E...

Страница 26: ...s remote push up and hold the WOOFER button for 5seconds repeatedly until ALL TVREMOTE appears in the display Then use your TV s menu to select external speakers S O U N D M O D E V O L W O O F E R S...

Страница 27: ...l studs Purchase wall mounting screws according to the type and thickness of the wall you want to mount the Soundbar on Diameter M5 Length 1 3 8 inches or longer recommended Connect cables from the un...

Страница 28: ...ed drill bit drill a hole in the wall at each marking If the markings do not correspond to the positions of studs make sure you insert appropriate anchors or mollies into the holes before you insert t...

Страница 29: ...Screws on the wall 8 Slide the Soundbar down as shown below so that the Bracket WallMounts rest securely on the Holder Screws Insert the Holder Screws into the wide bottom part of the Bracket Wall Mou...

Страница 30: ...n to cancel the function Isthevolumesettominimum Adjust the Volume Theremotecontroldoesnotwork Arethebatteriesdrained Replace with new batteries IsthedistancebetweentheremotecontrolandSoundbarmainunit...

Страница 31: ...demarks of DTS Inc in the United States and or other countries DTS Inc All Rights Reserved The terms HDMI and HDMI High Definition Multimedia Interface and the HDMI Logo are trademarks or registered t...

Страница 32: ...erating Humidity Range 10 75 AMPLIFIER Rated Output power 30W x 6 Supported play formats LPCM 2ch Dolby Audio supporting Dolby Digital DTS Subwoofer Name PS WR65D Weight 13 2 lbs 6 0 kg Dimensions W x...

Страница 33: ...pt must be retained by the customer and is the only acceptable proof of purchase It must be presented to the authorized service center at the time service is requested EXCLUSIONS WHATISNOTCOVERED This...

Страница 34: ...mer care Center HEADQUARTERS Samsung Electronics Canada Inc 2050 Derry Road West Mississauga Ontario L5N 0B9 Canada TEL 1 800 SAMSUNG 1 800 726 7864 www samsung com ca support Country Contact Center W...

Страница 35: ...HW R650 MANUEL UTILISATEUR...

Страница 36: ...iminuer les risques d incendie ou de choc lectrique n exposez pas cet appareil la pluie ou l humidit Pour viter des blessures cet appareil doit tre solidement fix au plancher au mur conform ment aux d...

Страница 37: ...fiche polaris e Une fiche polaris e comporte deux lames dont l une est plus large que l autre Une fiche de mise la terre comporte deux lames et une troisi me broche de mise la terre La lame la plus la...

Страница 38: ...chaleur Cela pourrait causer une surchauffe du fil et causer un dysfonctionnement de l unit 4 Prot gez le produit de l humidit comme les vases et d une chaleur excessive comme une chemin e ou de tout...

Страница 39: ...s sur l installation du produit les composants les connexions et les caract ristiques du produit MANUELCOMPLET Vous pouvez acc der au MANUEL COMPLET sur le centre d assistance la client le en ligne de...

Страница 40: ...5 Connexion manuelle du caisson des basses en cas d chec de la connexion automatique 6 Raccordement du module SWA 8500S vendu s par ment au Soundbar 7 04 Branchement votreT l viseur 9 M thode 1 Branch...

Страница 41: ...e la t l commande 17 R glage du volume du Soundbar l aide d une t l commande de t l viseur 20 09 InstallationduSupportMural 21 Pr cautions d installation 21 Composantes murales 21 10 D pannage 24 11 L...

Страница 42: ...undbar Les tapes de connexion d alimentation sont num rot es 1 2 3 Pour plus d informations sur les connexions d alimentation reportez vous la page 4 Pour acheter des composants suppl mentaires ou des...

Страница 43: ...HDMI BT USB Pour activer le mode BTPAIRING d finissez la source sur le mode BT puis appuyez sur le bouton Source et maintenez le appuy pendant plus de 5 secondes D IN Se branche la sortie num rique o...

Страница 44: ...sur la source d alimentation et la consommation lectrique veuillez vous reporter l tiquette appos e sur le produit tiquette Partie inf rieure de l unit principale du Soundbar POWER Arri reducaisson d...

Страница 45: ...t Description R solution Bleu Activ Connexion tablie fonctionnement normal Clignotant R cup ration de la connexion V rifiez si le c ble d alimentation branch l unit principale du Soundbar est bien con...

Страница 46: ...situ l arri re du caisson des basses s teint et le voyant bleu clignote 5 Sec Arri reducaissondesbasses 2 Appuyez sur la touche Haut de la t l commande et maintenez le enfonc pendant au moins 5second...

Страница 47: ...ND RIGHT SURROUND LEFT SURROUND RIGHT 2 V rifiez le statut de veille du module r cepteur sans fil apr s l avoir branch dans une prise lectrique Le voyant LED LINK voyant bleu du module r cepteur sans...

Страница 48: ...st en train de lire de la musique lorsqu il est connect au module SWA 8500S vous entendrez probablement des gr sillements provenant du haut parleur lors de la finalisation de la connexion 4 V rifiez q...

Страница 49: ...d une diffusion est encod en Dolby Digital et que le param tre Format audio de sortie num rique est d fini sur PCM sur votre t l viseur nous recommandons de changer ce param tre en le d finissant sur...

Страница 50: ...I IN HDMI IN ARC V rificationduportHDMIIN ARC devotret l viseur C bleHDMI nonfourni Partieinf rieuredupanneauduSoundbar V rifiezleportHDMIOUT TV ARC surl unit principaleduSoundbar FacedroiteduSoundbar...

Страница 51: ...e enfonc pendant plus de 5 secondes jusqu ce que BTPAIRING apparaisse 2 S lectionnez le mode Bluetooth sur le t l viseur Pour plus d informations reportez vous au manuel du t l viseur 3 S lectionnez A...

Страница 52: ...ntenez la touche Source enfonc e pendant plus de 5 secondes pendant que le Soundbar est en mode BT REMARQUES Si vous tes invit saisir un code PIN lors de la connexion un p riph rique Bluetooth entrez...

Страница 53: ...urBD DVD D codeur Consoledejeu FacedroiteduSoundbar 1 C bleoptique X X Branchez le connecteur DIGITALAUDIOIN OPTICAL de l unit principale sur le connecteur OPTICAL OUT du p riph rique source l aide d...

Страница 54: ...e le connecteur HDMIIN situ l arri re du produit et le connecteur HDMI OUT de votre p riph rique num rique 2 Branchez un c ble HDMI non fourni entre le connecteur HDMIOUT TV ARC situ l arri re du prod...

Страница 55: ...z sur le bouton Source situ sur la face lat rale droite ou sur la t l commande puis s lectionnez le mode USB 4 USB appara t sur l cran d affichage 5 Diffusez des morceaux partir du p riph rique de sto...

Страница 56: ...ar et maintenez le enfonc pendant plus de 5 secondes jusqu ce que BTPAIRING apparaisse 2 Sur votre appareil s lectionnez AV SamsungSoundbarR6 Series dans la liste qui appara t Lorsqu un Soundbar est c...

Страница 57: ...SOUND GAME ou SMART S lectionnez le mode STANDARD si vous voulez profiter du son d origine DRC DynamicRangeControl Vous permet d appliquer la commande de port e dynamique aux pistes Dolby Digital Main...

Страница 58: ...sur le bouton de Gauche pour s lectionner le morceau pr c dent Anynet AutoPowerLink Vous pouvez activer ou d sactiver la fonction Anynet ou Auto Power Link Les fonctions Anynet et Auto Power Link peu...

Страница 59: ...SOUND MODE PAIR WOOFER S O U N D M O D E V O L W O O F E R S O U N D B A R S O U N D M O D E V O L W O O F E R S O U N D B A R V O L W O O F E R S O U N D B A R S O U N D M O D E V O L W O O F E R S...

Страница 60: ...sung poussez le bouton WOOFER vers le haut et maintenez le pendant 5 secondes jusqu ce que ALL TVREMOTE apparaisse sur l cran Ensuite utilisez le menu du t l viseur pour s lectionner les haut parleurs...

Страница 61: ...des murs Achetez des vis de montage mural en fonction du type et de l paisseur du mur sur lequel vous souhaitez installer le Soundbar Diam tre M5 Longueur 1 3 8 pouces ou plus long Raccordez les c bl...

Страница 62: ...pri e percez un trou dans le mur chaque marque Si les marques ne correspondent pas aux positions des montants de la cloison veillez ins rer les chevilles ou les chevilles Molly appropri es dans les tr...

Страница 63: ...a Soundbar vers le bas comme illustr ci dessous afin que les querresde supportmural reposent fermement sur les Visdesupport Ins rez les Visdesupport dans la partie large inf rieure des Supportdefixati...

Страница 64: ...ver la fonction Levolumeest ilr gl auminimum R glez le volume Lat l commandenefonctionnepas Lespilessont ellesd charg es Remplacez les par de nouvelles piles Ladistanceentrelat l commandeetl unit prin...

Страница 65: ...other countries DTS Inc All Rights Reserved The terms HDMI and HDMI High Definition Multimedia Interface and the HDMI Logo are trademarks or registered trademarks of HDMI Licensing LLC in the United...

Страница 66: ...75 AMPLIFICATEUR Puissance de sortie nominale 30W x 6 Formats de lecture pris en charge LPCM 2ch Dolby Audio prise en charge de Dolby Digital DTS Nom du caisson de basses PS WR65D Poids 13 2 Ibs 6 0 k...

Страница 67: ...doit le pr senter au Centre de service agr au moment o il fait la demande d une r paration sous garantie EXCLUSIONS CEQUIN ESTPASCOUVERT Cette garantie ne couvre pas les dommages caus s par un accide...

Страница 68: ...nsommateurs Samsung SI GE SOCIAL Samsung Electronics Canada Inc 2050 Derry Road West Mississauga Ontario L5N 0B9 Canada TEL 1 800 SAMSUNG 1 800 726 7864 www samsung com ca_fr support Country Contact C...

Отзывы: