background image

Français


39

03

Confi

 guration

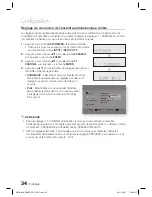
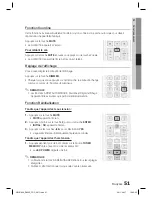
Réglage du mode NEO:6

Vous pouvez utiliser le son 2 canaux sur un son 5.1 canaux ou 7.1 canaux pour écouter de la musique ou 
visionner un fi lm.

Appuyez sur la touche 

SETUP/MENU

 de la télécommande.

Chaque fois que vous appuyez sur cette touche, le système 
bascule entre les modes 

INPUT

 et 

SETUP OFF

.

Appuyez sur les touches ▲▼ pour sélectionner 

SURROUND

puis appuyez sur la touche 

ENTER

.

Appuyez sur les touches ▲▼ pour sélectionner 

DTS NEO:6

puis appuyez sur la touche 

ENTER

.

Appuyez sur la touche ENTER pour régler le mode C-IMAGE 
de votre choix. Appuyez sur les touches ◄ ►pour régler C-
IMAGE sur une valeur entre 0 et 5. Ce paramètre permet de 
régler l’image centrale via les enceintes avant et centrale. « 5 » 
est la plus valeur la plus élevée.

Utilisation du mode NEO:6

Appuyez sur la touche 

NEO:6

 de la télécommande.

MUSIC 

 :  Lorsque vous écoutez de la musique, vous pouvez profi ter des effets sonores comme si 

vous étiez physiquement dans la salle de concert.

CINEMA 

 : Ajoute du réalisme à la bande son du fi lm.

OFF 

:  Émet le signal original sans lui appliquer l'effet sonore des champs acoustiques ni aucun autre effet sonore.

REMARQUE

Le mode NEO:6 fonctionne uniquement avec les signaux audio 2 canaux dotés de fréquences 
d’échantillonnage de 32 kHz, 44 kHz ou 48 kHz.

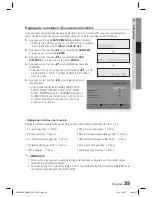
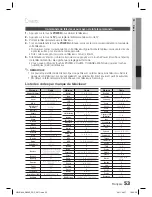
Réglage du mode EX/ES

Lorsque les enceintes ambiophoniques arrière sont connectées, vous pouvez écouter le son multi-canal 7.1 à 
l’aide d’un décodeur intégré Dolby Digital Surround EX ou DTS ES. Cette fonction est compatible avec une source 
Dolby Digital ou DTS (telle qu’un lecteur de DVD), mais pas avec des sources à 2 canaux LPCM ou Dolby Digital.

Appuyez sur la touche 

SETUP/MENU

 de la télécommande.

Chaque fois que vous appuyez sur cette touche, le système 
bascule entre les modes 

INPUT

 et 

SETUP OFF

.

Appuyez sur les touches ▲▼ pour sélectionner 

SURROUND

puis appuyez sur la touche 

ENTER

.

Appuyez sur les touches ▲▼ pour sélectionner 

EX/ES

, puis 

appuyez sur la touche 

ENTER

.

Appuyez sur la touche ▲▼ pour régler le mode EX/ES de 
votre choix.

AUTO :

 si l’unité reçoit un signal audio qu’elle peut reconnaître, 

elle sélectionne le meilleur décodeur pour effectuer la lecture par 
le biais des canaux 7.1. Si l’amplifi cateur ne reconnaît pas le 
signal audio, elle n’effectuera pas automatiquement la lecture 
par le biais des canaux 7.1.

OFF : 

Le décodeur Surround EX/DTS ES Dolby Digital ne 

sera pas utilisé pour la lecture.

ON : 

le signal Dolby Digital ou DTS sera émis par le biais des canaux 7.1 à l’aide du décodeur 

Surround EX/DTS ES Dolby Digital.

REMARQUE

 Vous ne pouvez pas utiliser le canal DTS-ES si les enceintes ambiophoniques arrière ne sont pas 
connectées.

1.

2.

3.

4.

1.

2.

3.

4.

HW-D600_D650S_FRC_0617.indd   39

HW-D600_D650S_FRC_0617.indd   39

2011-06-17     10:33:29

2011-06-17     10:33:29

Содержание HW-D600

Страница 1: ...es Thank you for purchasing this Samsung product To receive more complete service please register your product at www samsung com register HW D600 HW D650S HW D600_D650S_XAC_0614 indd 1 HW D600_D650S_XAC_0614 indd 1 2011 06 17 10 34 09 2011 06 17 10 34 09 ...

Страница 2: ...slots are not covered Do not stack anything on top of the product To disconnect the product completely from the power supply remove its plug from the wall outlet If you leave the product unused for a long period of time disconnect the plug from the wall outlet During thunderstorms disconnect the AC plug from the wall outlet Voltage spikes caused by lightning could damage the product Do not expose ...

Страница 3: ...ng the FM Antenna 26 Connecting AUX Components SETUP 27 27 Before Using the AV Receiver 27 Home Menu 28 Selecting Digital HDMI Analog 29 Setup Menu Tree 32 Audio Setup 32 Selecting a Source Device And Connection Jack Digital Audio In 32 Setting the Speaker Size 34 Connection Setting For Surround Back 35 Setting the Speaker Listening Distance 36 Setting the Speaker Level 37 Setting the Test Tone 38...

Страница 4: ...r BD Player with the Remote Control OTHER INFORMATION 55 55 Troubleshooting 56 Product Protection Function 56 Auto Calibration Error List 57 Specifications Figures and illustrations in this User Manual are provided for reference only and may differ from actual product appearance An administration fee may be charged if either an engineer is called out at your request and there is no defect in the pr...

Страница 5: ... a surround back channel for more spacious sound compared to regular 5 1 channel Dolby Digital Dolby Digital Plus Dolby Digital Plus is the next generation audio technology for all high definition programming and media Dolby True HD Dolby True HD is Dolby s next generation lossless technology developed for high definition disc based media DTS 96 24 DTS 96 24 encodes standard 16 bit 44 1 kHz sound ...

Страница 6: ...und with normal stereo audio sources Anynet HDMI CEC Function Anynet is a function that can be used to operate this AV Receiver with a Samsung TV remote control by connecting the receiver to a SAMSUNG TV using an HDMI Cable This function is available only in connection with Samsung TV and DVD player supporting Anynet HDMI CEC Accessories Check the box for the supplied accessories listed below INPU...

Страница 7: ...UT SELECT BUTTON Used to select a source FM TV BD DVD SAT GAME AUX CD IPOD AUDIO IPOD VIDEO 8 AUDIO ASSIGN BUTTON Toggles to select an input mode for the selected source 9 SOUND EFFECT BUTTON Toggles to select a surround sound mode 10 SETUP BUTTON Displays the SETUP menu 11 UP DOWN LEFT RIGHT BUTTONS Used to move the cursor up down left or right Also used to select detailed options in the SOUND EF...

Страница 8: ... status of the receiver 13 RETURN BUTTON Return to the previous menu 14 ASC BUTTON Used to select the auto calibration mode 15 S DIRECT STEREO BUTTON Used to select the S DIRECT or STEREO mode Output the original signal as it is without applying the sound field effect or any other sound effect 16 3D SOUND BUTTON Press to apply 3D Sound effect 17 TONE CONTROL BUTTON Used to set the bass treble level...

Страница 9: ...ONLY FOR SERVICE JACK Used for the service repair 9 AUDIO IN JACKS Receives the audio signal from a video player BD DVD SAT TV 10 OPTICAL IN JACKS DIGITAL AUDIO IN Receives the digital optical audio signal 11 COAXIAL IN JACK DIGITAL AUDIO IN Receives the digital coaxial audio signal 12 SURROUND BACK OUT JACKS Outputs the Surround Back analog signal to the external amplifier 13 SUBWOOFER AUDIO OUT J...

Страница 10: ...EXIT INFO TUNER 3D SOUND iPod AV SYNC ASC SAT GAME TV BD DVD CD AUX SLEEP DIMMER DSP NEO 6 AUDIO ASSIGN PROLOGIC 1 2 3 4 5 6 7 8 0 9 TV AMP BD DVD SUB WOOFER CROSS OVER 1 3 4 6 7 8 9 10 11 12 13 14 15 22 20 5 21 2 16 23 17 19 18 35 36 24 25 26 27 28 29 31 30 32 33 34 HW D600_D650S_XAC_0614 indd 10 HW D600_D650S_XAC_0614 indd 10 2011 06 17 10 34 38 2011 06 17 10 34 38 ...

Страница 11: ...TEREO for radio broadcasts 12 TONE BUTTON You can adjust the bass and treble level 13 SETUP MENU BUTTON Displays the SETUP menu 14 UP DOWN LEFT RIGHT BUTTONS Used to navigate the menus 15 RETURN BUTTON Used to return to the previous menu from the SETUP menu 16 FUNCTION SELECTOR BUTTONS Used to select an input source 17 AV SYNC BUTTON Used to select the Audio Delay Mode 18 ASC BUTTON Used to set th...

Страница 12: ...change the radio broadcasting frequency or TV channel 30 S DIRECT BUTTON Press to select S DIRECT mode 31 TUNER MEMORY BUTTON Used to set a preset radio frequency 32 INFO BUTTON Display information on the connected device currently being used 33 ENTER BUTTON Used to select an item in the SETUP menu 34 EXIT BUTTON Exits the SETUP menu 35 3D SOUND BUTTON Press to apply 3D Sound effect 36 CROSS OVER ...

Страница 13: ... type of batteries Batteries that look similar may differ in voltage Always replace both batteries at the same time Do not expose the batteries to heat or a flame Operation Range of the Remote Control The remote control can be used up to approximately 23 feet 7 meters in a straight line It can also be operated at a horizontal angle of up to 30 from the remote control sensor Battery size AAA HW D600...

Страница 14: ...r tweeters will be at the same height as your ears Align the front face of the front speakers with the front face of the center speaker or place them slightly in front of the center speaker Center Speaker It is best to install it at the same height as the front speakers You can also install it directly over or under the TV Surround Speakers Place these speakers behind your listening position If th...

Страница 15: ...t surround sound experience you should connect five speakers and a subwoofer The following table shows which channels you should use based on the number of speakers you have 2 speakers 3 speakers 4 speakers 5 speakers 7 speakers DPL IIx Option 7 speakers DPL IIz Option SBL FHL SBR FHR NOTE If you place a speaker near your TV set screen color may be distorted because of the magnetic field generated b...

Страница 16: ...tric shock Make sure the polarities and are correct If you want to use a active subwoofer speaker not supplied connect a subwoofer speaker into the SUBWOOFER OUT terminal in the rear panel By using an external amplifier you can connect the surround back speakers SBL SBR or front height speakers FHL FHR to improve your system up to a 7 1 channel system ONLY FOR SERVICE ONLY FOR UPDATE SURROUND BACK ...

Страница 17: ... A TV with an HDMI jack Video Audio A TV with a DVI D jack TV supporting HDCP Video A TV with a DVI D jack TV not supporting HDCP NOTE Audio from SACD discs will not be heard with this connection To play a DVD disc whose copyright is protected by CPPM use a player supporting CPPM The quality of the audio output through the HDMI jack sampling frequency and bit rate may be limited by the performance...

Страница 18: ...d then press the ENTER button Press the buttons to select HDMI SETUP and then press the ENTER button Press the buttons to select HDMI ANYNET and then press the ENTER button Press the buttons to set ANYNET to ON and then press the ENTER button To exit setup mode Press the SETUP MENU or EXIT button on the remote control SETUP OFF appears on the display and Setup Mode is exited NOTE If you use an HDM...

Страница 19: ...o Connection Connect the Digital Input OPTICAL 3 on your AV Receiver to the Digital Output of the TV OR Connect AUDIO IN TV on your AV Receiver to the Audio Out of the TV ONLY FOR SERVICE ONLY FOR UPDATE SURROUND BACK OUT SUBWOOFER OUT SURROUND BACK OUT SUBWOOFER OUT OUT VIDEO IN AUDIO OUT OPTICAL OUT or HW D600_D650S_XAC_0614 indd 19 HW D600_D650S_XAC_0614 indd 19 2011 06 17 10 34 51 2011 06 17 1...

Страница 20: ...t the Digital Input OPTICAL 1 on your AV Receiver to the Digital Output of the DVD BD player OR Connect AUDIO IN BD DVD on your AV Receiver to the Audio Out of the DVD BD player ONLY FOR SERVICE ONLY FOR UPDATE SURROUND BACK OUT SUBWOOFER OUT SURROUND BACK OUT SUBWOOFER OUT OUT OPTICAL OUT AUDIO OUT VIDEO OUT VIDEO IN or or or DVD or BD Player HW D600_D650S_XAC_0614 indd 20 HW D600_D650S_XAC_0614 ...

Страница 21: ...TE Disconnect the power plug from the outlet if you will not use this unit for a long period of time If the cable set top box has only one audio output jack connect it to either the right or left audio input jack of the main unit Connect the audio cable s red plug to the red jack and white cable to the white jack ONLY FOR SERVICE ONLY FOR UPDATE SURROUND BACK OUT SUBWOOFER OUT SURROUND BACK OUT SU...

Страница 22: ...nnect the audio cable s red plug to the red jack and white cable to the white jack If the CD player has only one audio output jack connect it to either the right or left audio input jack of the main unit ONLY FOR SERVICE ONLY FOR UPDATE SURROUND BACK OUT SUBWOOFER OUT SURROUND BACK OUT SUBWOOFER OUT OUT AUDIO OUT COAXIAL OUT or CD Player HW D600_D650S_XAC_0614 indd 22 HW D600_D650S_XAC_0614 indd 2...

Страница 23: ...y outputs analog signal AV Receiver s SURROUND BACK OUT provides the Volume Control The external amplifier with volume control and without volume control can be used When you use the external amplifier with volume control external amplifier s volume should be adjusted to a suitable position The volume control for the 7 1 channel can be controlled in this AV receiver ONLY FOR SERVICE ONLY FOR UPDATE S...

Страница 24: ...he INPUT SELECT on the main unit The mode switches as follows FM TV BD DVD SAT GAME AUX CD IPOD AUDIO IPOD VIDEO NOTE You must have the VIDEO Monitor or TV output connected to your TV to view iPod video See page 19 Adjust the volume to a moderate level before you connect your iPod and AV Receiver When the unit is powered on and you connect an iPod the unit will charge your iPod s battery Make sure...

Страница 25: ...th generation iPod nano 3rd generation iPod nano 2nd generation iPod nano 1st generation iPhone 4 iPhone 3GS iPhone 3G iPhone NOTE Made for iPod means that an electronic accessory has been designed to connect specifically to iPods and has been certified by the developer to meet Apple performance standards Made for iPhone means that an electronic accessory has been designed to connect specifically to ...

Страница 26: ...rd Keep it as far away as possible If you experience poor FM reception use an external antenna Connecting AUX Components You can connect external devices you use for a short time camcorder game console mobile equipment etc to the front of this unit for convenience 1 2 3 ONLY FOR SERVICE ONLY FOR UPDATE SURROUND BACK OUT SUBWOOFER OUT SURROUND BACK OUT SUBWOOFER OUT OUT FM antenna supplied AUDIO OU...

Страница 27: ...Each time you press this button FM TV BD DVD SAT GAME AUX CD IPOD AUDIO IPOD VIDEO will be selected in turn Method 2 Press the BD DVD SAT GAME TV CD iPod or TUNER button You can directly select the desired function Home Menu Use the HDMI cable to connect between main unit and monitor Press SETUP MENU to display the INPUT message on the display screen You will see the OSD menu in a few seconds NOTE...

Страница 28: ... mode changes as follows For BD DVD function For SAT function For TV function For CD function For AUX function NOTE You can also change the input mode by pressing the AUDIO ASSIGN button on the front of your AV Receiver You can enjoy Dolby Digital or DTS if you connect the digital audio output jack of an external audio component to the optical or coaxial digital audio input jack on the main unit F...

Страница 29: ...CAL1 2 COAXIAL CD OPTICAL1 2 SPEAKER SIZE SPEAKER DISTANCE SPEAKER LEVEL TEST TONE DPLIIx DTS NEO 6 EX ES AUDIO SYNC MP3 ENHANCER SMART VOLUME AUTO CALIBRATION DRC HDMI SETUP 7 1 CHANNEL DUAL MONO SPEAKER SURROUND OPTION INPUT SELECTION INPUT TONE CONTROL HW D600_D650S_XAC_0614 indd 29 HW D600_D650S_XAC_0614 indd 29 2011 06 17 10 35 18 2011 06 17 10 35 18 ...

Страница 30: ... SPEAKER LEVEL SURROUND SURROUND BACK CENTER FRONT HEIGHT LARGE NONE SMALL LARGE NONE SMALL 60Hz 80Hz 100Hz 120Hz 150Hz 180Hz 200Hz SUBWOOFER CROSSOVER YES NO FRONT LARGE SMALL PLIIz SURR BACK 7 1 CHANNEL MANUAL LARGE NONE SMALL AUTO FRONT HEIGHT LEFT FRONT HEIGHT RIGHT CENTER SURROND LEFT FRONT LEFT FRONT RIGHT SURROUND RIGHT SURROUND BACK LEFT SURROUND BACK RIGHT SUBWOOFER FRONT HEIGHT LEFT FRON...

Страница 31: ...O SYNC HDMI AUDIO HDMI SETUP AVR TV OFF ON DUAL MONO CH1 OFF ON CH2 BOTH ARC OFF AUTO HDMI ANYNET MAXIMUM AUTO AUDIO SYNC 0ms 240ms 10ms step OPTION TONE CONTROL OFF ON TONE BASS TREBLE 6dB 6dB 1dB Step 6dB 6dB 1dB Step MODE OFF ON MEASUREMENT move to Auto Calibration Measurement Page MINIMUM 7 7 HW D600_D650S_XAC_0614 indd 31 HW D600_D650S_XAC_0614 indd 31 2011 06 17 10 35 18 2011 06 17 10 35 18 ...

Страница 32: ...her certain speakers are used or not Press the SETUP MENU button on the remote control Each time the button is pressed the mode switches between INPUT and SETUP OFF Press the buttons to select SPEAKER and then press the ENTER button Press the buttons to select SPK SIZE and then press the ENTER button Press the buttons to select the speaker you want and then press the ENTER button Each time you pre...

Страница 33: ...akers NONE Select when no speaker is used YES subwoofer Select when using the subwoofer speaker NO subwoofer Select when not using the subwoofer speaker CROVR Select the crossover frequency for the best bass response in your speakers NOTE You can also use the SETUP ENTER RETURN buttons on the front of your AV Receiver When the Front speaker is only set to LARGE you can select LARGE of other speake...

Страница 34: ...o install the surround back speaker in the default settings With this setting you can enable the Dolby Pro Logic IIx mode PLIIz Select this if you want to install the surround back speaker in the top front corner With this setting you can enable the Dolby Pro Logic IIz mode NOTE Depending on the 7 1 CHANNEL settings the surround back speaker or front height speaker menus may not be activated or ma...

Страница 35: ...ER Speakers you can set the distance from the speaker to listening position between 1ft 30ft 0 3 9 0m in intervals of 1ft 0 3m Setting Speaker Distance Set the distance from the speaker to listening position in intervals of 1ft 0 3m F L front left 1ft 30ft SW subwoofer 1ft 30ft F R front right 1ft 30ft SBL surround back left 1ft 30ft S L surround left 1ft 30ft SBR surround back right 1ft 30ft S R ...

Страница 36: ...crements The sound gets quieter at 10dB and louder at 10dB Setting Speaker Level F L front left 10 10dB SW subwoofer 10 10dB F R front right 10 10dB SBL surround back left 10 10dB S L surround left 10 10dB SBR surround back right 10 10dB S R surround right 10 10dB FHL front height left 10 10dB CEN center 10 10dB FHR front height right 10 10dB NOTE If Dolby Pro Logic IIz is set to On the Surround B...

Страница 37: ...he ENTER button F L CEN S W F R S R S L will be selected in turn 2 Press the buttons to set the Test Tone mode you want You can adjust the speaker output level from 10 to 10dB by 1 step The sound gets quieter at 10dB and louder at 10dB Test Tone Output F L front left 10 10dB CEN center 10 10dB F R front right 10 10dB S W subwoofer 10 10dB S L surround left 10 10dB SBL surround back left 10 10dB S ...

Страница 38: ...ress the ENTER button Press the buttons to select DPLIIx and then press the ENTER button Press the buttons to select the option you want and then press the ENTER button PANORAMA Press the buttons to select ON or OFF This mode extends the front stereo image to include the surround speakers for an exciting wraparound effect with side wall imaging DIMENSION Press the buttons to set from 7 to 7 Increm...

Страница 39: ...ting EX ES Mode When surround back speakers are connected you can listen to 7 1 multi channel sound using the built in Dolby Digital Surround EX or DTS ES decoder This function works when a Dolby Digital or DTS source such as a DVD player is input and does not work with L PCM and Dolby Digital 2 channel sources Press the SETUP MENU button on the remote control Each time the button is pressed the m...

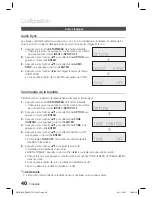
Страница 40: ...utton is pressed the mode switches between INPUT and SETUP OFF Press the buttons to select OPTION and then press the ENTER button Press the buttons to select TONE CONTROL and then press the ENTER button Press the buttons to select TONE and then press the ENTER button Press the buttons to select ON or OFF you want and then press the ENTER button If it is set to TONE OFF the Tone Control function wi...

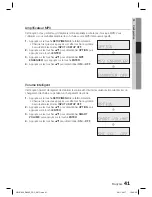
Страница 41: ...ENTER button Press the buttons to select ON or OFF Smart Volume This will regulate and stabilize the volume level against a drastic volume change when changing channels or during a scene transition Press the SETUP MENU button on the remote control Each time the button is pressed the mode switches between INPUT and SETUP OFF Press the buttons to select OPTION and then press the ENTER button Press t...

Страница 42: ...ect OPTION and then press the ENTER button Press the buttons to select AUTO CALIBRATION and then press the ENTER button Press the buttons to select MEASUREMENT and then press the ENTER button To create the optimal 5 1 channel sound field the selections are in the following sequence L C R SR SBR SBL SL SW MODE ON The auto calibration mode is set to on MODE OFF The auto calibration mode is set to off...

Страница 43: ...tton Press the buttons to select DRC and then press the ENTER button Press the buttons to set the DRC you want AUTO The Dynamic Range Control will be set automatically based on the information provided by the Dolby TrueHD Soundtrack MIN Sets DRC effect to minimum STD Sets DRC effect to standard MAX Sets DRC effect to maximum Dual Mono Setup Dual mono programs have two independent mono channels You...

Страница 44: ... speakers set it to TV Otherwise leave it on AVR to listen to audio from the A V receiver AVR HDMI audio is not output TV HDMI audio is output HDMI ANYNET ON OFF Anynet is a function that enables you to control other Samsung Devices with your Samsung TV s remote control ON Anynet is enabled OFF Anynet is disabled ARC AUTO OFF If you use the HDMI cable to connect between HDMI IN of an Audio Return ...

Страница 45: ...be selected in turn Press the button Each time you press the button STEREO HALL 1 HALL 2 J CLUB CHURCH ROCK CLASSIC LIVE GAME MOVIE CONCERT STADIUM will be selected in turn You can also select the DSP mode by pressing the DSP button on the remote control Selecting the 3D SOUND mode Press the AUDIO EFFECT button to select 3D SOUND mode Each time you press this button 3D SOUND will be selected in tu...

Страница 46: ...C R SL SR SBL SBR SW DTS ES O O O O O DTS ES L C R SL SR SBL SBR SW DTS 96 24 O O O O DTS 96 24 L C R SL SR SW DTS HD DTS HD Master Audio O O O O O DTS HD MSTR L C R SL SR SBL SBR SW DTS HD High Resolution O O O O O DTS HD L C R SL SR SBL SBR SW LPCM Multi Channel Multi Channel O O O O O Digital LPCM L C R SL SR SBL SBR SW Multi Channel O O O O Height O Digital LPCM L C R SL SR H SW 2 ch PCM Stere...

Страница 47: ...y disappears automatically Setting the Subwoofer Level SW Subwoofer 10 10dB Listening to the Radio You can listen to the radio by using either automatic or manual tuning Press the INPUT SELECT button on the remote control to select FM Select a frequency radio broadcast Preset tuning Press the buttons on the remote control to select the preset frequency Manual tuning 1 Automatic tuning Press and ho...

Страница 48: ...to select 89 10 Refer to step 2 above to tune in automatically and manually Press the TUNER MEMORY button on the main unit You can also use the TUNER MEMORY button on the remote control Tuner number will blink on the display Press the TUNING CH buttons on the remote control to select preset 2 You can select from presets 1 to 15 Press the TUNER MEMORY button on the main unit Tuner number will disap...

Страница 49: ...nds on the software version of your iPod You can also select iPod by pressing the iPod button on the remote control Watching a Movie iPod video function You can play video files stored in the iPod player on a TV by connecting it to the AV receiver Connect the iPod dock connector to the iPod jack on the AV receiver In the iPod screen move to Videos Settings and set the TV Out option to On Place the ...

Страница 50: ...n the software version of your iPod When the current file is played to the end the next file will not be played automatically To play the next file select a file to play in the list screen of the iPod player No other screen than the playback one will appear on the TV screen Check other screens on the iPod player Convenient Functions Sleep Timer Function You can set the time that this unit will shut it...

Страница 51: ...st Display functions can only be operated with the remote control Reset Function When the Power is on Press the MUTE button MUTE appears on the display Press the 2 button five times and then press the ENTER button INITIAL NO appears on the display Press the buttons to select YES The unit will turn off after 5 seconds When the Power is Off Press and hold the TUNER MEMORY button on the front of your ...

Страница 52: ...ntaining the firmware upgrade into the USB port on the back of the main unit Please be careful to not disconnect the power or remove the USB drive while upgrades are being applied The main unit will turn off automatically after completing the firmware upgrade When software is upgraded settings you have made will return to their default factory settings We recommend you write down your settings so th...

Страница 53: ...21 22 23 24 25 26 27 28 29 30 32 34 35 36 48 59 90 Daytron 40 Dynasty 03 Emerson 03 15 40 46 59 61 64 82 83 84 85 Fisher 19 65 Funai 03 Futuretech 03 General Electric GE 06 40 56 59 66 67 68 Hall Mark 40 Brand Code Realistic 03 19 Sampo 40 Samsung 00 15 16 17 40 43 46 47 48 49 59 60 98 Sanyo 19 61 65 Scott 03 40 60 61 Sears 15 18 19 Sharp 15 57 64 Signature 2000 M Wards 57 58 Sony 50 51 52 53 55 S...

Страница 54: ...ns 0 9 NOTE The remote control may not work on some brands of DVD Also some operations may not be possible depending on your brand of DVD The remote control will work with Samsung DVD BD by default DVD Brand Code List Brand Code Number Brand Code Number Brand Code Number DENON 003 032 ONKYO 004 014 TOSHIBA 004 018 DOONOON 019 OPTIMUS 011 YAMAHA 009 033 DMTECH 017 PANASONIC 021 ZENITH 004 024 FISHE...

Страница 55: ...the left right speaker or left right input output cables connected properly Check the left right channel and connect it them correctly Can t receive radio broadcasts Is FM antenna connected properly Connect the antenna correctly If the input strength of antenna signal is weak install the FM antenna in a place with good reception There is no sound from surround speakers Are the surround speakers co...

Страница 56: ...en you turn the unit on again after turning it off PROTECTION mark will disappear on the display and the unit will work properly Auto Calibration Error List Error No Auto Calibration Error Message on OSD E02 NO MIC Connect the calibration microphone E03 NOISY Keep quiet during the measurement E04 MIC LEVL The speaker are too close to the microphone Install all speakers and the calibration micropho...

Страница 57: ...87 5 108 0MHz Usable sensitivity 12dBf S N ratio MONO STEREO 55 55dB Distortion MONO STEREO 0 3 0 8 Stereo separation 30dB Tuner output level 1kHz 75kHz Dev AMPLIFIER Rated output 20Hz 20kHz THD 0 9 Front speaker left right 6 Ω 100W CH Center speaker 6 Ω 100W CH Surround speaker left right 6 Ω 100W CH Subwoofer speaker 6 Ω 100W CH Input sensitivity impedance 450mV 47kΩ S N ratio analog input 80dB ...

Страница 58: ... purchase It must be presented to the authorized service center at the time service is requested This warranty does not cover damage due to accident fire flood and or other acts of God misuse incorrect line voltage improper installation improper or unauthorized repairs commercial use or damage that occurs in shipping Exterior and interior finish lamps glass are not covered under this warranty Cust...

Страница 59: ...700 726 7864 www samsung com Slovakia 0800 SAMSUNG 726 7864 www samsung com Spain 902 1 SAMSUNG 902 172 678 www samsung com Sweden 0771 726 7864 SAMSUNG www samsung com Switzerland 0848 SAMSUNG 7267864 CHF 0 08 min www samsung com ch www samsung com ch_fr French U K 0330 SAMSUNG 7267864 www samsung com Eire 0818 717100 www samsung com Lithuania 8 800 77777 www samsung com Latvia 8000 7267 www sams...

Страница 60: ...HW D600_D650S_XAC_0614 indd 60 HW D600_D650S_XAC_0614 indd 60 2011 06 17 10 35 33 2011 06 17 10 35 33 ...

Страница 61: ...és Merci d avoir acheté ce produit Samsung Pour obtenir un service plus complet veuillez enregistrer votre produit à www samsung com register HW D600 HW D650S HW D600_D650S_FRC_0617 indd 1 HW D600_D650S_FRC_0617 indd 1 2011 06 17 10 32 20 2011 06 17 10 32 20 ...

Страница 62: ...Ne posez rien sur l appareil Pour débrancher complètement le produit de l alimentation retirez la fiche principale de la prise murale Si vous n utilisez pas le produit pendant une période prolongée débranchez la fiche de la prise murale En cas d orage débranchez l appareil de sa prise de courant Les surtensions causées par les éclairs pourraient endommager l appareil N exposez pas l appareil à la lu...

Страница 63: ... 27 Avant d utiliser le récepteur AV 27 Menu Accueil 28 Sélection de l entrée numérique HDMI analogique 29 Configuration de l arborescence du menu 32 Configuration audio 32 Sélection d un appareil source et d un connecteur Entrée audio numérique 32 Réglage de la taille des enceintes 34 Réglage de connexion de l enceinte ambiophonique arrière 35 Réglage de la distance d écoute des enceintes 36 Réglag...

Страница 64: ...ande AUTRES INFORMATIONS 55 55 Dépannage 56 Fonction de protection du produit 56 Liste des erreurs d étalonnage automatique 57 Fiche technique Les figures et illustrations de ce manuel d utilisation sont fournies à titre de référence et peuvent différer de l apparence réelle de l appareil Des frais supplémentaires pourront vous être facturés dans les cas suivants Lorsqu un ingénieur est amené à in...

Страница 65: ...Dolby Digital ordinaire 5 1 canaux Dolby Digital Plus Dolby Digital Plus constitue la technologie audio de la prochaine génération pour la programmation haute définition et pour tous les supports Dolby True HD Dolby TrueHD représente la technologie de la prochaine génération sans perte qui a été développée pour les supports sur disques haute définition DTS 96 24 Ajoute un canal ambiophonique arriè...

Страница 66: ...que audio de 32 bits Fournit un son ambiophonique plus réaliste avec des sources audio stéréo normales Fonction Anynet HDMI CEC Anynet est une fonction qui peut être utilisée pour commander le récepteur AV avec une télécommande de téléviseur SAMSUNG en connectant le récepteur au téléviseur SAMSUNG à l aide d un câble HDMI Offerte uniquement avec les téléviseurs et les lecteurs de DVD SAMSUNG prena...

Страница 67: ... SELECT Pour sélectionner une source FM TV BD DVD SAT GAME AUX CD IPOD AUDIO IPOD VIDEO 8 TOUCHE AUDIO ASSIGN Bascule afin de sélectionner un mode d entrée pour la source sélectionnée 9 TOUCHE SOUND EFFECT Bascule pour sélectionner un mode de son ambiophonique 10 TOUCHE SETUP Affiche le menu SETUP 11 TOUCHES HAUT BAS GAUCHE DROITE Pour déplacer le curseur vers le haut vers le bas vers la gauche ou v...

Страница 68: ...récepteur 13 TOUCHE RETURN Permet de revenir au menu précédent 14 TOUCHE ASC Pour sélectionner le mode d étalonnage automatique 15 TOUCHE S DIRECT STEREO Pour sélectionner le mode S DIRECT ou STÉRÉO Émet le signal original sans lui appliquer l effet sonore des champs acoustiques ni aucun autre effet sonore 16 TOUCHE 3D SOUND Appuyez pour appliquer l effet sonore 3D 17 TOUCHE TONE CONTROL Pour régl...

Страница 69: ... un iPod 8 PRISE ONLY FOR SERVICE Pour le service de réparations 9 PRISES AUDIO IN Reçoivent le signal audio d un lecteur vidéo BD DVD SATELLITE TÉLÉVISEUR 10 PRISES OPTICAL IN DIGITAL AUDIO IN Reçoivent le signal audio numérique optique 11 ENTRÉE COAXIALE DIGITAL AUDIO IN Reçoit le signal audio numérique coaxial 12 PRISES SURROUND BACK OUT Émet le signal analogique Ambiophonique arrière sur l amp...

Страница 70: ...EXIT INFO TUNER 3D SOUND iPod AV SYNC ASC SAT GAME TV BD DVD CD AUX SLEEP DIMMER DSP NEO 6 AUDIO ASSIGN PROLOGIC 1 2 3 4 5 6 7 8 0 9 TV AMP BD DVD SUB WOOFER CROSS OVER 1 3 4 6 7 8 9 10 11 12 13 14 15 22 20 5 21 2 16 23 17 19 18 35 36 24 25 26 27 28 29 31 30 32 33 34 HW D600_D650S_FRC_0617 indd 10 HW D600_D650S_FRC_0617 indd 10 2011 06 17 10 32 48 2011 06 17 10 32 48 ...

Страница 71: ... pour la diffusion de la radio 12 TOUCHE TONE Pour régler le niveau des graves et des aigus 13 TOUCHE SETUP MENU Affiche le menu SETUP 14 TOUCHES HAUT BAS GAUCHE DROITE Pour naviguer dans les menus 15 TOUCHE RETURN Pour revenir au menu précédent depuis le menu SETUP 16 TOUCHES DE SÉLECTION DE FONCTION Pour sélectionner une source d entrée 17 TOUCHE AV SYNC Pour sélectionner le mode Audio Delay Ret...

Страница 72: ... la fréquence de diffusion de la radio ou la chaîne de télévision 30 TOUCHE S DIRECT Pour sélectionner le mode S DIRECT 31 TOUCHE TUNER MEMORY Pour sélectionner une fréquence radio préréglée 32 TOUCHE INFO Affiche l information relative au périphérique connecté qui est actuellement utilisé 33 TOUCHE ENTER Pour sélectionner un article dans le menu SETUP 34 TOUCHE EXIT Pour quitter le menu SETUP 35 ...

Страница 73: ... le type de piles approprié Des piles qui semblent similaires peuvent avoir une tension différente Remplacez toujours les deux piles en même temps N exposez pas les piles à la chaleur ou à une flamme Portée de la télécommande La portée de la télécommande est d environ 7 mètres 23 pi en ligne droite Elle peut aussi être utilisée dans un rayon horizontal pouvant atteindre 30 degrés du capteur de télé...

Страница 74: ...z les de façon à ce que les haut parleurs d aigus soient à la hauteur de vos oreilles Alignez la face des enceintes avant avec la face de l enceinte centrale ou placez les légèrement en avant de l enceinte centrale Enceinte centrale Il est préférable de l installer à la même hauteur que les enceintes avant Vous pouvez aussi l installer directement sur ou sous le téléviseur Enceintes ambiophoniques...

Страница 75: ...ir un son ambiophonique optimal vous devez connecter cinq enceintes et un caisson de graves Le tableau suivant indique les canaux que vous devriez utiliser selon le nombre d enceintes dont vous disposez 2 enceintes 3 enceintes 4 enceintes 5 enceintes 7 enceintes DPL IIx Option 7 enceintes DPL IIz Option SBL FHL SBR FHR REMARQUE Si vous placez une enceinte près du téléviseur la couleur de l écran p...

Страница 76: ...r un choc électrique Assurez vous que les polarités et sont positionnées correctement Si vous souhaitez utiliser un caisson de graves activé non fourni branchez le caisson dans la borne SUBWOOFER OUT située sur le panneau arrière En utilisant l amplificateur externe vous pouvez connecter les enceintes ambiophoniques arrière SBL SBR ou les enceintes avant haut FHL FHR pour transformer votre système ...

Страница 77: ...d un connecteur HDMI Video Audio Téléviseur équipé d un connecteur DVI D téléviseur prenant en charge la norme HDCP Video Téléviseur équipé d un connecteur DVI D téléviseur ne prenant pas en charge la norme HDCP REMARQUE Le son des disques SACD est inaudible via cette connexion Pour lire un DVD dont les droits d auteur sont protégés par le système CPPM utilisez un lecteur qui prend en charge ce sy...

Страница 78: ... les touches pour sélectionner OPTION puis sur la touche ENTER Appuyez sur les touches pour sélectionner HDMI SETUP puis sur la touche ENTER Appuyez sur les touches pour sélectionner HDMI ANYNET puis sur la touche ENTER Appuyez sur les touches pour régler la fonction ANYNET à ON puis sur la touche ENTER Pour quitter le mode de configuration Appuyez sur les touches SETUP MENU ou EXIT de la télécomma...

Страница 79: ...e votre téléviseur Connexion audio Connectez l entrée numérique OPTICAL 3 de votre récepteur AV à la sortie numérique du téléviseur OU Connectez l entrée AUDIO IN TV de votre récepteur AV à la sortie audio du téléviseur ONLY FOR SERVICE ONLY FOR UPDATE SURROUND BACK OUT SUBWOOFER OUT SURROUND BACK OUT SUBWOOFER OUT OUT VIDEO IN AUDIO OUT OPTICAL OUT ou HW D600_D650S_FRC_0617 indd 19 HW D600_D650S_...

Страница 80: ...ctez l entrée numérique OPTICAL 1 de votre récepteur AV à la sortie numérique du lecteur DVD BD OU Connectez l entrée AUDIO IN BD DVD de votre récepteur AV à la sortie audio du lecteur DVD BD ONLY FOR SERVICE ONLY FOR UPDATE SURROUND BACK OUT SUBWOOFER OUT SURROUND BACK OUT SUBWOOFER OUT OUT OPTICAL OUT AUDIO OUT VIDEO OUT VIDEO IN ou ou ou Lecteur DVD ou BD HW D600_D650S_FRC_0617 indd 20 HW D600_...

Страница 81: ...LLITE REMARQUE Retirez la fiche de la prise murale si vous n utilisez pas l appareil pendant une période prolongée Si le câble boîtier décodeur n est muni que d une seule prise de sortie audio connectez le à la prise d entrée audio droite ou gauche de l unité principale Connectez la fiche rouge du câble audio à la prise rouge et le câble blanc à la prise blanche ONLY FOR SERVICE ONLY FOR UPDATE SURR...

Страница 82: ...la fiche rouge du câble audio à la prise rouge et le câble blanc à la prise blanche Si le lecteur de CD n est muni que d une seule prise de sortie audio connectez le à la prise d entrée audio droite ou gauche de l unité principale ONLY FOR SERVICE ONLY FOR UPDATE SURROUND BACK OUT SUBWOOFER OUT SURROUND BACK OUT SUBWOOFER OUT OUT AUDIO OUT COAXIAL OUT ou Lecteur CD HW D600_D650S_FRC_0617 indd 22 HW...

Страница 83: ... sortie ambiophonique arrière n émet que le signal analogique La borne SURROUND BACK OUT du récepteur AV autorise le réglage de volume Un amplificateur externe avec ou sans réglage de volume pourra être utilisé Lorsque vous utilisez un amplificateur externe muni d un réglage de volume le volume de l amplificateur externe doit être spécifié sur la position appropriée Le réglage de volume du système 7 1...

Страница 84: ...LECT de l unité principale Le mode change dans l ordre suivant FM TV BD DVD SAT GAME AUX CD IPOD AUDIO IPOD VIDEO REMARQUE La sortie VIDEO Monitor ou TV doit être connectée à votre téléviseur pour que vous puissiez visionner la vidéo stockée sur le iPod Voir page 19 Réglez le volume à un niveau modéré avant de connecter votre iPod au récepteur AV Si vous connectez un iPod lorsque l unité est sous ...

Страница 85: ...on iPod nano 3ème génération iPod nano 2ème génération iPod nano 1ère génération iPhone 4 iPhone 3GS iPhone 3G iPhone REMARQUE Made for iPod signifie que l accessoire électronique a été conçu pour être connecté spécialement à un iPod et a été certifié conforme aux normes de performance Apple par le développeur Made for iPhone signifie que l accessoire électronique a été conçu pour être connecté spéci...

Страница 86: ...igné possible Si la réception FM n est pas satisfaisante utilisez une antenne externe Connexion des composants auxiliaires Pour plus de commodité vous pouvez connecter pendant une courte période de temps des appareils externes caméscope console de jeux équipement mobile etc à l avant de cette unité 1 2 ONLY FOR SERVICE ONLY FOR UPDATE SURROUND BACK OUT SUBWOOFER OUT SURROUND BACK OUT SUBWOOFER OUT...

Страница 87: ...ous appuyez sur cette touche FM TV BD DVD SAT GAME AUX CD IPOD AUDIO IPOD VIDEO défilent dans cet ordre Méthode 2 Appuyez sur la touche BD DVD SAT GAME TV CD iPod ou TUNER Vous pouvez directement sélectionner la fonction voulue Menu Accueil Utilisez le câble HDMI pour connecter l unité principale au moniteur Appuyez sur la touche SETUP MENU pour afficher le message INPUT sur l écran d affichage Le me...

Страница 88: ...mode d entrée défilent comme suit Pour la fonction BD DVD Pour la fonction SAT Pour la fonction TV Pour la fonction CD Pour la fonction AUX REMARQUE Vous pouvez également changer le mode d entrée en appuyant sur la touche AUDIO ASSIGN située à l avant de votre récepteur AV Pour bénéficier d un son numérique Dolby Digital ou DTS raccordez le connecteur de sortie audio numérique du composant audio ext...

Страница 89: ... OPTICAL1 2 COAXIAL SAT OPTICAL1 2 COAXIAL CD OPTICAL1 2 SPEAKER SIZE SPEAKER DISTANCE SPEAKER LEVEL TEST TONE DPLIIx DTS NEO 6 EX ES AUDIO SYNC MP3 ENHANCER SMART VOLUME AUTO CALIBRATION DRC HDMI SETUP 7 1 CHANNEL DUAL MONO SPEAKER SURROUND OPTION INPUT SELECTION INPUT TONE CONTROL HW D600_D650S_FRC_0617 indd 29 HW D600_D650S_FRC_0617 indd 29 2011 06 17 10 33 25 2011 06 17 10 33 25 ...

Страница 90: ...1 dB valeur par défaut 00 dB SPEAKER LEVEL SURROUND SURROUND BACK CENTER FRONT HEIGHT LARGE NONE SMALL LARGE NONE SMALL 60Hz 80Hz 100Hz 120Hz 150Hz 180Hz 200Hz SUBWOOFER CROSSOVER YES NO FRONT LARGE SMALL PLIIz SURR BACK 7 1 CHANNEL MANUAL LARGE NONE SMALL AUTO FRONT HEIGHT LEFT FRONT HEIGHT RIGHT CENTER SURROND LEFT FRONT LEFT FRONT RIGHT SURROUND RIGHT SURROUND BACK LEFT SURROUND BACK RIGHT SUBW...

Страница 91: ... AUDIO HDMI SETUP AVR TV OFF ON DUAL MONO CH1 OFF ON CH2 BOTH ARC OFF AUTO HDMI ANYNET MAXIMUM AUTO AUDIO SYNC 0 ms 240 ms pas de 10 ms OPTION TONE CONTROL OFF ON TONE BASS TREBLE 6 dB 6 dB pas de 1 dB 6 dB 6 dB pas de 1 dB MODE OFF ON MEASUREMENT pour passer à Page de mesure de l étalonnage automatique MINIMUM 7 7 HW D600_D650S_FRC_0617 indd 31 HW D600_D650S_FRC_0617 indd 31 2011 06 17 10 33 26 2...

Страница 92: ...ration de ces dernières et de l utilisation ou non de certaines d entre elles Appuyez sur la touche SETUP MENU de la télécommande Chaque fois que vous appuyez sur cette touche le système bascule entre les modes INPUT et SETUP OFF Appuyez sur les touches pour sélectionner SPEAKER puis appuyez sur la touche ENTER Appuyez sur les touches pour sélectionner SPK SIZE puis appuyez sur la touche ENTER App...

Страница 93: ... n utilisez aucune enceinte YES caisson de graves sélectionnez cette option lorsque vous utilisez un caisson de graves NO caisson de graves sélectionnez cette option lorsque vous n utilisez pas de caisson de graves CROVR Sélectionnez cette option pour obtenir la meilleure réponse de basse sur vos enceintes REMARQUE Vous pouvez également utiliser les touches SETUP ENTER et RETURN situées à l avant ...

Страница 94: ...ceinte ambiophonique arrière dans les réglages par défaut Ce réglage vous permet d activer le mode Dolby Pro Logic IIx PLIIz Sélectionnez ceci pour installer l enceinte ambiophonique arrière dans le coin supérieur avant Ce réglage vous permet d activer le mode Dolby Pro Logic IIz REMARQUE Selon les réglages 7 1 CHANNEL sélectionnés les menus correspondants à l enceinte ambiophonique arrière ou à l...

Страница 95: ...BACK LEFT SURRBACK RIGHT et SUBWOOFER à une distance de 1 à 30 pi 0 3 à 9 m entre l enceinte et la position d écoute et les espacer de 1 pi 0 3m Réglage de la distance de l enceinte Réglez la distance séparant l enceinte de la position d écoute par intervalles de 0 3 m 1 pi F L avant gauche 1 à 30 pi SW caisson de graves 1 à 30 pi F R avant droite 1 à 30 pi SBL ambiophonique arrière gauche 1 à 30 ...

Страница 96: ...dB par incrémentations de 1 Le son s atténue à 10 dB et s amplifie à 10 dB Réglage du niveau de puissance des enceintes F L avant gauche 10 à 10 dB SW caisson de graves 10 à 10 dB F R avant droite 10 à 10 dB SBL ambiophonique arrière gauche 10 à 10 dB S L ambiophonique gauche 10 à 10 dB SBR ambiophonique arrière droite 10 à 10 dB S R ambiophonique droite 10 à 10 dB FHL avant haut gauche 10 à 10 dB ...

Страница 97: ...ue Chaque fois que vous appuyez sur la touche ENTER les enceintes F L CEN S W F R S R S L défilent dans cet ordre 2 Appuyez sur les touches pour régler le mode de tonalité d essai de votre choix Vous pouvez régler le niveau de sortie de l enceinte de 10 à 10 dB par incrémentations de 1 Le son s atténue à 10 dB et s amplifie à 10 dB Sortie de la tonalité d essai F L avant gauche 10 à 10 dB CEN centra...

Страница 98: ... touche ENTER Appuyez sur les touches pour sélectionner l option que vous voulez puis appuyez sur la touche ENTER PANORAMA Appuyez sur les touches pour sélectionner ON ou OFF Ce mode permet d étendre l image stéréo avant afin d intégrer les enceintes ambiophoniques pour obtenir un effetd enveloppement exceptionnel avec traitement latéral de l image DIMENSION Appuyez sur les touches pour régler une ...

Страница 99: ... 48 kHz Réglage du mode EX ES Lorsque les enceintes ambiophoniques arrière sont connectées vous pouvez écouter le son multi canal 7 1 à l aide d un décodeur intégré Dolby Digital Surround EX ou DTS ES Cette fonction est compatible avec une source Dolby Digital ou DTS telle qu un lecteur de DVD mais pas avec des sources à 2 canaux LPCM ou Dolby Digital Appuyez sur la touche SETUP MENU de la télécom...

Страница 100: ... sur cette touche le système bascule entre les modes INPUT et SETUP OFF Appuyez sur les touches pour sélectionner OPTION puis appuyez sur la touche ENTER Appuyez sur les touches pour sélectionner TONE CONTROL puis appuyez sur la touche ENTER Appuyez sur les touches pour sélectionner TONE puis appuyez sur la touche ENTER Appuyez sur les touches pour sélectionner ON ou OFF puis appuyez sur la touche...

Страница 101: ...che ENTER Appuyez sur les touches pour sélectionner ON ou OFF Volume intelligent Cette option permet de régler et de stabiliser le volume afin d éviter les variations importantes lors du changement de chaîne ou pendant un changement de scène Appuyez sur la touche SETUP MENU de la télécommande Chaque fois que vous appuyez sur cette touche le système bascule entre les modes INPUT et SETUP OFF Appuyez...

Страница 102: ...ctionner OPTION puis appuyez sur la touche ENTER Appuyez sur les touches pour sélectionner AUTO CALIBRATION puis appuyez sur la touche ENTER Appuyez sur les touches pour sélectionner MEASUREMENT puis appuyez sur la touche ENTER Pour créer un champ sonore 5 1 canaux optimal les sélections s effectuent dans l ordre suivant L C R SR SBR SBL SL SW MODE ON Le mode d étalonnage automatique est activé MO...

Страница 103: ...es pour sélectionner DRC puis appuyez sur la touche ENTER Appuyez sur les touches pour spécifier l effet DRC de votre choix AUTO L effet Contrôle de la gamme dynamique est automatiquement réglé sur la base des informations fournies par la bande son Dolby TrueHD MIN permet de régler l effet DRC au niveau minimum STD permet de régler l effet DRC au niveau standard MAX permet de régler l effet DRC au ...

Страница 104: ...nnectés à HDMI réglez l audio à TV Sinon laissez la à AVR pour écouter l audio depuis le récepteur A V AVR l audio HDMI n est pas transmise TV l audio HDMI est transmise HDMI ANYNET ON OFF Anynet est une fonction qui vous permet de commander les autres appareils Samsung à l aide de la télécommande de votre téléviseur Samsung ON Anynet est activée OFF Anynet est désactivée ARC AUTO OFF Si vous util...

Страница 105: ...ns cet ordre Appuyez sur la touche Chaque fois que vous appuyez sur la touche les options STEREO HALL 1 HALL 2 J CLUB CHURCH ROCK CLASSIC LIVE GAME MOVIE CONCERT STADIUM défilent dans cet ordre Vous pouvez aussi sélectionner le mode DSP en appuyant sur la touche DSP de la télécommande Sélection du mode 3D SOUND Appuyez sur la touche AUDIO EFFECT pour sélectionner le mode 3D SOUND Chaque fois que vo...

Страница 106: ...C R SL SR SBL SBR SW DTS ES O O O O O DTS ES L C R SL SR SBL SBR SW DTS 96 24 O O O O DTS 96 24 L C R SL SR SW DTS HD DTS HD Master Audio O O O O O DTS HD MSTR L C R SL SR SBL SBR SW DTS HD High Resolution O O O O O DTS HD L C R SL SR SBL SBR SW LPCM Multi Channel Multi Channel O O O O O Numérique LPCM L C R SL SR SBL SBR SW Multi Channel O O O O Haut O Numérique LPCM L C R SL SR H SW 2 ch PCM Ste...

Страница 107: ...fichage disparaît automatiquement Réglage du niveau de caisson de graves SW Caisson de graves 10 10 dB Écoute de la radio Vous pouvez écouter la radio en suivant la procédure de syntonisation automatique ou manuelle Appuyez sur la touche INPUT SELECT pour sélectionner FM Sélectionnez une fréquence diffusion radio Préréglez la syntonisation Appuyez sur les touches de la télécommande pour sélectionne...

Страница 108: ...rtez vous à l étape 2 ci dessus pour effectuer une syntonisation automatique ou manuelle Appuyez sur la touche TUNER MEMORY de l unité principale Vous pouvez également utiliser la touche TUNER MEMORY de la télécommande Le numéro du syntoniseur clignote à l écran Appuyez sur les touches TUNING CH de la télécommande pour sélectionner le préréglage 2 Vous pouvez sélectionner les préréglages dans une ...

Страница 109: ...Pod compatibles La compatibilité dépend de la version du logiciel de votre iPod Vous pouvez aussi sélectionner le mode iPod en appuyant sur la touche iPod de la télécommande Pour visionner un film fonction iPod Video Vous pouvez visionner les fichiers vidéo stockés dans votre iPod en connectant celui ci au récepteur AV Connectez le connecteur du socle du iPod à la prise pour iPod du récepteur AV À l...

Страница 110: ... de la version du logiciel de votre iPod Lorsque le fichier actuel est lu jusqu à la fin la lecture du fichier suivant ne commence pas automatiquement Pour lire le fichier suivant sélectionnez un fichier à lire dans la liste affichée à l écran du iPod Aucun écran autre que l écran de lecture n apparaît à l écran du téléviseur Vérifiez les autres écrans du iPod Fonctions pratiques Fonction Minuteur d arrê...

Страница 111: ...Sourdine et Régler l affichage ne peuvent être exécutées qu à partir de la télécommande Fonction Réinitialisation Tandis que l appareil est sous tension Appuyez sur la touche MUTE MUTE apparaît à l écran Appuyez cinq fois sur la touche 2 puis sur la touche ENTER INITIAL NO apparaît à l écran Appuyez sur les touches pour sélectionner YES L appareil s éteint automatiquement après 5 secondes Tandis qu...

Страница 112: ...Insérez un lecteur USB contenant la mise à niveau du micrologiciel dans le port USB à l arrière de l unité principale Veillez à ne pas couper l alimentation ou retirer le lecteur USB pendant le déroulement des mises à niveau L unité principale s éteindra automatiquement après l exécution de la mise à niveau Après la mise à niveau du logiciel les réglages que vous avez définis sont rétablis aux vale...

Страница 113: ...ma 97 Classic 03 Concerto 18 Contec 46 Coronado 15 Craig 03 05 61 82 83 84 Croslex 62 Crown 03 Curtis Mates 59 61 63 CXC 03 Daewoo 02 03 04 15 16 17 18 19 20 21 22 23 24 25 26 27 28 29 30 32 34 35 36 48 59 90 Daytron 40 Dynasty 03 Emerson 03 15 40 46 59 61 64 82 83 84 85 Fisher 19 65 Funai 03 Futuretech 03 General Electric GE 06 40 56 59 66 67 68 Hall Mark 40 Marque Code Realistic 03 19 Sampo 40 S...

Страница 114: ...les touches numériques 0 à 9 REMARQUE Il se pourrait que la télécommande ne soit pas compatible avec certaines marques de lecteurs DVD Selon la marque de votre lecteur DVD il se pourrait également que certaines fonctions ne puissent pas être exécutées Par défaut la télécommande fonctionne avec les lecteurs DVD BD Samsung Liste des codes par marque de lecteur DVD Marque Code Marque Code Marque Code...

Страница 115: ...auche droit et connectez le s correctement La réception des émissions de radio est impossible L antenne FM est elle correctement connectée Connectez l antenne correctement Si la puissance d entrée du signal d antenne est faible installez l antenne FM à un endroit où la réception sera de meilleure qualité Aucun son n est émis par les enceintes ambiophoniques L enceinte ambiophonique est elle connec...

Страница 116: ...court circuit dans le câble d enceinte Si aucun problème n est détecté lorsque vous rallumez l appareil après l avoir éteint l icône PROTECTION disparaît de l écran et l appareil fonctionne de nouveau correctement Liste des erreurs d étalonnage automatique N de l erreur Message d erreur d étalonnage automatique affiché à l écran E02 NO MIC Connectez le microphone d étalonnage E03 NOISY Gardez le si...

Страница 117: ...pport signal bruit MONO STÉRÉO 55 55 dB Distorsion MONO STÉRÉO 0 3 0 8 dB Séparation des canaux 30dB Puissance de sortie du syntoniseur 1kHz 75kHz Dev AMPLIFICATEUR Sortie nominale 20 Hz 20 kHz THD 0 9 Enceinte avant gauche droite 6 Ω 100W Canal Enceinte centrale 6 Ω 100W Canal Enceinte ambiophonique gauche droite 6 Ω 100W Canal Caisson d extrêmes graves 6 Ω 100W Canal Sensibilité d entrée impédan...

Страница 118: ...ervice au moment où il fait la demande de réparation sous garantie Cette garantie ne couvre pas les dommages causés par un accident un incendie une inondation et ou tout cas de force majeure Elle ne couvre pas non plus les dommages causés par une mauvaise utilisation un branchement à une tension inappropriée une mauvaise installation une réparation inappropriée ou non autorisée une utilisation com...

Страница 119: ...w samsung com Slovakia 0800 SAMSUNG 726 7864 www samsung com Spain 902 1 SAMSUNG 902 172 678 www samsung com Sweden 0771 726 7864 SAMSUNG www samsung com Switzerland 0848 SAMSUNG 7267864 CHF 0 08 min www samsung com ch www samsung com ch_fr French U K 0330 SAMSUNG 7267864 www samsung com Eire 0818 717100 www samsung com Lithuania 8 800 77777 www samsung com Latvia 8000 7267 www samsung com Estonia...

Страница 120: ...Code No AH68 02354L HW D600_D650S_FRC_0617 indd 60 HW D600_D650S_FRC_0617 indd 60 2011 06 17 11 12 39 2011 06 17 11 12 39 ...

Отзывы: