background image

ENG

OPERA

TION

37

36

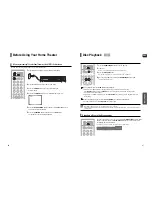
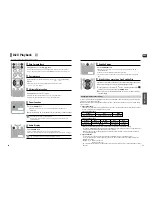
A-B Repeat Playback

• The A-B Repeat function does not operate with DivX, MP3 or JPEG discs.

• No sound is heard during step motion playback.

1

Press the

INFO

button twice.

2

Press the Cursor

button to move to the REPEAT PLAYBACK (

) display.

3

Press the Cursor

,

button to select <A-> and then press the

ENTER

but-

ton at the beginning of the desired segment.

When the

ENTER

button is pressed, the selected position will be stored in memory.

4

Press the

ENTER

button at the end of the desired segment.

The specified segment will be played repeatedly.

To return to normal playback, press the Cursor

,

button to select 

OFF.

You can repeatedly play back a designated section of a DVD.

Press the

STEP

button.

The picture moves forward one frame each time the button is pressed during playback.

A - B

REPEAT : A—B

DVD

DVD

DivX

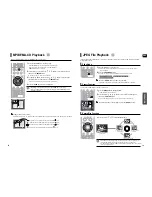
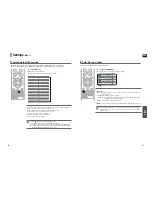
Step Function

1

Press the

INFO

button.

2

Press the Cursor

button to move to ANGLE (

) display.

3

Press the Cursor

,

button or numeric buttons to select the desired angle.

Each time the button is pressed, the angle changes as follows:

This function allows you to view the same scene in different angles.

Angle Function

2/3

3/3

1/3

• The Angle function works only with discs on which multiple angles have been recorded.

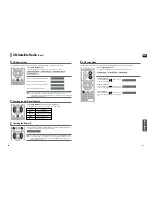
1

Press the 

ZOOM

button.

2

Press the Cursor

,

,

,

button to move to the area you want to enlarge.

3

Press the 

ENTER

button.

Each time the button is pressed, the zoom level changes as follows:

ZOOM X 1.5 

ZOOM X 2 

ZOOM X 3 

ZOOM OFF

This function allows you to enlarge a particular area of the displayed image.

Zoom (Screen Enlarge) Function

• When a DivX disc is being played, the screen is enlarged up to twice the normal size.

DVD

DVD

DivX

SELECT ZOOM POSITION

A TO B REPEAT ON

Using the Playback Function

(Con’t)

Содержание HT-WX70

Страница 1: ...truction Manual AH68 01951G REV 00 COMPACT DIGITAL AUDIO If you have any questions or comments relating to Samsung products please contact the SAMSUNG customer care center Samsung Electronics America Inc 1 800 SAMSUNG 7267864 www samsung com ...

Страница 2: ...ripping or splashing and no objects filled with liquids such as vases shall be placed on the apparatus This reminder is provided to call the CATV system installer s attention to Section 820 40 of the NEC which provides guidelines for proper grounding and in particular specifies that the cable ground shall be connected to the grounding system of the building as close to the point of cable entry as ...

Страница 3: ...y available with SAMSUNG TV s that support Anynet PREPARATION Safety Warnings 2 Precautions 3 Features 4 Notes on Discs 6 Description 8 CONNECTIONS Connecting the Speakers 12 Connecting the optional Wireless Receiving Amplifier 14 Connecting the Video Out to your TV 17 Connecting the HDMI IN OUT 18 HDMI Function 19 Connecting Audio from External Components 21 Connecting the FM Antenna 23 Connectin...

Страница 4: ...rate might not be played while playing a DivX file For more information about the formats authorized by DivX Networks Inc please visit www divxnetworks net This product does not support Secure DRM Media files Disc Recording Format PREPARATION Notes on Discs DVD players and the discs are coded by region These regional codes must match in order for the disc to play If the codes do not match the disc...

Страница 5: ...eo inputs to these jacks 4 External Digital Optical Input Jack Use this to connect external equipment capable of digital out put 5 FM 75Ω COAXIAL Jack 6 Cooling Fan 7 XM Antenna Jack 8 TX Card Connection WIRELESS 9 AUX IN 2 Jacks 10 HDMI Output Jack 11 HDMI Input Jack 1 DOLBY DIGITAL indicator 2 LINEAR PCM indicator 3 DTS indicator 4 TITLE indicator 5 GROUP indicator 6 CHAPTER indicator 7 TRACK in...

Страница 6: ... 32 INFO button 33 SOUND EDIT button 34 DIGEST button 35 TEST TONE button 36 SLIDE MODE button 37 LOGO button 1 Remove the battery cover in the direction of the arrow 2 Insert two 1 5V AAA batteries paying attention to the correct polarities and 3 Replace the battery cover Follow these precautions to avoid leaking or cracking cells Place batteries in the remote control so they match the polarity t...

Страница 7: ...the Home Theater Place it on a stand cabinet shelf or under the TV stand Selecting the Listening Position The listening position should be located about 2 5 to 3 times the distance of the TV s screen size away from the TV Example For 32 TVs 2 2 4m 6 8 feet For 55 TVs 3 5 4m 11 13 feet Before moving or installing the product be sure to turn off the power and disconnect the power cord R L C SR SL SW...

Страница 8: ...lanted side faces leftward and insert the card into the port The TX card enables communication between the main unit and the wireless receiver 3 Connect the left and right rear speakers to the wireless receiving module 4 Plug the power cord of the wireless receiving module in the wall outlet and switch the power switch ON Do not insert a card other than the TX card dedicated for the product The pr...

Страница 9: ...tput from the Rear Speaker Output Connectors on the back of the main unit The wireless receiving antenna is built into the wireless receiver module Keep the unit away from water and moisture For optimal listening performance make sure that the area around the wireless receiver module location is clear of any obstructions Sound will be heard from the wireless rear speakers in DVD 5 1 CH or Dolby Pr...

Страница 10: ...an external device is connected to this unit via DVI no audio will be output In this case you can lis ten to the digital audio by connecting the Optical OUT of the external device to the Optical IN of this unit HDMI Function Why use HDMI High Definition Multimedia Interface This device transmits a DVD video signal digitally without the process of converting to analog You will get sharper digital p...

Страница 11: ... used by connecting this Home Theater to a SAMSUNG TV using an HDMI Cable This is only available with SAMSUNG TVs that support Anynet MOVE ENTER EXIT MOVE ENTER EXIT When selecting View TV you must have a digital optical cable connected from the TV to the Home Theater to listen to the TV sound through the Home Theater If Anynet HDMI CEC is on and you turn off the main unit your TV will also turn o...

Страница 12: ...external analog compo nent has only one Audio Out connect either left or right AUX2 Rear Panel OPTICAL Connecting an External Digital Component Digital signal components such as a Set Top Box 1 Connect the Digital Input OPTICAL on the Home Theater to the Digital Output of the external digital com ponent 2 Press the AUX button on the remote control to select DIGITAL IN You can also use the FUNCTION...

Страница 13: ...structions on the page that help each function operate Connecting the Optional XM Satellite Radio Antenna Connect an XM Antenna not supplied to the XM Antenna Jack on the rear of this unit To ensure optimal reception of XM s satellite signal the XM Antenna should be placed at or near a southerly facing window with nothing obstructing its path to the sky You can mount it indoors or outdoors When ma...

Страница 14: ...rom the stop position This function works only with DVDs If pressed twice STOP is displayed and if the PLAY PAUSE button is pressed playback starts from the beginning To temporarily pause playback press the PLAY PAUSE button during playback To resume playback press the PLAY PAUSE button again DVD CD 1 Plug the main unit s power cord into the AC power supply 2 Press the TV button to set the remote ...

Страница 15: ...or camcorder or JPEG files on a PC can be stored on a CD and then played back with this Home Theater JPEG File Playback The maximum resolutions supported by this product are 5120 x 3480 or 19 0 MPixel for standard JPEG files and 2048 x 1536 or 3 0 MPixel for progressive image files If a JPEG file is played when the HDMI output resolution is 720p 1080i the mode is automat ically converted to 480p m...

Страница 16: ...layed normally If the Disc has more than One Subtitle File Format AVI WMV Supported Versions DivX3 11 DivX5 1 XviD V1 V2 V3 V7 DivX is a video file format developed by Microsoft and is based on MPEG4 compression technology to provide audio and video data over the Internet in real time MPEG4 is used for video encoding and MP3 for audio encoding so that the users can watch a movie at near DVD qualit...

Страница 17: ... playback of a CD or MP3 CD sound is heard only at 2x speed and not at 4x 8x and 32x speeds 1 2 1 4 1 8 1 2 1 4 1 8 PLAY 1 2 1 4 1 8 PLAY DVD CD MP3 DVD CD MP3 DivX DVD DivX DVD DivX Using the Playback Function Press the INFO button Each time the button is pressed the display changes as follows The information Display disappears from the screen The information Display disappears from the screen Th...

Страница 18: ...04 045 DVD CD MP3 DVD MP3 Press the REPEAT button Each time the button is pressed during playback the repeat playback mode changes as follows Repeat playback allows you to repeatedly play a chapter title track song or directory MP3 file Repeat Playback DVD CD MP3 JPEG DivX 1 Press the INFO button twice 2 Press the Cursor button to move to REPEAT PLAYBACK display 3 Press the Cursor button to select...

Страница 19: ...n is pressed during playback A B REPEAT A B DVD DVD DivX Step Function 1 Press the INFO button 2 Press the Cursor button to move to ANGLE display 3 Press the Cursor button or numeric buttons to select the desired angle Each time the button is pressed the angle changes as follows This function allows you to view the same scene in different angles Angle Function 2 3 3 3 1 3 The Angle function works ...

Страница 20: ...that requires a 4 digit key number to access See the disc packaging for details and the key number Bonus Group During playback press the button on the remote control You can select the desired image from a DVD Audio disc containing still images With some discs you may not be able to select images Navigating Pages BONUS GROUP KEY NUMBER To operate this function you can also press the AUDIO or SUBTI...

Страница 21: ...e selected title or time 01 05 001 040 0 00 37 1 1 Using the Disc Menu Using the Title Menu The disc menu display may be different depending on the disc 1 In Stop mode press the MENU button 2 Press the Cursor button to move to Disc Menu and then press the ENTER button When you select Disc Menu and it is not supported by the disc the This menu is not supported message appears on the screen 3 Press ...

Страница 22: ...peed press the button during playback Each time you press the either button the playback speed will change as follows 2x 4x 8x 32x Normal Fast playback Compatible Devices 1 USB devices that support USB Mass Storage v1 0 USB devices that operate as a removable disc in Windows 2000 or later without additional driver installation 2 MP3 Player HDD and flash type MP3 players 3 Digital camera Cameras th...

Страница 23: ...ENTER button 4 Press the Cursor button to select the desired item and then press the ENTER button Once the setup is complete you will be taken to the previous screen Press the RETURN button to return to the previous level Press the EXIT button to exit the setup screen Setting TV Screen Type If a DVD is in the 4 3 ratio you cannot view it in widescreen Since DVD discs are recorded in various image ...

Страница 24: ...play and all settings will return to the default values Press the POWER button Using the RESET function will erase all stored settings Do not use this unless necessary If you have forgotten the rating level password do the following While watching a DVD or JPEG CD you can set the image you like as background wallpaper 1 During playback press the PLAY PAUSE button when an image you like appears 2 P...

Страница 25: ...s the ENTER button 3 In the SPEAKER SETUP press the the ENTER button again 4 Press the Cursor button to move to the desired speaker and then press the ENTER button For C SL and SR each time the button is pressed the mode switches alternately as follows SMALL NONE For L and R the mode is set to SMALL SMALL Select this when using the speakers NONE Select this when no speaker is connected Press the R...

Страница 26: ...n Use the Test Tone feature to check the speaker connections 1 In Stop mode press the MENU button 2 Press the Cursor button to move to Audio and then press the ENTER button 3 Press the Cursor button to move to TEST TONE and then press the ENTER button The test tone will be sent to L C R SR SL SW in order If the ENTER button is pressed again at this time the test tone will stop Press the RETURN but...

Страница 27: ...utton is pressed the effect is greater and when the Cursor button is pressed the effect is smaller Press the RETURN button to return to the previous level Press the EXIT button to exit the setup screen Setting the DRC Dynamic Range Compression MOVE ENTER EXIT CHANGE EXIT RETURN RETURN MOVE ENTER EXIT RETURN MOVE SELECT EXIT RETURN The audio signals transmitted over the HDMI Cable can be toggled ON...

Страница 28: ... the sound of a dance club with a throbbing bass beat HALL Provides a clear vocal as if listening in a concert hall MOVIE Provides the feeling of a movie theater CHURCH Gives the feel of being in a grand church PASS Select this for normal listening You can select the desired Dolby Pro Logic II audio mode Press the PL II MODE button Each time the button is pressed the mode changes as follows Dolby ...

Страница 29: ... 6 Incrementally adjusts the sound field DSP from the front or rear Dolby Pro Logic II Effect Listening to Radio 1 Press the FM XM button to select the FM band 2 Tune in to the desired station Automatic Tuning 1 When the button is pressed a preset broadcast station is selected Automatic Tuning 2 Press and hold the button to automatically search for active broadcasting stations Manual Tuning Briefl...

Страница 30: ...supplied Before Using XM Satellite Radio 1 Press the FM XM button or FUNCTION button on the main unit and select the XM band Each time the FM XM button is pressed the band switches between FM XM 2 Press the Cursor button to select the channel press the Cursor button to select the category You can select the channel directly by pressing the number buttons 1 to 255 Listening to XM Satellite Radio If...

Страница 31: ... 2346 with a major credit card to sign up The XM features described here only operate when the optional XM antenna is connected to the main unit Press the XM SEARCH button Each time the XM SEARCH button is pressed the mode changes as follows XM Search Mode Checking the XM Signal Strength Checking the Radio ID Channel Search Mode Press the TUNING CH or button on the main unit to move to the desired...

Страница 32: ...eadphones not supplied for private listening pleasure Connect the headphones to the Headphone jack for private listening Using Headphones To prevent hearing damage do not increase the volume excessively when using headphones XM Satellite Radio Con t 1 Press the FM XM button or FUNCTION button on the main unit and select the XM band Each time the FM XM button is pressed the band switches between FM...

Страница 33: ...ldstar Luxman LXI Sears Magnavox Marantz Matsui MGA Mitsubishi MGA No Brand Code 56 57 58 01 15 01 02 03 04 05 06 07 08 09 10 11 12 13 14 01 18 40 48 57 58 81 59 60 18 03 03 18 25 97 03 18 46 15 03 05 61 82 83 84 62 03 59 61 63 03 02 03 04 15 16 17 18 19 20 21 22 23 24 25 26 27 28 29 30 32 34 35 36 48 59 90 40 03 03 15 40 46 59 61 64 82 83 84 85 19 65 03 03 06 40 56 59 66 67 68 40 15 18 50 59 69 4...

Страница 34: ...he audio language correctly set to DOLBY DIGITAL 5 1 CH in the information display Dolby Digital 5 1 CH Surround Sound is not produced Symptom Check Remedy Is the TV power on Are the video cables connected properly Is the disc dirty or damaged A poorly manufactured disc may not be playable Disc is rotating but no picture is produced Picture quality is poor and picture is shaking Audio language and...

Страница 35: ...n 1349 Macedonian 1509 Somali 1044 Arabic 1196 Guarani 1350 Malayalam 1511 Albanian 1045 Assamese 1203 Gujarati 1352 Mongolian 1512 Serbian 1051 Aymara 1209 Hausa 1353 Moldavian 1513 Siswati 1052 Azerbaijani 1217 Hindi 1356 Marathi 1514 Sesotho 1053 Bashkir 1226 Croatian 1357 Malay 1515 Sundanese 1057 Byelorussian 1229 Hungarian 1358 Maltese 1516 Swedish 1059 Bulgarian 1233 Armenian 1363 Burmese 1...

Страница 36: ...TICK M USB 2 0 64M RiDATA EZDrive USB 2 0 64M Product Company Type USB Flash Disc Creative MuVo NX128M Creative 128 MB MP3 Player Iriver H320 Iriver 20G HDD MP3 Player YH 920 Samsung 20G HDD MP3 Player YP T7 Samsung MP3 Player YP MT6 Samsung MP3 Player YP T6 Samsung MP3 Player YP 53 Samsung MP3 Player YP ST5 Samsung MP3 Player YP T5 Samsung MP3 Player YP 60 Samsung MP3 Player YP 780 Samsung MP3 Pl...

Страница 37: ...ire water lightning or other acts of nature use of products equipment systems utilities services parts supplies accessories applications installations repairs external wiring or connectors not supplied and authorized by SAMSUNG or which damage this product or result in service problems incorrect electrical line voltage fluctuations and surges customer adjustments and failure to follow operating in...

Отзывы: