background image

GB

SETUP

43

42

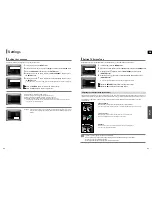
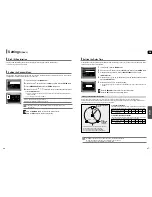
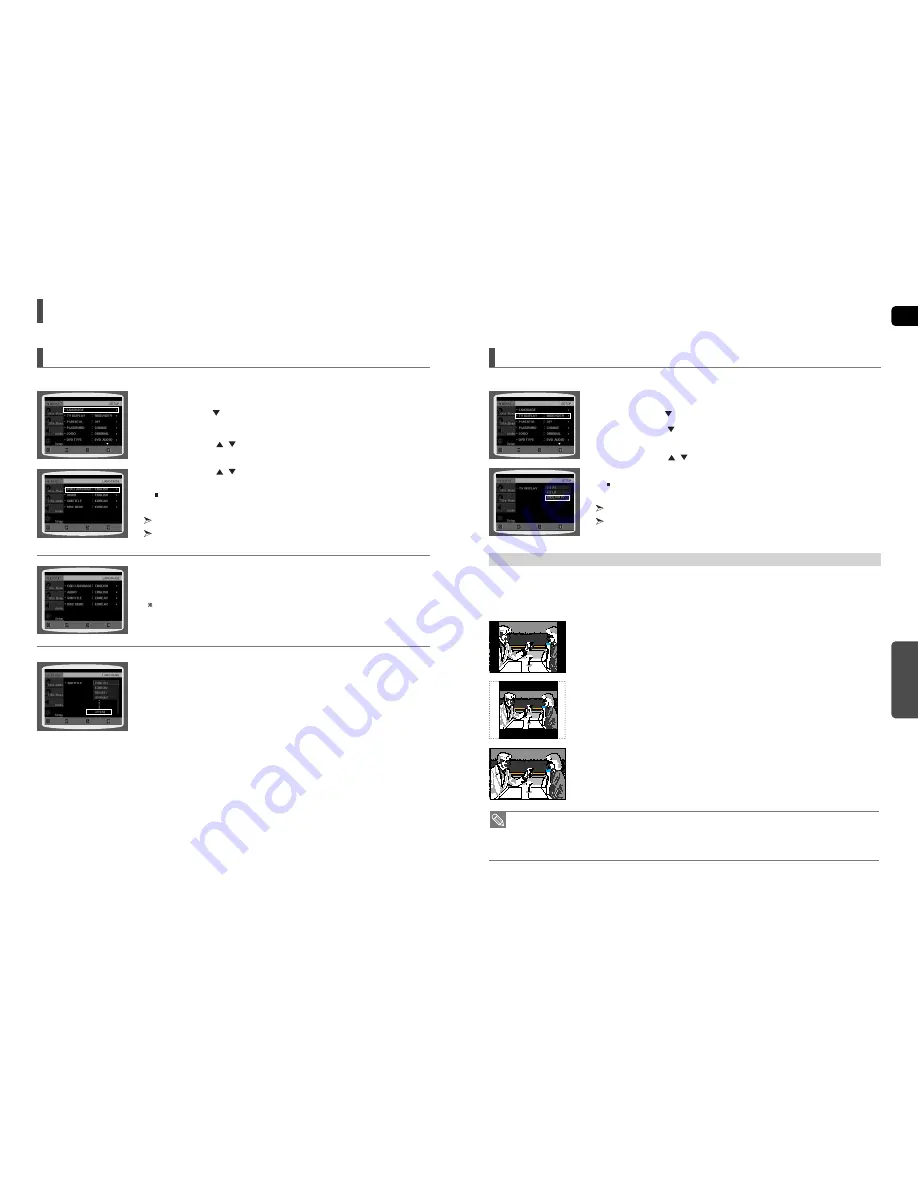
OSD(On-Screen Display) language is set to English by default.

Settings

1

In Stop mode, press the MENU button.

2

Press the Cursor

button to move to <Setup> and then press the ENTER button.

3

Select <LANGUAGE> and then press the ENTER button.

4

Press the Cursor

,

button to select <OSD LANGUAGE> and then press

the ENTER button.

5

Press the Cursor

,

button to select the desired language and then press

the ENTER button.

Once the setup is complete, the OSD will be English if English has been selected as language.

Press the RETURN button to return to the previous level.

Press the EXIT button to exit the setup screen.

• OSD LANGUAGE : Selecting the OSD Language
• AUDIO : Selecting the Audio Language (recorded on the disc)
• SUBTITLE : Selecting the Subtitle Language (recorded on the disc)
• DISC MENU : Selecting the Disc Menu Language (recorded on the disc)

If the language you selected is not recorded on the disc, menu language will not change even 
if you set it to your desired language.

• OTHERS : To select another language, select OTHERS and enter the language code of your country.

(See page 65 for language codes) AUDIO, SUBTITLE and DISC MENU language can be
selected. 

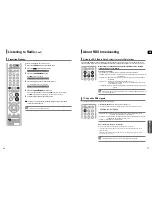
Setting the Language

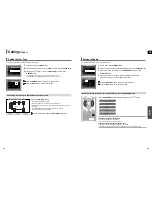
Depending on your TV type (Wide Screen or conventional 4:3), you can select the TV's aspect ratio.

The horizontal to vertical screen size ratio of conventional TVs is 4:3, while that of widescreen and high definition TVs is 16:9. This ratio is
called the aspect ratio. When playing DVDs recorded in different screen sizes, you should adjust the aspect ratio to fit your TV or monitor.

For a standard TV, select either <4:3PS> or <4:3LB> option according to personal preference. Select <WIDE/HDTV> if you have 
a widescreen TV.

1

In Stop mode, press the MENU button.

2

Press the Cursor

button to move to <Setup> and then press the ENTER button.

3

Press the Cursor

button to move to <TV DISPLAY> and then press 

the ENTER button.

4

Press the Cursor

,

button to select the desired item and then press 

the ENTER button.

Once the setup is complete, you will be taken to the previous screen.

Press the RETURN button to return to the previous level.

Press the EXIT button to exit the setup screen.

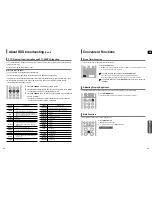
Setting TV Screen Type

Adjusting the TV Aspect Ratio (Screen Size)

MOVE

ENTER

EXIT

RETURN

MOVE

ENTER

EXIT

RETURN

MOVE

ENTER

EXIT

RETURN

MOVE

SELECT

EXIT

RETURN

MOVE

ENTER

EXIT

RETURN

MOVE

SELECT

EXIT

RETURN

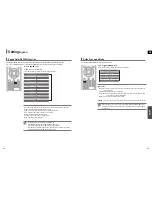
4:3PS (4:3 Pan&Scan) 
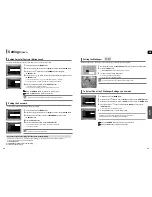
Select this to play a 16:9 picture in the pan & scan mode on a conventional TV.

■  

You can see the central portion of the screen only (with the sides of the 16:9 picture cut off).

4:3LB (4:3 Letterbox)
Select this to play a 16:9 picture in the letter box mode on a conventional TV.

■  

Black bars will appear at the top and bottom of the screen.

WIDE/HDTV
Select this to view a 16:9 picture in the full-screen mode on your widescreen TV.

■  

You can enjoy the widescreen aspect.

• If a DVD is in the 4:3 ratio, you cannot view it in widescreen.
• Since DVD discs are recorded in various image formats, they will look different depending on the software, 

the type of TV, and the TV aspect ratio setting.

• When using HDMI, the screen is automatically converted to Wide mode.

Содержание HT-THX22

Страница 1: ...DIGITAL HOME CINEMA SYSTEM HT THX22 HT THX25 COMPACT DIGITAL AUDIO GB Instruction Manual AH68 01660E REV 01 AH68 01978B ...

Страница 2: ...are wires directly into a main socket A plug and fuse must be used at all times IMPORTANT The wires in the main lead are coloured in accordance with the following code BLUE NEUTRAL BROWN LIVE As these colours may not correspond to the coloured markings identifying the terminals in your plug proceed as follows The wire coloured BLUE must be connected to the terminal marked with the letter N or colo...

Страница 3: ...the HDMI Audio 51 Sound Field DSP EQ Function 52 Dolby Pro Logic II Mode 53 Dolby Pro Logic II Effect 54 MISCELLANEOUS Listening to Radio 55 About RDS broadcasting 57 Convenient Functions 59 Operating a TV with the Remote Control 60 Troubleshooting 62 Cautions on Handling and Storing Discs 64 Language Code List 65 USB Host Feature Supported Products 66 Specifications 67 4 Features Multi Disc Playb...

Страница 4: ...nc a DivX file created by the user might not play Software updates for incompatible formats are not supported Example QPEL GMC resolution higher than 800 x 600 pixels etc Sections with a high frame rate might not be played while playing a DivX file For more information about the formats authorized by DivX Networks Inc please visit www divxnetworks net This product does not support Secure DRM Media...

Страница 5: ... 8 Description Front Panel Display 1 DOLBY DIGITAL indicator 2 DTS Disc indicator 3 LINEAR PCM indicator 4 TITLE indicator 5 CHAPTER indicator 6 TRACK indicator 7 PROGRAM indicator 8 REPEAT indicator 9 TUNER indicator 10 STEREO indicator 11 RTA indicator 12 RDS indicator 13 PRO LOGIC indicator 14 MPEG indicator 15 DSP indicator 16 System Status Display 17 RADIO FREQUENCY indicator 18 SPEAKER indic...

Страница 6: ...ntrol 1 DVD RECEIVER button 2 TV button 3 TV VIDEO button 4 POWER button 5 Number 0 9 buttons 6 REMAIN button 7 STEP button 8 Tuning Preset CD Skip buttons 9 VOLUME button 10 MENU button 11 AUDIO button 12 PL II EFFECT button 13 PL II MODE button 14 TUNER MEMORY SD Standard Definition HD High Definition button 15 ZOOM button 16 SLEEP button 17 SLOW MO ST button 18 EZ VIEW NT PAL button 19 DVD butt...

Страница 7: ...akers so they face each other Place them about 60 to 90cm 2 to 3feet above your ear facing slightly downward Unlike the front and center speakers the rear speakers are used to handle mainly sound effects and sound will not come from them all the time Sound will be heard from the rear speakers in DVD 5 1 CH or Dolby Pro Logic II mode only Front Speakers Place these speakers in front of your listeni...

Страница 8: ...the Stand Base How to Install the Speaker on the Stand Base 1 3 2 Speaker Installation 1 Turn the STAND upside down and connect it to the STAND BASE 2 Insert two screws A into the two holes marked with arrows using a screwdriver as shown in the illustration 3 Insert a screw B into the hole on the rear of the Speaker STAND 4 Connect the assembled stand to the SPEAKER 5 Insert another screw B into t...

Страница 9: ...m while the main unit and the wireless receiver module SWA 3000 are in Power Standby mode 1 With the main unit turned off press and hold the remote control s REMAIN button for 5 seconds The STANDBY LED on the front panel of the wireless receiver module blinks 2 With the wireless receiver module turned on use a ball point pen or a pair of toothpick to press the RESET button on the back of the unit ...

Страница 10: ...the COMPONENT SEL button shortly to select Y Pb Pr to set the main unit to COMPONENT mode METHOD 2 Component Video Better Quality METHOD 4 supplied METHOD 2 METHOD 3 METHOD 1 1 With the main unit turned off press and hold the COMPONENT SEL button on the remote control for over 5 seconds Y Pb Pr and RGB will appear in the display 2 Press the COMPONENT SEL button shortly to select RGB to set SCART m...

Страница 11: ...DMI Function Why use HDMI High Definition Multimedia Interface This device transmits a DVD video signal digitally without the process of converting to analog You will get sharper digital pictures when using an HDMI connection In Stop mode press and hold the SD HD Standard Definition High Definition button on the remote control Resolutions available for the HDMI output are 576p 480p 720p and 1080i ...

Страница 12: ...icable to DVD VIDEO and DVD R RW discs that have been recorded in Video Mode and then finalized Where a particular DVD type is mentioned it is indicated separately If a DVD R RW disc has not been recorded properly in DVD Video format it will not be playable DVD OPERATION 22 Connecting the FM Antenna FM Antenna supplied 1 Connect the FM antenna supplied to the FM 75Ω COAXIAL Jack 2 Slowly move the ...

Страница 13: ...your Samsung TV and the Home Theater with the HT THX22 HT THX25 s Remote Control 1 Plug the main unit s power cord into the AC power supply Before plugging your system into a main socket you must check the voltage setting If the voltage of the socket does not correspond to the setting on the rear of the unit you may seriously damage your system 2 Press the TV button to set the remote to TV mode 3 ...

Страница 14: ...est Function You can view 9 JPEG images on the TV screen at once Press the Cursor button during playback Rotate Flip Function button Flip Vertically button Flip Horizontally button Rotate 90 Counterclockwise button Rotate 90 Clockwise Original Image JPEG 26 MP3 WMA CD Playback 1 Place the MP3 WMA disc on the disc tray The MP3 WMA menu screen will appear and playback will start The appearance of th...

Страница 15: ...creen resolutions higher than 800 will not be supported When you play a disc whose sampling frequency is higher than 48khz or 320kbps you may experience shaking on the screen during playback Supported Audio Formats Press the SUBTITLE button Each time you press the button your selection will toggle between SUBTITLE 1 N 2 N and SUBTITLE OFF If the disc has only one subtitle file it will be played au...

Страница 16: ...REMAIN TRACK ELAPSED TRACK REMAIN TOTAL ELAPSED TOTAL REMAIN TRACK REMAIN TRACK ELAPSED 30 Using the Playback Function Press the INFO button Each time the button is pressed the display changes as follows The information Display disappears from the screen The information Display disappears from the screen The information Display disappears from the screen Screen Display CD display DVD display TITLE...

Страница 17: ...de To select another album and track repeat Steps 2 and 3 above 4 Press the ENTER button For DivX MP3 and JPEG discs you cannot select Repeat Play from the information display screen To Select a Repeat Playback Mode in the Disc Information Screen Repeat playback allows you to repeatedly play a chapter title track song or directory MP3 file Repeat Playback DVD CD MP3 JPEG DivX DVD CD DVD CD DVD VID...

Страница 18: ...X disc is being played the screen is enlarged up to twice the normal size DVD DVD DivX SELECT ZOOM POSITION 34 Using the Playback Function Con t A B Repeat Playback The A B Repeat function does not operate with DivX MP3 or JPEG discs No sound is heard during step motion playback 1 Press the INFO button twice 2 Press the Cursor button to move to REPEAT PLAYBACK display 3 Press the Cursor button to ...

Страница 19: ...Press the Cursor button or numeric buttons to select the desired subtitle Subtitle Language Selection Function EN 1 3 EN 01 03 OFF SP 02 03 FR 03 03 OFF 03 DVD DVD 36 Using the Playback Function Con t This function will not work if the DVD is recorded with multi camera angle format Black bars may not disappear because some DVD discs have a built in horizontal to vertical ratio This feature is not ...

Страница 20: ...view the title of each movie Depending on the disc the availability of this feature may vary DVD DVD ENTER MOVE EXIT ENTER MOVE EXIT 38 Using the Playback Function Con t Moving Directly to a Scene Song 1 Press the INFO button 2 Press the Cursor button or numeric buttons to select the desired title track and then press the ENTER button 3 Press the Cursor button to move to the Chapter display 4 Pres...

Страница 21: ... make sure to connect an auxiliary power cord to the USB HDD for proper operation 5 USB card Reader One slot USB card reader and Multi slot USB card reader Depending on the manufacturer the USB card reader may not be supported If you install multiple memory devices into a multi card reader you may experience problems 6 If you use a USB extension cable the USB device might not be recognized 40 You ...

Страница 22: ...VDs recorded in different screen sizes you should adjust the aspect ratio to fit your TV or monitor For a standard TV select either 4 3PS or 4 3LB option according to personal preference Select WIDE HDTV if you have a widescreen TV 1 In Stop mode press the MENU button 2 Press the Cursor button to move to Setup and then press the ENTER button 3 Press the Cursor button to move to TV DISPLAY and then...

Страница 23: ...splay and all settings will return to the default values Press the POWER button Using the RESET function will erase all stored settings Do not use this unless necessary If you have forgotten the rating level password do the following While watching a DVD or JPEG CD you can set the image you like as background wallpaper 1 During playback press the PLAY PAUSE button when an image you like appears 2 ...

Страница 24: ...rn to the previous level Press the EXIT button to exit the setup screen Setting the Delay Time When 5 1CH Surround Sound is played you can enjoy the best sound if the distance between you and each speaker is the same Since the sounds arrive at the listening position at different times depending on the placement of speakers you can adjust this difference by adding a delay effect to the sound of the...

Страница 25: ... Use the Test Tone feature to check the speaker connections 1 In Stop mode press the MENU button 2 Press the Cursor button to move to Audio and then press the ENTER button 3 Press the Cursor button to move to TEST TONE and then press the ENTER button The test tone will be sent to L C R SR SL SW in order If the ENTER button is pressed again at this time the test tone will stop Press the RETURN butt...

Страница 26: ...t the DRC When the Cursor button is pressed the effect is greater and when the Cursor button is pressed the effect is smaller Press the RETURN button to return to the previous level Press the EXIT button to exit the setup screen Setting the DRC Dynamic Range Compression MOVE ENTER RETURN EXIT CHANGE EXIT RETURN MOVE ENTER EXIT RETURN MOVE SELECT EXIT RETURN The audio signals transmitted over the H...

Страница 27: ... of a dance club with a throbbing bass beat HALL Provides a clear vocal as if listening in a concert hall MOVIE Provides the feeling of a movie theater CHURCH Gives the feel of being in a grand church PASS Select this for normal listening You can select the desired Dolby Pro Logic II audio mode Press the PL II MODE button Each time the button is pressed the mode changes as follows Dolby Pro Logic ...

Страница 28: ... 6 Incrementally adjusts the sound field DSP from the front or rear Dolby Pro Logic II Effect Listening to Radio 1 Press the TUNER button to select the FM band 2 Tune in to the desired station Automatic Tuning 1 When the button is pressed a preset broadcast station is selected Automatic Tuning 2 Press and hold the button to automatically search for active broadcasting stations Manual Tuning Briefl...

Страница 29: ...nnot differentiate upper case and lower case letters and always uses upper case letters The display window cannot show accented letters A for instance may stands for accented A s like À Â Ä Á Å and à Using the RDS Radio Data System to receive FM stations TO show the RDS signals RDS may not operate correctly if the station tuned is not transmitting RDS signal properly or if the signal strength is w...

Страница 30: ...gain When pressing the buttons on the primary remote control make sure that you have selected the FM station using the primary remote control Display NEWS AFFAIRS INFO SPORT EDUCATE DRAMA CULTURE SCIENCE VARIED POP M ROCK M M O R M LIGHT M Program Type News including an announced opinion and report Several matters including a current incident documentary discussion and analysis Information includi...

Страница 31: ...KEC KMC LG Goldstar Luxman LXI Sears Magnavox Marantz Matsui MGA Mitsubishi MGA No Brand Code 56 57 58 01 15 01 02 03 04 05 06 07 08 09 10 11 12 13 14 01 18 40 48 57 58 81 59 60 18 03 03 18 25 97 03 18 46 15 03 05 61 82 83 84 62 03 59 61 63 03 02 03 04 15 16 17 18 19 20 21 22 23 24 25 26 27 28 29 30 32 34 35 36 48 59 90 40 03 03 15 40 46 59 61 64 82 83 84 85 19 65 03 03 06 40 56 59 66 67 68 40 15 ...

Страница 32: ...ction below does not help turn off the unit disconnect the power cord and contact the nearest authorized dealer or Samsung Electronics Service Center Troubleshooting Is the power cord plugged securely into the outlet Turn off the power and then turn it back on Check the region number of the DVD DVD discs purchased from abroad may not be playable CD ROMs and DVD ROMs cannot be played on this DVD pl...

Страница 33: ... 1194 Galician 1349 Macedonian 1509 Somali 1044 Arabic 1196 Guarani 1350 Malayalam 1511 Albanian 1045 Assamese 1203 Gujarati 1352 Mongolian 1512 Serbian 1051 Aymara 1209 Hausa 1353 Moldavian 1513 Siswati 1052 Azerbaijani 1217 Hindi 1356 Marathi 1514 Sesotho 1053 Bashkir 1226 Croatian 1357 Malay 1515 Sundanese 1057 Byelorussian 1229 Hungarian 1358 Maltese 1516 Swedish 1059 Bulgarian 1233 Armenian 1...

Страница 34: ...a AZ 1 Olympus Digital Camera Product Company Type Digital Camera Cruzer Micro Sandisk USB 2 0 USB Flash Drive 128M Cruzer Mini Sandisk USB 2 0 128M Cruzer Mini Sandisk USB 2 0 256M SONY Micro Vault Sony USB 2 0 64MB FLEX DRIVE Serotech USB 2 0 32MB AnyDrive A L tech USB 2 0 128MB XTICK LG USB 2 0 128M Micro Mini Iomega USB 2 0 128M iFlash Imation USB 2 0 64M LG XTICK M USB 2 0 64M RiDATA EZDrive ...

Страница 35: ... Front Rear Center 90 x 1045 x 95 mm Stand 270 90 x 168 x 95 mm 250 x 90 x 95 mm 3 25kg 0 5kg 0 7kg Front Rear Center Front Center Rear speaker 3Ω x 5 140Hz 20kHz 86dB W M 100W 200W 5 1ch speaker system HT THX22 Speaker system Impedance Frequency range Output sound pressure level Rated input Maximum input Dimensions W x H x D Weights SPEAKER Subwoofer speaker 3Ω 45Hz 160Hz 86dB W M 100W 200W 175 x...

Отзывы: