background image

ENG

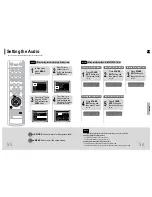
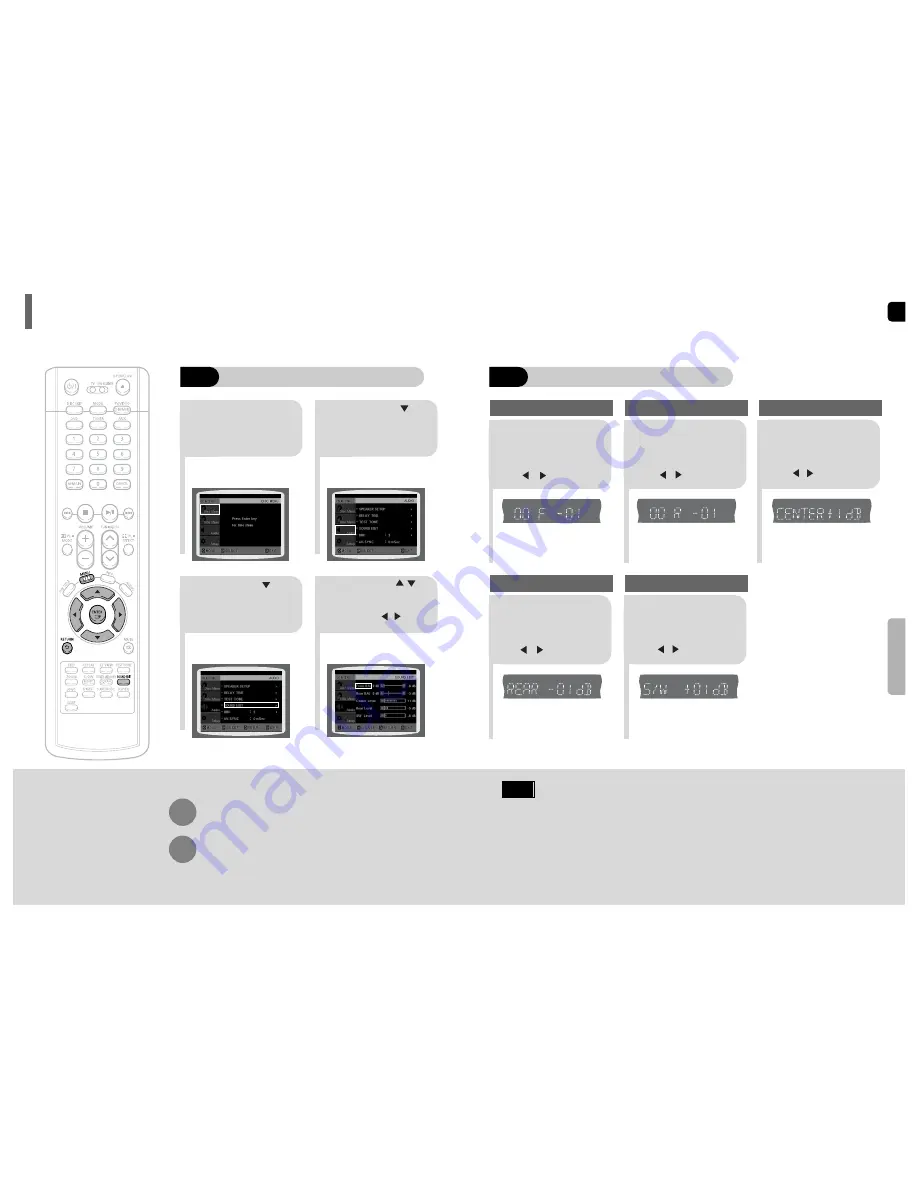
The adjustments will appear on the main unit's display, not on your TV screen.

Adjusting Front/Rear Speaker Balance

You can select between 00 and –06 and OFF.

The volume decreases as you move closer to –6.

Adjusting Center/Rear/Subwoofer Speaker Level

The volume level can be adjusted in steps from +6dB to –6dB.

The sound gets louder as you move closer to +6dB and quieter as you get closer to -6dB.

Method 2

When manually adjusting with the SOUND EDIT button

2

1

Adjusting Front Speaker Balance

Adjusting Rear Speaker Balance

Press 

SOUND

EDIT

button and

then press Cursor    

,     .

3

Adjusting Center Speaker Level

4

5

Adjusting Rear Speaker Level

Adjusting Subwoofer Speaker Level

56

Press 

SOUND

EDIT

button and

then press Cursor    

,    .

Press 

SOUND

EDIT

button and

then press Cursor   

,    .

Press 

SOUND

EDIT

button and

then press Cursor   

,    .

Press 

SOUND

EDIT

button and

then press Cursor   

,    .

Note

SETUP

TITLE

CHAP

PRGM RDS RT

ST

TUNED

kHz

MHz

TITLE

CHAP

PRGM RDS RT

ST

TUNED

kHz

MHz

TITLE

CHAP

PRGM RDS RT

ST

TUNED

kHz

MHz

TITLE

CHAP

PRGM RDS RT

ST

TUNED

kHz

MHz

TITLE

CHAP

PRGM RDS RT

ST

TUNED

kHz

MHz

55

Press 

RETURN

button to return to the previous level.

Press 

MENU

button to exit the setup screen.

2

1

4

3

In Stop mode,
press 

MENU

button.

Press Cursor     
button to move to
‘Audio’ and then press

ENTER

button.

Press Cursor      button
to move to ‘SOUND
EDIT’ and then press

ENTER

button.

Method 1

When adjusting the audio quality using the setup screen

Press Cursor       ,

buttons to select and

adjust the desired item.

Press the      ,      buttons

to adjust the settings.

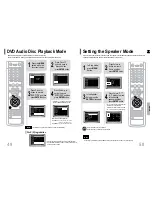
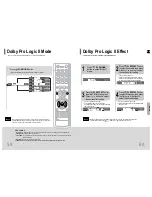
You can adjust the balance and level for each speaker.

Setting the Audio 

Содержание HT-P38

Страница 1: ... SYSTEM HT P38 Instruction Manual AH68 01701R V I D E O COMPACT DIGITAL AUDIO SAMSUNG ELECTRONICS AMERICA INC SERVICE DIVISION 400 Valley Road Suite 201 Mount Arlington NJ 07856 1 800 SAMSUNG 1 800 726 7864 www samsung com ...

Страница 2: ... the unit Do not expose the unit to direct sunlight or other heat sources This could lead to overheating and malfunction of the unit The batteries used with this product contain chemicals that are harmful to the environment Do not dispose of batteries in the general household trash PREPARATION CLASS 1 LASER PRODUCT This Compact Disc player is classified as a CLASS 1 LASER product Use of controls a...

Страница 3: ...OWER LINES An outside antenna system should not be located in the vicinity of overhead power lines or other electric light or power circuits or where it can fall into such power lines or circuits When installing an outside antenna sys tem extreme care should be taken to keep from touching such power lines or circuits as contact with them might be fatal POLARIZATION This video product is equipped w...

Страница 4: ...RATION Disc Playback 21 Selecting a Disc in the Disc changer 22 MP3 CD Playback 23 Displaying Disc Information 24 JPEG File Playback 25 DivX Playback 27 Playing Media Files using the USB HOST feature 29 Checking the Remaining Time 31 Fast Slow Playback 32 Skipping Scenes Songs 32 Repeat Playback 33 A B Repeat Playback 34 Step Function 35 Angle Function 35 Zoom Screen Enlarge Function 36 EZ VIEW Fu...

Страница 5: ...both low bit rate and high bit rate e g 32Kbps 320Kbps the sound may skip during playback A maximum of 500 tracks can be played per CD A maximum of 300 folders can be played per CD DVD Digital Versatile Disc offers fantastic audio and video thanks to Dolby Digital surround sound and MPEG 2 video compression technology Now you can enjoy these realistic effects in the home as if you were in a movie ...

Страница 6: ...t external equipment capable of digital output Cooling Fan COMPONENT VIDEO OUTPUT Connectors Connect a TV with component video inputs to these jacks AM Antenna Connector Video Cable AH39 40001V AM Antenna AH42 00019A Remote Control AH59 01506D FM Antenna AH42 00017A Accessories User s Manual AH68 01701R 10 Video Output Connector Connect the TV s video input jacks VIDEO IN to the VIDEO OUT connecto...

Страница 7: ...o and to Use the correct type of batteries Batteries that look similar may differ in voltage Always replace both batteries at the same time Do not expose batteries to heat or flame PL II MODE button VOLUME button MENU button TV DVD POWER button TV indicator DISC SKIP button SLEEP button CANCEL button RETURN button Number 0 9 buttons MODE button TV VIDEO DIMMER button OPEN CLOSE button DVD RECEIVER...

Страница 8: ... the same height as the front speakers You can also install it directly over or under the TV Position of the Home Theater Place it on a stand cabinet shelf or under the TV stand Selecting the Listening Position The listening position should be located about 2 5 to 3 times the distance of the TV s screen size away from the TV Example For 32 TVs 2 2 4m 6 8 feet For 55 TVs 3 5 4m 11 13 feet 13 Before...

Страница 9: ...Interlaced Scanning This function works only on TVs equipped with component video inputs Y Pr Pb that support Progressive Video It does not work on TVs with conventional component inputs i e non progressive scan TVs Depending on the brand and model of your TV this function may not work Note 16 1 2 Choose one of the three methods for connecting to a TV Connecting the Video Out to TV Unlike regular ...

Страница 10: ...1 Connect the AM loop antenna supplied to the AM and terminals 2 If reception is poor connect an outdoor single vinyl covered wire to the AM terminal Keep the AM loop antenna connected Snap the tabs on the loop into the slots of the base to assemble the AM loop antenna FM Antenna supplied AM Loop Antenna supplied If AM reception is poor connect an outdoor AM antenna not supplied Press AUX on the r...

Страница 11: ...rticular DVD type is mentioned it is indicated separately Depending on the content of the disc the initial screen may appear different DVD Note Groups and tracks DVD AUDIO DVD audio is divided into several large sections called groups and smaller sections called tracks Numbers are allotted to these sections These numbers are called group numbers and track numbers GROUP 1 GROUP 2 TRACK 1 TRACK 2 TR...

Страница 12: ...r 2 Load a disc Place a disc gently into the tray with the disc s label facing up Depending on the content of the disc the initial screen may appear different Depending on the recording mode some MP3 CDs cannot be played Table of contents of a MP3 CD varies depending on the MP3 track format recorded on the disc 1 Press OPEN CLOSE button to open the disc tray 3 Press DISC SKIP button Rotate the car...

Страница 13: ...e the button is pressed the display changes as follows DVD The information display disappears from the screen The information display disappears from the screen The information display disappears from the screen CD Something like you Back for good Love of my life More than words DVDRECEIVER SMARTNAVI appears on the TV screen If this symbol appears on the TV screen while buttons are being operated ...

Страница 14: ...ide Mode 25 Place the JPEG disc on the disc tray Each time the button is pressed the slide moves backward or forward Press to skip to the next slide 1 Press the OPEN CLOSE button Choose the appropriate JPEG disc in the tray 2 Playback starts automatically Each time the button is pressed the image makes the transition as follows Press SLIDE MODE button 3 From top to bottom From bottom to top Rectan...

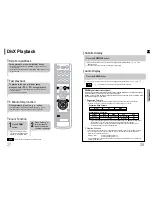
Страница 15: ... Supported Versions DivX3 11 5 1 V1 V2 V3 V7 DivX Digital internet video eXpress DivX is a video file format developed by Microsoft and is based on MPEG4 compression technology to provide audio and video data over the Internet in real time MPEG4 is used for video encoding and MP3 for audio encoding so that the users can watch a movie at near DVD quality video and audio 1 Supported Formats This pro...

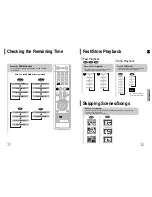
Страница 16: ...e than a file when you press the button the previous file is selected To play back the disc at a faster speed press and hold or during playback Each time you press and hold either button the playback speed will change as follows 2x 4x 8x 32x Normal Compatible Devices 1 USB devices that support USB Mass Storage v1 0 USB devices that operate as a removable disk in Windows 2000 or later without addit...

Страница 17: ...y TITLE 01 05 CHAPTER 002 040 TITLE 01 05 CHAPTER 004 040 MP3 Something like you Back for good Love of my life More than words I need you My love Uptown girl DVDRECEIVER SMARTNAVI Something like you Back for good Love of my life More than words I need you My love Uptown girl DVDRECEIVER SMARTNAVI Something like you Back for good Love of my life More than words I need you My love Uptown girl DVDREC...

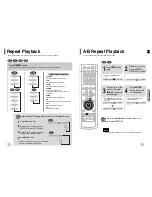
Страница 18: ...y plays the selected title GROUP Repeatedly plays the selected group RANDOM Plays tracks in random order A track that has already been played may be played again TRACK Repeatedly plays the selected track DIR Repeatedly plays all tracks in the selected folder DISC Repeatedly plays the entire disc OFF Cancels Repeat Playback Repeat Playback Options Note OPERATION DVD CD MP3 JPEG To Select a Repeat P...

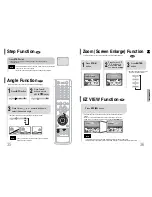
Страница 19: ...n to move to ANGLE display Press INFO button 1 3 Each time the button is pressed the angle changes as follows 3 Press Cursor or numeric buttons to select the desired angle 2 3 3 3 1 3 1 3 The Angle function works only with discs on which multiple angles have been recorded Note Note OPERATION EZ VIEW OFF EZ VIEW SELECT ZOOM POSITION Step Function This function allows you to enlarge a particular are...

Страница 20: ...UNING CH button on the remote control DVD AUDIO Bonus Group Navigating Pages 38 37 OPERATION Depending on the number of languages on a DVD disc a different audio language ENGLISH SPANISH FRENCH etc is selected each time the button is pressed 2 Press Cursor buttons or numeric buttons to select the desired audio language 1Press INFO button twice SP 2 3 FR 3 3 EN 1 3 EN 01 03 OFF SP 02 03 FR 03 03 OF...

Страница 21: ...umeric buttons You can press on the remote control to move directly to the desired title chapter or track Depending on the disc you may not be able to move to the selected title or time 39 Note OPERATION Moving Directly to a Scene Song 2 Press Cursor button to move to Title Menu DVD 1 In Stop mode press MENU button 3 Press ENTER button The title menu appears Press MENU button to exit the setup scr...

Страница 22: ...the language was set to English OSD will be displayed in English 3 Selecting the Subtitle Language recorded on the disc Selecting the Disc Menu Language recorded on the disc Select Language and then press ENTER button 5 Press Cursor button to select OSD Language and then press ENTER button Press Cursor button to select the desired language and then press ENTER button Press RETURN button to return ...

Страница 23: ...n different screen size you should adjust the aspect ratio to fit your TV or monitor For a standard TV select either 4 3LB or 4 3PS option according to personal preference Select 16 9 if you have a widescreen TV Select this to view a 16 9 picture in the full screen mode on your widescreen TV You can enjoy the widescreen aspect Select this to play a 16 9 picture in the letter box mode on a conventi...

Страница 24: ...NTER button Use this to restrict playback of adult or violent DVDs you do not want children to view Setting Parental Controls Rating Level 4 Enter the old password a new password and confirm new password The setting is complete 3 5 Press Cursor button to move to PASSWORD and then press ENTER button Press ENTER button Enter the password and then press ENTER button 2 1 Press MENU button Press Cursor...

Страница 25: ...ress MENU button to exit the setup screen 47 DVD JPEG Select this to set the Samsung Logo image as your wallpaper Select this to set the desired image as your wallpaper COPY LOGO DATA will be displayed on the TV screen The selected wallpaper will be displayed You can select up to 3 wallpaper settings 2 1 3 During playback press PLAY PAUSE button when an image you like appears Press LOGO button The...

Страница 26: ...akers are used or not Setting the Speaker Mode 2 1 Press the MENU button while the disc tray is open Press Cursor button to move to Setup and then press ENTER button 4 3 Press Cursor button to move to DVD TYPE and then press ENTER button Press Cursor button to move to DVD VIDEO and then press ENTER button DVD Play mode is set to DVD Audio as factory default setting Note Set steps 1 4 again if you ...

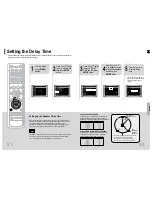
Страница 27: ...NT SPEAKER Dc The distance from CENTER SPEAKER Ds The distance from SURROUND SPEAKER Ideal CENTER SPEAKER placement It is desirable to place all speakers within this circle Ideal SURROUND SPEAKER placement SETUP You can set the delay time for C between 00 and 05mSEC and for LS and RS between 00 and 15mSEC 4 3 5 Press Cursor button to move to DELAY TIME and then press ENTER button Press Cursor butt...

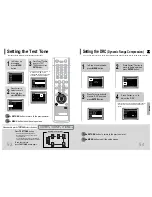
Страница 28: ...y in Stop mode Use this function to check that each speaker is correctly connected and that there is no problem Alternate method press the TEST TONE button on the remote Multi Channel Pro Logic Mode Start Use the Test Tone feature to check the speaker connections Setting the Test Tone ENG 54 53 1 2 In Stop or no disc mode press MENU button Press Cursor button to move to Audio and then press ENTER ...

Страница 29: ...EDIT button and then press Cursor Press SOUND EDIT button and then press Cursor Press SOUND EDIT button and then press Cursor Press SOUND EDIT button and then press Cursor Note SETUP TITLE CHAP PRGM RDS RT ST TUNED kHz MHz TITLE CHAP PRGM RDS RT ST TUNED kHz MHz TITLE CHAP PRGM RDS RT ST TUNED kHz MHz TITLE CHAP PRGM RDS RT ST TUNED kHz MHz TITLE CHAP PRGM RDS RT ST TUNED kHz MHz 55 Press RETURN b...

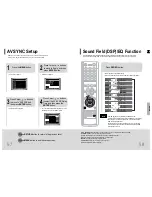
Страница 30: ...hannels multi channel mode will be selected automatically and DSP EQ function does not work Note DSP Digital Signal Processor DSP modes have been designed to simulate different acoustic environments EQ You can select ROCK POP or CLASSIC to optimize the sound for the genre of music you are playing Sound Field DSP EQ Function Video may look slower than the audio if it is connected to a digital TV If...

Страница 31: ... Press PL II EFFECT button to select Dimension then press the Cursor buttons to select the desired setting Note SETUP This function works only in Dolby Pro Logic MUSIC mode Dolby Pro Logic II Effect 59 Press PL II MODE button PRO LOGIC II MUSIC When listening to music you can experience sound effects as if you are listening to the actual performance CINEMA Adds realism to the movie soundtrack PRO ...

Страница 32: ...s the STOP button to select PRESET and then press button to select the preset station AutomaticTuning1 Press the Function button to select the desired band FM AM Press the STOP button to select MANUAL and then press and hold button to automatically search the band AutomaticTuning2 Press STOP to select MANUAL and then briefly press to tune in to a lower or higher frequency Manual Tuning Each time t...

Страница 33: ...shut itself off Convenient Functions MUTE ON appears in the display To restore the sound press the button again to select MUTE OFF Mute Function This is useful when answering a doorbell or telephone call Press MUTE button Using Headphones Use headphones not supplied for private listening pleasure Connect the headphones to the PHONES jack for private listening The remaining time before the Home The...

Страница 34: ...ess POWER If the TV turns off or on the setting is complete TV DVDRECEIVER Note 1 2 3 4 5 6 7 8 9 10 11 12 13 14 15 16 17 18 19 20 21 22 23 24 25 26 27 28 29 SAMSUNG ANAM DAEWOO LG HITACHI JVC SHARP SONY TOSHIBA SANYO MITSUBISHI MATSUSHITA TELEFUNKEN RCA PANASONIC SABA PHILIPS GRUNDIG ZENITH MIVAL NOBLEX EMERSON MAGNAVOX LOEWE THOMSON NORDMENDE LOEWE OPTA BLAUPUNKT SIEMENS TV Brand Code List No Br...

Страница 35: ...ck the region number of the DVD DVD discs purchased from abroad may not be playable CD ROMs and DVD ROMs cannot be played on this Home Theater Make sure that the rating level is correct Are you using a deformed disc or a disc with scratches on the surface Wipe the disc clean Disc tray does not open Playback does not start Playback does not start immediately when the Play Pause button is pressed No...

Страница 36: ...nnada 1483 Romanian 1564 Urdu 1149 Spanish 1301 Korean 1489 Russian 1572 Uzbek 1150 Estonian 1305 Kashmiri 1491 Kinyarwanda 1581 Vietnamese 1151 Basque 1307 Kurdish 1495 Sanskrit 1587 Volapuk 1157 Persian 1311 Kirghiz 1498 Sindhi 1613 Wolof 1165 Finnish 1313 Latin 1501 Sangro 1632 Xhosa 1166 Fiji 1326 Lingala 1502 Serbo Croatian 1665 Yoruba 1171 Faeroese 1327 Laothian 1503 Singhalese 1684 Chinese ...

Страница 37: ...ow operating instructions cleaning maintenance and environmental instructions that are covered and prescribed in the instruction book product removal or reinstallation reception problems and distortion related to noise echo interference or other signal transmission and delivery problems SAMSUNG does not warrant uninterrupted or error free operation of the product THERE ARE NO EXPRESS WARRANTIES OT...

Отзывы: