


Picture Control
English - 62
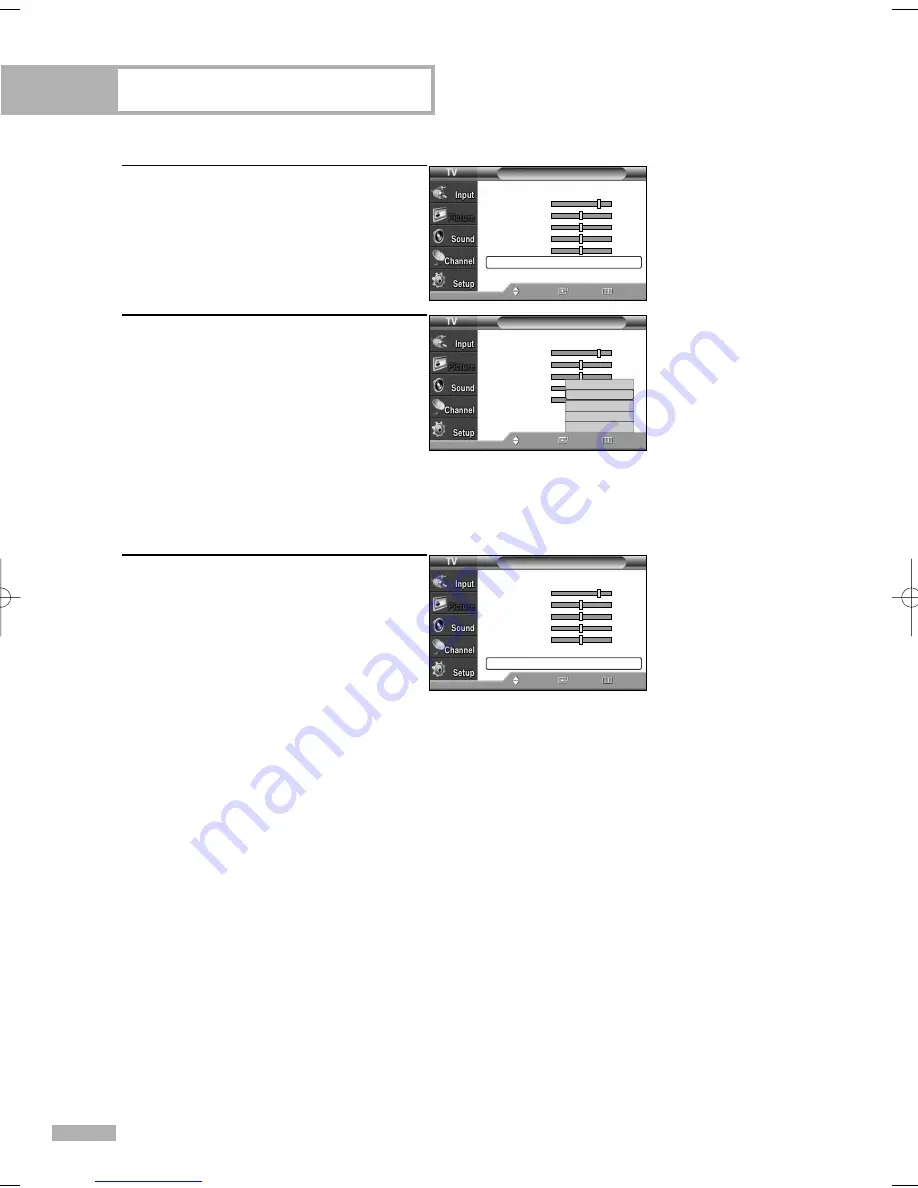
5
Press the ENTER button to return to
“Mode”.
Press the
…
or
†
button to select
“Color Tone”, then press the ENTER
button.
6
Press the
…
or
†
button to select a
particular option (Cool2, Cool1, Normal,
Warm1, or Warm2), then press the
ENTER button.
7
To return the factory defaults, select
“Reset” by pressing the
…
or
†
button.
Press the ENTER button.
Press the EXIT button to exit.
• The previously adjusted settings will
be reset to the factory defaults.
Resetting the Picture Settings to the Factory Defaults
Mode
Mode
: Standard
√
Contrast
80
Brightness
50
Sharpness
50
Color
50
Tint (G/R) G50
R50
Color Tone
: Cool1
√
Reset
Move
Enter
Return
Mode
Mode
: Standard
√
Contrast
80
Brightness
50
Sharpness
50
Color
50
Tint (G/R) G50
R50
Color Tone
: Cool1
√
Reset
Move
Enter
Return
Mode
Mode
: Standard
√
Contrast
80
Brightness
50
Sharpness
50
Color
50
Tint (G/R) G50
R50
Color Tone
Reset
Move
Enter
Return
Cool2
Cool1
Normal
Warm1
Warm2
BP68-00586F-00Eng(060~073) 3/30/06 7:14 PM Page 62
Downloaded from
www.Manualslib.com
manuals search engine
Содержание HL-S5065W
Страница 6: ...SAMSUNG Downloaded from www Manualslib com manuals search engine...
Страница 7: ...Your New Wide TV Downloaded from www Manualslib com manuals search engine...
Страница 15: ...Connections Downloaded from www Manualslib com manuals search engine...
Страница 25: ...Operation Downloaded from www Manualslib com manuals search engine...
Страница 47: ...Channel Control Downloaded from www Manualslib com manuals search engine...
Страница 58: ...SAMSUNG Downloaded from www Manualslib com manuals search engine...
Страница 59: ...Picture Control Downloaded from www Manualslib com manuals search engine...
Страница 72: ...SAMSUNG Downloaded from www Manualslib com manuals search engine...
Страница 73: ...Sound Control Downloaded from www Manualslib com manuals search engine...
Страница 83: ...Special Features Downloaded from www Manualslib com manuals search engine...
Страница 103: ...PC Display Downloaded from www Manualslib com manuals search engine...
Страница 113: ...Appendix Downloaded from www Manualslib com manuals search engine...
Страница 118: ...This page is intentionally left blank Downloaded from www Manualslib com manuals search engine...
Страница 119: ...This page is intentionally left blank Downloaded from www Manualslib com manuals search engine...


