


4
5
SETTING UP
AND MENUS
It is always a good idea to shoot using the optimal
settings in your DSLR and, with the following
information, we will have a close look at the key
settings within menus on a DSLR to help optimise
it for top-quality shots
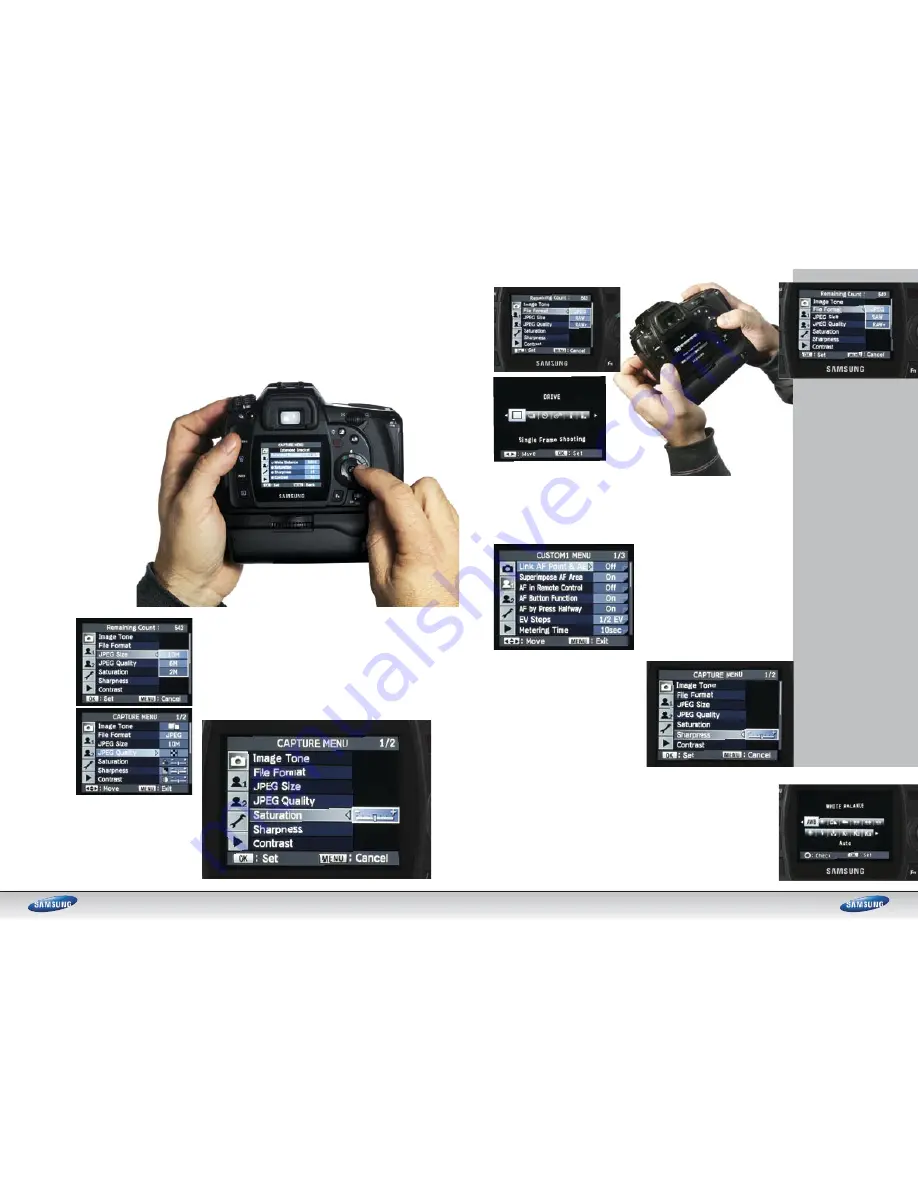
Menus and settings
The settings information may be
housed within a menu or on an
external control or sometimes on
both – depending on your camera
– and allows you to control and tailor
settings to get the most from all
those lovely pixels. While specifi cs
vary from camera maker to camera
maker, the advice on these pages
for setting up your camera for
day-to-day use generally holds true.
Pressing your camera’s menu
button will activate the system
that allows you to tinker with the
camera’s core settings. Menus are
displayed like pages or fi les in a
fi ling drawer. Scrolling around moves
you through pages of information,
the current ‘pick’ highlighted. Some
cameras have animated menus that
look funky and many have neat help
screens, which tell you when to use
a specifi c setting; very helpful they
are, too.
You will need to check the manual
for your camera but the following
assumes you are in the menu for
each topic or know where the button
is to get at it, if it is not in a menu.
Image size or resolution
Always set your camera to use the
largest number of pixels possible.
Why? You will be able to make very
big, fi nely detailed prints or crop into
a shot and enlarge sections if needed.
It is easier to downsize a big picture
than enlarge a small one. Removing
pixels is easy (in editing software on
a PC, for example) but adding them
can ruin a good shot. Remember that
basically, pixels equal detail. When
you enlarge a small image, the PC
adds pixels and ‘guesses’ what
information they would contain. The
more non-original pixels you add to
the image to make it physically
bigger, the more ‘garbage’ pixels are
added. The only time it’s a good idea
to shoot at a smaller size is if the
images are specifi cally for the web or
email and there’s no possibility that
you’ll ever want to use them bigger.
Image quality
The ‘image quality’ setting
refers to the compression
used. You’ll have various
options. There’ll be a series of
JPEG settings, perhaps a TIFF
mode and probably a RAW
setting. Some use both RAW
and JPEG simultaneously. As
a rule of thumb,use the highest
quality setting possible (or
RAW) for best results.
JPEG: This fi le format uses
compression to help fi t more
images onto a memory card.
Usually it will have settings
such as Standard, Better,
Best; or Good, Fine and Super
Fine. Pick the highest setting
for top-quality or if you want
to make big prints. Only use
the lower settings if you know
you won’t want big prints or if
room on your card is at a pre-
mium. JPEG fi les can be heav-
ily compressed; the higher the
compression used, the lower
the quality of the fi nal image.
• TIFF: A fi le format that can
be compressed by up to 50%
but without degrading the
image. TIFF fi les provide very
high-quality images but at a
much larger fi le size, so will
use memory up quickly.
• RAW: Unprocessed image
data that provides scope to be
edited on PC; no camera pro-
cessing is carried out on RAW
fi les. Think of these as digital
negatives, as you can process
them later and control almost
all aspects of the image after
the fact. Generally creates
smaller fi les than TIFFs and
can be used simultaneously
with JPEG in some DSLRs.
The JPEG becomes a ‘proof’
image, the RAW a negative
providing the best quality.
Sensitivity
Focus mode
Colour
Typically, you’ll have a variety of colour modes to play with
including a standard (default) setting, a higher saturation
setting called something like ‘Vivid’ and perhaps a sepia
or black and white mode. You may also have presets for
particular subjects. For instance, if shooting portraits, a
more natural colour is best for skin tones. For landscapes
or plants, a vivid setting might work well. If shooting in RAW
format the settings do not apply, as no image processing
takes place within the camera.
Sharpness
Set date and time and fi le numbering
Metering, white balance and sensitivity
Here you can set the camera’s ISO, and the
higher the ISO, the more sensitive it is to light.
However, a downside of higher sensitivities is the
introduction of image noise (analogous to grain in
fi lm) that can adversely affect a shot. Try to use
the lowest possible setting for the shot at hand,
using ISO 100 or its lowest setting as a rule of
thumb and for best results. Set your camera’s
noise reduction (in menus) to ‘On’ but bear in
mind, unless shooting RAW, the extra noise
processing will slow the image handling speed
and may affect detail in the shots.
Your DSLR will have a variety of focus modes
to choose from. Single AF, for instance, sets the
focus so that once it has locked onto a subject it
stays there until the shot is made. Continuous AF
on the other hand constantly tracks your subject
in the frame even if it moves. Use Single AF for
most subjects and switch to Continuous AF for
action, sports or snapping the kids when they will
not sit still! DSLRs use multiple AF points, some
have a modest three, some around 8-12, while
some high-end cameras can have more than 30!
AF zones can be pre-assigned, say, to a single
central AF point; many can be used in groups
or patterns, or the camera can be left to decide
which are best for the job automatically.
Sharpness settings let you increase or decrease the
way the camera adjusts the image after it is shot to
help defi ne detail. Sharpening adjusts the contrast
around the edges of pixels, making them stand out
(or not) as you need them to and depending on the
mode you use. Usually, the default setting works
well enough, but can be conservative. The best way
to check is to take some images at each setting
and see what looks best. Again, if in doubt let the
camera’s default mode be your guide. However, less
sharpening is best for portraits while landscapes
might want more punch to bring out fi ne, distant
detail. Alternatively you may want to save your
sharpening to the editing stage on your PC.
Always set the camera’s date and time correctly
since this information will help you to fi le and
organise your images on the PC. The data is
stored with the image and, when using image-
organising software, can ensure you have an
accurate record of when you took the photo.
Another option is the fi le-numbering system.
You can set the camera to reset the count
every time a new card is used, or for each new
day, or it can count continuously.
These three items are key to getting top-notch
exposure and colour. Each is covered overleaf,
but as a rule of thumb, set the ISO (sensitivity)
to the lowest ISO for the job at hand (ISO
100 or 200 depending on your camera). The
metering mode should depend on the subject,
but Matrix (or Evaluative) is best for all-round
snapping. Set the white balance (WB) to the
correct setting for the ambient light: daylight
mode for daylight, for example.


