background image

Français - 14

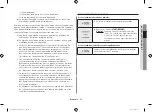
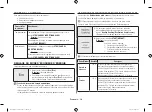
VÉRIFICATION DU BON FONCTIONNEMENT DE VOTRE FOUR

La procédure suivante vous permet de vérifier à tout moment que votre four fonctionne 

correctement.

Ouvrez la porte du four en poussant le bouton-poussoir situé au bas du tableau de 

commande. Placez un verre d'eau sur le plateau. puis fermez la porte.

1. 

Appuyez sur la touche 

Numérique

 pour saisir la durée de 

fonctionnement. (4 à 5 minutes)

2. 

Appuyez sur le bouton 

START (DÉPART)

.

Résultat :

  L'éclairage du four est activé et le plateau 

commence à tourner.

1)  Lorsque la cuisson est terminée, un signal 

sonore retentit 4 fois.

2)  Le signal de rappel de fin de cuisson retentit 

1 fois (une fois toutes les minutes).

3)  L'heure s'affiche à nouveau.

Le four doit être branché sur une prise murale appropriée. Le plateau doit être 

correctement positionné dans le four. Si une puissance autre que la puissance 

maximale est utilisée, l'eau mettra plus longtemps à bouillir.

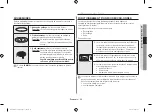
RÉGLAGE DE L'HORLOGE

Votre four micro-ondes est équipé d'une horloge.  

Lors de la mise sous tension, « 12:00 » s'affiche automatiquement.  

Réglez l'heure actuelle.

•  à l'installation initiale ;
•  après une coupure de courant.

N'oubliez pas de changer l'heure lors du passage à l'heure d'hiver ou à l'heure 

d'été.

1.  

Appuyez sur le bouton 

Clock (Horloge)

.

2. 

Utilisez les boutons du pavé

 Numérique

 pour régler l'heure 

actuelle.  

Vous devez appuyer sur au moins trois chiffres pour régler 

l’horloge. Si l'heure actuelle est 5:00, saisissez 

5

0

0

.

3. 

Appuyez sur le bouton 

START (DÉPART)

.

En cas de coupure de courant, il convient de régler l’horloge à nouveau.  

Vous pouvez vérifier l'heure actuelle pendant la cuisson en appuyant sur le bouton 

Clock (Horloge)

.

GE0103MB1_XSG_DE68-03886G-01_FR.indd   14

2014-09-13     6:12:38

Содержание GE286

Страница 1: ... إرشادات GE286 GE0103MB1 100 بنسبة تدويره عاد ُ م ورق باستخدام الدليل هذا إنتاج مت تصحيح أو املنتج تشغيل بشرح اخلاصة اخلدمة اتصاالت يغطي ال Samsung ضمان بأن العلم يرجى العادية التنظيف أو الصيانة عمليات تنفيذ أو السليم غير التركيب GE0103MB1_XSG_DE68 03886G 01_AR indd 1 2014 09 13 6 12 39 ...

Страница 2: ...ويات 2 السالمة معلومات 11 السريع البحث دليل 12 الفرن ميزات 12 الفرن 12 التحكم لوحة 13 اإلضافية األدوات 13 الفرن استخدام 13 امليكروويف فرن عمل طريقة 14 صحيح بشكل يعمل الفرن أن من التأكد 14 الوقت ضبط 15 الطاقة ومستويات الطهي أوقات ضبط 15 واحدة مرحلة على الطهي 15 مراحل عدة على الطهي 15 ثانية 30 الزر استخدام 16 الطهي إيقاف 16 الطاقة توفير وضع إعداد 16 الصحي الطبخ ميزات استخدام 17 التلقائي التسخني إعاد...

Страница 3: ...ح األطفال بل ِ ق من اجلهاز هذا استخدام كن ُ ي حتذير الذين األشخاص أو أكثر أو سنوات 8 العمر من البالغني من أو ضعيفة جسدية أو حسية أو عقلية قدرات لديهم إرشادات إعطائهم مت إذا املعرفة أو اخلبرة في نقص لديهم آمنة بطريقة اجلهاز باستخدام يتعلق فيما وتوصيات على ينبغي املوجودة اخملاطر جلميع دركني ُ م وأصبحوا عمليات إجراء عدم ينبغي باجلهاز العبث عدم األطفال القيام للمستخدم ميكن التي اجلهاز وصيانة التنظيف و...

Страница 4: ... تشغيل يجب مرة ألول افصل دخان أو حريق رائحة أو غريبة ضجة الفرن أصدر إذا خدمة مركز بأقرب واتصل الفور على الكهرباء مأخذ فصله أو الفرن تشغيل بإيقاف قم دخان تصاعد حالة في أي إلخماد ا ً مغلق الفرن باب واجعل الكهربي التيار عن اشتعال فرن باستخدام املشروبات تسخني عن ينتج قد حتذير يجب لذا غليانها عند شديد فوران حدوث امليكروويف احلاوية مع التعامل عند احلذر توخي وبرطمانات الرضاعة زجاجات محتويات رج يجب حتذير ...

Страница 5: ... ُ ي حتذير االستخدام أثناء ساخنة األجزاء ملس ب ّ ن لتج احلذر توخي عليك يتعني ّ ثم ومن الساخنة عن ا ً د بعي سنوات 8 من أقل األطفال على احلفاظ يجب مستمرة بصفة مراقبني كانوا إذا إال املنتج اجلهاز يكون عندما مرتفعة األسطح حرارة درجة تكون قد التشغيل قيد يكون عندما ا ً ن ساخ اخلارجي السطح أو الباب يصبح قد التشغيل قيد اجلهاز متناول عن ا ً د بعي به اخلاص والسلك اجلهاز يكون أن يجب سنوات 8 عن عمرهم يقل ممن ...

Страница 6: ...طح يكون أن يجب سم 85 بأمان الفرن بشكل تهويته من تأكد الفرن تركيب عند 1 بوصة 4 سم 10 مسافة بترك جيد الفرن جانبي وعلى اخللف من األقل على أعاله بوصة 8 سم 20 ومسافة الفرن داخل املوجودة التغليف مواد كافة بإزالة قم 2 الدوارة والصينية الدوارة احللقة بتركيب قم 3 بحرية الدوارة الصينية دوران من تأكد فقط الدوارة بالصينية د ّ و املز الطراز التيار مأخذ من ا ً ب قري يكون بحيث امليكروويف وضع يجب 4 توصيله يسهل بح...

Страница 7: ...اب وقفل الداخلية اجلدران امسح األولى للمرة امليكروويف فرن استخدام قبل امليكروويف فرن تنظيف فترات على امليكروويف فرن من التالية األجزاء تنظيف يجب الطعام وبقايا الدهون تراكم ملنع منتظمة واخلارجية الداخلية األسطح الباب وقفلي الباب الدوارة واحللقة الدوارة الصينية فقط الدوارة بالصينية د ّ و املز الطراز الباب إغالق ومن الباب قفلي نظافة من ا ً دوم تأكد بإحكام حالة تدهور إلى الفرن تنظيف في اإلهمال يؤدي أن...

Страница 8: ...قرب اتصل ليمون عصير به كوب ضع والروائح الطعام بقايا إلزالة 3 دقائق عشر ملدة بالتسخني وقم الفرن في مخفف للطاقة مستوى أعلى باستخدام في األطباق غسالة مع باستخدامه املسموح الطبق اغسل 4 لذلك حتتاج وقت أي مواد أي استخدام يحظر الفتحات في املاء سكب يحظر تنظيف عند ً ا جد ً ا حريص كن كيماوية مذيبات أو كاشطة بقايا أي وجود عدم لضمان الباب قفلي متراكمة صحيح بشكل الباب إغالق متنع فيها تستخدمه مرة كل بعد امليكرو...

Страница 9: ...ربي أشياء تضع أو مفرط بشكل ثنيه أو الكهربي التيار سلك بسحب تقم ال عليه ثقيلة من غيره أو املسال النفطي الغاز أو البروبان غاز مثل الغاز تسرب عند الكهربي التيار قابس ملس دون ا ً فور بالتهوية قم الغازات مبتلة ٍ د بأي الكهربي التيار قابس تلمس ال يكون عندما الكهربي التيار قابس فصل طريق عن اجلهاز تشغيل توقف ال التشغيل قيد مواد أي دخول حالة وفي الفرن إلى غريبة مواد أي أو أصابعك دخل ُ ت ال مركز بأقرب واتصل...

Страница 10: ...وصيل عند احلذر توخي يجب الفرن الفرن سطح على احلشرية املبيدات مثل متطايرة مواد ترش ال أطباق تسخني عند احلذر توخ الفرن داخل لالشتعال قابلة مواد أي ن ّ ز تخ ال ا ً ء جز تلمس قد الكحول أبخرة إن حيث الكحول على حتتوي مشروبات أو بالفرن ا ً ن ساخ يحشرون رمبا ألنهم غلقه أو فتحه عند الباب عن األطفال إبعاد يجب الباب داخل أصابعهم شر ُ ت رمبا أو الباب عند أنفسهم حدوث امليكروويف فرن باستخدام املشروبات تسخني عن ...

Страница 11: ...مل أو التدوير أداة أو الدوران موجهة أو الفرن صينية في كسر ب التحذيرات تغطي ال اإلرشادات دليل في مذكور هو كما فقط له اخملصص للغرض اجلهاز هذا استخدم على يقع لذا حدوثها احملتمل واملواقف الظروف جميع الدليل هذا في الواردة املهمة السالمة وإرشادات وتشغيله وصيانته اجلهاز تركيب عند االنتباه ومراعاة بحذر والتعامل السليم املنطق اتباع مسئولية عاتقك قد تستعمله التي امليكروويف خصائص فإن متعددة رز ُ ط على تنطبق ...

Страница 12: ...ر 9 األرقام أزرار 10 الطاقة مستوى الزر 11 املطبخ مؤقت الزر 12 الساعة الزر 13 الطاقة توفير الزر 14 الصوت الزر 15 إلغاء إيقاف زر 16 ثانية 30 زر 17 تشغيل الزر 18 الفرن ميزات الفرن الباب 1 التهوية فتحات 2 الشواية 3 اإلضاءة 4 الباب قفال 5 الدوارة الصينية 6 التدوير أداة 7 الدوارة احللقة 8 األمان قفل فتحتا 9 التحكم لوحة 10 6 7 8 9 10 5 1 2 4 3 GE0103MB1_XSG_DE68 03886G 01_AR indd 12 2014 09 13 6 12 46 ...

Страница 13: ...لطاقة تعمل التردد عالية كهرومغناطيسية موجات عن عبارة امليكروويف أشعة إن لونه أو شكله على التأثير دون تسخينه إعادة أو الطعام طهي يلي فيما امليكروويف فرن استخدام ميكنك التجميد فك التسخني الطهي الطهي عملية بشكل املاجنترون بواسطة تتولد التي امليكروويف أشعة توزيع يتم 1 الدوارة الصينية على الطعام دوران أثناء متساو متساوية بدرجة الطعام طهي يتم وبذلك ا ً ب تقري واحدة بوصة عمق حتى امليكروويف موجات الطعام م...

Страница 14: ...جب مناسب حائط مبقبس الفرن توصيل يجب للغليان أطول ً ا وقت املياه تستغرق األقصى احلد غير طاقة مستوى استخدام مت إذا الوقت ضبط نة ّ مضم ساعة على امليكروويف فرن يحتوي احلالي الوقت تعيني الرجاء الشاشة على ا ً تلقائي 12 00 الرقم عرض يتم بالكهرباء اإلمداد عند األولى للمرة امليكروويف فرن تركيب عند الكهربائي التيار انقطاع بعد الشتوي أو الصيفي التوقيت إلى أو من التبديل عند الساعة ضبط إعادة تنسى ال اعة ّ الس ...

Страница 15: ...مستوى 3 منخفض 30 90 الطاقة مستوى 9 قلي 90 40 الطاقة مستوى 4 ً ال قلي منخفض 40 عالي الطاقة مستوى 10 مرتفع 100 50 الطاقة مستوى 5 متوسط 50 الطهي لبدء تشغيل START الزر على اضغط 3 الزر على فاضغط الطاقة مستوى تغيير في ترغب كنت إذا تشغيل START الزر على الضغط قبل إلغاء ف ّ توق STOP CANCEL التعليمات كافة إدخال أعد ثم مراحل عدة على الطهي مراحل عدة على الطهي Microwave Multi Stage ضبط تريد كنت إذا 1 ّباع ت ا ...

Страница 16: ...أو الطهي وقت ضبط إلى حتتاج ال فهي ا ً مسبق جة َ مبرم للطهي ً ة مد 9 بها الصحي الطهي ميزات الطاقة مستوى امليكروويف مع باستخدامها املسموح األواني فقط استخدم الباب أغلق الدوارة الصينية منتصف في الطعام ضع الباب افتح الزر على بالضغط طهيه املطلوب الطعام نوع حدد 1 مرات عدة أو واحدة مرة صحي طبخ Healthy Cooking الصحي الطهي جدول راجع تشغيل START الزر على اضغط 2 ينتهي عندما الطهي يبدأ النتيجة مرات أربع تنبيه...

Страница 17: ... ملعقة على الطبق ضع ثم الغطاء اثقب ثم احلراري امليكروويف ورق دقيقتني إلى دقيقة ملدة اتركه الدوارة الصينية 9 الطازج اجلمبري جم 250 إليه أضف ثم خزفي طبق على وضعه اجلمبري اغسل من بطبقة بتغطيتها قم ثم الليمون عصير من ملعقة على الطبق ضع ثم الغطاء اثقب ثم احلراري امليكروويف ورق دقيقتني إلى دقيقة ملدة اتركه الدوارة الصينية التلقائي التسخني إعادة ميزات استخدام أو الطهي وقت ضبط إلى حتتاج ال فهي ا ً مسبق جة...

Страница 18: ... الوجبة حجم اإلرشادات 1 املشوي الدجاج جم 1200 من طبق في الدجاجة ضع والتوابل الزيت من ٍ بقليل الدجاجة ادهن إصدار مبجرد بقلبها قم ثم ً ال أو ألسفل الصدر ناحية وضع مع البيركس ألعلى الصدر ناحية ضع التقليب عند التنبيه أصوات الفرن دقائق 5 ملدة اتركها الشواء انتهاء بعد 2 الدجاج قطع جم 500 شكل على ضعها والتوابل الزيت من بقليل الدجاج قطع ادهن واحدة دجاج قطعة ضع املنتصف في العظام وضع مع دائرة دقائق 3 إلى دق...

Страница 19: ...عام الكود الوجبة حجم اإلرشادات 1 اللحوم كجم 1 5 إلى 0 1 صدر ُ ي عندما اللحوم ّب ل ق ثم األملونيوم بورق احلواف بحماية قم تنبيه صوت الفرن وشرائح الضأن وحلم البقري اللحم مع البرنامج هذا يتناسب املفروم واللحم اللحم وقطع الستيك دقيقة 60 إلى 20 من ملدة اتركها 2 الدواجن كجم 1 5 إلى 0 1 األملونيوم ورق باستخدام واألجنحة األرجل أطراف بحماية قم تنبيه صوت الفرن صدر ُ ي عندما الدواجن ّب ل ق ثم الدجاج أجزاء أو ...

Страница 20: ...الذائبة الزبد ا ً د واح ا ً شخص تكفي كمية جم 50 شخصني تكفي كمية جم 100 وعاء في وضعها قطع 4 أو 3 إلى الزبد بتقطيع قم اإلذابة أثناء الغطاء تضع وال صغير زجاجي الطهي بعد بالتقليب قم دقيقتني إلى دقيقة ملدة واتركها 2 الشوكوالتة الذائبة السوداء ا ً د واح ا ً شخص تكفي كمية جم 50 شخصني تكفي كمية جم 100 وعاء في وضعها السوداء الشوكوالتة ببشر قم صغير زجاجي اإلذابة أثناء الغطاء تضع وال اإلذابة بعد بالتقليب قم ...

Страница 21: ...ماصة ورقية فوطة ضع باستخدام بالتغطية وقم بيركس طبق أو امليكروويف مع قدمها بالطهي ذلك بعد وقم أخرى ورقية فوطة 2 أجنحة الدجاج اجملمدة ا ً شخص تكفي كمية أوقية 7 6 ا ً د واح أشخاص 2 تكفي كمية أوقية 9 8 شكل على الدجاج أجنحة ورتب طبق فوق ورقية فوطة ضع تغطيها وال الورقية الفوطة على دائرة دقيقتني إلى دقيقة ملدة اتركه 3 الدجاج قطع اجملمدة ا ً شخص تكفي كمية أوقية 5 4 ا ً د واح أشخاص 2 تكفي كمية أوقية 7 6 شك...

Страница 22: ...ير للطهي وذلك ا ً مع والشواية امليكروويف باستخدام الطهي ا ً أيض ميكنك سريع املصنوعة األطباق تعتبر والفرن امليكروويف مع باستخدامها املسموح الطهي أدوات ً ا دوم استخدم إلى بالتخلل امليكروويف ألشعة تسمح حيث الطهي عند مثالية اخلزفية واألطباق الزجاج من ٍ متساو بشكل الطعام حرارته لشدة ً ا نظر الفرن في املستخدمة األدوات ملس عند الفرن قفازات ا ً دوم استخدم العلوي احلامل استخدمت إذا والشي الطهي عملية حتسني ...

Страница 23: ...ء 2 ثوان 3 ملدة أخرى مرة طبيعي بشكل الفرن استخدام ميكنك النتيجة التنبيه صفارة تشغيل إيقاف تريد وقتما التنبيه صوت تشغيل إيقاف ميكنك الصوت Sound الزر على اضغط 1 2 أو 1 رقم الزر على اضغط 2 العرض شاشة على تشغيل ON ويظهر يعمل الصوت 1 العرض شاشة على تشغيل إيقاف OFF ويظهر يعمل ال الصوت 2 الوقت لعرض الشاشة تعود تشغيل START الزر على اضغط 3 النتيجة الصوت تنبيه تشغيل عند صوت إصدار ميزة تشغيل مع للعمل الفرن ي...

Страница 24: ... األكياس الصحف حتترق قد تصنيعه املعاد الورق الزجاجية األدوات أو معدنية بزخارف املزينة كهربائي ماس حدوث في يتسبب قد الطهي أوعية مسموح باستخدامها امليكروويف مع تعليقات الزجاجية األدوات أدوات إلى الفرن من املائدة معدنية بزخارف مزينة تكن لم ما استخدامها ميكن الزجاجية األدوات الرقيقة يتعرض قد والسوائل األطعمة تدفئة في استخدامها ميكن املفاجئ التسخني بسبب الشرخ أو للكسر الرقيق الزجاج الزجاجية البرطمانات ...

Страница 25: ...لهمية غاية في ا ً أمر الطهي أثناء الطعام تغطية تعتبر أو خزفية أطباق باستخدام املثال سبيل على مختلفة بطرق الطعام تغطيه وميكن الطهي في ويسهم احلراري امليكروويف ورق من بطبقة أو بالستيكية االنتظار فترات أجزاء بني احلرارة درجة احلرارة درجة مبعادلة تسمح أنها في الطهي انتهاء بعد االنتظار مدة أهمية تتمثل الداخلية الطعام اجملمدة اخلضراوات طهي دليل احلد مدة الغطاء وضع مع الطعام بطهي قم غطاء لها البيركس من م...

Страница 26: ...عقتان مل 30 أضف شرائح إلى الكوسة ع ّ قط دقائق 3 ملدة اتركها تنضج حتى الطهي يستمر الباذجنان جم 250 100 4 3 5 اإلرشادات عليه الليمون عصير من كبيرة ملعقة وانثر صغيرة شرائح إلى الباذجنان ع ّ قط دقائق 3 ملدة اتركها الطعام الوجبة حجم الطاقة بالدقيقة الوقت األخضر البصل جم 250 100 4 5 4 اإلرشادات دقائق 3 ملدة اتركها سميكة شرائح إلى األخضر البصل ع ّ قط الغراب عيش جم 125 جم 250 100 2 1 5 3 2 5 اإلرشادات امل...

Страница 27: ...عام وأن 20 إلى 18 والتغطية الترتيب أن قبل وجتفيفها ا ً د جي طهيها يجب حيث الكبيرة اللحم قطع مثل احلجم كبيرة األطعمة تسخني جتنب ا ً ح جنا أكثر الصغيرة القطع تسخني إعادة يكون لذا الوسط من الساخن الهواء انبعاث يبدأ والتقليب الطاقة مستويات األنواع تسخني يجب بينما عالية الطاقة من 100 نسبة باستخدام األطعمة بعض تسخني ميكن نسبة حتى أو متوسطة 50 نسبة أو هادئة نار على 60 نسبة باستخدام األطعمة من األخرى منخف...

Страница 28: ... شكل على فناجني وثالثة متقابلني واثنني الوسط دقيقتني إلى دقيقة ملدة واتركها ً ا جيد قلب ُ ت و االنتظار مدة أثناء امليكروويف بارد حساء جم 250 جم 350 جم 450 جم 550 100 3 2 5 3 5 3 4 3 5 5 4 5 اإلرشادات بغطاء بتغطيته قم خزفية سلطانية أو عميق خزفي طبق في يصب التقدمي قبل أخرى مرة قلب ُ ي ثم التسخني إعادة بعد ً ا جيد يقلب بالستيكي دقائق 3 إلى دقيقتني ملدة اتركه الطعام الوجبة حجم الطاقة بالدقيقة الوقت با...

Страница 29: ...من وانزعها معدنية أربطة أي فك طهيها قبل ا ً د جي الدواجن التجميد فك يتم أن يجب إذابته مت الذي السائل بإخراج للسماح اإلمكان قدر محتوياته وإخراج سائل أي من الطبق بتصفية قم غطاء دون طبق على اجملمد الطعام ضع الدفء درجة إلى وصوله عدم من للتأكد آلخر حني من الطعام افحص حمايتها فيمكنك الدفء درجة إلى الوصول في اجملمد الطعام من والرفيعة الصغيرة األجزاء بدأت إذا التجميد فك أثناء األملونيوم ورق من صغيرة بشرائ...

Страница 30: ...ة تتم حتى 30 تبلغ طاقة باستخدام ثانية 30 إلى 20 ملدة بتسخينه قم اجليالتني إذابة البارد املاء في دقائق 5 ملدة جم 10 اجلافة اجليالتني أوراق ضع صغير بايركس وعاء في جتفيفه مت الذي اجليالتني ضع 30 تصل طاقة باستخدام دقيقة ملدة بالتسخني قم اإلذابة بعد بالتقليب قم واجلاتوه للكعك الثلجي الغطاء اجليلي عمل البارد املاء من مل 250 و السكر من جم 40 مع ا ً ب تقري جم 14 التحضير سريع اجليلي امزج اجليلي لون يصبح حت...

Страница 31: ... بعي الفرن ضع املشكلة هذه حلل العرض شاشة تعيني إعادة يتم قد للفرن املصغر املعالج جانب من تشويش حدوث حالة في الوقت ضبط أعد أخرى مرة توصيله وإعادة التيار مأخذ بفصل قم املشكلة هذه حلل كهربائي ماس الفرن داخل فرقعة صوت وإصدار شرارة انبعاث معدنية زخارف به ا ً طبق تستخدم هل الفرن داخل أخرى معدنية أداة أو شوكة تركت هل الداخلية اجلدران من ً ا جد قريب األملونيوم ورق هل األولي التشغيل عند الكريهة والروائح ال...

Страница 32: ...8252273 SYRIA 021 8255 IRAN 080 100 22 55 MOROCCO 920021230 SAUDI ARABIA 444 77 11 TURKEY 0800 726 7864 NIGERIA 0800 10077 Ghana 0302 200077 8000 0077 Cote D Ivoire 800 00 0077 SENEGAL 7095 0077 CAMEROON 0800 545 545 KENYA 0800 300 300 UGANDA 0800 755 755 TANZANIA 9999 RWANDA 200 BURUNDI 499999 DRC 1969 SUDAN 0860 SAMSUNG 726 7864 SOUTH AFRICA 8007260000 BOTSWANA 08 197 267 864 NAMIBIA 0211 350370...

Страница 33: ...103MB1 Ce manuel est en papier recyclé à 100 Veuillez noter que la garantie Samsung n inclut pas les déplacements du service après vente pour expliquer le fonctionnement de l appareil corriger une installation non correcte ou exécuter des travaux de nettoyage ou d entretien réguliers GE0103MB1_XSG_DE68 03886G 01_FR indd 1 2014 09 13 6 12 31 ...

Страница 34: ...nes de sécurité 2 Présentation rapide 11 Fonctionnalités du four 12 Four 12 Tableau de commande 12 Accessoires 13 Utilisation du four 13 Fonctionnement d un four micro ondes 13 Vérification du bon fonctionnement de votre four 14 Réglage de l horloge 14 Réglage du temps de cuisson et de la puissance 15 Cuisson en une étape 15 Cuisson en plusieurs étapes 15 Utilisation du bouton 30s 15 Arrêt de la c...

Страница 35: ...ns surveillance que si vous lui avez donné les instructions appropriées lui permettant de se servir de l appareil en toute sécurité et de comprendre les dangers qu implique une mauvaise utilisation AVERTISSEMENT cet appareil peut être utilisé par des enfants à partir de 8 ans et des personnes ayant des capacités physiques sensorielles ou mentales réduites ou un manque d expérience et de connaissan...

Страница 36: ...ils risqueraient d exploser Ne tentez jamais de nettoyer le four au jet d eau Ce four micro ondes est prévu pour faire chauffer des aliments et des liquides Le séchage des aliments ou de vêtements et le chauffage de plaques chauffantes pantoufles éponges chiffon mouillé ou similaire peut entraîner des blessures des flammes ou un incendie Si de la fumée s échappe de l appareil laissez la porte de c...

Страница 37: ...ère l appareil ne doit être utilisé par des enfants que sous la surveillance d un adulte lorsqu il fonctionne en mode combiné Cet appareil devient très chaud pendant son utilisation Prenez garde à ne pas toucher les éléments chauffants situés à l intérieur du four AVERTISSEMENT les parties accessibles peuvent devenir très chaudes pendant l utilisation Les enfants en bas âge doivent être tenus à l ...

Страница 38: ... utilisé avec une minuterie extérieure ou une télécommande INSTALLATION DU FOUR MICRO ONDES Placez le four sur une surface plane située à 85 cm au dessus du sol Cette surface doit être suffisamment résistante pour supporter le poids du four en toute sécurité 1 Lorsque vous installez votre four assurez une ventilation adéquate de celui ci en laissant un espace d au moins 10 cm à l arrière et sur le...

Страница 39: ...squez d en détériorer les surfaces et par conséquent d en réduire la durée de vie et de créer des situations dangereuses 1 Nettoyez l extérieur avec un chiffon doux et de l eau savonneuse tiède Rincez et séchez 2 Éliminez les traces de projections situées sur les surfaces intérieures du four à l aide d un chiffon imbibé d eau savonneuse Rincez et séchez 3 Si votre four est très sale ou si une odeu...

Страница 40: ...roduit inflammable N installez pas cet appareil dans un endroit humide graisseux ou poussiéreux et veillez à ce qu il ne soit pas exposé directement à la lumière du soleil ou à une source d eau eau de pluie N installez pas cet appareil dans un endroit susceptible de présenter des fuites de gaz Pour faciliter le nettoyage de la partie supérieure de la cavité du four inclinez la résistance d environ...

Страница 41: ... jamais une fiche ou un cordon d alimentation endommagé e ou une prise murale mal fixée Si la prise ou le cordon d alimentation est endommagé e contactez le centre de dépannage le plus proche Ne versez et ne vaporisez jamais d eau directement sur le four Ne posez pas d objets sur le dessus du four à l intérieur ou sur la porte Ne vaporisez pas de substances volatiles ex insecticide sur la surface ...

Страница 42: ...de puis avec un chiffon doux et sec c Si le four est endommagé NE L UTILISEZ PAS tant qu il n a pas été réparé par un technicien micro ondes qualifié formé par le fabricant Il est impératif que la porte du four ferme correctement et que les éléments suivants ne soient pas endommagés N utilisez pas le four à micro ondes pour une cuisson à bain d huile car la température de l huile ne peut pas être ...

Страница 43: ...téristiques de votre four micro ondes peuvent différer légèrement de celles décrites dans ce manuel et certains symboles d avertissement peuvent ne pas s appliquer Pour toute question contactez votre centre de dépannage le plus proche ou recherchez de l aide et des informations en ligne sur www samsung com Ce four micro ondes est prévu pour faire chauffer des aliments Il est uniquement destiné à u...

Страница 44: ...PAVÉ NUMÉRIQUE 11 BOUTON DE PUISSANCE 12 BOUTON MINUTERIE 13 BOUTON HORLOGE 14 BOUTON DU MODE ÉCONOMIQUE 15 BOUTON SON 16 BOUTON ARRÊT ANNULATION 17 BOUTON 30s 18 BOUTON DÉPART fonctionnalités du four FOUR 1 PORTE 2 ORIFICES DE VENTILATION 3 GRIL 4 ÉCLAIRAGE 5 LOQUETS DE LA PORTE 6 PLATEAU TOURNANT 7 COUPLEUR 8 ANNEAU DE GUIDAGE 9 ORIFICES DU SYSTÈME DE VERROUILLAGE DE SÉCURITÉ 10 TABLEAU DE COMMA...

Страница 45: ...aute fréquence L énergie qu elles dégagent permet de faire cuire ou réchauffer les aliments sans en altérer la forme ni la couleur Vous pouvez utiliser votre four à micro ondes pour Décongélation Réchauffage Cuire Principe de cuisson 1 Les micro ondes générées par le magnétron sont réfléchies sur les parois du four et réparties de façon homogène à l intérieur du four pendant la cuisson grâce à la ...

Страница 46: ...iée Le plateau doit être correctement positionné dans le four Si une puissance autre que la puissance maximale est utilisée l eau mettra plus longtemps à bouillir RÉGLAGE DE L HORLOGE Votre four micro ondes est équipé d une horloge Lors de la mise sous tension 12 00 s affiche automatiquement Réglez l heure actuelle à l installation initiale après une coupure de courant N oubliez pas de changer l h...

Страница 47: ...point 3 Appuyez sur le bouton START DÉPART pour démarrer la cuisson Si vous souhaitez modifier la puissance appuyez sur le bouton STOP CANCEL ARRÊT ANNULER avant d appuyer sur START DÉPART et ressaisissez toutes les instructions CUISSON EN PLUSIEURS ÉTAPES 1 Si vous voulez régler la cuisson au micro ondes en plusieurs étapes utilisez les touches Numériques pour régler une seconde durée de cuisson ...

Страница 48: ...ains ont 9 programmes de cuisson Vous n avez donc besoin de régler ni le temps de cuisson ni la puissance Utilisez uniquement de la vaisselle adaptée à la cuisson aux micro ondes Ouvrez la porte Placez les aliments au centre du plateau Refermez la porte 1 Sélectionnez le type d aliment que vous souhaitez décongeler en appuyant une ou plusieurs fois sur le bouton Healthy Cooking Réalisation de plat...

Страница 49: ...le plat sur le plateau tournant Laissez reposer 1 à 2 minutes 9 Crevettes fraîches 250 g Rincez les crevettes sur une assiette en céramique ajoutez 1 cuillère à soupe de jus de citron Recouvrez les de film étirable spécial micro ondes Percez le film Posez le plat sur le plateau tournant Laissez reposer 1 à 2 minutes UTILISATION DE LA FONCTION RÉCHAUFFAGE AUTOMATIQUE Les fonctions Réchauffage autom...

Страница 50: ...Code Aliment Quantité Consignes 1 Poulet rôti 1200 g Badigeonnez le poulet d huile et saupoudrez d épices Placez tout d abord le poulet poitrine vers le bas sur le plat en Pyrex Retournez dès que le signal sonore retentit Puis retournez le vers le haut directement Laissez reposer 5 minutes une fois la cuisson au gril terminée 2 Morceaux de poulet 500 g Badigeonnez les morceaux de poulet d huile et...

Страница 51: ...ns un plat en verre ou sur une assiette en céramique Code Aliment Quantité Consignes 1 Viande 0 1 à 1 5 kg Protégez les extrémités avec de l aluminium Retournez la viande au signal sonore Ce programme convient à la décongélation du bœuf de l agneau du porc des côtelettes ou des émincés Laissez reposer 20 à 60 minutes 2 Volaille 0 1 à 1 5 kg Protégez les extrémités des cuisses et des ailes avec de ...

Страница 52: ...ns appropriées Ces programmes n utilisent que l énergie par micro ondes Code Aliment Quantité Consignes 1 Faire fondre du beurre 1 portion 50 g 2 portions 100 g Coupez le beurre en 3 ou 4 et placez le dans un petit bol en verre Faites le fondre sans couvrir Remuez après cuisson Laissez reposer 1 à 2 minutes 2 Faire fondre du chocolat noir 1 portion 50 g 2 portions 100 g Râpez le chocolat noir dans...

Страница 53: ...eur ou supermarché Placez les sur du papier absorbant dans un plat transparent aux micro modes ou dans un plat en Pyrex recouvrez d un autre morceau de papier absorbant et enfournez le tout Servez 2 Ailes de poulet surgelées 1 portion 6 à 7 oz 2 portions 8 à 9 oz Placez une feuille de papier absorbant sur une assiette et disposez y les ailes en étoile Ne couvrez pas Laissez reposer 1 à 2 minutes 3...

Страница 54: ... la cuisson au gril afin de faire cuire et dorer rapidement en une seule fois Utilisez TOUJOURS des ustensiles adaptés à la cuisson au micro ondes et au four traditionnel Les plats en verre ou en céramique conviennent parfaitement car ils laissent les micro ondes pénétrer les aliments de façon uniforme Les récipients pouvant devenir très chauds veillez à TOUJOURS porter des maniques lorsque vous d...

Страница 55: ...CANCEL ARRÊT ANNULER pendant 3 secondes Résultat Le four peut à nouveau être utilisé normalement ARRÊT DU SIGNAL SONORE Le signal sonore peut être désactivé à tout moment 1 Appuyez sur le bouton Sound Son 2 Appuyez sur la touche Numérique 1 ou 2 1 Volume activé Le message ON ACTIVÉ s affiche 2 Volume désactivé Le message OFF DÉSACTIVÉ s affiche 3 Appuyez sur le bouton START DÉPART L heure actuelle...

Страница 56: ...électriques Plats en verre Plat allant au four Peuvent être utilisés sauf s ils sont ornés de décorations métalliques Plats en cristal Peuvent être utilisés pour faire réchauffer des aliments ou des liquides Les objets fragiles peuvent se briser ou se fendre s ils sont brusquement soumis à une chaleur excessive Récipient Adapté à la cuisson aux micro ondes Remarques Pots en verre Retirez en le cou...

Страница 57: ... est très important de couvrir les aliments pendant la cuisson car l évaporation de l eau contribue au processus de cuisson Vous pouvez les couvrir de différentes manières avec une assiette en céramique un couvercle en plastique ou un film plastique spécial micro ondes Temps de repos Il est important de respecter le temps de repos lorsque la cuisson est terminée afin de laisser la température s ho...

Страница 58: ...l 2 cuillères à soupe d eau ou une noix de beurre Faites les cuire jusqu à ce qu elles soient tendres Laissez reposer 3 minutes Aubergines 250 g 100 3 4 Consignes Coupez les aubergines en fines rondelles et arrosez les d un filet de jus de citron Laissez reposer 3 minutes Aliment Quantité Puissance Temps min Poireaux 250 g 100 4 4 Consignes Coupez les poireaux en épaisses rondelles Laissez reposer...

Страница 59: ...on uniforme et à cœur Il vaut mieux faire réchauffer de petites quantités en plusieurs fois Puissances et mélange Certains aliments peuvent être réchauffés avec une puissance de 100 alors que d autres aliments doivent être réchauffés à une puissance de 60 Mijotage 50 Moyen ou même 30 Faible Consultez les tableaux pour plus de renseignements Pour faire réchauffer des aliments délicats en grande qua...

Страница 60: ... de l autre et 3 tasses disposez les en cercle Laissez les reposer dans le four à micro ondes le temps nécessaire et remuez bien Laissez reposer 1 à 2 minutes Soupe réfrigérée 250 g 350 g 450 g 550 g 100 2 3 3 3 3 4 4 5 Consignes Versez la soupe dans une assiette creuse ou un bol en céramique Recouvrez le récipient d un couvercle en plastique Remuez bien après le réchauffage Remuez de nouveau avan...

Страница 61: ...Retirez toute attache métallique et tout emballage de la volaille afin de permettre au liquide produit pendant la décongélation de s écouler Placez les aliments congelés dans un plat sans couvrir Retournez à la moitié du temps de décongélation videz le liquide et retirez les abats dès que possible Vérifiez les aliments de temps à autre afin de vous assurer qu ils ne chauffent pas Si les parties le...

Страница 62: ...ant 20 à 30 secondes à 30 jusqu à ce que le miel ait entièrement fondu FAIRE FONDRE DE LA GÉLATINE Faites tremper des feuilles de gélatine 10 g pendant 5 minutes dans de l eau froide Placez la gélatine égouttée dans un petit bol en Pyrex Faites chauffer pendant 1 minute à 30 Remuez une fois fondue CONFECTIONNER UN GLAÇAGE POUR GÂTEAUX Mélangez le glaçage instantané environ 14 g avec 40 g de sucre ...

Страница 63: ... être réinitialisé Pour remédier à ce problème déconnectez le cordon d alimentation puis rebranchez le Réglez à nouveau l horloge Des étincelles et des craquements se produisent à l intérieur du four arcs électriques Avez vous utilisé un plat comportant des ornements métalliques Avez vous laissé une fourchette ou un autre ustensile métallique dans le four L aluminium que vous avez utilisé se situe...

Страница 64: ...sung com n_africa support www samsung com sa support www samsung com sa_en support English www samsung com iran support www samsung com n_africa support www samsung com ae support English www samsung com ae_ar support Arabic U A E 800 SAMSUNG 800 726 7864 OMAN 800 SAMSUNG 800 726 7864 KUWAIT 183 CALL 183 2255 BAHRAIN 8000 GSAM 8000 4726 QATAR 800 CALL 800 2255 EGYPT 08000 726786 16580 ALGERIA 021 ...

Страница 65: ...s Cooking guide GE286 GE0103MB1 This manual is made with 100 recycled paper Please be advised that the Samsung warranty does NOT cover service calls to explain product operation correct improper installation or perform normal cleaning or maintenance GE0103MB1_XSG_DE68 03886G 01_EN indd 1 2014 09 13 6 12 34 ...

Страница 66: ...ter for help Note Important contents Safety information 2 Quick look up guide 11 Oven features 12 Oven 12 Control panel 12 Accessories 13 Oven use 13 How a microwave oven works 13 Checking that your oven is operating correctly 14 Setting the time 14 Setting cooking times Power levels 15 One stage cooking 15 Multi stage cooking 15 Using the 30s button 15 Stopping the cooking 16 Setting the energy s...

Страница 67: ...children to use the oven without supervision when adequate instructions have been given so that the child is able to use the oven in a safe way and understands the hazards of improper use WARNING This appliance can be used by children aged from 8 years and above and persons with reduced physical sensory or mental capabilities or lack of experience and knowledge if they have been given supervision ...

Страница 68: ... avoid a hazard WARNING Liquids and other foods must not be heated in sealed containers since they are liable to explode The microwave oven is intended for heating food and beverages Drying of food or clothing and heating of warming pads slippers sponges damp cloth and similar may lead to risk of injury ignition or fire If smoke is emitted switch off or unplug the appliance and keep the door close...

Страница 69: ... mode children should only use the oven under adult supervision due to the temperatures generated During use the appliance becomes hot Care should be taken to avoid touching heating elements inside the oven WARNING Accessible parts may become hot during use Young children should be kept away A steam cleaner is not to be used WARNING Ensure that the appliance is switched off before replacing the la...

Страница 70: ...ING YOUR MICROWAVE OVEN Place the oven on a flat level surface 85 cm above the floor The surface should be strong enough to safety bear the weight of the oven 1 When you install your oven make sure there is adequate ventilation for your oven by leaving at least 10 cm 4 inches of space behind and on the sides of the oven and 20 cm 8 inches of space above 2 Remove all packing materials inside the ov...

Страница 71: ... a clean condition could lead to deterioration of the surface that could adversely affect the life of the appliance and possibly result in a hazardous situation 1 Clean the outside surfaces with a soft cloth and warm soapy water Rinse and dry 2 Remove any splashes or stains on the inside surfaces of oven with a soapy cloth Rinse and dry 3 To loosen hardened food particles and remove smells place a...

Страница 72: ... where gas may leak on un level ground This appliance must be properly grounded in accordance with local and national codes Remove all foreign substances such as dust or water from the power plug terminals and contact points using a dry cloth on a regular basis When cleaning the upper part inside the cavity it will be convenient to turn heater downward by 45 and clean it Swing heater model only ST...

Страница 73: ...ct your nearest service centre Do not pour or directly spray water onto the oven Do not place objects on the oven inside or on the door of the oven Do not spray volatile material such as insecticide onto the surface of the oven Do not store flammable materials in the oven Take special care when heating dishes or drinks that contain alcohol as alcohol vapours may contact a hot part of the oven Keep...

Страница 74: ...2 door hinges broken or loose 3 door seals and sealing surfaces d The oven should not be adjusted or repaired by anyone other than a properly qualified microwave service technician trained by the manufacturer CAUTION Only use utensils that are suitable for use in microwave ovens DO NOT use any metallic containers Dinnerware with gold or silver trimmings Skewers forks etc Remove wire twist ties fro...

Страница 75: ...rning signs may be applicable If you have any questions or concerns contact your nearest service centre or find help and information online at www samsung com This microwave oven is supposed for heating food It is intended for domestic home use only Do not heat any type of textiles or cushions filled with grains which could cause burns and fire The manufacturer cannot be held liable for damage cau...

Страница 76: ...BUTTON 10 NUMBER BUTTON 11 POWER LEVEL BUTTON 12 KITCHEN TIMER BUTTON 13 CLOCK BUTTON 14 ECO BUTTON 15 SOUND BUTTON 16 STOP CANCEL BUTTON 17 30s BUTTON 18 START BUTTON oven features OVEN 1 DOOR 2 VENTILATION HOLES 3 GRILL 4 LIGHT 5 DOOR LATCHES 6 TURNTABLE 7 COUPLER 8 ROLLER RING 9 SAFETY INTERLOCK HOLES 10 CONTROL PANEL 6 7 8 9 10 5 1 2 4 3 GE0103MB1_XSG_DE68 03886G 01_EN indd 12 2014 09 13 6 12 ...

Страница 77: ...ncy electromagnetic waves the energy released enables food to be cooked or reheated without changing either the form or the colour You can use your microwave oven to Defrost Reheat Cook Cooking principle 1 The microwaves generated by the magnetron reflected at cavity and are distributed uniformly as the food rotates on the turntable The food is thus cooked evenly 2 The microwaves are absorbed by t...

Страница 78: ...appropriate wall socket The turntable must be in position in the oven If a power level other than the maximum is used the water takes longer to boil SETTING THE TIME Your microwave oven has an inbuilt clock When power is supplied 12 00 is automatically displayed on the display Please set the current time When you first install your microwave oven After a power failure Do not forget to reset the cl...

Страница 79: ...auté 4 PL 40 40 Medium low 10 PL Hi 100 High 5 PL 50 50 Medium 3 Press the START button to begin cooking If you want to change the power level press STOP CANCEL before you press START and re enter all of the instructions MULTI STAGE COOKING 1 If you want to set the Microwave Multi Stage Use the Number buttons to set a second cooking time after follow steps 1 and 2 in the One Stage Cooking section ...

Страница 80: ...es or the power level Use only recipients that are microwave safe Open the door Place the food in the centre of the turntable Close the door 1 Select the type of food that you are cooking by pressing the Healthy Cooking button one or more times Refer to the Healthy Cooking Table 2 Press the START button Result Cooking starts When it has finished 1 The oven beeps 4 times 2 The end reminder signal w...

Страница 81: ...S The Auto Reheat features has 3 pre programmed cooking times You do not need to set either the cooking times or the power level Open the door Place the food in the centre of the turntable Close the door 1 Select the type of food that you are cooking by pressing the Auto Reheat button one or more times Refer to the Auto Reheat table 2 Press the Number 1 or 2 3 4 button to select the serving size y...

Страница 82: ...t chicken in the pyrex dish and breast side down first Turnover as soon as the beep sounds When turnover breast side up Stand for 5 minutes after grilling 2 Chicken Pieces 500 g Brush chicken pieces with oil and spices Put them in a circle with the bones to the middle Put one chicken piece not into the centre of the rack Stand for 2 3 minutes 3 Frozen Pasta 400 g Put frozen pasta into a small flat...

Страница 83: ...plate Code Food Serving Size Instructions 1 Meat 0 1 1 5 kg Shield the edges with aluminium foil Turn the meat over when the oven beeps This programme is suitable for beef lamb pork steaks chops minced meat Stand for 20 60 minutes 2 Poultry 0 1 1 5 kg Shield the leg and wing tips with aluminium foil Turn the poultry over when the oven beeps This programme is suitable for whole chicken as well as f...

Страница 84: ...s quantities and appropriate instructions Those programmes are running with microwave energy only Code Food Serving Size Instructions 1 Melt Butter 1 Serving 50 g 2 Servings 100 g Cut butter into 3 or 4 pieces and Put them on small glass bowl Melt uncovered Stir after cooking Stand for 1 2 minutes 2 Melt Dark Chocolate 1 Serving 50 g 2 Servings 100 g Grate dark chocolate and put in small glass bow...

Страница 85: ... or supermarket Place on the absorbent paper towel on microwave safe plate or Pyrex dish and cover with another piece of paper towel and cook Serve 2 Frozen Chicken Wings 1 Serving 6 7 oz 2 Servings 8 9 oz Place a paper towel on a plate and arrange the wings in a spoke like fashion on the paper towel Do not cover Stand for 1 2 minutes 3 Frozen Chicken Nuggets 1 Serving 4 5 oz 2 Servings 6 7 oz Pla...

Страница 86: ...ou can also combine microwave cooking with the grill to cook quickly and brown at the same time ALWAYS use microwave safe and oven proof cookware Glass or ceramic dishes are ideal as they allow the microwaves to penetrate the food evenly ALWAYS use oven gloves when touching the recipients in the oven as they will be very hot You can improve cooking and grilling if you use the high rack Open the do...

Страница 87: ...OP CANCEL button again for 3 seconds Result The oven can be used normally SWITCHING THE BEEPER OFF You can switch the beeper off whenever you want 1 Press the Sound button 2 Press the Number 1 or 2 button 1 Volume On and The display shows ON 2 Volume Off and The display shows OFF 3 Press START button The display returns to the time of day Result When Beep on The oven operates with the beeper on Wh...

Страница 88: ...verheating may cause the polystyrene to melt Paper bags or newspaper May catch fire Recycled paper or metal trims May cause arcing Cookware Microwave safe Comments Glassware Oven to tableware Can be used unless decorated with a metal trim Fine glassware Can be used to warm foods or liquids Delicate glass may break or crack if heated suddenly Glass jars Must remove the lid Suitable for warming only...

Страница 89: ...ering during cooking To cover the food during cooking is very important as the evaporated water rises as steam and contributes to cooking process Food can be covered in different ways e g with a ceramic plate plastic cover or microwave suitable cling film Standing times After cooking is over food the standing time is important to allow the temperature to even out within the food Cooking Guide for ...

Страница 90: ...dd 30 ml 2 tbsp water or a knob of butter Cook until just tender Stand for 3 minutes Egg Plants 250 g 100 3 4 Instructions Cut egg plants into small slices and sprinkle with 1 tbsp lemon juice Stand for 3 minutes Food Serving Size Power Time min Leeks 250 g 100 4 4 Instructions Cut leeks into thick slices Stand for 3 minutes Mushrooms 125 g 250 g 100 1 2 2 3 Instructions Prepare small whole or sli...

Страница 91: ...ge items such as joint of meat they tend to overcook and dry out before the centre is piping hot Reheating small pieces will be more successful Power levels and stirring Some foods can be reheated using 100 High power while others should be reheated using 60 Simmer 50 Medium or even 30 Low Check the tables for guidance In general it is better to reheat food using a lower power level if the food is...

Страница 92: ...a circle Keep in microwave oven during standing time and stir well Stand for 1 2 minutes Soup Chilled 250 g 350 g 450 g 550 g 100 2 3 3 3 3 4 4 5 Instructions Pour into a deep ceramic plate or deep ceramic bowl Cover with plastic lid Stir well after reheating Stir again before serving Stand for 2 3 minutes Food Serving Size Power Time min Stew Chilled 350 g 60 4 5 Instructions Put stew in a deep c...

Страница 93: ...ve any metal ties and take it out of any wrapping to allow thawed liquid to drain away Put the frozen food on a dish without cover Turn over half way drain off any liquid and remove any giblets as soon as possible Check the food occasionally to make sure that it does not feel warm If smaller and thinner parts of the frozen food start to warm up they can be shield by wrapping very small strips of a...

Страница 94: ...stallized honey into a small deep glass dish Heat for 20 30 seconds using 30 until honey is melted MELTING GELATINE Lay dry gelatine sheets 10 g for 5 minutes into cold water Put drained gelatine into a small glass pyrex bowl Heat for 1 minute using 30 Stir after melting COOKING GLAZE ICING FOR CAKE AND GATEAUX Mix instant glaze approximately 14 g with 40 g sugar and 250 ml cold water Cook uncover...

Страница 95: ...s and aerials If interference is detected by the oven s microprocessor the display may be reset To solve this problem disconnect the power plug and reconnect it Reset the time Sparking and cracking occur inside the oven arcing Have you used a dish with metal trimmings Have you left a fork or other metal utensil inside the oven Is aluminum foil too close to the inside walls Smoke and bad smell when...

Страница 96: ...frica support www samsung com sa support www samsung com sa_en support English www samsung com iran support www samsung com n_africa support www samsung com ae support English www samsung com ae_ar support Arabic U A E 800 SAMSUNG 800 726 7864 OMAN 800 SAMSUNG 800 726 7864 KUWAIT 183 CALL 183 2255 BAHRAIN 8000 GSAM 8000 4726 QATAR 800 CALL 800 2255 EGYPT 08000 726786 16580 ALGERIA 021 36 11 00 PAK...

Отзывы: