Samsung Galaxy Note Скачать руководство пользователя страница 18

35

DEVICE FUNCTIONS

DEVICE FUNCTIONS

34

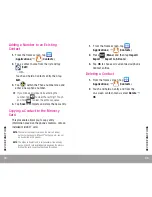
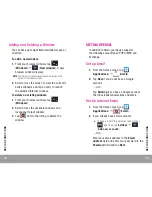
Adding a Number to an Existing 
Contact

1. 

From the Home screen, tap 


(

Applications

g


 (

Contacts

).

2. 

Tap a contact name from the list and tap 

 (

Edit

).

– or– 

Touch and hold a Contacts entry then tap 

Edit

.

3. 

Tap 

 within the Phone number area and 

enter a new phone number.


–

If you make a mistake while entering the  
number, tap 

 to clear the last digit. Touch 

and hold 

 to clear the entire sequence.

4. 

Tap 

Save

 to complete and store the new entry.

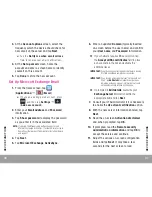
Copying a Contact to the Memory 
Card

This procedure allows you to copy entry 
information saved on the phone’s memory, onto an 
installed microSD

 card.

NOTE: 

These must be contacts stored on the device. External 

entries such as Google, Microsoft

®

 Exchange, etc., can not 

be transferred in this manner.

NOTE: 

The option to Export to SD is only available if you already 

have a microSD card installed before beginning the process. 

Without the card, you will not be shown this option.

1. 

 From the Home screen, tap 


(

Applications

g


 (

Contacts

).

2. 

Press 

 (

Menu

) and then tap 

Import/

Export


g


Export to SD card

.

3. 

Tap 

OK

 to choose all current device/phone 

Contact entries.

Deleting a Contact

1. 

From the Home screen, tap 


(

Applications

g


 (

Contacts

).

2. 

Touch and hold an entry and from the  

on-screen context-menu, select 

Delete 

g


OK

.

Содержание Galaxy Note

Страница 1: ...Battery Installation Removal 10 Turning Your Device On or Off 18 Locking and Unlocking Your Device 19 Extending Your Battery Life 19 Home Screen 21 DEVICE FUNCTIONS 25 Creating a New Google Account 25...

Страница 2: ...itional support please visit www t mobile com support where you can Register at my t mobile com to check your minutes pay your bill upgrade your phone and change your rate plan Review your device s Us...

Страница 3: ...e Your Service Agreement and the agent code on your Agreement Your name home address home phone number and billing address NOTE For business and government accounts please provide the name of the orga...

Страница 4: ...IDE FEATURES 1 HEADSET CONNECTOR 2 POWER LOCK KEY 3 EXTERNAL SPEAKER 4 S PEN 5 CHARGING PORT 6 VOLUME KEY S PEN The S Pen is a stylus that assists you in performing different functions By using the Pe...

Страница 5: ...single motion touch on the screen for one second then drag the screen to the left The previous screen is displayed Holding it for 2 seconds takes a screen shot Menu Button Function To display the men...

Страница 6: ...ing other accessories may invalidate your warranty and may cause damage IMPORTANT Before removing or replacing the battery make sure the device is switched off To turn the device off hold down the key...

Страница 7: ...back cover until you have a secure seal 3 Installing the Battery 1 Slide the battery into the compartment 1 so that the tabs on the end align with the slots at the bottom of the phone making sure the...

Страница 8: ...f the phone 3 Orient the card with the gold strips facing down 4 Firmly press the card into the slot and make sure that it catches with the push click insert Correct Incorrect Installing and Removing...

Страница 9: ...roper operation Failure to unplug the wall charger before you remove the battery can cause the device to become damaged 1 Connect the USB cable to the charging head 2 Plug the charging head into a sta...

Страница 10: ...turns off To unlock your device from the lock screen X With your device turned on press Power Lock to wake the display and sliding your finger across the screen in any direction To lock your device s...

Страница 11: ...rvices and close any unnecessary applications Use the Task manager feature to end shutdown background applications that are still running These minimized applications can over time cause your device t...

Страница 12: ...fications Panel 1 In a single motion touch and drag the Status bar down to the bottom of the screen to open the Notifications screen 1 2 Tap a notification entry to open the associated application 2 A...

Страница 13: ...n tap Applications g Play Store 2 Read the introduction and tap New to begin 3 Follow the on screen instructions to create a Google Account or If this is not the first time you are starting the phone...

Страница 14: ...rm your information 5 If prompted create a new Gmail username by entering a prefix for your gmail com email address VOICEMAIL Voicemail allows callers to leave voice messages which can be retrieved an...

Страница 15: ...nd tap Next 3 Read the on screen information and tap Done A list of the voicemail messages displays IMPORTANT If this is your first time to ever access Visual Voicemail you may be prompted to enter a...

Страница 16: ...coming call to your voicemail system Reject a Call with a Message 1 At the incoming call screen touch and drag the Reject call with message tab upward 2 Tap a predefined rejection message or tap Creat...

Страница 17: ...From the Home screen tap Phone 2 Enter the number you wish to call using the dialpad and tap Send 3 Once connected to the first caller tap Add call Add call Add call to place the first caller on hold...

Страница 18: ...o copy entry information saved on the phone s memory onto an installed microSD card NOTE These must be contacts stored on the device External entries such as Google Microsoft Exchange etc can not be t...

Страница 19: ...displays To turn Bluetooth off 1 From the Home screen press Menu and then tap Settings 2 In a single motion touch and slide the Bluetooth slider to the left OFF to turn it off The slider color indica...

Страница 20: ...nicating displays in the Status area To turn Wi Fi off 1 From the Home screen press Menu and then tap Settings 2 In a single motion touch and slide the Wi Fi slider to the left OFF to turn it off The...

Страница 21: ...way to keep using the phone as a HotSpot is to have it connected to a power supply To secure the Portable HotSpot service The two most common methods for securing your connection to the HotSpot are to...

Страница 22: ...g Tethering and Mobile HotSpot 2 Plug in the USB cable between your computer and your device 3 When prompted for a USB mode press Back to exit the menu 4 Tap USB tethering from the Tethering menu This...

Страница 23: ...roll across the available windows and locate your target window 3 Tap next to the listing to delete the window SETTING UP EMAIL In addition to Gmail your device supports the following account types PO...

Страница 24: ...Domain typically inserted on screen before the user name and confirm your User name and Password information If your network requires SSL encryption tap the Accept all SSL certificates field to place...

Страница 25: ...recipient field 4 Tap the Tap to enter message field and use the on screen keypad to enter a message 5 Add more recipients by tapping the recipient field 6 Review your message and tap Send Create and...

Страница 26: ...cases cellular radio frequencies can disrupt the performance of other electronic equipment If you have questions about the interaction between your device and any other piece of electronic equipment...

Страница 27: ...ect to emergency situations transmission limits network problems limitations interconnecting carrier problems your phone buildings tunnels signal strength and atmospheric topographical conditions and...

Страница 28: ...ifying data plan or access to a Wi Fi connection Wi Fi Device will not transition between Wi Fi and the cellular network Devices using wireless connections may be vulnerable to unauthorized attempts t...

Страница 29: ...r there may be some newer wireless technologies used in this phone that have not been tested yet for use with hearing aids It is important to try the different features of this phone thoroughly and in...

Страница 30: ...58 NOTES...

Отзывы: