background image

97

Language

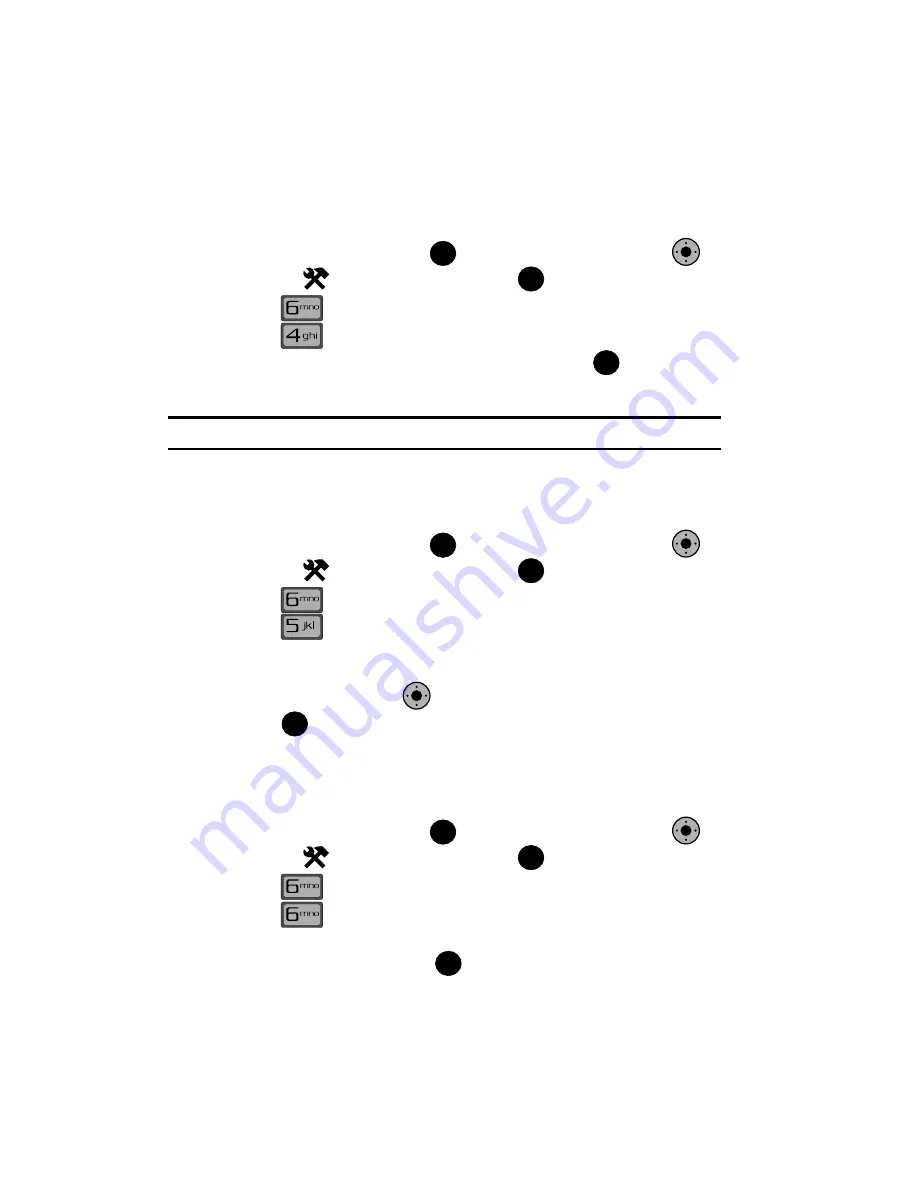
Change the display language from English to Spanish or vice versa using the 

Language

 menu.

1.

From the main screen, press 

 MENU

. Use the 

Navigation Key


to 

highlight  

Settings & Tools

 and press 

.

2.

Press  

Phone Settings

3.

Press  

Language

.

4.

Use the navigation key to select a language and press 

.

Location

Note: 

This feature is only available on the Verizon Wireless network.

The Location Global Positioning Service (GPS) setting identifies your location to the 
network. You can fully enable this setting or set GPS to work only in the case that 
you dial 911 from your phone.

1.

From the main screen, press 


MENU

. Use the 

Navigation Key


to 

highlight  

Settings & Tools

 and press 

.

2.

Press  

Phone Settings

3.

Press  

Location

. The following options appear in the display: 

• Location


On

: GPS location setting is on wherever the feature is available.

• E911


Only

: GPS location setting is on whenever you dial 911 only.

4.

Use the 

Navigation Key


 to highlight an option.

5.

Press 

 to select the highlighted setting.

Security

The 

Security

 menu allows you to lock your phone, set restrictions, and other 

security options.

1.

From the main screen, press 

 MENU

. Use the 

Navigation Key


to 

highlight  

Settings & Tools

 and press 

.

2.

Press  

Phone Settings

3.

Press 

 Security

.

4.

Enter the lock code (factory settings are the last four digits of your 

telephone number) and press 

. The following options appear in the 

display:

OK

K

O

OK

OK

OK

K

O

OK

K

O

OK

OK

K

O

OK

OK

Содержание FlipShot

Страница 1: ...izon Wireless FlipShot P O R T A B L E A l l D i g i t a l M O B I L E P H O N E User Manual Please read this manual before operating your phone and keep it for future reference DRAFT DRAFT FT F A A R DR D ...

Страница 2: ...that you will not and will not attempt to modify prepare derivative works of reverse engineer decompile disassemble or otherwise attempt to create source code from the software No title to or ownership in the Intellectual Property is transferred to you All applicable rights of the Intellectual Property shall remain with SAMSUNG and its suppliers Samsung Telecommunications America STA LLC Headquart...

Страница 3: ...Y KIND WHATSOEVER WITH RESPECT TO THE PRODUCT INCLUDING BUT NOT LIMITED TO THE MERCHANTABILITY OF THE PRODUCT OR ITS FITNESS FOR ANY PARTICULAR PURPOSE OR USE THE DESIGN CONDITION OR QUALITY OF THE PRODUCT THE PERFORMANCE OF THE PRODUCT THE WORKMANSHIP OF THE PRODUCT OR THE COMPONENTS CONTAINED THEREIN OR COMPLIANCE OF THE PRODUCT WITH THE REQUIREMENTS OF ANY LAW RULE SPECIFICATION OR CONTRACT PER...

Страница 4: ...e 23 Phone Memory Storage 23 Section 3 Call Functions 24 Making a Call 24 Answering a Call 25 Recent Calls 26 Roaming 28 TTY 29 Voice Commands 30 Section 4 Menu Navigation 39 Menu Navigation 39 Menu Outline 41 Section 5 Entering Text 48 Changing the Text Entry Mode 48 Entering Text Using Word Mode 48 Entering Upper and Lower Case 49 Entering Symbols 49 Entering Numbers 50 Entering Text Using Voice...

Страница 5: ...Message Folders 74 Changing Message Settings 82 Voicemail 83 Mobile IM 83 Email 84 Chat 84 Section 8 Changing Your Settings 85 My Account 85 Tools 85 Bluetooth Menu 86 Sounds Settings 88 Display Settings 90 Phone Settings 95 Call Settings 102 Memory 106 Phone Info 107 Section 9 Multimedia 108 Get It Now 108 Music Tones 109 Picture Video 114 Printing Pictures Using PictBridge 131 Games 134 News Inf...

Страница 6: ...vel Adapter 150 Consumer Information on Wireless Phones 150 Road Safety 157 Responsible Listening 158 Operating Environment 160 Using Your Phone Near Other Electronic Devices 160 Potentially Explosive Environments 162 Emergency Calls 163 FCC Notice and Cautions 164 Other Important Safety Information 164 Product Performance 165 Availability of Various Features Ring Tones 166 Battery Standby and Tal...

Страница 7: ...call quality and may cause the phone to operate at a higher power level than is necessary The internal antenna is located along the top on the back side of your phone 2 Once the phone finds a signal the time date and day appear in the display 3 You re now ready to place and receive calls Note If the phone is outside the Verizon Wireless coverage area the roaming icon appears in the top of the disp...

Страница 8: ...afety information that you should know before using your phone Most of this information is near the back of the guide beginning on page 148 The instructions in this User Manual are written for the FlipShot with the phone using the factory default settings For instance the factory default setting for the main screen wallpaper is the City Screen Living Wallpaper The User Manual will provide instruct...

Страница 9: ... Closed Views of Your Phone Back View of Your Phone Command Keys Understanding the Display Screen Battery Installing Your Memory Card Removable Memory Card Storage Phone Memory Storage This section outlines some key features of your phone It also displays the screen and the icons that are displayed when the phone is in use ...

Страница 10: ...Messaging Video Messaging Sketch Messaging Postcard e mail Messaging Mobile Instant Messenger and Chat Advanced Speech Recognition Speakerphone microSD Memory Card Slot Bluetooth Wireless Technology Important The FlipShot supports the following Bluetooth profiles Headset Handsfree Serial Port Dial Up Networking Object Push for vCard Phonebook Access Bluetooth Stereo Support for Music Basic Image f...

Страница 11: ... show the main elements of your phone 1 Earpiece 2 Navigation Key 3 Left Soft Key 4 Camera Camcorder 5 Send Key 6 Voicemail Key 7 Alpha numeric Keys 8 Special Function Key 16 Internal LCD 15 OK Key 14 Right Soft Key 10 Voice Commands 12 End Power Key 11 CLR Key 9 Microphone Key 13 Speakerphone Key Keys ...

Страница 12: ...phone The Microphone allows the other caller to hear you clearly when you are speaking to them 10 Voice Commands key Press and hold 0 zero key to activate Voice Commands 11 CLR key Deletes characters from the display when you are in text entry mode Press to return to the previous menu or screen when navigating features on your phone 12 End Power key Ends a call Press and hold the END key to power ...

Страница 13: ...rd key Music fast forward key Touch and hold to fast forward music Tap to go to the next song Operates only with the phone closed 5 Play Pause key Music play or pause toggle key Operates only with the phone closed 6 Rewind key Music rewind key Touch and hold to rewind music Tap to go to a previous song Operates only with the phone closed 7 Hand Strap loop Allows the use of a handstrap to carry you...

Страница 14: ...ress the volume key up or down When the flip is closed press and hold the key and sub LCD displays In landscape mode press to zoom in out on an object 4 Photo Capture key Press to capture an image This key also functions as recording key in camcorder mode A long press on this key will change camera mode and camcorder mode 5 Flash The built in flash has manual and automatic capabilities 6 Camera Ca...

Страница 15: ...t soft key to open your Contacts list When the right soft key function is Options press the Options right soft key to view more options for the current menu Clear Key The CLR key is used to erase or clear numbers text or symbols from the display You can also use to return to a previous menu or to return to main screen from any menu If you enter an incorrect character briefly press to backspace and...

Страница 16: ...ey also acts as a shortcut to launch applications The navigation key can be customized to launch your favorite application For more information refer to Set Shortcut Key on page 96 Speakerphone Key With the flip open press and hold the Speakerphone key to switch from using the earpiece to the speakerphone before or during a call Use the volume zoom key located on the right side of your phone to ad...

Страница 17: ...tes the current signal strength More bars indicate a stronger signal 1X Signal Strength Indicates your phone is using the CDMA 1X protocol Appears when your phone is on and indicates the current signal strength More bars indicate a stronger signal D Signal Strength Appears when your phone is receiving digital data Appears when your phone is on and indicates the current signal strength More bars in...

Страница 18: ...ling a number this icon flashes until the call connects E911 Global Positioning Service GPS for 911 is set to On for emergency calls only Location On Global Positioning Service is set to On for location and 911 calls Bluetooth Indicates that Bluetooth wireless technology is active Bluetooth Connected Indicates Bluetooth wireless technology is active and connected Bluetooth Active Indicates Bluetoo...

Страница 19: ...d voicemail messages in your voicemail box Only applicable on Verizon Wireless Network Calendar Appointment Your phone displays this icon when you have a calendar appointment scheduled Voicemail You ve received a voicemail message page or web alert message Alarm On Indicates that your phone has a set alarm Auto Answer Automatic answer is enabled Your phone automatically picks up calls after the de...

Страница 20: ...sung handsets do not support the use of a non supported battery When using a non supported battery you will hear a series of beeps and you will see a warning message that indicates NON SUPPORTED BATTERY SEE USER GUIDE If you receive this warning battery charging has been disabled Samsung charging accessories i e travel adapter and cigarette lighter adapter will only charge a Samsung approved batte...

Страница 21: ...attery cover release latch 2 Lift the battery cover up and slide it forward 3 Insert the top end of the battery in the direction of the arrow printed on the battery into the phone housing The gold contacts on the top of the battery should match up with those on the phone ...

Страница 22: ...19 4 Push the top end of the battery down until it snaps into place Remove the Battery 1 Press the battery cover release latch 2 Lift the battery cover up and slide it forward ...

Страница 23: ...se damage Note You must fully charge the battery before using your phone for the first time A fully discharged battery requires up to 4 hours of charge time Note For connection to an electrical supply not located in the U S you must use an adaptor of the proper configuration for the power outlet Use of the wrong adapter could damage your phone and void your warranty Travel Charger The travel charg...

Страница 24: ...ur bars indicate a full charge while an empty icon indicates an almost empty battery Two to three minutes before the battery becomes too low to operate a blinking empty battery icon appears and a tone sounds If you continue to operate the phone without charging it shuts down Installing Your Memory Card Note Your phone does not come with the microSD memory card it must be purchased as an accessory ...

Страница 25: ...press to format card 7 On the FORMAT CARD screen press the navigation key up or down to choose Yes or No and press Formatting Your microSD Card Using Your PC For best playback of songs stored to the microSD memory card you should reformat your memory card with PC format FAT32 Note The phone will recognize cards formatted with both FAT16 and FAT32 32MB cards can only be formatted with FAT16 FAT32 i...

Страница 26: ...aken using your phone My Music Music you have downloaded directly from the V CAST Music catalog or music you have transferred from your PC using Sync Music My Sounds Sounds you have recorded using your phone or saved from a Picture message with Sound attached Phone Memory Storage The following file types can be saved to the phone memory storage area My Pictures Pictures you have saved from a Pictu...

Страница 27: ...interest If you ve already entered information into your Contacts list you can recall and dial the contact easily See Adding a Contact on page 54 for information on creating contacts 1 From the main screen press the right soft key Contacts 2 Use the Navigation Key to highlight the contact you want to call Tip To quickly locate a name press or multi press any key on the keypad that corresponds to t...

Страница 28: ...ventually returns to the main screen 1 While in a call press the right soft key Options The following menu items appear in the display Messaging Display the Messaging menu Contact List Open the Contact list to view your contacts Recent Calls Display your recent incoming missed and outgoing calls Bluetooth Menu Display the Bluetooth menu Main Menu Display the main menu Notepad Open the Notepad Voic...

Страница 29: ...creen press the key 2 Use the navigation key to highlight the desired number 3 Once the desired number is highlighted press OPEN 4 The following options appear in the display Call Type Where type indicates if the call was missed dialed or received Name If the caller is in your Contacts list their name is listed here as well as the appropriate icon to indicate Mobile 1 Mobile 2 Home Work or Fax if ...

Страница 30: ...hlighted number Or you can press OPEN then press to call the highlighted number Creating Contacts Using Call History 1 From the main screen press then use the Navigation Key until the desired number is highlighted 2 Press the right soft key Options Save is highlighted Press 3 Add New Contact is highlighted Press 4 Use the Navigation Key to highlight one of the following options Mobile 1 Mobile 2 H...

Страница 31: ...he display 3 Use the Navigation Key to highlight Erase and press Select Yes or No at the ERASE ENTRY pop up screen 4 Press Delete All Call History Entries 1 From the main screen press 2 Press the right soft key Options A pop up menu appears in the display 3 Use the Navigation Key to highlight Erase All and press Select Yes or No at the ERASE ALL ENTRIES pop up screen 4 Press Roaming What is Roamin...

Страница 32: ...ings 3 Press System Select 4 Use the Navigation Key to highlight the setting you want and press TTY Your phone is fully TTY compatible Connect the TTY equipment to the headset jack which is located on the left side of the phone Before you can use your phone with a TTY device you ll need to enable TTY functions in the phone Note Enabling TTY disables headset audio 1 From the main screen press MENU ...

Страница 33: ...Commands by pressing and holding the key to launch to Voice Commands menu and pressing the Settings right soft key Using this menu you can change the following Voice Command features Choice List Behavior Speech Recognition Sensitivity Digit Dial Adaptation VoiceSignal Sound Settings VoiceMode Adaptation and Tutorial To access the Voice Commands Settings menu follow these steps 1 From the main scre...

Страница 34: ...menu to adapt digit dialing to your voice Adapt Digits Lets you adapt digits which can improve speech recognition of phone numbers Adaptation takes about 60 seconds Reset Digits Erases any digit adaptation you have done and resets digit recognition to the factory default If you have not adapted digits this option is grayed out Sound You can customize the VoiceSignal user interface by turning playb...

Страница 35: ...adapt Digit Dial your phone is customized to your voice and your voice only Others will not be able to use it reliably unless they reset the phone to factory defaults Adaptation involves recording several digit sequences to adapt the system to the unique properties of your voice The adaptation process takes about three minutes Tips for adapting Digit Dial Adapt digits in a quiet place Make sure yo...

Страница 36: ...igits After ten sets of digits the phone indicates that adaptation is complete Reset Digit Dial Adaptation This option erases an adaptation and resets Digit Dial to its original state 1 From the main screen press MENU Use the navigation key to highlight SETTINGS TOOLS and press 2 Press Phone Settings then Voice Commands 3 Press Voice Settings then Digit Dialing 4 Highlight Reset Digits and press T...

Страница 37: ... screen press and hold the key 2 After a brief pause a list of optional commands appears in the display and the audio prompt Please say a command plays through the speakerphone 3 As one command say Call followed by a contact entry or phone number For example you could say Call John Smith Call John Smith s Mobile or Call John Smith at Work at a distance of 3 12 inches from the phone in a natural vo...

Страница 38: ...y and the audio prompt Please say a command plays through the speakerphone 3 As a single command say Call followed by a valid 10 digit phone number such as Call 111 222 3333 at a distance of 3 12 inches from the phone in a natural voice For best results speak the sequence of digits naturally and do not pause between each digit The digits that you say are repeated through the speakerphone and your ...

Страница 39: ...ly and naturally The number that you said is repeated through the speakerphone 5 The CREATE MESSAGE screen appropriate to the message type you said into the microphone appears in the display with the name or number you said entered in an address field 6 Complete and send your message See Creating and Sending Text Messages on page 67 for more information Name Lookup To perform a name lookup you ll ...

Страница 40: ... you can launch one of the following applications News Info V CAST Videos or My Music 1 From the main screen press and hold the key 2 A list of commands appears in the display and the audio prompt Please say a command plays through the speakerphone 3 Say Go To at a distance of 3 12 inches from the microphone A list of options displays and a prompt of Please choose plays through the speakerphone Sp...

Страница 41: ...s Displays the missed call log Time Displays and announces the current time through the speakerphone Battery Displays and announces the current battery level through the speakerphone Signal Strength Displays and announces the current EVDO and 1x signal strength levels through the speakerphone Volume Displays and announces the current master volume setting through the speakerphone Checking Your Acc...

Страница 42: ...eturn to the Previous Menu Press to return to the previous menu Navigate Using Shortcuts You can also access menus and sub menus using menu numbers This method is often called a shortcut To shortcut to a menu or sub menu press MENU then enter the menu and or sub menu number s for the feature in question See Navigation Key Shortcuts on page 40 for looking up the menu shortcut number 1 From the main...

Страница 43: ...n identify and select menu options by entering numbers that represent the first few letters of the name of the menu option For example 1 From the main screen press The number entry screen appears in the display with the numbers 5264 showing 2 Press the down navigation key The MENU LIST screen appears in the display with the Language option showing and highlighted 3 Press The LANGUAGE screen appear...

Страница 44: ...Ringtones 1 Get New Ringtones 1 Get New Applications 4 My Music 5 My Sounds 1 Record New 6 Sync Music 2 Picture Video 1 V CAST Videos 2 Get New Pictures 1 Get New Applications 3 My Pictures 4 My Videos 5 Take Picture 6 Record Video 7 PIX Place 8 Scan Biz Card 3 Games 1 Get New Applications 4 News Info 5 Tools on the Go 1 Get New Applications 6 Extras 1 Get New Applications MESSAGING 1 New Message ...

Страница 45: ... Sent 4 Drafts 5 Voicemail 6 Mobile IM 1 Get New Applications 7 Email 8 Chat CONTACTS 1 New Contact 2 Contact List 3 Groups 1 No Group 2 Business 3 Colleague 4 Family 5 Friends 4 Speed Dials 5 In Case of Emergency 6 My Name Card RECENT CALLS 1 Missed 2 Received 3 Dialed 4 All 5 View Timers SETTINGS TOOLS 1 My Account ...

Страница 46: ...ulator 1 Normal 2 Tip 3 Converter 1 Temperature 2 Length 3 Weight 4 Area 5 Volume 6 Currency 3 Calendar 4 Alarm Clock 5 Stop Watch 6 World Clock 7 Notepad 3 Bluetooth Menu 1 Add New Device 4 Sounds Settings 1 Call Sounds 1 Call Ringtone 1 Get New Ringtones 2 Call Vibrate 2 Alert Sounds 1 TXT Message 1 Tone ...

Страница 47: ...der 3 Voicemail 1 Tone 1 Get New Ringtones 2 Vibrate 3 Reminder 4 Device Connect 3 Keypad Sounds 4 Keypad Volume 5 Service Alerts 1 ERI 2 Minute Beep 3 Call Connect 6 Power On Off 1 Power On 2 Power Off 5 Display Settings 1 Banner 1 Personal Banner 2 ERI Banner 2 Backlight 1 Display 1 Duration 2 Brightness 2 Keypad 3 Contrast 4 Wallpaper ...

Страница 48: ...ize 8 Clock Format 1 Main Clock 2 Front Clock 6 Phone Settings 1 Standalone Mode 2 Set Shortcut Keys 1 Left Key 2 Up Key 3 Right Key 4 Down Key 5 Reset All 3 Voice Commands 1 Voice Dial 2 Voice Settings 1 Choice Lists 2 Sensitivity 3 Digit Dialing 1 Adapt Digits 2 Reset Digits 4 Sound 1 Prompts 2 Digits 3 Names 4 Name Settings 1 Speed ...

Страница 49: ...ert 4 Language 5 Location 6 Security 1 Edit Codes 1 Phone Only 2 Calls Services 2 Restrictions 1 Location Setting 2 Calls 1 Incoming Calls 2 Outgoing Calls 3 Messages 1 Incoming Messages 2 Outgoing Messages 4 Dial Up Modem 3 Phone Lock Setting 4 Lock Phone Now 5 Restore Phone 7 System Select 8 NAM Select 9 Quick Search 7 Call Settings 1 Answer Options 2 Auto Retry 3 TTY Mode ...

Страница 50: ...y 1 Phone Memory Usage 2 My Pictures 3 My Videos 4 My Ringtones 5 My Music 6 My Sounds 3 Card Memory 1 Card Memory Usage 2 My Pictures 3 My Videos 4 My Music 5 My Sounds 0 Phone Info 1 My Number 2 SW HW Version 3 Icon Glossary A microSD card must be insert in the microSD card slot located under the battery cover between the camera lens and the battery ...

Страница 51: ...t Entry Mode 1 While composing a message press left soft key Abc to display a pop up menu with the following Text Entry Mode options Voice Mode Word Abc ABC 123 Symbols Quick Text Entering Text Using Word Mode Word recognizes the most commonly used word for any sequence of key presses and inserts that word into your message It s much faster than the traditional method of text entry Abc and require...

Страница 52: ...hat contains the desired characters for H Press the key repeatedly to cycle through other available characters for that key Pause briefly when the desired character appears in the display to accept the character and therefore insert it into the message Press to enter a space To cycle between uppercase lower case and initial caps for characters in ABC mode briefly press Entering Symbols Symbol mode...

Страница 53: ...se a new text message 2 Enter the phone number or email address of the recipient then use the Navigation Key to enter text 3 Press the left soft key Abc to display a pop up menu containing the text entry mode options 4 Abc is highlighted by default Use the Navigation Key to highlight 123 then press 5 Press the keys that correspond with the numbers that you wish to enter For example press for the n...

Страница 54: ...xt entry mode options 4 Abc is highlighted by default Use the up down navigation keys to highlight Voice Mode then press The text entry mode indicator changes from Abc to Voice 5 Press and hold the Camera Options key The icon flashes at the upper right corner of the screen Speak clearly into the microphone to enter the words in the message 6 Release the Camera Options key when finished composing t...

Страница 55: ...nu The Contacts menu provides access to powerful features such as adding Groups creating and sending vCards and viewing the phone number assigned to your phone by Verizon Wireless 1 From the main screen press MENU The CONTACTS menu is displayed Press to view the following sub menus New Contact Add a number and e mail to your Contacts Contact List Find a phone number by Name Groups Add new or renam...

Страница 56: ...ield Email 1 icon Enter an e mail address for the entry in this field Group icon Select an available group to associate with the entry in this field Picture icon Select an available pre loaded image or downloaded image from Picture ID to associate with the contact Ringtone icon Select a ringtone to associate with the entry in this field Mobile 2 icon Enter a secondary mobile number for the entry i...

Страница 57: ...age appears in the display Yes is highlighted press to add the Contact to the speed dial location Note Voicemail is assigned to Speed Dial location 1 Note You can assign a speed dial location to each number associated with the contact Mobile 1 Home Work Mobile 2 and Fax 6 When you re finished entering information for the entry press SAVE to save the entry to your Contacts Method 2 You can add new ...

Страница 58: ...splay Yes is highlighted press to add the Contact to the speed dial location Note Voicemail is assigned to Speed Dial location 1 Note You can assign a speed dial location to each number associated with the contact Mobile 1 Home Work Mobile 2 and Fax 8 When you re finished entering information for the entry press SAVE The entry is saved to your Contacts 9 If you selected Update Existing the Contact...

Страница 59: ...main screen enter the number 2 Press the right soft key Options use the navigation key to highlight Add Wait A W appears in the display or Add Pause A P appears in the display and press Add Wait A hard pause stops the calling sequence until further input from you Add Pause A two second pause stops the calling sequence for two seconds and then automatically sends the remaining digits 3 When you re ...

Страница 60: ... wish to move 2 Press the left soft key Edit Use the up down navigation key to scroll to the Group option 3 Press the left soft key Set Choose from the following groups No Group Business Colleague Family Friends 4 Use the Navigation Key to highlight the group containing the entry that you wish to move then press 5 Press SAVE The selection has been saved to the designated group Create a New Group I...

Страница 61: ...o highlight the contacts in the group to which you want to send a message Press to mark each selection you want to send the message 5 Press the left soft key Done after selecting up to 10 contacts Note You can mark up to 10 members of a group for message distribution If you try and mark an 11th member you ll be notified that MAXIMUM NUMBER OF RECIPIENTS IS 10 6 Use the Navigation Key to place the ...

Страница 62: ...able within Verizon Wireless Enhanced Services Area 1 From the main screen press MENU the CONTACTS menu is displayed Press 2 Press Groups Your existing groups appear in the display 3 Highlight the desired group name and press the right soft key Options Highlight New Video Message and press 4 Use the down navigation key to highlight the contacts in the group to which you want to send a message Pres...

Страница 63: ...ft key Edit 4 Use the Navigation Key to highlight the name number e mail address or other field that you wish to edit 5 Press to backspace and delete numbers text or symbols 6 Press and hold to erase all numbers in the highlighted field 7 Use the keypad to re enter numbers text or symbols 8 When you re finished editing the entry press SAVE Your changes are saved Deleting a Contact Entry 1 From the...

Страница 64: ...le to speed dial the number assigned to 013 briefly press then press and hold until the number dials 3 touch dialing Call phone numbers assigned to memory locations 100 through 999 by briefly pressing the first and second keys then pressing and holding the third key For example to dial location number 113 briefly press then press and hold until the number dials Assign a speed dial location 1 From ...

Страница 65: ...f Bluetooth is not powered on or your FlipShot is not paired with another device see Bluetooth Menu on page 86 1 From the main screen press right soft key Contacts 2 Highlight a contact and press right soft key Options 3 Press Send Name Card The following options display TXT Message Allows you to send a name card via TXT Message A name card with a picture cannot be sent in a TXT Message Picture Me...

Страница 66: ... name ringtone notes and Emergency ICE contact reference Finding My Phone Number My Number displays the ten digit number assigned to your phone 1 From the main screen press MENU then use the Navigation Key to highlight SETTINGS TOOLS and press 2 Press Phone Info 3 Press My Number The mobile device phone number and mobile identification number are displayed Emergency Contacts Adding Emergency Conta...

Страница 67: ...such as illnesses allergies and other detail information 4 Press From Contacts to add an emergency number from your contacts list Select a Contact and press Press New Contact to enter a new contact as an emergency number Enter Contact information and press SAVE 5 The Emergency Contact is added and is displayed in the Contact List in red font OK OK OK ...

Страница 68: ...cy Contact you want to delete Note Emergency contacts are displayed in red font 3 Press the right soft key Options 4 Press Unassign ICE Contact 5 The UNASSIGN ICE CONTACT confirmation screen appears in the display 6 Yes is highlighted press to confirm or highlight No and press to return to your contact list OK OK ...

Страница 69: ...hanging Message Settings Voicemail Mobile IM Email Chat This section allows you to send or receive different types of messages It also includes the features and functionality associated with messaging Types of Messages Your phone is capable of sending Email text picture and video messages Send Email Mobile Instant Messages IM text picture and video messages by simply entering the Email address or ...

Страница 70: ...y Save Quick Text Lock Add To Contacts Find Number Address and Messaging Font Size and Message Info appear Press the left soft key Erase to erase the message 3 With the message open press REPLY to return a message to the sender Creating and Sending Text Messages You can send text messages to another mobile phone or to an Email address 1 From the main screen press the left soft key Message 2 Press ...

Страница 71: ... loaded messages You can add 15 additional messages by pressing the right soft key New and you can erase Quick Text messages by pressing the left soft key Erase Add Name Card Attach My Name Card information or information from one of your Contacts Edit Text Format Allows you to edit the text size alignment style color and background color Priority Level Save the message with a High or Normal prior...

Страница 72: ...o return to your message 5 Use the Navigation Key or key to move to the Text field In the text field compose your message using the keypad At any point while composing a message press the left soft key Abc or the right soft key Options soft keys to display additional options 䊳 Press the left soft key Abc to change Text Entry Mode Choose Voice Mode Word Abc ABC 123 Symbols and Quick Text modes of t...

Страница 73: ...dd to select My Name Card or an entry from your Contacts list Follow the prompts and press to insert 10 Once all fields are complete press to send the message to the intended recipient s Creating and Sending Video Messages Video Message combines text and video creating an intuitive message This is also known as Multimedia Messaging MMS 1 From the main screen press the left soft key Message 2 Press...

Страница 74: ...ve the message with a High or Normal priority Validity Period Allows you to enter a fixed date and time for which this message is valid Cancel Message Cancels the message and allows you to save it in the Drafts folder Note If you do not select an option press the to return to your message 6 Use the Navigation Key to highlight the Video field Press the left soft key My Videos to add a video and fol...

Страница 75: ...t Erase Deletes the message Save Picture Saves the picture in a Picture message to My Pictures Save As Ringtone Saves the sound byte received with the message as a ringtone Save Sound Saves the sound received with the message in My Sounds Save Quick Text Saves the text received in the message to the Quick Text list Save Name Card Saves the attached name card to your Contact List Lock Unlock Locks ...

Страница 76: ...rward Forward the message to another recipient Save Video Saves the video to My Videos Save Quick Text Saves the text received in the message to the Quick Text list Save Name Card Saves the attached name card to your Contact List Lock Unlock Locks or unlocks the message to prevent accidental deletion Add To Contacts Save the number of the sender to your Contacts as a new entry or add to an existin...

Страница 77: ...ure Video message that you would like to view later highlight View Later and press 2 To view the message press the left soft key Message 3 Press Inbox 4 Use the Navigation Key to highlight the unopened message then press OPEN The INBOX screen appears first with information about the message Press DOWN to view Picture Video message Message Folders Your phone provides default message folders for you...

Страница 78: ... to a URL web address Messaging Font Size Allows you to select the font size of the message being viewed Select Normal Small or Large Message Info Provides the following information From also provides the date and time the message was sent Callback Priority Message Type Size and if a Picture Sound or Name Card were included in the message For Picture Messages the following options may appear in th...

Страница 79: ... the number of the sender to your Contacts as a new entry or add to an existing entry Find Number Address Allows you to view phone numbers e mail addresses or URLs in the text message body or callback information Highlight the desired number or address and press left soft key Save to save it to your Contacts Press to CALL a phone number to SEND a message to an e mail address or to connect to a URL...

Страница 80: ...to your contact list Messaging Font Size Allows you to select the font size of the message being viewed Select Normal Small or Large Message Info Provides the following information Send To Number also provides the date and time the message was sent Priority Message Type Size Attachment s if a Graphic Sound or Name Card were included in the message Status and Error Code For Picture Messages the fol...

Страница 81: ...message Status and Error Code Note If no sound byte is attached to the message press the left soft key Erase to delete the message Press the left soft key Mute Unmute Play to play or mute unmute the sound byte attached to the picture message 5 Use the Navigation Key to highlight the desired option 6 Press to perform the function for the highlighted option 7 From the Sent menu press the left soft k...

Страница 82: ... up to 12 pre loaded messages You can add 15 additional messages by pressing the right soft key New and you can erase Quick Text messages by pressing the left soft key Erase Add Name Card Attach My Name Card information or information from one of your Contacts Edit Text Format Allows you to edit the text size alignment style color and background color Priority Level Save the message with a High or...

Страница 83: ... Level Save the message with a High or Normal priority Validity Period Allows you to enter a fixed date and time for which this message is valid Remove Picture Video Deletes the attached Picture Video file Cancel Message Cancels the message and allows you to save it in the Drafts folder Sound Insert a sound byte Note Press the left soft key Sounds to add a new sound byte Preview Allows you to prev...

Страница 84: ...to enter a fixed date and time for which this message is valid Remove Name Card Deletes the name card Cancel Message Cancels the message and allows you to save it in the Drafts folder 8 Use the Navigation Key to highlight the desired option Press to perform the function for the highlighted option 9 Once you ve returned to the message composer press to send the message if desired Erase Options You ...

Страница 85: ...t messages are stored in the Inbox and the oldest read Picture Video message is replaced by an incoming Picture Video message when 200 Picture Video messages are stored in the Inbox Choose from On or Off Messaging Font Size Allows you to set the message font size for message received TXT Auto View Automatically displays the text message when received Choose from On or Off Pic Video Auto Receive Au...

Страница 86: ...ess View Voicemail Messages in the Inbox Folder 1 From the main screen press the left soft key Message 2 Press Voicemail 3 Press CALL to dial voicemail and retrieve your message s Mobile IM The Instant Messaging function allows you to send and receive instant messages using one of the following communities AOL Instant Messenger MSN Messenger Service Yahoo Messenger Note You must first create the I...

Страница 87: ...ons to use the Email applications Chat You have the ability to join wireless chat rooms from your phone Send messages including text and icons to many chat room participants or launch one on one private chat rooms To access a chat room from the browser 1 From the main screen press the left soft key Message 2 Press Chat 3 Use the Navigation Key to select one of the following chat rooms and press Po...

Страница 88: ...s Mobile Web You can setup Favorites or choose from the available applications Tools The Tools menu provides the ability to access the following menus Voice Commands For more information refer to VoiceSignal Commands on page 33 Calculator For more information refer to Calculator on page 136 Calendar For more information refer to Calendar on page 138 Alarm Clock For more information refer to Alarm ...

Страница 89: ...ther Your phone supports the following Bluetooth profile service Voice Calls are supported using any of the following depending on the accessory HSP Headset or HFP Hands free profiles Transfer Object allows sending an OPP Object Push Profile which allows transfer of vCard i e Contact information between devices Bluetooth Stereo uses A2DP Advanced Audio Distribution Profile and AVRCP Audio Video Re...

Страница 90: ...A list of found Bluetooth devices will be displayed Use the Navigation Key to highlight a Bluetooth device Press to pair the devices 5 The phone automatically attempts to send a passkey of 0000 to a hands free device and shows the message ATTEMPTING TO AUTO PAIR If the default passkey is not successful the phone will display the message AUTO PAIR FAILED ENTER PASSKEY If you are attempting to pair ...

Страница 91: ...enu provides the ability to access the following menus Call Sounds 1 From the main screen press MENU Use the Navigation Key to highlight Settings Tools and press 2 Press Sounds Settings 3 Press Call Sounds or Press Call Ringtone to get new ringtones from Get It Now Get New Ringtones or choose from pre loaded ringtones 4 Press Call Vibrate to turn Call Vibrate On or Off 5 Press to save the setting ...

Страница 92: ... Press the Navigation Key up or down or press the volume key to adjust the keypad volume 5 Press SET to save Service Alerts 1 From the main screen press MENU Use the Navigation Key to highlight Settings Tools and press 2 Press Sounds Settings 3 Press Service Alerts For the following options you can turn the Service Alert On or Off ERI Sounds an alert when you go into and out of your coverage areas...

Страница 93: ...aper to use as the background display for your Main Screen Choose Pictures from My Pictures to use as the background display for your Front Screen Display Themes Choose from 3 preset colors used for menu display Dial Fonts Choose a dialing font style and size Menu Font Size Choose a menu font size Clock Format Choose digital or analog format for time display 3 Use the navigation key to highlight t...

Страница 94: ...your battery faster 1 From the main screen press MENU Use the Navigation Key to highlight Settings Tools and press 2 Press Display Settings 3 Press Backlight The menus listed appear in the display Display The following options are for the Main LCD Duration Can be set to 7 seconds 15 seconds 30 seconds Always On or Always Off Brightness Use the navigation key to adjust the brightness Keypad The fol...

Страница 95: ...nd press 2 Press Display Settings 3 Press Wallpaper 4 Press Main Screen or Front Screen Main Screen Choose My Pictures allows you to select an image from the My Picture folder My Videos allows you to select a video from the My Videos folder or Living Wallpaper allows you to select animated wallpaper Front Screen Choose My Pictures allows you to select an image from the My Picture folder 5 Use the ...

Страница 96: ...lpaper indicators display the following Volume has been set to one of the following Vibrate Only Alarm Only All Sounds Off New message is received New Voicemail is received Missed calls Calendar event will occur within 24 hours Speakerphone is turned on Alarm is set Daytime Nighttime Vibrate On Calendar Speakerphone Alarm Voicemail Missed Calls New Messages Appointment ...

Страница 97: ...splay Settings 3 Press Display Themes 4 Press the left soft key View to view thumbnails of the themes Press the left right navigation key to see the thumbnail view of each of the display themes Press the left soft key List to return to the list 5 Highlight your selection and press SET to save Dial Fonts 1 From the main screen press MENU Use the Navigation Key to highlight Settings Tools and press ...

Страница 98: ...he following options appear in the display Highlight one of the following options and press to save Digital Time appears in digital format for example 12 54pm Analog Time appears in clock format Digital format is still present in the display Off No time is displayed Phone Settings The Phone Settings menu provides the ability to access the following menus Standalone Mode With Standalone Mode on all...

Страница 99: ...he Navigation Key to highlight Settings Tools and press 2 Press Phone Settings 3 Press Voice Commands Choose from the following Voice Dial Select from the following Voice Key Only Initiate voice commands by pressing the key Voice Key Headset Initiate voice commands by pressing the key or by speaking into a headset Voice Key Flip Initiate voice commands by pressing the key or by opening the handset...

Страница 100: ...ENU Use the Navigation Key to highlight Settings Tools and press 2 Press Phone Settings 3 Press Location The following options appear in the display Location On GPS location setting is on wherever the feature is available E911 Only GPS location setting is on whenever you dial 911 only 4 Use the Navigation Key to highlight an option 5 Press to select the highlighted setting Security The Security me...

Страница 101: ...t to place calls except to emergency numbers you have to unlock the phone 1 From the main screen press MENU Use the Navigation Key to highlight Settings Tools and press 2 Press Phone Settings 3 Press Security You re prompted to enter the lock code The default lock code is the last four digits of your telephone number 4 Enter the Lock Code and press Several security menus appear in the display 5 Pr...

Страница 102: ...e last four digits of your phone number Edit Code allows you to change this code to a lock code of your preference 1 From the main screen press MENU Use the Navigation Key to highlight Settings Tools and press 2 Press Phone Settings 3 Press Security You re prompted to enter the lock code The default lock code is the last four digits of your telephone number 4 Enter the Lock Code and press Several ...

Страница 103: ...m the main screen press MENU Use the Navigation Key to highlight Settings Tools and press 2 Press Phone Settings 3 Press Security and enter the lock code and press 4 Press Restore Phone A prompt appears in the display asking if you wish to restore default settings and erase all user data including pictures video music messages contacts and downloaded applications stored on the phone 5 Highlight Ye...

Страница 104: ...phone numbers Select either NAM1 or NAM2 1 From the main screen press MENU Use the Navigation Key to highlight Settings Tools and press 2 Press Phone Settings 3 Press NAM Select The following options appear in the display NAM 1 NAM 2 4 Make your selection and press Quick Search Quick Search is an easy way to locate contacts in your Address Book and Menu items 1 From the main screen press MENU Use ...

Страница 105: ...espond to the letters of the Menu item name For example to search for Inbox you would enter 2 Press the down navigation key to search for Menu items If a match is found the menu item s appear in the display 3 Press the key to access the content of the menu item Call Settings The Call Settings menu allows you to select the method for answering incoming calls setting redial options setting data opti...

Страница 106: ... main screen press MENU Use the Navigation Key to highlight Settings Tools and press 2 Press Call Settings 3 Press Auto Retry The following options appear in the display On Off 4 Use the navigation key to select an option and press TTY Mode Before you can use your phone with a TTY device you ll need to enable TTY functions in the phone For more information refer to TTY on page 29 One Touch Dial Yo...

Страница 107: ... Data call is enabled for next call only Phone will reset to Data Off mode after call Data Until Powered Off Phone will remain in Data Mode until phone is powered off 4 Use the Navigation Key to select an option and press DTMF Tones Use this menu to set DTMF settings to Normal or Long 1 From the main screen press MENU Use the Navigation Key to highlight Settings Tools and press 2 Press Call Settin...

Страница 108: ... your computer Copy From To Card if the removable memory card is inserted into the phone when the USB data cable is connected your FlipShot memory card will be detected as an external storage device to your computer Note The Copy From To Card function is intended for copying pictures and other non protected files from to your phone s removable memory card to from your computer Sync Music when the ...

Страница 109: ... a Picture message downloaded via the Get It Now application or taken using your phone My Videos Video Clipsyouhavesavedfrom a Video message downloaded via the Get It Now application or taken using your phone My Ringtones Ringtones you have downloaded via the Get It Now application My Music Music you have downloaded directly from the V CAST Music catalog or music you have transferred from your PC ...

Страница 110: ...Phone Info menu allows you to view the software and hardware information your assigned number and an icon glossary for your phone 1 From the main screen press MENU Use the Navigation Key to highlight Settings Tools and press 2 Press Phone Info My Number is highlighted 3 Press My Number to display the Mobile Device and Identification numbers 4 Press SW HW Version to view the version of software PRL...

Страница 111: ...w much space you ve used and have left for stored media Use the following steps for each GET IT NOW sub menu 1 From the main screen press the Navigation Key right to open Get It Now 2 Press the right soft key Info 3 Press App Memory to display the memory available Press the key to return 4 Press Content Memory to view the memory used for the following items Press the key to return Internal Memory ...

Страница 112: ...ss V CAST Music to open the V CAST Music catalog 3 Browse or search the catalog to preview the songs you want 4 Highlight the music song or album that you want to purchase Press BUY to purchase 5 The CONFIRM PURCHASE screen will display the price and items you selected to purchase Press BUY to accept the terms 6 You ll receive confirmation that your purchase was successful and your music is availa...

Страница 113: ...ss Get New Ringtones to access the Get It Now catalog to download new ringtones Or if you have already downloaded ringtones highlight your selection and press 4 To return to the main screen press the key My Music The Music Player can be used to play music files that you have downloaded from the V CAST Music catalog or that you have transferred from your PC using Sync Music You can play your music ...

Страница 114: ... Music 3 The Music Library screen appears in the display The following options appear in the display Genres This option organizes your songs by music type genre For example Folk Rock Country Classical Soul Unknown and so on Each folder will contain all songs within that genre Artists This option organizes your songs by artist Albums This option organizes your songs by album title Even if you only ...

Страница 115: ... down navigation keys to highlight the song you want to listen to and press PLAY to play the song 8 During song playback press the right soft key Options to switch to one of the following functions Play All Selects all songs for playback Shuffle Re sorts the current playlist order Get V CAST Music Connects you to the V CAST Music catalog to download more songs 9 During song playback use the Naviga...

Страница 116: ...key Options Highlight Edit playlist and press 5 To remove a song from the playlist highlight the song and press the right soft key Remove 6 To change the order of the songs in your playlist highlight a song and press Move Use the Navigation Key to move the song up or down in the playlist order When you are finished press Save 7 To return to the main screen press the key My Sounds 1 From the main s...

Страница 117: ... want to sync into the Sync List 6 When complete press the Sync Now option 7 Once synchronization is complete press the End Power key and disconnect the USB cable purchased separately Picture Video This menu allows you to get new Picture and Video from the internet or take new Picture or Video using your phone s camera You can also view the saved pictures V CAST Videos V CAST the next generation w...

Страница 118: ...ble and then press After connection and buffering occurs the video clip begins Downloading a Video Clip 1 Launch V CAST Videos and select a video you want to save For information about launching your video player and choosing a video clip review steps 1 5 of the previous section Browsing Selecting and Playing Video Clips above 2 To download and save the highlighted video press SAVE The video clip ...

Страница 119: ...t to configure an alert 3 Choose a sub category if applicable then press the right soft key Options 4 Highlight Alerts and press 5 Highlight Configure alerts and press 6 Select the alert content you want and press 7 After reading terms highlight Save to accept and press or highlight Cancel to decline and press Note Fees apply for text messages alerts both sent and received Get New Pictures 1 From ...

Страница 120: ...ies of pictures Print Allows you to print the image using a USB cable connection or to a paired Bluetooth printer Zoom Allows you to zoom in the picture Create Postcard Allows you to merge a sketched picture with a regular picture to create a postcard Edit Allows you to edit the picture with the following options Effects Decorate Revision Merge Copy Paste Resize and Rotate Flip Rename Allows you t...

Страница 121: ...TM card Video clips you save are stored in My Videos You can access video clips without launching the V CAST Videos application and delete your saved video clips directly 1 From the main screen press the Navigation Key right to open Get It Now 2 Press Picture Video 3 Press My Videos 4 Use the navigation key to select a video and press PLAY to play the highlighted video 5 Press the left soft key Er...

Страница 122: ... for Digital Camera Mode Rotating the internal display counter clockwise may cause damage to the phone To take a picture in the Digital Camera Mode use the following steps 1 Open your handset 2 Rotate the internal display clockwise 180 degrees until the internal display is facing outward and fold down Starting Camera appears in the display 3 Press the Camera Options key The following settings are ...

Страница 123: ...Backlight Flash Off On Auto Only This Shot Auto Focus Allows you to turn auto focus On or Off Auto focus increases battery consumption Self Timer Off 3 Sec 5 Sec 10 Sec Quality Economy Normal Fine Resolution 2048X1536 1600X1200 1280X960 1024X768 800X600 640X480 320X240 and Picture ID 160X120 Multi Shot Series Shot Divided Shot Panorama Shot Auto Manual Auto Shot When set to On the display will sho...

Страница 124: ... in My Pictures Take Picture in Flip Open Mode To take a picture in the Flip Open Mode use the following steps 1 From the main screen press the Navigation Key right to open Get It Now 2 Press Picture Video 3 Press Take Picture The camera is now active You can also activate the camera by pressing the Camera Camcorder key 4 Press the right soft key Options or the Camera Options key on the right side...

Страница 125: ...ionless to take picture Camcorder Switches from Camera to Camcorder Note Zoom function is enabled with resolution setting of 1024x768 or lower 5 Press the Navigation Key down to highlight a setting 6 Press at the desired setting to open the pop up menu 7 With the pop up menu opened press the Navigation Key left or right to choose the desired setting and press 8 To take a picture press TAKE The cam...

Страница 126: ...the following options From Contacts Choose a number from your contacts lists Recent Calls Choose a number from the recent calls lists Groups Choose a group or a number from your group To PIX Place Send the message to the PIX Place 4 Press once you ve finished entering the phone number s or email address es 5 In the Text field compose your message 6 Press the Navigation Key down to highlight the Pi...

Страница 127: ...es from to your phone s removable memory card to from your computer Warning While the USB data cable is connected to your phone all calls and Bluetooth will be temporarily disabled if you select Copy from to card or Sync Music USB mode You must unplug the USB data cable from your phone to be able to make or receive calls and to enable Bluetooth Note Steps for transferring pictures may vary dependi...

Страница 128: ...g Camera appears on the main display 3 Press the Camera Options key 4 Press the Volume Zoom key to highlight Multi Shot and press the Photo Capture Ok key 5 Press the Volume Zoom key to highlight Panorama Shot and press the Photo Capture Ok key 6 Press the Volume Zoom key to highlight On and press the Photo Capture Ok key 7 To take a Panorama shot frame the left part of the desired scene on the ca...

Страница 129: ...ollowing settings are available Settings Memory store Video to phone or microSD card Icon Display Start Sound End Sound Call Interruption Reset Setting Color Effects Normal Black White Antique Negative Emboss White Balance Auto Sunny Cloudy Tungsten Fluorescent Brightness Allows you to adjust the brightness of the video Memory Allows you to select the location for saved Video Save to phone or micr...

Страница 130: ...e recording press the Camera Options key again 11 Press the Photo Capture Ok key to stop recording 12 Any camera icons clear and the Rotate to Play message appears in the display 13 Press the Photo Capture Ok key to save or the Camera Options key to erase the recording Saved videos are stored in My Videos To play the video after the Rotate to Play message appears Note Rotate to Play message only a...

Страница 131: ...tion for saved Video Save to phone or microSD card Icon Display Allows you to view all part or none of the camcorder icons in the display Start Sound Allows you to select a start sound You will hear this sound when you press the record key End Sound Allows you to select an end sound You will hear this sound only when the recording has been stopped or the recording has completed Call Interruption A...

Страница 132: ... your video is auto saved and the camcorder application exits in the background Note If the battery level becomes too low while you are recording the recording is stopped and the video is auto saved The low battery indicator will be displayed and you will exit from the camcorder application If your battery is too low then the phone will power down without saving the video Note If you receive a tex...

Страница 133: ...sword Use the Navigation Key to highlight LOGIN and press You are now connected to your online album Scan Biz Card 1 From the main screen press the Navigation Key right to open GET IT NOW 2 Press Picture Video 3 Press Scan Biz Card 4 Place a business card on a flat surface Align the camera so the business card edge is on the frame on the camera screen 5 Press Photo Capture Ok key down fully to cap...

Страница 134: ...a printer using the PictBridge technology Bluetooth connection or a USB cable sold separately must be connected between the two devices before any printing can occur Note Using PictBridge to print photos automatically places your phone in Standalone Mode This means you cannot receive or make calls other than emergency 911 calls until PictBridge is finished To use PictBridge with a USB printer to p...

Страница 135: ...per sizes are supported by the printer Note Paper sizes may vary and are dependent on the printer s capabilities 11 Press the navigation key down to select Type Press the navigation key left or right to select one of the following sizes Default 1 Up Borderless 2 Up 4 Up Index Note These sizes may vary and are dependent on the printer s capabilities 12 Press the navigation key down to select Qualit...

Страница 136: ...u menu appears in the display with Add New Device highlighted 6 Press If your phone s Bluetooth interface is not on TURN BLUETOOTH POWER ON appears in the display Highlight Yes and press You are prompted to add a new device 7 PLACE DEVICE YOU ARE CONNECTING TO IN DISCOVERABLE MODE appears in the display and press 8 Highlight the printer and press PAIR 9 Enter the passkey and press 10 Highlight Yes...

Страница 137: ...in screen press the Navigation Key right to open GET IT NOW 2 Press News Info 3 The browser is launched and a pop up screen with available applications is displayed 4 Use the navigation key to browse the categories 5 Once the desired category is highlighted press to enter the category list When you use Get News Info some of the keys operate differently than during a normal phone call It presents o...

Страница 138: ...Would you like to run it prompt press Yes to launch application or No to return to category list Note The Tools on the Go menu will display all downloaded applications with the most current download first Extras 1 From the main screen press the Navigation Key right to open GET IT NOW 2 Press Extras 3 Get New Applications is highlighted 4 Press 5 Highlight the application you wish to download and p...

Страница 139: ...ivision using your phone 1 From the main screen press MENU then use the Navigation Key to highlight SETTINGS TOOLS and press Press Tools Calculator Normal The Calculator opens 2 Enter the first number in your equation using the keypad Numbers can be up to nine digits long 3 Press the right soft key Operator to display a pop up menu which allows you to enter a Parenthesis or Power if desired Press ...

Страница 140: ...ll Tip enter the tip percentage Paying enter the amount of people paying Note Press the key to enter a decimal 3 The tip is automatically calculated in the section below Converter The Converter menu provides the following conversion categories Temperature Length Weight Area Volume Currency To convert any of the above categories do the following 1 Scroll to the conversion feature you wish to use an...

Страница 141: ... view available options press the right soft key Options A pop up menu appears in the display that contains the menu items Weekly View the current week Go To Date Go to any date that you specify Go to Today View today s events Erase Old Select a past event to delete Erase All Delete all events in your calendar 4 Press the left soft key Add to add a new event 5 The Appointment name field is highlig...

Страница 142: ... Press the right soft key Options Tip Use the Navigation Key to move between months in the calendar 4 In the pop up menu that appears in the display use the navigation key to highlight Go To Date then press 5 Enter the desired date in the box then press The month that you entered appears in the display with the event date highlighted 6 Press VIEW repeatedly to view event details for the date 7 To ...

Страница 143: ...t you wish for the alarm to sound 6 Use the Navigation Key to highlight the am pm field Use the Navigation Key to select am or pm Note Press for am or for pm 7 Use the Navigation Key to highlight the Frequency field Use the Navigation Key to set the frequency occurrence of the alarm Below lists and defines the options for this field Once The alarm sounds only once at the time specified Daily The a...

Страница 144: ...d Snooze To use this feature follow these steps 1 Set one of your phone s 3 alarms For more information about setting an alarm see Set An Alarm on page 140 2 When an alarm sounds use the Navigation Key to highlight Snooze or Dismiss To snooze highlight Snooze and press to set it to ring again after 5 minutes Or highlight Dismiss to turn the alarm off completely The alarm turns off and the standby ...

Страница 145: ...otepad Create and store notes in Notepad Return to Notepad anytime to review and edit your notes 1 From the main screen press MENU then use the Navigation Key to highlight SETTINGS TOOLS and press Press Tools Notepad The Note Pad menu opens 2 If you have any stored notes they appear as a list in the display If this is your first time in Notepad No Notes displays 3 To add a new memo press the left ...

Страница 146: ...ns A pop up menu with the options listed in the following table appears in the display Edit Edit the note currently highlighted or appearing in the display Erase Erase the note currently highlighted or appearing in the display Erase Notes Erases the notes Lock Unlock Locks messages When a message is locked it cannot be deleted until it is unlocked 4 Use the navigation keys to highlight an option o...

Страница 147: ...ion resumes where you left off Note This feature is currently unavailable outside of the United States Only available within the Verizon Wireless Enhanced Services Area Any time the service indicator icon is visible you are connected to the Internet and billed accordingly Rates and prices vary according to your service contract For further information on billing contact Verizon Wireless Launching ...

Страница 148: ...y of the following ways Text or numeric input Links embedded in content Numbered options some options may not be numbered Simple text You can act on the options or links by using the soft keys Mobile Web Soft Keys Note This feature is currently unavailable outside of the United States Only available within the Verizon Wireless Enhanced Services Area At the bottom of the Mobile Web display contains...

Страница 149: ...ble upper case characters in Abc mode 0 Next Key Press to enter a zero 0 or to display another word in the dictionary when in Word entry mode Pound Space Key Press to insert a space when entering text Numbers 1 9 Use the number keys to select items in a menu if they are numbered END Key Press to exit Mobile Web and return the phone to the main screen Left Soft Key Press the left soft key to go to ...

Страница 150: ...ed to select a highlighted link Place a Call While Using Mobile Web Note This feature is currently unavailable outside of the United States Only available within the Verizon Wireless Enhanced Services Area You can place a call while using Mobile Web if the website supports this feature Press the appropriate soft key to call the number In most cases you can also press to call the number The Interne...

Страница 151: ...ther Important Safety Information Product Performance Availability of Various Features Ring Tones Battery Standby and Talk Time Battery Precautions Care and Maintenance This section outlines the safety precautions associated with using your phone These safety precautions should be followed to safely use your phone Health and Safety Information Exposure to Radio Frequency RF Signals Certification I...

Страница 152: ...ighest certified power level in all tested frequency bands Although the SAR is determined at the highest certified power level the actual SAR level of the phone while operating can be well below the maximum value This is because the phone is designed to operate at multiple power levels so as to use only the power required to reach the network In general the closer you are to a wireless base statio...

Страница 153: ...es Go to http www samsung com us consumer type type do group mobilephones type mobilephones for more information UL Certified Travel Adapter The Travel Adapter for this phone has met applicable UL safety requirements Please adhere to the following safety instructions per UL guidelines FAILURE TO FOLLOW THE INSTRUCTIONS OUTLINED MAY LEAD TO SERIOUS PERSONAL INJURY AND POSSIBLE PROPERTY DAMAGE IMPOR...

Страница 154: ...r that wireless phones are absolutely safe Wireless phones emit low levels of radio frequency energy RF in the microwave range while being used They also emit very low levels of RF when in the stand by mode Whereas high levels of RF can produce health effects by heating tissue exposure to low level RF that does not produce heating effects causes no known adverse health effects Many studies of low ...

Страница 155: ...p National Institute for Occupational Safety and Health Environmental Protection Agency Federal Communications Commission Occupational Safety and Health Administration National Telecommunications and Information Administration The National Institutes of Health participates in some interagency working group activities as well FDA shares regulatory responsibilities for wireless phones with the Feder...

Страница 156: ...ingioma or acoustic neuroma tumors of the brain or salivary gland leukemia or other cancers None of the studies demonstrated the existence of any harmful health effects from wireless phones RF exposures However none of the studies can answer questions about long term exposures since the average period of phone use in these studies was around three years What research is needed to decide whether RF...

Страница 157: ...tracts to independent investigators The initial research will include both laboratory studies and studies of wireless phone users The CRADA will also include a broad assessment of additional research needs in the context of the latest research developments around the world What steps can I take to reduce my exposure to radio frequency energy from my wireless phone If there is a risk from these pro...

Страница 158: ...that hands free kits reduce risks Hands free kits can be used with wireless phones for convenience and comfort These systems reduce the absorption of RF energy in the head because the phone which is the source of the RF emissions will not be placed against the head On the other hand if the phone is mounted against the waist or other part of the body during use then that part of the body will absor...

Страница 159: ...fibrillators are safe from wireless phone EMI FDA has tested wireless phones and helped develop a voluntary standard sponsored by the Institute of Electrical and Electronic Engineers IEEE This standard specifies test methods and performance requirements for hearing aids and wireless phones so that no interference occurs when a person uses a compatible phone and a compatible hearing aid at the same...

Страница 160: ...ee accessories available today 3 Position your wireless phone within easy reach Be able to access your wireless phone without removing your eyes from the road If you get an incoming call at an inconvenient time let your voice mail answer it for you 4 Let the person you are speaking with know you are driving if necessary suspend the call in heavy traffic or hazardous weather conditions Rain sleet s...

Страница 161: ...For more information please call 1 888 901 SAFE or visit our web site www wow com com Important If you are using a handset other than a standard numeric keypad please call 1 888 901 7233 Provided by the Cellular Telecommunications Internet Association Responsible Listening Caution Avoid potential hearing loss Damage to hearing occurs when a person is exposed to loud sounds over time The risk of he...

Страница 162: ...e device in a noisy environment you noise cancelling headphones to block out background environmental noise By blocking background environment noise noise cancelling headphones should allow you to hear the music at lower volumes than when using earbuds Limit the amount of time you listen As the volume increases less time is required before you hearing could be affected Avoid using headphones after...

Страница 163: ...s forbidden to use it or when it may cause interference or danger When connecting the phone or any accessory to another device read its user s guide for detailed safety instructions Do not connect incompatible products As with other mobile radio transmitting equipment users are advised that for the satisfactory operation of the equipment and for the safety of personnel it is recommended that the e...

Страница 164: ...tml Hearing Aid Compatibility with Mobile Phones When some mobile phones are used near some hearing devices hearing aids and cochlear implants users may detect a buzzing humming or whining noise Some hearing devices are more immune than others to this interference noise and phones also vary in the amount of interference they generate The wireless telephone industry has developed ratings for some o...

Страница 165: ... facilities may be using equipment that could be sensitive to external RF energy Vehicles RF signals may affect improperly installed or inadequately shielded electronic systems in motor vehicles Check with the manufacturer or its representative regarding your vehicle You should also consult the manufacturer of any equipment that has been added to your vehicle Posted Facilities Switch your phone of...

Страница 166: ...eck with local service providers To make an emergency call 1 If the phone is not on switch it on 2 Key in the emergency number for your present location for example 911 or other official emergency number Emergency numbers vary by location 3 Press the key If certain features are in use call barring for example you may first need to deactivate those features before you can make an emergency call Con...

Страница 167: ... it is a complex piece of equipment and can be broken Avoid dropping hitting bending or sitting on it Other Important Safety Information Only qualified personnel should service the phone or install the phone in a vehicle Faulty installation or service may be dangerous and may invalidate any warranty applicable to the device Check regularly that all wireless phone equipment in your vehicle is mount...

Страница 168: ...When it s turned on it receives and transmits radio frequency RF signals When you use your phone the system handling your call controls the power level This power can range from 0 006 watts to 0 2 watts in digital mode Maintaining Your Phone s Peak Performance For the best care of your phone only authorized personnel should service your phone and accessories Faulty service may void the warranty Th...

Страница 169: ... battery as this could result in serious safety hazards If you use the phone near the network s base station it uses less power talk and standby time are greatly affected by the signal strength on the cellular network and the parameters set by the network operator Follow battery usage storage and charging guidelines found in the user s guide Battery charging time depends on the remaining battery c...

Страница 170: ...ng appliance iron or radiator Do not get your phone or battery wet Even though they will dry and appear to operate normally the circuitry could slowly corrode and pose a safety hazard Do not short circuit the battery Accidental short circuiting can occur when a metallic object coin clip or pen causes a direct connection between the and terminals of the battery metal strips on the battery for examp...

Страница 171: ...old areas When the phone warms up to its normal operating temperature moisture can form inside the phone which may damage the phone s electronic circuit boards Do not drop knock or shake the phone Rough handling can break internal circuit boards Do not use harsh chemicals cleaning solvents or strong detergents to clean the phone Wipe it with a soft cloth slightly dampened in a mild soap and water ...

Страница 172: ...is conditioned upon proper use of Product by Purchaser This Limited Warranty does not cover a defects or damage resulting from accident misuse abuse neglect unusual physical electrical or electromechanical stress or modification of any part of Product including antenna or cosmetic damage b equipment that has the serial number removed or made illegible c any plastic surfaces or other externally exp...

Страница 173: ...tly repair or replace the defective Product SAMSUNG may at SAMSUNG s sole option use rebuilt reconditioned or new parts or components when repairing any Product or replace Product with a rebuilt reconditioned or new Product Repaired replaced leather cases pouches and holsters will be warranted for a period of ninety 90 days All other repaired replaced Product will be warranted for a period equal t...

Страница 174: ...R ANY BREACH OF CONTRACT OR FOR ANY CLAIM BROUGHT AGAINST PURCHASER BY ANY OTHER PARTY SOME STATES PROVINCES DO NOT ALLOW THE EXCLUSION OR LIMITATION OF INCIDENTAL OR CONSEQUENTIAL DAMAGES SO THE ABOVE LIMITATION OR EXCLUSION MAY NOT APPLY TO YOU THIS WARRANTY GIVES YOU SPECIFIC LEGAL RIGHTS AND YOU MAY ALSO HAVE OTHER RIGHTS WHICH VARY FROM STATE TO STATE PROVINCE TO PROVINCE THIS LIMITED WARRANT...

Страница 175: ... whether oral or written do not constitute warranties by SAMSUNG and should not be relied upon Precautions for Transfer and Disposal If data stored on this device is deleted or reformatted using the standard methods the data only appears to be removed on a superficial level and it may be possible for someone to retrieve and reuse the data by means of special software To avoid unintended informatio...

Страница 176: ...nt If you are using a handset other than a standard numeric keypad dial the numbers listed in brackets Phone 1 888 987 HELP 4357 2007 Samsung Telecommunications America All rights reserved No reproduction in whole or in part allowed without prior written approval Specifications and availability subject to change without notice ...

Страница 177: ...n 26 deleting entry 28 icons 27 new contact 27 28 updating existing contact 27 28 Call In Progress Option 25 Camera taking pictures 119 Change lock code 99 Changing Message Settings 82 Chat 84 Clear key 12 Clock Format 95 Command Keys 12 Contact List finding a contact entry 60 Contacts 52 adding a new contact entry 54 deleting a contact entry 60 editing an existing contact entry 60 finding my phon...

Страница 178: ... move entries from to 57 Send a Picture Message to Members of a Group 58 send messages to 58 viewing 57 H Health and Safety Information 148 I Icons alarm on 16 alarm only 16 battery level 15 display 14 dormant 15 signal strength 14 silent mode 16 TTY 15 Indicator Bluetooth Active 15 calendar appointment 16 message 16 missed calls 16 no service 15 roaming 14 signal strength 14 speakerphone 16 stand...

Страница 179: ...tion key 13 Navigation key shortcuts 40 New message icon 16 No service indicator 15 Non Supported Battery 17 Notepad 142 Notes and tips 5 Notes description 5 P Pause hard pause 56 two second pause 56 Phone Info 107 Phone Memory Storage 23 Phone Settings 95 Shortcut Key 96 Standalone Mode 95 Picture Video messages view later 74 PIX Place 130 Place a call while using Mobile Web 147 Playing Your Vide...

Страница 180: ... stacked 30 Tools 85 Shortcut to menus 39 Signal strength icon 14 Silent mode icon 16 Snooze 141 Sounds 88 Alert Sounds 88 Call Sounds 88 Keypad Volume 89 Power On Off 89 Service Alerts 89 Speakerphone Key 13 Speed dial assigning 61 SSL Icon 15 Standard Limited Warranty 169 Storing numbers after a call 56 Sync Music 114 T Take Picture Digital Camera Mode 119 Flip Open Mode 121 Panorama Shot 125 Se...

Страница 181: ...escription 114 downloading clips 115 Vibrate mode icon 16 View an event calendar 139 View Picture Video Message Later 74 Voice Call Icon 15 Voice Commands 30 Voice mail icon 16 Voice privacy 103 Voicemail 83 listening to 5 Receive 83 setting up 4 viewing messages 83 VoiceSignal description 33 digit dial 35 features 33 menu speech recognition 30 name dial 34 name lookup 36 opening Menus and Applica...

Отзывы: