background image

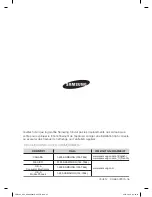
Code N° : 

DG68-00297A-06


CANADA 

1-800-SAMSUNG (726-7864)


MEXICO 

01-800-SAMSUNG (726-7864)


U.S.A 

1-800-SAMSUNG (726-7864)

Consumer Electronics
 

U.S.A


Mobile Phones 

www.samsung.com/ca (English)

www.samsung.com/ca_fr (French)

www.samsung.com

1-800-SAMSUNG (726-7864)

Veuillez noter que la garantie Samsung n’inclut pas les deplacements du service apres-
vente pour expliquer le fonctionnement de l’appareil, corriger une installation non correcte 
ou executer des travaux de nettoyage ou d’entretien reguliers.

FE-R400_XAC_DG68-00297A-06_CFR.indd   45

2013-05-29   �� 5:09:18

Содержание FE-R400SX

Страница 1: ... receive more complete service please register your product at www samsung com register 1 800 SAMSUNG 726 7864 Electric Range user manual ENGLISH This manual is made with 100 recycled paper FE R400SX FE R400SW FE R400SB FE R400_XAC_DG68 00297A 06_EN indd 1 2013 06 11 12 38 37 ...

Страница 2: ...al up to different pot size A smaller warming burner in the center of the range top important safety instructions Read and follow all instructions before using your oven to prevent the risk of fire electric shock personal injury or damage when using the range This guide does not cover all possible conditions that may occur Always contact your service agent or manufacturer about problems that you d...

Страница 3: ...cured by a properly installed Anti Tip device AFTER THE RANGE HAS BEEN INSTALLED CONFIRM THAT THE ANTI TIP DEVICE HAS BEEN PROPERLY INSTALLED AND VERIFY THAT THE ANTI TIP DEVICE IS PROPERLY ENGAGED Refer to the installation manual for instructions a If the anti tip device is not installed a child or adult can tip the range and be killed b Verify the anti tip device has been properly installed and ...

Страница 4: ...the opening crevices around the oven door Be sure your appliance is properly installed and grounded by a qualified technician User Servicing Do not repair or replace any part of the appliance unless specifically recommended in the manual All other servicing should be referred to a qualified technician Always disconnect power to appliance before servicing by removing the fuse or switching off the c...

Страница 5: ...elements Do not use a towel or other bulky cloth Teach children not to play with the controls or any other part of the range Keep children away from the door when opening or closing it as they may bump themselves on the door or catch their fingers in the door SURFACE COOKING UNITS Never leave surface units unattended at high heat settings Boilovers cause smoking and greasy spillovers that may igni...

Страница 6: ...es of glass glass ceramic ceramic earthenware or other glazed utensils are suitable for range top service without breaking due to the sudden change in temperature Utensil handles should be turned inward and not extend over adjacent surface units To reduce the risk of burns ignition of flammable materials and spillage due to unintentional contact with the utensil the handle of a utensil should be p...

Страница 7: ...ven can ignite Use care when opening door Let hot air or steam escape before you remove or replace food in the oven Protective liners Do not use aluminum foil to line the oven bottoms except as suggested in the manual Improper installation of these liners may result in a risk of electric shock or fire Keep oven vent ducts unobstructed The oven vent is located above the right rear surface unit this...

Страница 8: ...G SURFACES DO NOT TOUCH SURFACE UNITS OR AREAS NEAR UNITS Surface units may be hot even though they are dark in color Areas near surface units may become hot enough to cause burns During and after use do not touch or let clothing or other flammable materials contact surface units or areas near units until they have had sufficient time to cool Among these areas are the cook top and facing the cook ...

Страница 9: ...t This appliance must be properly grounded Do not ground the appliance to a gas pipe plastic water pipe or telephone line This may result in electric shock fire an explosion or problems with the product Do not cut or remove the ground prong from the power cord under any circumstances Connect the oven to a properly grounded circuit Do not install this appliance in a humid oily or dusty location in ...

Страница 10: ... If the oven needs to be repaired contact an authorized service center near you Use the appliance only after closing the door If you use the appliance when it is contaminated by alien substances such as food waste it may result in a problem with the appliance Take care when removing the wrapping when taking food out of the appliance If the food is hot hot steam may be emitted abruptly when removin...

Страница 11: ... Do not store or use oven outdoors Never use this appliance for purposes other than cooking This may result in fire Open the cap or stopper of a sealed container herb tonic tea bottle baby bottle milk bottle and so on and make a hole in food items such as shells or nuts eggs chestnuts etc with a knife before cooking them Failing to do so may result in burns or injury Never heat plastic or paper co...

Страница 12: ...ontents and cause burns Do not stand on top of the appliance or place objects such as laundry oven cover lighted candles lighted cigarettes dishes chemicals metal objects etc on the appliance Items such as a cloth may be caught in the door This may result in electric shock fire problems with the product or injury Do not operate the appliance with wet hands This may result in electric shock Do not ...

Страница 13: ...l You may hurt yourself on the sharp edges of the appliance Do not clean the appliance with a steam cleaner This may result in corrosion Keep the inside of the oven clean Food particles or spattered oils stuck to the oven walls or floor can cause paint damage and reduce the efficiency of the oven CAUTION APPLIANCE OUTLETS The 120V appliance outlets located on the control console may be used to run...

Страница 14: ...nimum and maximum settings 22 Using the oven racks 23 Baking 23 Timed cooking 24 Delay timed cooking 25 Broiling 26 Using the easy cook feature 27 Using the custom cook feature 27 Using the warm function 28 Extra features MAINTAINING YOUR APPLIANCE 31 31 Self cleaning 33 Steam cleaning 34 Care and cleaning of the oven 35 Care and cleaning of the glass cooktop 37 Removing and replacing the oven doo...

Страница 15: ...t from the Samsung Contact Center 1 800 726 7864 introducing your new range Oven door Shelf position Glass surface Automatic oven light switch Oven light Self steam clean latch Gasket Oven control panel See page 20 for more information Surface control knobs See page 16 for more information FE R400_XAC_DG68 00297A 06_EN indd 14 2013 06 11 12 38 39 ...

Страница 16: ...t touch the surface units until they have cooled down The surface may be still be hot and burns may occur if the glass surface is touched before it has cooled down sufficiently Immediately clean spills on the cooking area to prevent a tough cleaning chore later If cabinet storage is provided directly above the cooking surface make sure that the items are infrequently used and can be safely stored ...

Страница 17: ...n through the glass cooking surface The element will cycle on and off to maintain the preset heat setting even at high settings For more information on selecting proper types of cookware refer to the section Using the proper cookware on page 18 Single surface unit control knob 1 Push the knob in 2 Turn in either direction to the setting you want At both the off and high settings the knob clicks in...

Страница 18: ...uminum foil to maintain food quality Always start with hot food Eating uncooked or cold food placed on the warming center could result in illness 1 Turn the warming center on Press the WARMING CENTER ON OFF pad 2 Select the power setting you want Pressing the WARMING CENTER LEVEL pad once will set it to the level 1 setting Press the pad twice for the level 2 setting 3 times for level 3 3 Turn the ...

Страница 19: ...kware can prevent many problems such as uneven cooking or extended cooking times Using the proper pans will reduce cooking times and cook food more evenly Check for flatness by rotating a ruler across the bottom of the cookware CORRECT INCORRECT Flat bottom and straight sides Tight fitting lids Weight of handle does not tilt pan Pan is well balanced Pan size matches the amount of food to be prepar...

Страница 20: ...g good and can prevent damage If a spillover occurs while cooking immediately clean the spill from the cooking area while it is hot to prevent a tough cleaning chore later Using extreme care wipe the spill with a clean dry towel Do not allow spills to remain on the cooking area or the cooktop trim for a long period of time Do not use abrasive cleansing powders or scouring pads which will scratch t...

Страница 21: ... except the clock and timer warming center 5 CLOCK Press to set the time of day 6 OVEN LIGHT Press to turn the oven light on or off 7 KITCHEN TIMER ON OFF Press to select the timer feature 8 SELF CLEAN Press to select self cleaning function 9 STEAM CLEAN Press to select steam cleaning function 10 DELAY START Use along with Bake Cooking Time and Self Clean pads to set the oven to start and stop aut...

Страница 22: ...s 0 on the number pad to select 12 hour or 24 hour 3 Exit the set up Press the SET START pad SETTING THE KITCHEN TIMER The kitchen timer serves as an extra timer that will beep when the set time has elapsed It does not start or stop cooking functions The feature can be used during any of the other oven functions How to set the timer 1 Turn the timer on Press the KITCHEN TIMER ON OFF pad 2 Enter th...

Страница 23: ...ing layer cakes Centering the baking pans in the oven as much as possible will produce better results If baking with more than one pan place the pans so each has at least 1 to 1 of air space around it If cooking on multiple racks place the oven racks in positions 2 and 5 Place the cookware as shown in the figures below Fig 1 Fig 2 Before using the racks The oven has two racks Each rack has stops t...

Страница 24: ...KE pad The display will show the present temperature eg 375 F 2 Enter the temperature you want eg 425 F by using the number pad 3 Complete the entry by pressing the SET START pad TIMED COOKING In a timed cooking the oven turns on immediately and cooks for the length of time you select At the end of the cooking time the oven turns off automatically You can use the timed cooking feature only with an...

Страница 25: ...t times you select in advance You can use the delay timed cooking feature only with another cooking operation bake slow cook crispy pizza You can set the oven for a delay timed cooking before setting other cooking operations The clock must be set for the correct time of day How to set the oven for delay timed cooking 1 Position the oven rack s and place the food in the oven 2 Enter the set up Pres...

Страница 26: ...ntil food is browned turn and cook on the other side 3 Press the CLEAR OFF pad once you have finished cooking or if you want to cancel broiling Recommended broiling guide The size weight thickness starting temperature and your preference of doneness will affect broiling times This guide is based on meats at refrigerator temperature Food Quantity and or thickness Shelf position First side time min ...

Страница 27: ...ess and therefore does not have a temperature adjustment 3 Press the CLEAR OFF pad at any time to turn off the proofing feature If you press the Proof pad when the oven temperature is above 100 F Hot will appear in the display Because these functions produce the best results when started while the oven is cool we recommend that you wait until the oven has cooled down and Hot disappears from the di...

Страница 28: ...ing 1 Press the CUSTOM COOK pad the number of times corresponding to where the recipe setting is stored eg for recipe setting 2 press the CUSTOM COOK pad twice Recipe settings may be stored at 1 2 or 3 2 Start the stored cooking operation Press the SET START pad USING THE WARM FUNCTION The warm feature will maintain an oven temperature of 170 F You should not use this feature to reheat cold foods ...

Страница 29: ...ay will flash F Fahrenheit or C Centigrade 2 Press 0 on the number pad changes the display between F and C 3 Press the SET START pad Thermostat adjustment The temperature in the oven has been preset at the factory When first using the oven be sure to follow recipe times and temperatures If you think the oven is too hot or too cool the temperature in the oven can be adjusted Before adjusting test a...

Страница 30: ...F 3 Press the SET START pad Control lockout This feature will allow you to lock the buttons on the touch pad so they cannot be activated accidentally How to activate the control lockout feature 1 Press the CLEAR OFF pad for 3 seconds The display will show Loc and an icon of a lock continuously and the time of day if not blacked out All functions must be cancelled before the control lockout is acti...

Страница 31: ...lt temperature is 350 F 2 Enter the temperature you want eg 375 F by using the number pad 3 Press the SET START pad The temperature display will start to change once the oven temperature reaches 150 F 4 Press the CLOCK and the KITCHEN TIMER ON OFF pads at the same time for 3 seconds The display will show SAb Once SAb appears in the display the oven control will no longer beep or display any furthe...

Страница 32: ...cleaning cycle is complete Stand to the side of the oven when opening the door to allow hot air or steam to escape The oven may still be VERY HOT Before a self cleaning cycle Fig 1 We recommend venting your kitchen with an open window or using a ventilation fan or hood during the self cleaning cycle Remove the wire rack broil pan broil pan insert all cookware and any aluminum foil from the oven Wi...

Страница 33: ...ect the desired self clean time by pressing SELF CLEAN pad 2 Press the DELAY START pad 3 Using the CLOCK and number pads enter the time you want the clean cycle to start 4 Press the SET START pad The display will show Delay start time and Lock icon And the motor driven door lock will engage automatically 5 Self Cleaning cycle will turn on automatically at the set time How to turn off the self clea...

Страница 34: ...ay Because these functions produce the best results when started while the oven is cool we recommend that you wait until the oven has cooled down and Hot disappears from the display After a steam cleaning cycle Take care when opening the door before a steam cleaning procedure has ended the water on the bottom is hot Open the oven door and remove the remaining water with a sponge Do not leave the r...

Страница 35: ...el Appliance Cleaner or polish well 2 Place a small amount of stainless steel appliance cleaner or polish on a damp cloth or damp paper towel 3 Clean a small area rubbing with the grain of the stainless steel if applicable 4 Dry and buff with a clean dry paper towel or soft cloth 5 Repeat as necessary Do not use a steel wool pad it will scratch the surface If a mineral oil based stainless steel ap...

Страница 36: ...mal daily use cleaning Use only a ceramic cooktop cleaner on the glass cooktop Other creams may not be as effective By following these steps you can maintain and protect the surface of your glass cooktop 1 Before using the cooktop for the first time clean it with a ceramic cooktop cleaner This helps protect the top and makes cleanup easier 2 Daily use of a ceramic cooktop cleaner will help keep th...

Страница 37: ...ottoms of pans for roughness that may scratch the cooktop Cleaning the cooktop seal To clean the seal around the edges of the glass lay a wet cloth on it for a few minutes then wipe clean with a nonabrasive cleaner Potential for permanent damage to the glass surface Sugary spillovers such as jellies fudge candy syrups or melted plastics can cause pitting of the surface of your cooktop This is not ...

Страница 38: ...notch in the hinge arm must be fully inserted into the bottom of the slot 3 Open the door fully If the door will not open fully the indentation is not inserted correctly in the bottom edge of the slot 4 Push the hinge locks up against the front frame of the oven cavity to the locked position 5 Close the oven door REMOVING AND REPLACING THE STORAGE DRAWER How to remove the storage drawer 1 Pull the...

Страница 39: ... the range or disconnect power 3 Turn the glass bulb cover in the back of the oven counterclockwise to remove 4 Turn the bulb counterclockwise to remove it from its socket Remove Glass bulb cover Bulb Replace 5 Replace the light bulb and glass bulb cover by turning them clockwise 6 Plug in the range or reconnect power CAUTION Before changing your oven light bulb disconnect the electrical power to ...

Страница 40: ...ke the appliance accessible The carpet is interfering with movement of the range Provide sufficient space so the range can be lifted over the carpet The oven control beeps and displays an F error code You have a function error code CODE CAUSE SE Shorted key E 27 oven sensor opened E 28 Oven sensor shorted E 08 Oven heating error E 0A Oven heating over E 0E Door locking error Press the CLEAR OFF pa...

Страница 41: ...house lights will turn on If required call your local electric company for service The oven light will not turn on The light bulb is loose or defective Tighten or replace the bulb The switch operating light is broken Call for service Oven smokes excessively during broiling The control has not been set properly Refer to the section on setting oven controls Make sure the oven door is opened to the b...

Страница 42: ...ttoms Cookware has been slid across the cooktop surface Brown streaks or specks Boilovers have been cooked onto the surface Use the blade scraper to remove soil See the section on care and cleaning of the glass cooktop on page 35 Areas of discoloration with metallic sheen Mineral deposits from water and food have been left on the surface of the cooktop Remove using a ceramic glass cooktop cleaning...

Страница 43: ... a self cleaning cycle for a minimum of 3 hours See the section on self cleaning on page 31 Strong odor An odor from the insulation around the inside of the oven is normal for the first few times the oven is used This is temporary Oven racks are difficult to slide The shiny silver colored racks were cleaned in a self cleaning cycle Apply a small amount of vegetable oil to a paper towel and wipe th...

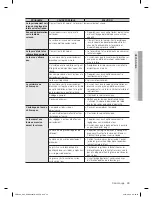
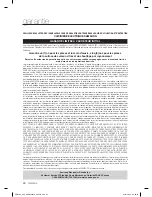
Страница 44: ...omer adjustments and failure to follow operating instructions maintenance and environmental instructions that are covered and prescribed in the instruction book product removal and reinstallation problems caused by pest infestations and overheating or overcooking by user This limited warranty shall not cover cases of incorrect electric current voltage or supply light bulbs house fuses house wiring...

Страница 45: ...memo FE R400_XAC_DG68 00297A 06_EN indd 44 2013 06 11 12 38 47 ...

Страница 46: ... Mobile Phones www samsung com ca English www samsung com ca_fr French www samsung com 1 800 SAMSUNG 726 7864 Please be advised that the Samsung warranty does NOT cover service calls to explain product operation correct improper installation or perform normal cleaning or maintenance FE R400_XAC_DG68 00297A 06_EN indd 45 2013 06 11 12 38 48 ...

Страница 47: ...service après vente enregistrez votre appareil sur le site suivant www samsung com register 1 800 SAMSUNG 726 7864 Cuisinière électrique manuel d utilisation FRANÇAIS CANADIEN Ce manuel est en papier recyclé à 100 FE R400SX FE R400SW FE R400SB FE R400_XAC_DG68 00297A 06_CFR indd 1 2013 05 29 5 09 01 ...

Страница 48: ...au centre de la table de cuisson pour maintenir les plats chauds consignes de sécurité importantes Lisez et suivez toutes les consignes avant d utiliser votre four afin d éviter tout risque d incendie d électrocution de blessure ou de dommage lors de l utilisation de la cuisinière Le présent guide ne couvre pas toutes les situations susceptibles de se produire Contactez toujours votre réparateur o...

Страница 49: ...ALLÉ LA CUISINIÈRE CONFIRMEZ QUE LE DISPOSITIF ANTI BASCULEMENT EST BIEN INSTALLÉ ET VÉRIFIEZ QUE CE DERNIER EST BIEN FIXÉ Reportez vous au manuel d installation pour plus d instructions a Si le dispositif anti basculement n est pas installé un enfant ou un adulte peut faire basculer la cuisinière et être tué b Vérifiez que le dispositif anti basculement ait été correctement installé et fixé sur l...

Страница 50: ...situées à proximité de cette ouverture les rainures situées autour de la porte du four Assurez vous que votre appareil est correctement installé et mis à la terre par un technicien qualifié Dépannage utilisateur Ne réparez ni ne remplacez jamais les pièces de l appareil vous même sauf si le présent manuel vous y autorise Toute autre réparation devra être effectuée par un technicien qualifié Eteign...

Страница 51: ...viette ou de chiffon de grande taille Apprenez aux enfants à ne pas jouer avec les commandes ou les autres éléments de la cuisinière Veillez a ce que les enfants soient eloignes de la porte lors de son ouverture ou de sa fermeture car ils pourraient se cogner contre la porte ou se prendre les doigts dedans TABLE DE CUISSON Ne laissez jamais la table de cuisson sans surveillance lorsqu un foyer fon...

Страница 52: ...les de cuisson en faïence Seuls certains ustensiles en verre vitrocéramique céramique terre cuite ou faïence peuvent être utilisés sur cette table de cuisson sans risque de fêlure lié au changement brusque de température Les manches des ustensiles devront être dirigés vers l intérieur et non au dessus des foyers adjacents Afin de réduire tout risque de brûlure d inflammation de matières inflammabl...

Страница 53: ...flammer Soyez prudent lorsque vous ouvrez la porte Laissez l air chaud ou la vapeur s échapper avant de retirer les aliments du four ou de les remettre Couches protectrices N utilisez pas de papier d aluminium pour recouvrir la sole du four sauf si les instructions le suggèrent Une installation inappropriée de ces couches protectrices est susceptible de provoquer une décharge électrique ou un ince...

Страница 54: ...ées à proximité Les éléments de la table de cuisson peuvent être chauds même s ils sont noirs Les zones situées à proximité de ces éléments peuvent devenir chaudes au point de provoquer des brûlures Pendant et après le fonctionnement de la cuisinière ne touchez pas les foyers ou les zones situées à proximité des foyers et évitez que des vêtements ou produits inflammables n entrent en contact avec ...

Страница 55: ...ue ou à une ligne téléphonique Cela pourrait entraîner un risque d électrocution d incendie d explosion ou de défaillance de l appareil Ne coupez ni ne retirez JAMAIS la broche de mise à la terre de la fiche du cordon d alimentation Connectez le four à un circuit d ampérage approprié N installez pas cet appareil dans un endroit humide graisseux ou poussiéreux et veillez à ce qu il ne soit pas expo...

Страница 56: ...lectrique circulant à l intérieur est très élevé Si le four nécessite des réparations contactez un centre de dépannage agréé proche de chez vous Ne faites fonctionner l appareil qu après en avoir fermé la porte Si vous utilisez l appareil alors qu il est contaminé par des substances étrangères telles que des déchets alimentaires cela peut entraîner un dysfonctionnement de celui ci Lorsque vous sor...

Страница 57: ...ppareil ne doit jamais être utilisé à d autres fins que la cuisson Cela pourrait provoquer un incendie Ôtez le couvercle ou le bouchon des récipients fermés bouteille de thé aux herbes biberon bouteille de lait etc et percez un trou dans les aliments protégés d une coquille œufs noisettes etc à l aide d un couteau avant de les faire cuire Le non respect de cette consigne risque d entraîner des brû...

Страница 58: ...troit Attendez au moins 30 secondes avant de retirer le récipient du four Le non respect de cette consigne risque de provoquer un soudain débordement de son contenu et d entraîner des brûlures Ne montez pas sur l appareil et ne placez pas d objets ex linge couvercle de four bougies allumées cigarettes allumées plats produits chimiques objets métalliques etc dessus Des articles peuvent rester coinc...

Страница 59: ... incendie Prenez garde à ne pas vous blesser en nettoyant l appareil extérieur intérieur Les arêtes de celui ci peuvent se révéler très tranchantes Ne nettoyez pas l appareil à l aide d un nettoyeur vapeur Cela pourrait entraîner un phénomène de corrosion Veillez à maintenir l intérieur du four toujours propre Les particules d aliments ou les projections d huile adhérant aux parois risquent d abîm...

Страница 60: ...ion des grilles du four 23 Faire cuire de la pâte crue 23 Cuisson minutée 24 Cuisson minutée différée 25 Cuisson au gril 26 Utilisation de la fonction de cuisson facile 27 Utilisation de la fonction cuisson personnalisée 27 Utilisation de la fonction de maintien au chaud 28 Fonctions complémentaires ENTRETIEN DE VOTRE APPAREIL 31 31 Auto nettoyage 33 Nettoyage vapeur 34 Entretien et nettoyage du f...

Страница 61: ...e Samsung 1 800 726 7864 présentation de votre nouvelle cuisinière Porte du four Hauteur Surface vitrée Commutateur d éclairage automatique du four Eclairage du four Loquet de nettoyage automatique vapeur Joint Tableau de commande du four Reportez vous à la page 20 pour plus d informations Boutons de commande de la table Reportez vous à la page 16 pour plus d informations FE R400_XAC_DG68 00297A 0...

Страница 62: ...t refroidi Le foyer peut encore être chaud et vous risquez de vous brûler si vous touchez la surface vitrée avant qu elle n ait suffisamment refroidi Nettoyez immédiatement les éclaboussures de la table de cuisson afin d éviter qu elles ne s incrustent et soient difficiles à nettoyer Si un placard de rangement est installé directement au dessus de la table de cuisson assurez vous que les éléments ...

Страница 63: ...ume et s éteint alternativement afin de maintenir la chaleur préréglée même lorsque le réglage de température est élevé Pour plus d informations sur la sélection des ustensiles de cuisine appropriés reportez vous au chapitre Utilisation des ustensiles de cuisine appropriés page 18 Bouton de commande de l élément unique 1 Enfoncez le bouton 2 Tournez dans l une ou l autre direction selon le réglage...

Страница 64: ...erver tout le goût Les aliments doivent être déjà chauds La consommation d aliments crus ou froids placés sur la zone chauffe plat risque de vous rendre malade 1 Allumez la zone chauffe plat Appuyez sur la touche WARMING CENTER ON OFF 2 Sélectionnez la puissance de votre choix Appuyer une fois sur la touche WARMING CENTER LEVEL NIVEAU DE LA ZONE CHAUFFE PLAT permet de régler le niveau sur 1 Appuye...

Страница 65: ...pproprié permet d éviter de nombreux problèmes tels qu une cuisson inégale ou un temps de cuisson trop long Utiliser une casserole adaptée permet de réduire les temps de cuisson et de cuire uniformément les aliments Vérifiez que le fond du récipient est plat en faisant tourner une règle dessus APPROPRIÉ NON APPROPRIÉ Fond plat et côtés droits Couvercles hermétiques Le poids du manche ne fait pas i...

Страница 66: ...bon état et éviterez les dommages Si la casserole déborde durant la cuisson nettoyez immédiatement la zone de cuisson tant qu elle est chaude afin d éviter un nettoyage ultérieur plus ardu Nettoyez prudemment les éclaboussures à l aide d un chiffon sec Evitez qu elles ne restent trop longtemps sur la zone de cuisson ou la garniture de la surface de cuisson N utilisez pas de poudre à récurer ou de ...

Страница 67: ...a minuterie 8 SELF CLEAN Auto nettoyage appuyez sur cette touche pour sélectionner la fonction d auto nettoyage 9 STEAM CLEAN Nettoyage vapeur appuyez sur cette touche pour sélectionner la fonction de nettoyage vapeur 10 DELAY START Départ différé utilisez cette touche en même temps que les touches Bake Cuisson Cooking Time Temps de cuisson et Self Clean Auto nettoyage afin de régler le départ et ...

Страница 68: ...ppuyez sur la touche Set Start Réglage Départ RÉGLAGE DE LA MINUTERIE La minuterie émet un signal sonore une fois que le temps réglé est écoulé Elle ne permet pas de démarrer ou d arrêter les fonctions de cuisson La minuterie peut être utilisée en parallèle avec toutes les autres fonctions du four Comment régler la minuterie 1 Activez la minuterie Appuyez sur la touche Kitchen Timer On Off Activat...

Страница 69: ...Cuisson de gâteaux étagés Positionnez les moules à gâteaux le plus au centre possible du four pour assurer de meilleurs résultats Si vous utilisez plusieurs moules espacez les d au moins 1 à 1 Si vous utilisez plusieurs grilles placez les aux hauteurs 2 et 5 Positionnez les ustensiles conformément aux schémas ci dessous Fig 1 Fig 2 Avant d utiliser les grilles Le four est équipé de deux grilles Ch...

Страница 70: ... actuelle s affiche ex 375 F 2 Saisissez la température de votre choix ex 425 F à l aide du pavé numérique 3 Terminez votre saisie en appuyant la touche Set Start Réglage Départ CUISSON MINUTÉE Durant la cuisson minutée le four s allume immédiatement et fonctionne pendant la durée que vous avez sélectionnée À la fin du temps de cuisson le four s éteint automatiquement Vous pouvez utiliser la fonct...

Страница 71: ...es préalablement Vous pouvez utiliser la fonction de cuisson minutée différée uniquement avec une autre fonction de cuisson Bake cuisson Slow cook cuisson lente crispy pizza Vous pouvez régler la cuisson minutée différée avant de régler les autres options de cuisson L horloge doit être réglée sur l heure correcte Comment régler le four pour la cuisson minutée différée 1 Positionnez la ou les grill...

Страница 72: ...e qu ils soient brunis Puis tournez les et faites cuire l autre côté 3 Appuyez sur la touche Clear Off Effacer Arrêt une fois la cuisson terminée ou pour annuler la cuisson au gril Guide de cuisson au gril Les temps de cuisson au gril dépendent de la taille du poids de l épaisseur de la température de départ ainsi que de vos préférences de cuisson Ce guide se base sur des viandes sortant du réfrig...

Страница 73: ...e fournit automatiquement la température optimale pour le processus de levée Par conséquent aucun réglage de température n est nécessaire 3 Appuyez sur la touche Clear Off Effacer Arrêt dès que vous souhaitez désactiver la fonction de levée Si vous appuyez sur la touche Proof Levée lorsque la température du four est supérieure à 100 F Hot Chaud s affiche Pour assurer des résultats optimaux il est ...

Страница 74: ...Cook Cuisson personnalisee le nombre de fois correspondant au numéro sous lequel la recette préréglée est mémorisée Par exemple pour la recette préréglée 2 appuyez sur la touche Custom Cook Cuisson personnalisee deux fois Les recettes préréglées peuvent être mémorisées sous 1 2 ou 3 2 Démarrez la cuisson mémorisée Appuyez sur la touche Set Start Réglage Départ UTILISATION DE LA FONCTION DE MAINTIE...

Страница 75: ...ndes Par défaut l affichage indique F L affichage indiquant F Fahrenheit ou C Celsius clignote 2 Appuyer sur la touche 0 du pavé numérique permet de passer de F à C et inversement 3 Appuyez sur la touche Set Start Réglage Départ Réglage du thermostat Les températures sont réglées par défaut Lorsque vous utilisez votre four pour la première fois veillez à respecter les temps et températures de cuis...

Страница 76: ...Set Start Réglage Départ Verrouillage des commandes Cette fonction permet de verrouiller les touches de sorte à ce qu elles ne puissent être activées par accident Comment activer la fonction de verrouillage des commandes 1 Appuyez sur la touche Clear Off Effacer Arrêt pendant 3 secondes L affichage indiquera Loc Verrou et l icône d un verrou s affiche en continu au dessus de l heure si vous ne l a...

Страница 77: ...u pavé numérique 3 Appuyez sur la touche Set Start Réglage Départ La température affichée change dès que le four atteint 150 F 4 Appuyez simultanément sur les touches Clock Horloge et Kitchen Timer On Off Activation Désactivation de la minuterie pendant 3 secondes L affichage indique alors SAb Une fois que SAb est affiché les commandes du four n émettent plus de signal sonore et l affichage reste ...

Страница 78: ...le d auto nettoyage terminé Pour permettre à l air chaud ou à la vapeur de s échapper maintenez vous sur le côté du four lorsque vous ouvrez la porte Le four peut encore être TRES CHAUD Avant le cycle d auto nettoyage Durant le cycle d auto nettoyage nous vous conseillons d aérer votre cuisine en ouvrant une fenêtre ou en activant un ventilateur ou une hotte Retirez la grille métallique la lèchefr...

Страница 79: ...ouche Delay Start Départ différé 3 A l aide de la touche Clock Horloge et des touches numériques saisissez l heure de départ du cycle d auto nettoyage 4 Appuyez sur la touche Set Start Réglage Départ L affichage indique l heure de départ différé et l icône du verrou Le verrouillage entraîné par moteur de la porte s enclenche automatiquement 5 Le cycle d auto nettoyage démarre automatiquement à l h...

Страница 80: ...r des résultats optimaux il est préférable de démarrer cette fonction à four froid C est pourquoi nous vous conseillons d attendre que le four ait refroidi et que l indication Hot Chaud disparaisse de l affichage Après un cycle de nettoyage vapeur Soyez vigilant si vous ouvrez la porte avant que le nettoyage vapeur soit terminé L eau située dans la sole du four est très chaude Ouvrez la porte du f...

Страница 81: ... en inox 1 Secouez énergiquement la bouteille de nettoyant pour acier inoxydable ou de produit lustrant 2 Versez en une petite quantité sur un torchon ou du papier absorbant humide 3 Nettoyez une petite zone en frottant si possible l inox dans le sens du grain 4 Séchez et lustrez à l aide de papier absorbant ou d un torchon doux propre et sec 5 Répétez l opération si nécessaire N utilisez pas de t...

Страница 82: ... à maintenir en bon état et à protéger votre table de cuisson vitrée 1 Avant d utiliser votre table de cuisson pour la première fois nettoyez la à l aide d un nettoyant pour surface de cuisson en céramique Vous protégerez ainsi la surface et faciliterez son nettoyage 2 L usage quotidien d un nettoyant pour table de cuisson en céramique permet de préserver l aspect neuf de votre table de cuisson 3 ...

Страница 83: ...ettoyage du joint de la table de cuisson Pour nettoyer le joint situé sur le pourtour de la vitre appliquez un chiffon humide durant quelques minutes puis nettoyez à l aide d un nettoyant non abrasif Risques d endommagement définitif de la surface vitrée Les éclaboussures de sucre comme celles produites par les confitures le caramel le sucre les sirops ou les plastiques fondus peuvent faire appara...

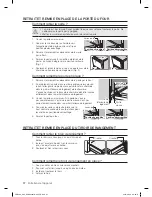
Страница 84: ...ntièrement dans la partie inférieure du logement 3 Ouvrez la porte au maximum Si la porte ne s ouvre pas complètement c est que la partie creuse n est pas correctement insérée dans la partie inférieure du logement 4 Poussez les verrous de la charnière vers le haut contre le cadre de la cavité du four pour les mettre en position de verrouillage 5 Fermez la porte du four RETRAIT ET REMISE EN PLACE D...

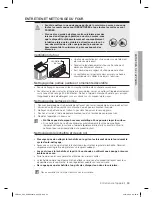
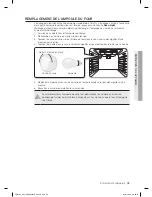
Страница 85: ...a hors tension 3 Tournez le cache en verre situé à l arrière du four dans le sens inverse des aiguilles d une montre pour le retirer 4 Tournez l ampoule dans le sens inverse des aiguilles d une montre pour la retirer de sa douille 5 Replacez l ampoule et son cache en verre en les tournant dans le sens des aiguilles d une montre 6 Branchez la cuisinière ou mettez la sous tension ATTENTION Avant de ...

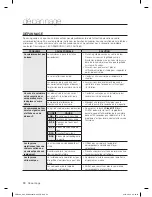
Страница 86: ...nière Contactez un maçon ou un installateur pour rendre la cuisinière accessible La moquette interfère avec les mouvements de la cuisinière Ménagez un espace suffisant pour que la cuisinière puisse être soulevée de la moquette La commande du four émet un signal sonore et affiche un code d erreur F Il s agit d un code d erreur de fonction CODE CAUSE SE Touche court circuitée E 27 Capteur du four co...

Страница 87: ...e grillé ou le disjoncteur a peut être lâché Assurez vous que le cordon d alimentation est branché sur une prise en état de marche et correctement mis à la terre Vérifiez le fusible et le disjoncteur Câblage incomplet Contactez le service technique Coupure de courant Vérifiez que les lampes de votre habitation s allument Au besoin demandez de l aide auprès de votre compagnie d électricité L éclair...

Страница 88: ...on La table de cuisson n est pas correctement nettoyée Les rayures ne peuvent être ôtées Les rayures légères s estomperont dans le temps au fil des nettoyages Des récipients à fond rugueux ont été en contact avec la table de cuisson ou bien des particules importantes comme du gros sel ou du sable se sont trouvées entre les récipients et la table de cuisson Afin d éviter les rayures respectez les p...

Страница 89: ... augmente proportionnellement au nombre de grilles ou à la quantité d aliments en cours de cuisson Odeur de brûlé ou d huile provenant de la ventilation Ce phénomène est tout à fait normal dans le cas d un four neuf L odeur disparaîtra au fil des utilisations Pour accélérer la disparition de ce phénomène programmez un cycle d auto nettoyage d une durée minimale de 3 heures Reportez vous au chapitr...

Страница 90: ...ctrique incorrecte tout réglage effectué par l acquéreur et non respect des instructions de fonctionnement d entretien et de respect de l environnement couvertes ou prescrites dans le présent carnet d entretien tout démontage ou toute réinstallation de l appareil tout problème résultant d une prolifération d insectes nuisibles d une surchauffe ou d un plat trop cuit par l utilisateur La présente g...

Страница 91: ...memo FE R400_XAC_DG68 00297A 06_CFR indd 44 2013 05 29 5 09 18 ...

Страница 92: ...English www samsung com ca_fr French www samsung com 1 800 SAMSUNG 726 7864 Veuillez noter que la garantie Samsung n inclut pas les deplacements du service apres vente pour expliquer le fonctionnement de l appareil corriger une installation non correcte ou executer des travaux de nettoyage ou d entretien reguliers FE R400_XAC_DG68 00297A 06_CFR indd 45 2013 05 29 5 09 18 ...

Отзывы: