background image

52

53

GB

GB

OK

2

1

3

3

5

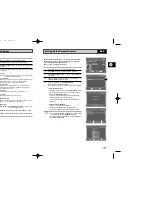
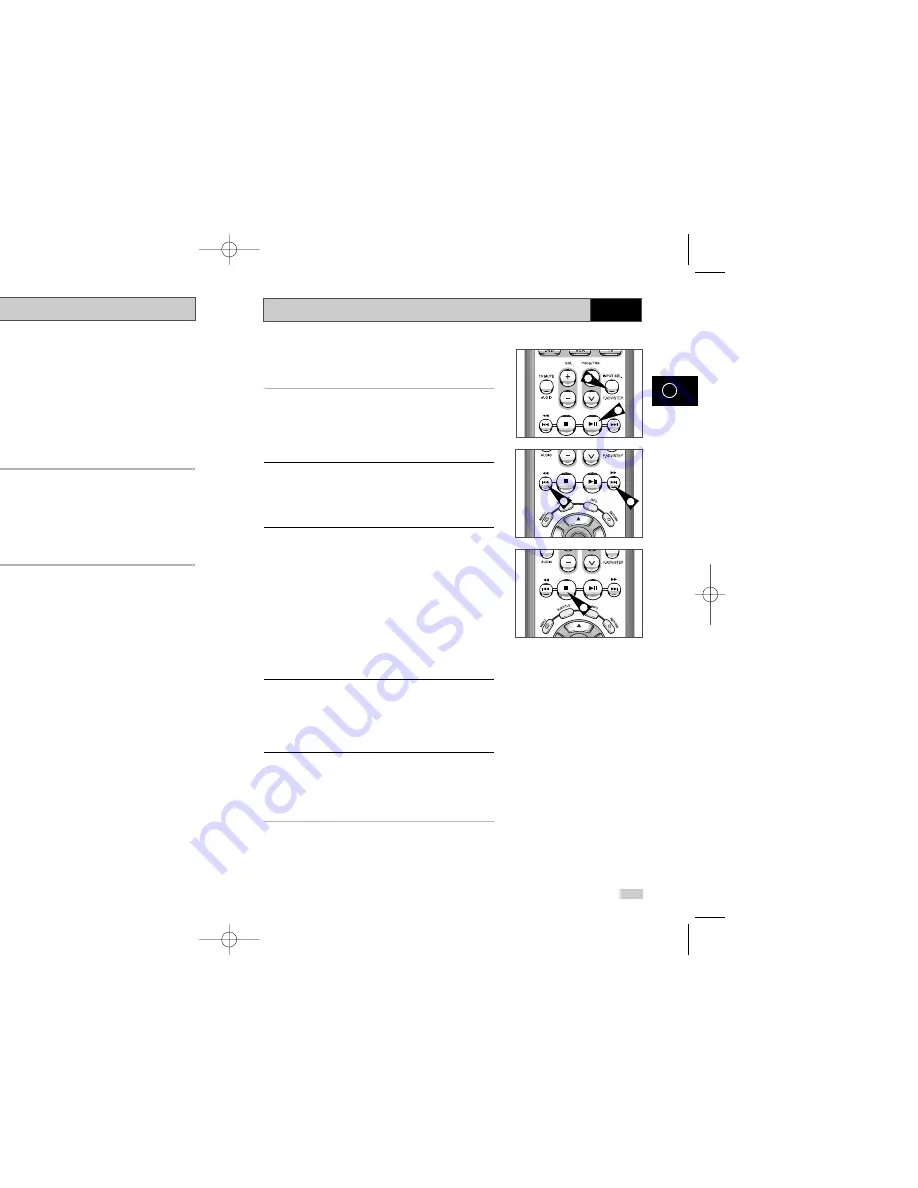
Special Playback Features

During DVD/CD playback you can select from the following
special playback options. To resume normal playback, press the

ll 

(Play/Still) button. 

1

Still

Press the 

ll 

(Play/Still) button on the remote control during

playback.

•  The picture will still and the audio will mute.
•  To resume playback, press the 

ll 

(Play/Still) button.

•  If the player is left in Still mode for 5 minutes, it will stop

automatically.

2

Frame Advance (Step)

While in playback mode, press the F.ADV/STEP button on the
remote control to advance one frame at a time.

•  Audio is muted during Frame Advance mode.
•  Press 

ll 

(Play/Still) to resume normal playback.

NOTE: Frame Advance operates only in the forward direction.

3

Skip Forward/Back

While a CD or DVD disc is in Play mode, press the Skip
Forward/Back (

❿❿

l

l

➛➛

) buttons on the remote control or front

panel to jump forward and backward through disc
chapters/tracks.

•  Skip Forward will jump to the next chapter/track.
•  Skip Back will jump to the beginning of the current 

chapter/track.

•  Press Skip Back again to jump to the beginning of the previous

chapter/track.

Search Forward/Back

While a disc is in Play mode, press and hold the Forward/Back 
(

❿❿

/

➛➛

) buttons on the remote control or front panel to visually

search forward/backward at 2X - 4X - 8X - 16X - 32X - 128X
speed. Press 

ll 

(Play/Still) button to resume normal speed.

4

Slow Motion

During playback, press the 

ll 

(Play/Still) button to Still the

image. Then use the Search Forward (

❿❿

) to play in slow motion

at variable speeds.

•  Each press increases the slow motion speed playback to 1/8, 

1/4 or 1/2 normal speed.

•  Audio is muted during slow motion playback.

5

Stop/Resume

•  Press the Stop button once to stop playback. To resume the

DVD/CD from the point where the disc stopped, press the 

ll

(Play/Still) button. 

•  Press the 

(Stop) button twice to completely stop playback.

The next time you press 

ll 

(Play/Still), the disc will start over

from the beginning. 

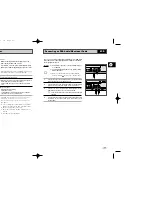
A/V Receiver Connections

To take full advantage of the movie theater experience that DVD
offers, you may want to connect your DVD-VCR to a complete
Surround Sound system, including an A/V Receiver and six
Surround Sound speakers.

Before You Begin...

•  

If your A/V receiver is equipped with a Dolby Digital
Decoder, you have the option to bypass the DVD-VCR’s built-
in Dolby Digital Decoder. Use the DIGITAL AUDIO OUT
connection below.

1

Digital Audio Out

Connect EITHER an optical cable OR a digital coaxial cable from
the DIGITAL AUDIO OUT jacks on the back panel of the DVD-
VCR to their corresponding Digital Audio Input jacks on your A/V
Receiver:

•  Optical 
•  Coaxial
•  Use whichever connection is available on your A/V Receiver.

LINE OUT     COMPONENT   VIDEO OUT

AUDIO

L                       Pr                  Y

R                    Pb

COAXIAL

DIGITAL AUDIO OUT

OPTICAL

S-VIDEO OUT

To Digital Audio Input of an A/V

Receiver with a Dolby Digital

Decoder

OR

DVD

DVD

 00282A DVD-V530/XSA-GB 3  8/9/03 6:23 PM  Page 52

Содержание DVD-V530

Страница 1: ......

Страница 2: ... Audio Video Input Cable 43 Using the Assemble Edit Function 44 Recording from Another VCR or Camcorder 44 Using the TV Buttons on the Remote Control 45 DVD FUNCTIONS Choosing a Connection 46 Setting Up the Language Features 47 Setting Up the Audio Options 48 Setting Up the Display Options 50 Setting Up the Parental Control 51 A V Receiver Connections 52 Special Playback Features 53 Adjusting the ...

Страница 3: ...se the DVD VCR to direct sunlight Do NOT expose the DVD VCR to any liquids Do NOT place any objects on the DVD VCR or remote control During a storm and or light ning unplug the DVD VCR from the mains socket and aerial If the remote control is not used for a long period of time remove the batteries and store it in a cool dry place The following illustrations represent precautions otection technolog...

Страница 4: ... analog signal with more distortion CD is recorded as a Digital Signal with better audio quality less distortion and less deterioration of audio quality over time 74 min 20 min 74 min 20 min Max Playing Time Characteristics Rear View of the DVD VCR LINE OUT COMPONENT VIDEO OUT AUDIO L Pr Y R Pb COAXIAL DIGITAL AUDIO OUT OPTICAL S VIDEO OUT RF ANTENNA INPUT RF OUT TO TV LINE IN 1 LINE OUT TO TV COM...

Страница 5: ...s active 6 A DVD with a DTS soundtrack is loaded 7 The Hi Fi track of a VHS tape is playing The current TV show or video is broadcast in Stereo 8 A Timer Recording is programmed or in progress 9 GB 1 STANDBY ON 2 SHUTTLE 3 CLEAR 4 DVD 5 TV MUTE AUDIO 6 VOLUME 7 REWIND SKIP BACK 8 STOP 9 SUBTITLE 10 MENU 11 UP 12 LEFT 13 DOWN 14 SPEED 15 RECORD 16 TIMER 17 ANGLE IPC 18 OPEN CLOSE 19 0 9 20 TV VCR F...

Страница 6: ...sion using the RCA cable if the appropriate input is available on the television You thus Obtain better quality sound and pictures Simplify the setting up procedure of your DVD VCR Regardless of the type of connection chosen you must always connect the coaxial cable supplied Otherwise no picture will be visible on the screen when the DVD VCR is switched off Make sure that both the television and t...

Страница 7: ...y pressing the or buttons 4 Press OK to store the language selected Result A message appears 5 Press OK button 6 Press OK to start the auto scanning The number of stations automatically stored by the VCR depends on the number of stations that it has found Auto preset can be performed by pressing STOP on the VCR continuously for 5 seconds or more with no tape inserted Receiver or Other Equipment 2 ...

Страница 8: ...operation of 46 65 pages press the DVD button on the remote control to select and watch DVD 1 STANDBY ON 1 2 3 4 DVD VCR tune your television for the DVD VCR only if you are a RCA cable To view pictures from your DVD VCR when a RCA cable is used the television must be set to the audio video mode AV tch on the television tch on the DVD VCR by pressing STANDBY ON on the front he DVD VCR or STANDBY O...

Страница 9: ... Do not forget to reset the time when you change clocks from winter to summer time and vice versa 1 After pressing the MENU press the OK or Result The Setup menu is displayed 2 Press the corresponding buttons to select the Clock option 3 Press the OK or to select this option Result The Clock Set menu is displayed 4 Press or to select the hour minutes day month and year Result The option selected h...

Страница 10: ... first station found is displayed and stored The DVD VCR then searches for the second station and so on When the automatic scanning procedure has finished the DVD VCR switches automatically to programme 1 The number of stations automatically stored by the DVD VCR depends on the number of stations that it has found 7 If you wish to cancel the auto scanning before the end press the MENU button to ex...

Страница 11: ... the or buttons to select a programme number as red s the button to preset the station lt The MANUAL TUNING menu is displayed s the or buttons to start scanning channel lt The frequency band is scanned and the first station found is displayed s the or buttons until the NAME is selected station name is set automatically from the broadcast signal hange the programme s name press the button lt The fi...

Страница 12: ...quency in which information is displayed on the screen 1 After pressing the MENU press the OK or Result The Setup menu is displayed 2 Press the corresponding buttons to select the Install option 3 Press the OK or to select this option Result The Install menu is displayed 4 Press the or buttons until the VCR Output CH option is selected 5 Select the required output channel CH21 CH69 by pressing the...

Страница 13: ...NICAM Stereo NICAM Mono and Bilingual transmission in another language NICAM programmes are always accompanied by a standard mono sound broadcast and you can select the desired sound Please refer to page 40 1 After pressing the MENU press the OK or Result The Setup menu is displayed 2 Press the corresponding buttons to select the User Set option 3 Press the OK or to select this option Result The U...

Страница 14: ...tically according to your own es ring playback press the MENU button on the remote control sult The Setup menu is displayed ess the OK or sult The Setup menu is displayed ess the corresponding buttons to select the er Set option ess the OK or buttons to select this option sult The User Set menu is displayed ess the corresponding or buttons until the IPC option selected ess the OK or buttons to sel...

Страница 15: ...mpletion press RETURN twice to exit the menu To watch S VHS tapes set the S VHS mode to On in the VCR Setup Off On Language English User Set Auto Power Off Off Screen Messages On Install Repeat Play Off VCR Setup Tape Select E180 S VHS Off Off On te Type D VCR displays most information both on the DVD VCR levision hoose to display or hide this information on the screen except for the SEARCH Progra...

Страница 16: ...on to be recorded using the PROG or buttons or The LINE1 LINE2 source using the INPUT SEL button for a satellite tuner or external video source Result The station number is displayed and the programme can be seen on the television 5 Select the recording speed by pressing the SPEED button as many times as required see page 30 6 Hold REC down for a while to start recording Result The record indicato...

Страница 17: ...ore presetting your DVD VCR Switch on both the television and your DVD VCR Check that the date and time are correct Insert the cassette on which the programme is to be recorded safety tab intact Up to six programmes can be preset 1 Press the TIMER button Result The TIMER METHOD is displayed 2 Press the corresponding or buttons until the G Code option is selected 3 Press the button to select G Code...

Страница 18: ...recording the DVD VCR compares the timer duration with the remaining time on the cassette Auto Tape Speed Select The DVD VCR s Auto Tape Speed Select function compares the duration of the timer recording to the actual recording time remaining on the tape loaded If there is insufficient tape to complete a timer recording in AUTO mode the DVD VCR automatically switches to LP mode to record the whole...

Страница 19: ...picture is clear and stable Result The tracking bar appears The image is adjusted The tracking bar disappears when you release the button ecording Recording heck your preset recordings When you have finished presetting the DVD VCR If you have forgotten which programmes will be recorded ess TIMER on the remote control sult The timer selection is displayed ess the OK button to select Standard option...

Страница 20: ...kers and AV outputs The following options are Description Used to listen to the sound on the left Hi Fi channel Used to listen to the sound on the right Hi Fi channel Used to listen to the mixed sound of the Hi Fi and normal channels Used to listen to the sound on the normal mono channel Used to listen to Hi Fi stereo sound on the left and right channels When playing back tapes recorded in Hi Fi t...

Страница 21: ...press 20 0 20 5 To cancel an Index search simply press the II or button INTRO SCAN INDEX SEARCH 6 3 3 you record a cassette on this DVD VCR an index is cally marked on the tape when recording starts h function allows you to fast forward or rewind to a ndex and start playback from that point Depending on ion selected the indexes are numbered as follows This DVD VCR uses a standard indexing system V...

Страница 22: ...tors on the other system VCR camcorder or Hi Fi sound system ter counter Indicates the elapsed time in the play and record modes hours minutes and seconds Is reset when a cassette is inserted in the DVD VCR Allows you to find the beginning of a sequence easily If the remaining time is to be calculated correctly you must indicate the type of cassette being used sert a cassette in your DVD VCR set t...

Страница 23: ... 2 2 5 5 4 4 3 6 Edit Function her VCR or Camcorder ion allows you to start a new recording at a specific on the cassette while maintaining a very smooth scene sert the cassette to be edited in your DVD VCR ess the ll button to start playback hen you reach the position from which you wish to start the w recording press the ll button ess the F ADV STEP button again as often as cessary to advance fr...

Страница 24: ......

Страница 25: ......

Страница 26: ...to make the SETUP menu disappear or return to menu screen during set up Press RETURN or button Manufactured under license from Dolby Laboratories Dolby and the double D symbol are trademarks of Dolby Laboratories DTS and DTS Digital Out are trademarks of Digital Theater Systems Inc DTS Dolby Digital Out MPEG 2 Digital Out PCM Down Sampling Setup Setup Setup Display Setup uage Features h the unit i...

Страница 27: ...screen during set up Press RETURN or button If you have forgotten your password see Forget Password in the Troubleshooting Guide DVD Setup Setup Setup Display Setup Use Password Parental Setup No Yes No Yes y Options th the unit in Stop mode press the MENU button lect DVD using buttons then OK or button lect Display Setup using buttons then press the OK button e the buttons to select the desired i...

Страница 28: ...ward Back buttons on the remote control or front panel to visually search forward backward at 2X 4X 8X 16X 32X 128X speed Press ll Play Still button to resume normal speed 4 Slow Motion During playback press the ll Play Still button to Still the image Then use the Search Forward to play in slow motion at variable speeds Each press increases the slow motion speed playback to 1 8 1 4 or 1 2 normal s...

Страница 29: ...VD title in 4 3 aspect ratio Screen Fit The top and bottom of the screen are cut off and the full screen appears The picture would look vertically stretched Zoom Fit The top bottom left and right of the screen are cut off and the central portion of the screen is enlarged This function may behave differently depending on the type of disc 55 GB Ratio EZ View pressed repeatedly depending on the scree...

Страница 30: ...g play press the INFO button on the remote se the buttons to select the desired item se the buttons to make the desired setup You may use the number buttons of the remote control to irectly access a title chapter or to start the playback from the esired time make the screen disappear press the INFO button again To access the desired title when there is more than one in the disc For example if ther...

Страница 31: ...e REPEAT button on the remote eat screen appears ct Chapter Title or A B using the buttons Press the REPEAT button Select A B on screen with the uttons Press OK at the point where you want the repeat play to start A The B is automatically highlighted Press OK at the point where you want the repeat play to stop B o terminate the function press the CLEAR button A B REPEAT does not allow you to set p...

Страница 32: ...nly music continuously and press it once again to release PROGRAM RANDOM playback cannot be used if the disc contains more than two types of file extensions MP3 WMA Play Function Program Random playback PROGRAM RANDOM tion re lets you mark sections of a DVD or VCD MENU OFF you can quickly find them at a later time ring play press the MARK button on the remote e Mark icons will be displayed e the b...

Страница 33: ...01 Track 05 06 07 08 09 10 11 12 13 14 15 16 Program order 01 02 03 04 CLEAR PROGRAM RANDOM format ble with Microsoft s DOS and Windows and with Apple s characters and place mp3 wma as the file omposing your title make sure that you use 8 characters or pecial characters including s when recording MP3 files e of compression decompression you choose Getting audio that is conversion to MP3 format of ...

Страница 34: ... the DISC MENU button tton on the remote controller is pressed for 60 seconds the will disappear and the selected item will be played en the disc tray ad the disc on the tray ad the disc with the labeled side up se the tray he tray closes and you should get a screen that looks like he one below or buttons on the remote controller to select the ou want to view and then press the OK button Press the...

Страница 35: ...hen tuning in your TV to the DVD VCR 1 Remove the aerial input plug from the socket marked aerial TV does not find the Screen symbol on the rear of the DVD VCR or the pattern when found suffers 2 Carry out the instructions Tuning Your Television for the DVD from interference it may be due to the VCR see page 14 DVD VCR output channel clashing with 3 Carry out the instructions Setting the DVD VCR o...

Страница 36: ...ngles available at the moment a title or chapter number or search time that is s selected in the Setup Menu may not work not encoded with the corresponding function fixed on your DVDs selected the correct Digital Output in the Audio m a cold start with no disc in the unit Press the s simultaneously on the front panel for five off and on the DVD VCR by pressing on The Parental Mode is now unlocked ...

Отзывы: