Samsung DVD-R100E Скачать руководство пользователя страница 32

English -

31

S

ystem Setup

Allow you to setup the Audio device and sound status
depending on the audio system in use.

1

With the unit in Stop mode, press the
MENU button on the remote.

2

Select “Setup” using 

†…

buttons, then

press the 

√ 

or OK button.

3

Select “Audio” using 

†…

buttons, then

press the 

√ 

or OK button.

Audio setup menu will be displayed.

4

Use 

†…

buttons to select the desired

sub menu and press the OK or 

√ 

button.

5

Use the 

†…

buttons to select the

desired item. Then press the 

√ 

or OK

button.

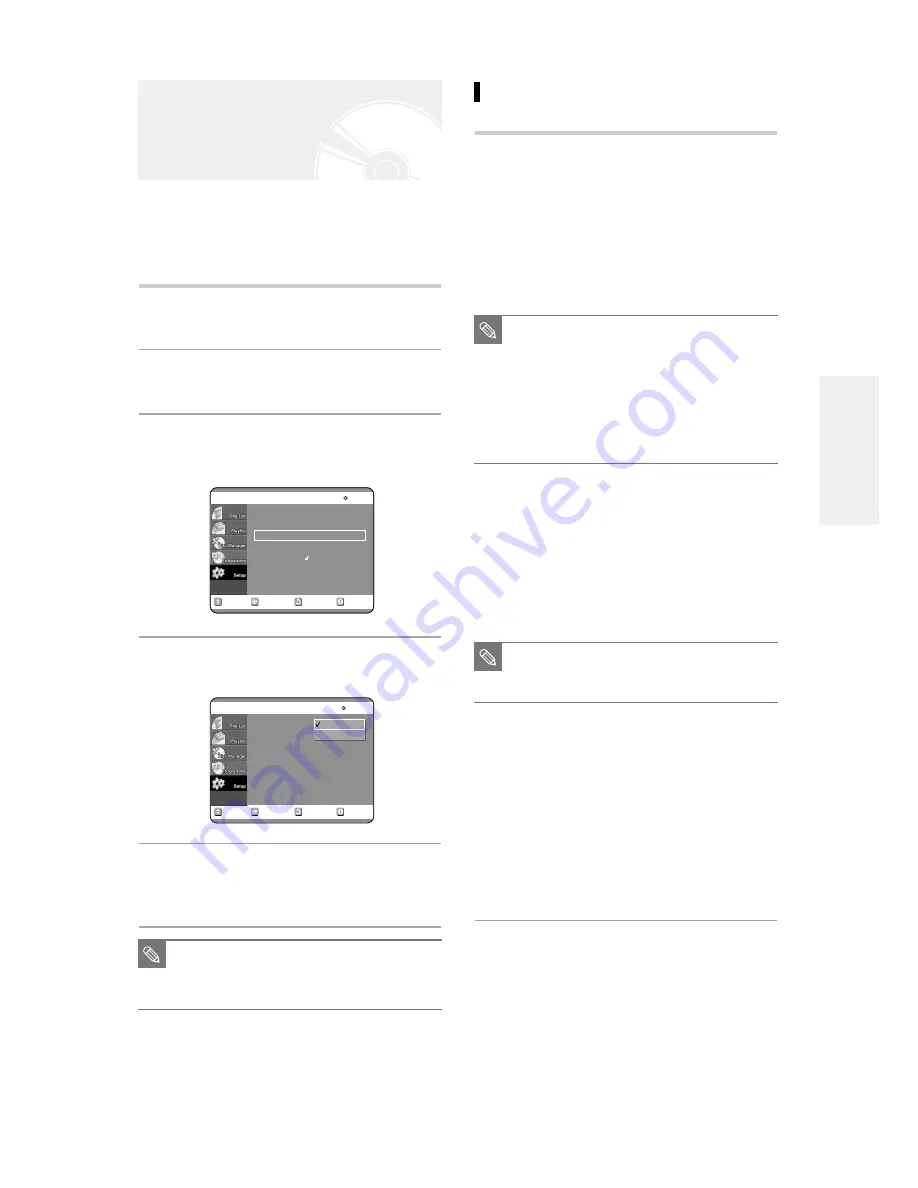
Setting Up the Audio
Options

RETURN

OK

MOVE

EXIT

Setup

DVD-RAM(VR)

System

Language

Audio

Video

Parental Control

RETURN

OK

MOVE

EXIT

Audio

DVD-RAM(VR)

Digital Output

: PCM

DTS

: Off

Dynamic Compression : On

PCM

Bitstream

■ 

Press the RETURN or 

œ

button to return

to the previous menu. Press the MENU
button to exit the menu.

NOTE

Audio Options

Digital Output

1. PCM :

Select this when you have no equipment that
can decode Dolby Digital (or MPEG-2) 
signal. When you play Dolby Digital (or
MPEG-2) sound track, the digital output are 
converted to PCM Stereo.

2. Bitstream : Output Dolby Digital (or MPEG-2) audio as

bitstream. Select this when your AV 
receiver or AV amplifier have Dolby Digital
(or MPEG-2) Decoder.

■ 

Digital output setting is equally applied to
both Dolby Digital and MPEG-2 audio.
LPCM sound track is always outputted as
PCM. It has no relation with Digital Output
setting.

■ 

Be sure to select the correct Digital
Output or you will hear no sound or loud
noise.

NOTE

DTS

1. Off :

Doesn’t output DTS signal.
Select this when your AV receiver or AV 
amplifier does not have DTS decoder.

2. On :

Outputs DTS Bitstream via digital output
when you play DTS track.
Select this only when your AV receiver (or
AV amplifier) have DTS decoder.

Dynamic Compression

Dynamic Range Compression : This is only active when
a Dolby Digital signal is detected.

- On  : When the Movie-soundtracks are played at low

volume or from smaller speakers, the system
can apply appropriate compression to make 
low-level content more intelligible and prevent
dramatic passages from getting too loud.

- Off : You can enjoy the movie with standard Dynamic

Range.

■ 

When DTS soundtrack is played, sound
does not output from Analogue Audio
Output.

NOTE

Содержание DVD-R100E

Страница 1: ...Haszn lati tmutat Instruction Manual DVD R100E English Magyar...

Страница 2: ...AK68 00427W 00...

Страница 3: ...nder this license for product features or functions that do not conform to the ISO IEC 11172 3 or ISO IEC 13818 3 WARNING DO NOT CONNECT EITHER WIRE TO THE EARTH TERMINAL WHICH IS MARKED WITH THE LETT...

Страница 4: ...operate normally or has been dropped Handling Cautions Before connecting other components to this recorder be sure to turn them all off Do not move the recorder while a disc is being played or the di...

Страница 5: ...editing can not be performed after finalisation If you want to record the disc in VR Mode and then record in V Mode be sure to execute Format Be careful when executing Format because all the recorded...

Страница 6: ...ot be played with this product For more information on recording a DVD consult your DVD RAM DVD RW DVD R manufacturer Use of poor quality DVD RAM DVD RW DVD R discs may cause following unexpected prob...

Страница 7: ...S video output jack 17 Step 4 Other type of connecting the Audio output cable 18 Method 1 Connecting to your TV 18 Method 2 Connecting to a stereo amplifier with analog output jacks 19 Method 3 Connec...

Страница 8: ...ation Troubleshooting 84 Specifications 88 Warranty 89 Recor Recording ding Before Recording 34 Recordable discs 34 Recording Formats 35 Recording Mode 35 Unrecordable pictures 35 About INFO Key 36 Ch...

Страница 9: ...ngth EP mode yields the most recording time LP SP modes provide less recording time with higher quality recording and XP mode gives you the highest quality recording There s also the FR Flexible Recor...

Страница 10: ...or CD RW This involves a function available MP3 in a data CD CD R or CD RW on which MP3 is recorded This involves a case where a Caution function does not operate or settings may be cancelled This in...

Страница 11: ...cessary First finish all editing and recording operations then finalise the disc When using a DVD RW disc in VR Mode Although finalising is generally unnecessary when playing the disc on a VR Mode com...

Страница 12: ...Stops disc playback 8 PLAY PAUSE Plays a disc or pauses playback 9 SEARCH Goes to the next title chapter track or goes back to the previous title chapter track 10 RECORD MODE Selects the recording mod...

Страница 13: ...ut of external equipment using a Video or S Video cable 4 AV1 TV OUTPUT SCART 5 AV2 EXT INPUT SCART 6 AV3 IN AUDIO VIDEO Connects the output of external equipment using an audio video or S Video cable...

Страница 14: ...button will play one frame forward 25 PLAY LIST TITLE MENU Button Use this to return to the Title menu or to view the recorded files list 26 ANYKEY Button Use this to view the status of the disc that...

Страница 15: ...al components and required initial setting modes Step 1 Unpacking Step 2 Connecting SCART Cable Step 3 Other type of connecting theVideo output cable Step 4 Other type of connecting the Audio output c...

Страница 16: ...ir antenna that has 300 ohm twin flat leads use an external antenna connector 300 75 ohm adaptor not supplied to connect the antenna to the DVD Recorder If you have two separate antennas one VHF and t...

Страница 17: ...x 6 Setup AV1 Output using on screen menu Refer to page 29 4 5 1 2 3 external device VCR satellite receiver cable box Method 1 Antenna DVD Recorder TV You can connect your DVD Recorder to the televisi...

Страница 18: ...put jack S Video Output Modes S Video output are available only if your TV supports S Video input If S Video output does not work check the TV connections and the TV input selection settings For infor...

Страница 19: ...ype of connecting the Audio output cable Manufactured under license from Dolby Laboratories Dolby and the double D symbol are trademarks of Dolby Laboratories DTS and DTS Digital Out are trademarks of...

Страница 20: ...or DTS decoder and a digital input jack use this connection To enjoy Dolby Digital MPEG 2 or DTS sound you will set up the audio settings See page 31 Method 2 Connecting to a stereo amplifier with ana...

Страница 21: ...r to other external devices and view or record their outputs Method 1 Connecting a VCR Set Top Box STB or DVD player to the AV3 Input jacks Method 2 Connecting a Camcorder to the AV4 Input jacks Metho...

Страница 22: ...he polarity of the batteries Dry Cell Check if the batteries are drained Check if remote sensor is blocked by obstacles Check if there is any fluorescent lighting nearby Dispose of batteries according...

Страница 23: ...CGE TV STANDBY ON 52 CONTINENTAL EDISON TV STANDBY ON 75 DAEWOO TV STANDBY ON 19 20 23 24 25 26 27 28 29 30 31 32 33 34 EMESON TV STANDBY ON 64 FERGUSON TV STANDBY ON 73 FINLUX TV STANDBY ON 06 49 57...

Страница 24: ...ight to cycle through the menu options 3 OK Button Press this button on the remote control to confirm any new settings 4 RETURN Button Press this button on the remote control to return to the last MEN...

Страница 25: ...mber of stations that it has found 7 After Auto Channel Scan is completed Auto Clock Setting will be started automatically in 10 seconds If you want to start Auto Clock Setting immediately press OK bu...

Страница 26: ...RAM VR System Language Audio Video Parental Control RETURN OK MOVE EXIT System DVD RAM VR System Language Audio Video Parental Control RETURN OK MOVE EXIT System DVD RAM VR Clock Set Install CM Skip...

Страница 27: ...the selection bar to Install then press OK button to select 5 Move the selection arrow to Auto Setup then press button to select from the following options Auto Setup RETURN OK MOVE EXIT Setup DVD RA...

Страница 28: ...ap at PR2 then press OK button or button at PR5 You can add preset channel that Auto Channel Search missed And you can delete a channel you wish to remove 1 With the unit in Stop mode press the MENU b...

Страница 29: ...kipped and then the next section is played RETURN OK MOVE EXIT System DVD RAM VR Clock Set Install CM Skip Time 15 Sec AV1 Output Video NICAM On RETURN OK MOVE EXIT System DVD RAM VR Clock Set Install...

Страница 30: ...MOVE EXIT Setup DVD RAM VR System Language Audio Video Parental Control RETURN OK MOVE EXIT System DVD RAM VR Clock Set Install CM Skip Time 15 Sec AV 1 Output Video NICAM On If you connect external...

Страница 31: ...Select Setup using the buttons then press the or OK button You can t use the Setup functions during disc playback 3 Select Language using the buttons then press the or OK button Language setup menu wi...

Страница 32: ...l output are converted to PCM Stereo 2 Bitstream Output Dolby Digital or MPEG 2 audio as bitstream Select this when your AV receiver or AV amplifier have Dolby Digital or MPEG 2 Decoder Digital output...

Страница 33: ...ding on the type of television you have you may want to adjust the screen setting aspect ratio 4 3 Letter Box Select when you want to see the total 16 9 ratio screen DVD sup plies even though you have...

Страница 34: ...sing buttons then press the or OK button For example if you select up to Level 6 discs that contain Level 7 8 will not play Larger number indicates the program is more intended to adult use only Press...

Страница 35: ...d List 46 This section shows various DVD recording methods Disc Types Recording Recording Finalising Additional Recording in format Device Samsung Recorder DVD RAM VR Mode Samsung X Recordable Other C...

Страница 36: ...want to format in either VR Mode or Video Mode refer to Formatting a Disc on page 82 DVD R Formatting DVD is unnecessary and only Video Mode Recording is supported DVD RW Video mode R This mode automa...

Страница 37: ...ce Disc Information When recording on an used disc make sure that there is enough disc space for recording With DVD RWs or DVD RAMs you can free up disc space by erasing titles Press the INFO button T...

Страница 38: ...t status of the disc and progress of recording Press the INFO button and the information about the disc will appear Press the INFO button once again Then you can check the information about the title...

Страница 39: ...isc is used whether to format or not will be asked first See page 35 If an unused DVD RW disc is used whether to initialize or not will be asked first See page 35 3 Press the INPUT button to select th...

Страница 40: ...recording can be done at the same time During the operation of Time Slip playback related buttons control the PIP window On the time slip screen you can play scan or perform other operations for the r...

Страница 41: ...Then you can check the information about the title under recording 30 seconds before the recording is done the message which asks whether you want the recorder to power off when the recording is done...

Страница 42: ...ected 2 Check the remaining time of the disc 3 Check the date and time are correct Make sure the Clock has been set Setup System Setting before you proceed with a timer recording 1 Press the MENU butt...

Страница 43: ...ecording ends within 2 minutes before the start time of the next recording You can make the Timer Recording up to 12 programmes NOTE Editing a Standard Timer Follow these directions to edit the timer...

Страница 44: ...The menu screen will disappear 5 Press the buttons to select Edit and then press the OK button The Timer Recording screen is displayed Edit the items you want to modify See the Making a Standard Time...

Страница 45: ...e numeric buttons to enter the code of the programme that you wish to record in your television magazine If you wish to correct the ShowView code that you are entering Press the button until the digit...

Страница 46: ...s to select ShowView Extended ShowView Extended RETURN OK MOVE EXIT Programme DVD RAM VR ShowView Record Standard Timer ShowView Extended Off RETURN OK MOVE EXIT Programme DVD RAM VR ShowView Record S...

Страница 47: ...t want to see the programmed being recorded on TV To stop Recording Press the STOP button and the message that asks whether to end recording or not will be displayed When Yes is selected Recording sto...

Страница 48: ...MP3 59 Playing a Picture CD 62 Playing the Title List 63 This section introduces basic functions of playback and playback by disc type Disc Types Disc Logo Recorded content Disc Shape Max Playing Tim...

Страница 49: ...is written in detail on the box Please refer to this if necessary Do not allow the disc to become dirty or scratched Fingerprints dirt dust scratch es or deposits of cigarette smoke on the recording s...

Страница 50: ...ENU button to move to the title menu of the disc Use this button if the disc contains more than one title Some type of discs may not support the title menu function For DVD RAM RW R discs 1 Press theT...

Страница 51: ...VR mode If you press the button it moves to the next chapter or track or marker DVD RAM DVD RW VR mode Slow Motion Play 1 In pause or step mode press the SEARCH button on the remote control If you pre...

Страница 52: ...to a desired time to help you find a scene 1 Press the ANYKEY button during playback 2 Press the buttons to select the Time 3 Enter the time in the sequence of hours minutes and seconds using the num...

Страница 53: ...ss the REPEAT button or buttons to select the Track or Disc you want to play repeatedly Press the OK button For MP3 discs you can select Track Folder or Disc DVD RAM DVD RW VR mode unfi nalised DVD R...

Страница 54: ...urn to normal playback To return to normal playback 4 Press the REPEAT button repeatedly to select Off Press the CANCEL button to return to normal playback Using the REPEA Using the REPEAT A B b T A B...

Страница 55: ...button or buttons to select the desired subtitle language Using the ANYKEY b Using the ANYKEY button utton 1 Press the ANYKEY button during playback 2 Press the buttons to select Subtitle and press t...

Страница 56: ...e you can select the Angle function This is only available during playback 1 Press the ANYKEY button during play back 2 Press the buttons to select Angle and press the buttons or number buttons to sel...

Страница 57: ...while playing a DVD disc 1 Press the PIP button The current disc is played in the PIP screen located at the bottom right of the screen To view the current status and progress of playback Press the IN...

Страница 58: ...er 1 is displayed and the scene is memorized 3 Press the button to move to the next position 4 Press the OK button when the desired scene appears The number 2 is displayed and the scene is memorized R...

Страница 59: ...CEL MOVE PLAY Marker N 2 01 02 1 Press the MARKER button 2 Press the buttons to select a bookmarked scene 3 Press the OK or button to start playing from the selected scene If you press the NEXT SKIP b...

Страница 60: ...t to hear and then press the OK button or button 2 2 Press the number buttons to select the track song and the track song is played automatically 1 Repeat mode Repeat off Repeat Track Repeat Disc 2 Cu...

Страница 61: ...song you want to hear and then press the OK button or button 2 2 Press the number buttons to select the track song and the track song is played automatically 1 Repeat mode Repeat off Repeat Track Rep...

Страница 62: ...l the play option is changed Intro The first 10 seconds of each track will be played If you want to listen to the music that you have selected press the OK button or button The play option will be cha...

Страница 63: ...CD with JPEG files and MP3 files mixed CD 1 When mixed CD is played a menu will be shown in order to have you choose which contents either JPEG or MP3 you want to play 1 1 If you want to play MP3 file...

Страница 64: ...g the MENU button utton 1 Press the MENU button RETURN OK MOVE EXIT Title List DVD RAM VR Title List RETURN OK MOVE EXIT Title List DVD RAM VR No Title Length Edit 19 APR 2004 12 00 PR12 19 APR 2004 1...

Страница 65: ...gth Edit 19 APR 2004 12 00 PR12 19 APR 2004 12 00 SP 01 19 APR 2004 1 00 00 21 02 19 APR 2004 1 00 00 03 03 20 APR 2004 2 00 00 15 04 20 APR 2004 2 00 00 16 05 21 APR 2004 1 00 06 32 06 21 APR 2004 1...

Страница 66: ...Since only the information necessary for playing a desired scene is included in a playlist even if that playlist is deleted the original stream will not be deleted If recording or editing could have n...

Страница 67: ...2 19 APR 2004 12 00 SP 01 19 APR 2004 1 00 00 21 02 19 APR 2004 1 00 00 03 03 20 APR 2004 2 00 00 15 04 20 APR 2004 2 00 00 16 05 21 APR 2004 1 00 06 32 06 21 APR 2004 1 00 08 16 RETURN OK MOVE EXIT T...

Страница 68: ...ma 19 APR 2004 12 00 SP 01 Drama 00 00 21 02 Music 00 00 03 03 Sports 00 00 15 04 Movie 00 00 16 05 Sports A1 00 06 32 06 Edu 1 00 08 16 RETURN OK MOVE EXIT Title List DVD RAM VR No Title Length Edit...

Страница 69: ...rts A1 00 06 32 06 Edu 1 00 08 16 RETURN OK MOVE EXIT Title List DVD RAM VR No Title Length Edit Sports A1 19 APR 2004 12 00 SP 01 Drama 00 00 21 02 Music 00 00 03 03 Sports 00 00 15 04 Movie 00 00 16...

Страница 70: ...le List No 05 Start 00 00 06 End 00 00 00 RETURN OK MOVE EXIT Edit Title List DVD RAM VR Sports A1 21 APR 2004 11 50 00 10 15 Start End Delete Return Title List No 05 Start 00 00 06 End 00 10 10 RETUR...

Страница 71: ...are displayed on the Start window The yellow colored selection bar moves to the End item Select the starting point of the section from which you want to create a new scene using the playback related...

Страница 72: ...lect the title you want to edit from the Playlist and then press the OK or button The Edit Playlist menu is displayed Play Rename Edit Screen Copy Delete RETURN OK MOVE EXIT Edit Playlist DVD RAM VR N...

Страница 73: ...NU button when the disc has stopped Press the buttons to select Playlist and then press the OK or button Press the buttons to select Edit Playlist and then press the OK or button 2 Press the buttons t...

Страница 74: ...6 43 01 Science 00 00 17 02 Sky 00 00 06 03 Dolphin 00 00 06 04 Natural 00 00 37 Play Rename Edit Scene Copy Delete RETURN OK MOVE EXIT Edit Playlist DVD RAM VR No Title Length Edit Science 7 Scenes 2...

Страница 75: ...is displayed 6 Press the OK button at the start point of the scene The image and starting point time are displayed on the Start window Select the starting or ending point of the section you want to mo...

Страница 76: ...d Delete 01 00 00 26 02 00 00 07 03 00 00 04 04 00 00 03 05 00 00 11 06 00 00 04 RETURN OK MOVE EXIT Edit Scene DVD RAM VR Scene No 3 7 Playlist No 3 Play Modify Move Add Delete 01 00 00 26 02 00 00 0...

Страница 77: ...LIST button utton 1 Press the PLAY LIST button The Edit Playlist screen is displayed Using the MENU button Press the MENU button When the disc has stopped Press the buttons to select Playlist and the...

Страница 78: ...URN OK MOVE EXIT Edit Playlist DVD RAM VR No Title Length Edit Science 7 Scenes 23 APR 2004 06 43 01 Science 00 00 17 02 Sky 00 00 06 03 Dolphin 00 00 06 04 Natural 00 00 37 05 Dolphin 00 00 06 RETURN...

Страница 79: ...VR Disc Name Disc Protection Not protected Disc Format Delete All Title Lists Cartridge Protection Info A B C D E a b c d e f g h i j k l m n o p q r s t u z n w x y F G H I J K L M N O P Q R S T U V...

Страница 80: ...le Lists Cartridge Protection Info Not Protected Portected Formatting a Disc Use these instructions to format a disc The cartridge write protect tab should be set to the unprotect position The disc pr...

Страница 81: ...o select Yes and then press the OK button The disc is formatted DVD VR and DVD V are defined according to their recording format Delete All Title Lists 1 Press the MENU button with the disc stopped DV...

Страница 82: ...ecord titles onto a DVD RW DVD R disc with your DVD recorder it needs to be finalised before it can be played back on external devices 1 Press the MENU button with the disc stopped 2 Press the buttons...

Страница 83: ...t difference Finalising time may be different depending on the amount of data recorded on the disc Data on the disc will be damaged if the recorder is powered off during finalise process NOTE Unfinali...

Страница 84: ...nalised or unfinalised in VR mode NOTE Finalise Unfinalise Mark DVD Video RW DVD RW V Operation Same as DVD Video Additional recording protection and deletion are possible Finalise Unfinalise Mark DVD...

Страница 85: ...n Troubleshooting Troubleshooting 84 Specification 88 Warranty 89 The DVD recorder requires some time to initialize and the input will be displayed for approx 10 seconds after it is turned on Checkpoi...

Страница 86: ...lay mode settings are different from the settings configured in the Settings menu The aspect ratio is fixed for DVD discs See page 32 Checkpoint 1 Cannot change the aspect ratio Each press of the Stop...

Страница 87: ...aterial on your disc Some low quality discs may not play properly If scenes change from dark to bright suddenly the screen may shake vertically temporarily but this is not a fault Checkpoint 1 Checkpo...

Страница 88: ...the batteries are empty Check for the TV DVD selection button Checkpoint 1 Checkpoint 2 Checkpoint 3 The remote control doesn t work A recorded disc is played with only the subtitle and the audio sign...

Страница 89: ...osite Audio analog Video Composite RGB Audio analog Analog output jacks 1 2 Optical Coaxial digital audio output Full scale Analog output level 2Vrms Composite Video Video output jack 1 S Video output...

Страница 90: ...prodiagrafev pou iscuvoun se cwvha avllh apovj authv gia thn opoiva proori ovtan h kataskeuavsthke H egguvhsh authv den kaluvptei apozhmiwvsei gia Kefalev binteo kai kasetofwvnwn kefalev binteokamera...

Отзывы: