background image

Before You Start

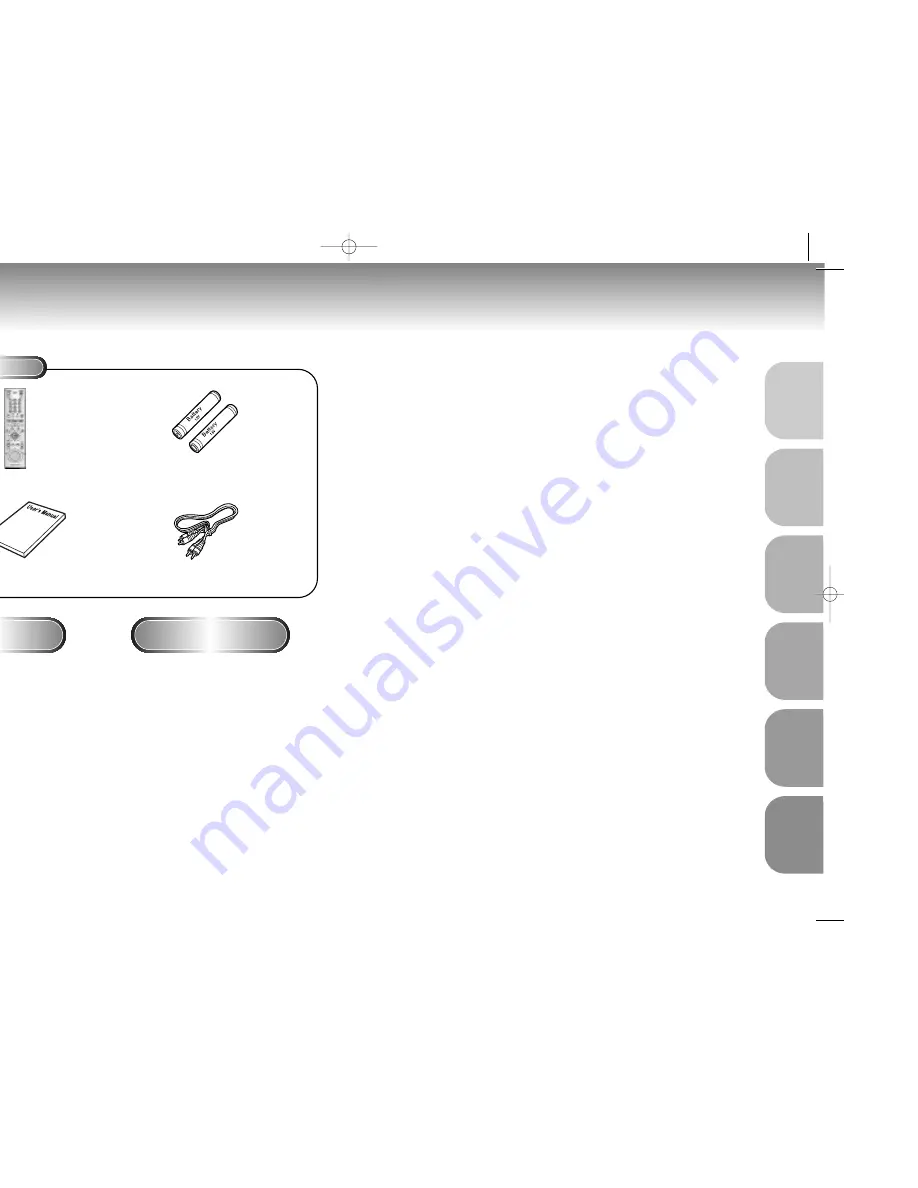
Accessories

Install Batteries in the

Remote

If remote doesn’t operate 

properly:

Remote Control

User’s Manual

Batteries for
Remote Control (AA Size)

Video/Audio Cable

Open the battery cover on the

back of the remote.

Insert two AA batteries. Make

sure that the polarities (+ and -)
are aligned correctly.

Replace the battery cover.

• Check the po - of the batteries

(Dry-Cell)

• Check if the batteries are drained. 

• Check if remote sensor is blocked by

obstacles.

• Check if there is any fluorescent

lighting nearby.

TABLE OF CONTENTS

General Features ..............................................................................................6
Disc Type and Characteristics .......................................................................... 7
Description-Front Panel ....................................................................................8
Description-Rear Panel ....................................................................................9
Tour of the Remote Control..............................................................................10

Choosing a Connection ..................................................................................12       

Playing a Disc................................................................................................14
Using the Search & Skip Functions ............................................................16
Using the Display Function..............................................................................17 
Repeat Play ..................................................................................................18
Program Play & Random Play ........................................................................19

S.FIT Play ......................................................................................................20
Digest Play ....................................................................................................21
Slow Repeat play ..........................................................................................22
Using the Disc View Function ..........................................................................23
Selecting the Audio Language ........................................................................24
Selecting the Subtitle Language ......................................................................25
Changing the Camera Angle ..........................................................................26
Using the Bookmark Function..........................................................................27
Using the Zoom and 3D Sound Functions........................................................................28

Using the Setup Menu ....................................................................................29
Setting Up the Language Features ..................................................................30
Setting Up the Parental Control ......................................................................32
Setting Up the Audio Options ........................................................................33
Surround Sound Speaker Setup ......................................................................34
Setting Up the Display Options ......................................................................35

Controlling a TV with the Remote ....................................................................36
Troubleshooting..............................................................................................37
Specifications ................................................................................................38
Warranty ......................................................................................................39

4

5

SETUP

SETUP

CONNECTIONS

BASIC

FUNCTIONS

ADV
ANCED

FUNCTIONS

CHANGING

SETUP MENU

REFERENCE

• DVDs/VCDs/CD-Rs recorded in a format different from the global DVD

player formats adopted by Samsung, may not be played.

• Some discs recorded under different manufacturing quality, may not be

played.

M405-1(Au-ENG)  2/20/01 4:36 PM  Page 4

Содержание DVD-M405/XEU

Страница 1: ...AH68 00723J 20 01 4 33 PM Page 2 ...

Страница 2: ...t play the disc This device is protected by U S patent numbers 4 631 603 4 577 216 and 4 819 098 and other intellectual property rights The use of Macrovision s copy protection technology in the device must be authorized by Macrovision and is intended for home and other limited pay per view uses only unless otherwise authorized in writing by Macrovision Reverse engineering or disassembly is prohib...

Страница 3: ...splay Function 17 Repeat Play 18 Program Play Random Play 19 S FIT Play 20 Digest Play 21 Slow Repeat play 22 Using the Disc View Function 23 Selecting the Audio Language 24 Selecting the Subtitle Language 25 Changing the Camera Angle 26 Using the Bookmark Function 27 Using the Zoom and 3D Sound Functions 28 Using the Setup Menu 29 Setting Up the Language Features 30 Setting Up the Parental Contro...

Страница 4: ...lay CD ROM CD I and DVD ROM in this player CDGs play audio only not graphics DIGITAL SOUND STEREO PAL Play Region Number PAL broadcast system in U K France Germany etc Dolby Digital disc Stereo disc Digital Audio disc DTS disc Both the DVD player and the discs are coded by region These regional codes must match in order for the disc to play If the codes do not match the disc will not play The Regi...

Страница 5: ... is loading disc information S VIDEO Y Pb Pr VIDEO OUT SELECT 1 2 3 4 5 6 7 DIGITAL AUDIO OUT JACKS Use either an optical or coaxial digital cable to connect to a compatible Dolby Digital receiver Use to connect to an A V Amplifier that contains a Dolby Digital or DTS decoder 5 1CH ANALOG AUDIO OUT JACKS Connect to an amplifier with 5 1ch analog input jacks MIXED AUDIO OUT JACKS Connect to the Aud...

Страница 6: ...tle chapter track or disc JOG DIAL Operates frame by frame play In CD mode performs track search SHUTTLE DIAL Performs fast or slow motion play TV POWER Button SLOW Button 3D Button OPEN CLOSE Button CHANNEL Buttons DIGEST Button PLAY PAUSE Button Begin Pause disc play SKIP Buttons Use to skip the title chapter or track RETURN Button Returns to a previous menu DISPLAY Button Displays the current d...

Страница 7: ... Digital Audio Input Jacks AUDIO DVD TV Normal Widescreen Projection etc Good picture Basic Audio Better picture Best picture Method 1 Method 2 Method 3 R1 R2 L1 L2 V1 V2 Audio Output Jacks OR OR OR AV Cable S Video Cable Video Cables Video Output Jack S Video Jack Component Video Jack DVD TV Method 1 DVD Player TV with Video Input Jack Method 2 DVD Player TV with S Video Input Jack If S Video is ...

Страница 8: ... step motion play in the forward direction 8 8 Slow Motion Play Except CD Press the FWD SEARCH button on the remote during PAUSE or STEP mode By pressing the FWD SEARCH button you can select slow motion play for 1 8 1 4 or 1 2 of normal speed No sound is heard during slow mode Press PLAY PAUSE to resume normal play Reverse slow motion play is not possible on this unit 15 BASIC FUNCTIONS RESUME fun...

Страница 9: ...When Playing a DVD When Playing a CD VCD 1 1 During play press the DISPLAY button on the remote Current title chapter number and elapsed time will be displayed Use the LEFT RIGHT buttons to select a title or a chapter number Use the UP DOWN buttons or Number buttons to enter a different title or chapter number then press the ENTER button To enter the time from which you want to start use the LEFT ...

Страница 10: ... B the end of title or track becomes B automatically mode MENU ON mode this function does not work NOTE Depending on the disc the Program and Random Play function may not work When in VCD 2 0 mode MENU ON mode these functions do not work To resume normal play press the CLEAR button DVD VCD CD Program Play DVD VCD CD Random Play DVD VCD CD 1 1 Press the MODE button 2 2 Use the LEFT RIGHT buttons to...

Страница 11: ... on remote control eliminate the black bars in the top and screen when a movie is playing in the ormat 16 9 not work when the Zoom mode is active emove the black bars on the screen m mode will work when Screen Fit is active os are available only in multiple screen format discs not work when a DVD has been recorded with a multi camera angle format e black bars cannot be eliminated due to their aspe...

Страница 12: ...NDEX VIEW Press the ENTER button 3 3 Select the desired view by pressing UP DOWN or LEFT RIGHT buttons 4 4 Press the ENTER button Disc View 1 Track View 2 Index View ENTER Track View 01 04 07 02 05 08 03 06 09 Index View 01 04 07 02 05 08 03 06 09 example example NOTE In stop mode on VCD press the TOP MENU button and the TRACK VIEW will be displayed When pressing the TOP MENU button with a DVD the...

Страница 13: ...title quickly and easily with the SUBTITLE button Using the SUBTITLE button 1 1 Press the SUBTITLE button 2 2 Use the UP DOWN buttons to select the desired subtitle language 3 3 Use the LEFT RIGHT buttons to determine whether or not the subtitle will be displayed Initially the subtitling will not appear on screen The subtitle languages are represented by abbreviations ENG ENG NOTE This function de...

Страница 14: ...he BOOKMARK button on the remote The Bookmark icons will be displayed 2 2 Use the LEFT RIGHT buttons to move to the desired bookmark icon 3 3 When you reach the scene you want to mark press the ENTER button The icon will change to a number 1 2 or 3 4 4 Press the BOOKMARK button to turn off the display Recalling a Marked Scene 1 1 During play press the BOOKMARK button on the remote 2 2 Use the LEFT...

Страница 15: ...layer to the type of television screen you have 1 1 With the unit in Stop mode press the SETUP button on the remote Player Menu Setup of the Display Language Use the Player preference menu to select the language for the player s on screen displays Disc Menu Setup of the Menu Language Use the Menu preference menu to select the language you want a DVD s disc menu to be displayed in Audio Setup of th...

Страница 16: ... Select Original if you want the default soundtrack language to be the original language the disc is recorded in Select Others if the language you want is not listed 5 5 Press the ENTER button English is selected and the screen returns to SETUP MENU 1 1 With the unit in Stop mode press the SETUP button 2 2 Use the UP DOWN buttons to select SUBTITLE 3 3 Press the ENTER button 4 4 Use the UP DOWN bu...

Страница 17: ...ct PCM when using the Analog Audio Outputs 2 Bitstream Converts to Dolby Digital Bitstream 5 1CH Select Bitstream when using the Digital Audio Output N N N NO O O OT T T TE E E E Be sure to select the correct Digital Output or no audio will be heard DTS 1 On Outputs DTS Bitstream via digital output only Select DTS when connecting to a DTS Decoder 2 Off Doesn t output digital signal 2X Scan Audio 1...

Страница 18: ...ademark registered by PHILIPS Corporation Ideal CENTER SPEAKER position Ideal SURROUND SPEAKER position NOTE 1 1 With the unit in Stop mode press the SETUP button 2 2 Use the UP DOWN buttons to select DISPLAY OPTIONS Then press the ENTER button 3 3 Use the UP DOWN buttons to select the desired item Then press the LEFT RIGHT buttons TV Aspect Depending on the type of television you have you may wan...

Страница 19: ...nd Check whether the disc being played has the Dolby 5 1 ch mark on the outside Check if your audio system is connected and working properly In a SETUP Menu is the Audio Output set to Bitstream The features or action cannot be completed at this time because 1 The DVD s software restricts it 2 The DVD s software doesn t support the feature e g angles 3 The feature is not available at the moment 4 Y...

Страница 20: ...eading Speed 11 45 ft sec Approx Play Time Single Sided Single Layer Disc 135 min Reading Speed 3 9 to 4 6 ft sec Maximum Play Time 74 min Reading Speed 3 9 to 4 6 ft sec Maximum Play Time 20 min Reading Speed 3 9 to 4 6 ft sec Maximum Play Time 74 min Video Audio 2 channel 1 0 Vp p 75 Ω load R Red 0 714 Vp p 75 Ω load G Green 0 714 Vp p 75 Ω load B Blue 0 714 Vp p 75 Ω load Composite Video 1 0 Vp...

Страница 21: ...Service Centre Stafford Park 12 TELFORD Shropshire TF3 3BJ el 01952 292262 Fax 01952 292033 NTY CONDITIONS anty is only valid if when warranty service is required the card is fully and properly completed and is presented with nal invoice or sales slip or confirmation and the serial on the product has not been defaced s obligations are limited to the repair or at its n replacement of the product or...

Страница 22: ...oduct for its normal es or incorrect installation ge caused by Lightning Water Fire Acts of God War Disturbances incorrect mains voltage improper ventilation other cause beyond the control of Samsung anty is valid for any person who legally acquired n of the product during the warranty period umers statutory rights in any applicable national legislation against the retailer arising from the purcha...

Отзывы: