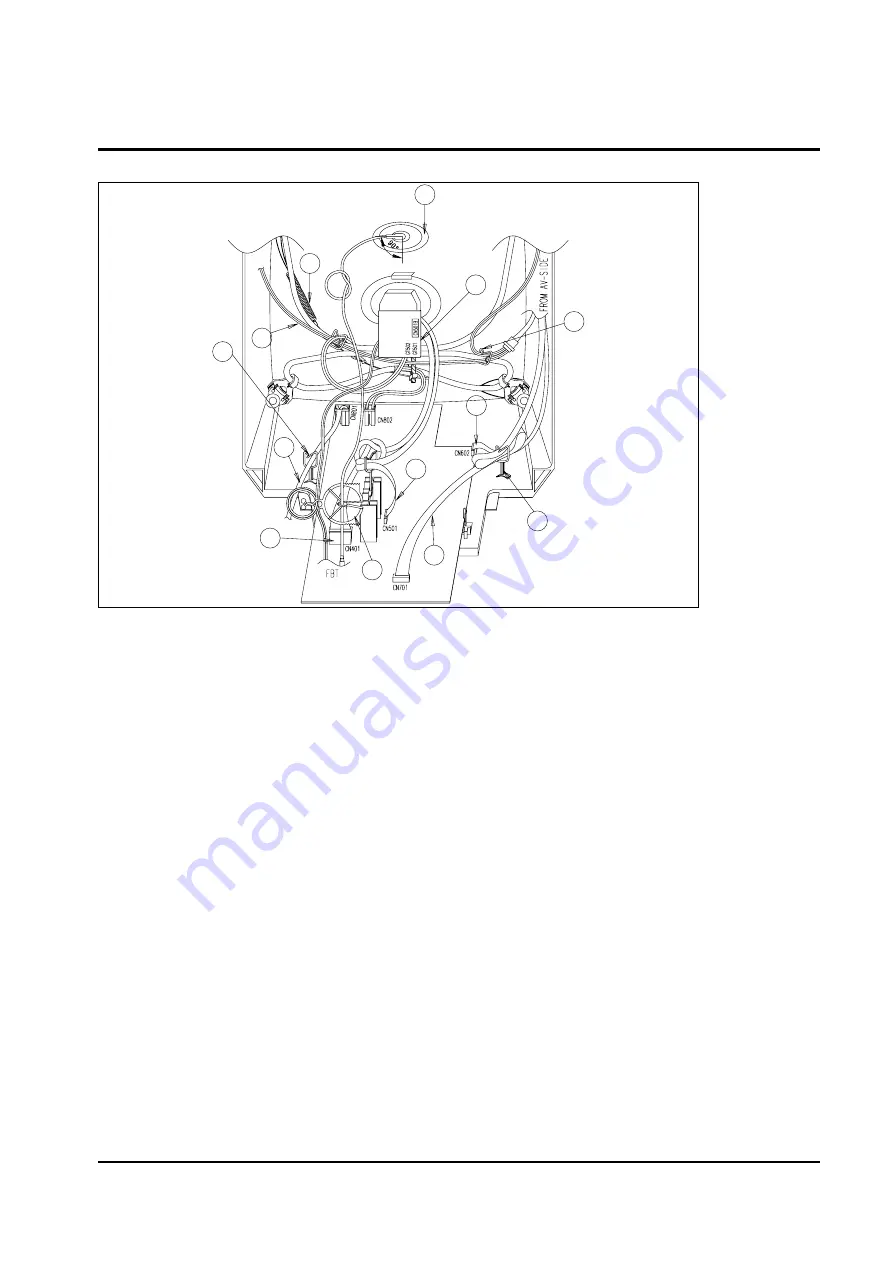
3-2 Main Board Removal
Disassembly and reassembly
3-2
Samsung Electronics
1
2
3
4
5
6
7
8
9
10
11
12
13
1. Separate the TBC-wire 2P connector from GT501,GT502.
2. Separate the CRT Assembly from the CRT socket.
3. Remove the Anode Cap from the CRT.
4. Separate the D-Coil Connector from CN802.
5. Separate the AC cord from CN801.
6. Separate the DC connector from CN401.
7. Separate the CN501B 8P CRT connector from CN501.
8. Separate the CNA05 5P A/V side connector from CN602.
9. Separate the CNA01 8P CRT connector from CN701.
10. Separate the Focus Screen Wire from the FBT clamper.
11. Separate the TBC wire 2P, speaker wires from the wire clamper.
12. Separate the CN701, CN602 connector from the wire clamper.
13. Separate the AC cord from the wire clamper.
14. Remove the main board by pulling it with both hands.
Содержание CX6844N3X/XEE
Страница 9: ...2 4 Samsung Electronics MEMO ...
Страница 39: ...10 2 Samsung Electronics MEMO ...
Страница 45: ...Schematic Diagrams 11 6 Samsung Electronics 11 6 PWB MAIN Sound Module Mono ...
Страница 47: ...Schematic Diagrams 11 8 Samsung Electronics 11 8 PWB MAIN SOUND MODULE STEREO ...
Страница 48: ...Schematic Diagrams 11 9 Samsung Electronics 11 9 PWB MAIN SOUND MODULE NICAM ...
Страница 49: ...Schematic Diagrams 11 10 Samsung Electronics 11 10 PWB MAIN A V FRONT VIDEO SWITCH RGB S W MODULE ...
Страница 50: ...ELECTRONICS Samsung Electronics Co Ltd DEC 1998 Printed in Korea 3S51A 4411 ...


