background image

 EN

Wiring Instructions

WARNING THIS APPLIANCE MUST BE EARTHED.

This appliance must be earthed. In the event of an electrical short circuit, earthing 
reduces the risk of electric shock providing an escape wire for the electric current.
The appliance is equipped with a mains lead which includes an earth wire for 
connecting to the earth terminal of your mains plug. 
The plug must be plugged into a socket that is properly installed and earthed.

The wires in this mains lead are coloured in accordance with the 
following code:

Green-and yellow 

: Earth

Blue : 

Neutral

Brown 

Live

As the colours of the wires in the mains lead of this appliance may not 
correspond with the coloured markings indentifying the terminals in your plug, 
proceed as follows.

Connect the green-and yellow wire to the terminal in the plug marked with the 
letter E or the earth symbol (

) or coloured green or green-and-yellow.

Connect the blue wire to the terminal marked with the letter N or coloured 
black.

Connect the brown wire to the terminal marked with the letter L or coloured 
red.

Consult a qualified electrician or service technician if in doubt 
about any of these instructions.
The manufacturer of this oven will not accept any liability for 
damage to persons or material for non observance of these 
requirements.

There are no user+serviceable parts inside the oven and if the 
mains lead of this appliance is damaged, it must only be replaced 
by qualified service personnel approved by the

Safety Precautiones 

IMPORTANT SAFETY INSTRUCTIONS.

READ CAREFULLY AND KEEP FOR FUTURE REFERENCE.

Before cooking food or liquids in your microwave oven, please check 
that the following safety precautions are taken.

1.

DO NOT 

use any metallic cookware in the microwave oven:

Metallic containers

Dinnerware with gold or silver trimmings

Skewers, forks, etc.

Reason

:      Electric arcing or sparking may occur and may damage the oven.

2.

DO NOT 

heat:

Airtight or vacuum-sealed bottles, jars, containers                                       
Ex) Baby food jars

Airtight food.                                                                                                       
Ex) Eggs, nuts in shells, tomatoes

Reason:  The increase in pressure may cause them to explode.                
 Tip:

Remove lids and pierce skins, bags, etc.

3.

DO NOT

 operate the microwave oven when it is empty.

Reason:   The oven walls may be damaged.
Tip: 

Leave a glass of water inside the oven at all times. The water will 
absorb the microwaves if you accidentally set the oven going when it is 
empty

.

4.

DO NOT

 cover the rear ventilation slots with cloths or paper.

Reason

:

  The cloths or paper may catch fire as hot air is evacuated from the 

oven.

5.

ALWAYS

 use oven gloves when removing a dish from the oven.

Reason:  Some dishes absorb microwaves and heat is always transferred from 

the food to the dish.The dishes are therefore hot.

6.

DO NOT

 touch heating elements or interior oven walls.

Reason

:

These walls may be hot enough to burn even after cooking has 
finished, enen though they do not appear to be so. Do not allow 
inflammable materials to come into contact with any interior area of the 
oven. Let the oven cool down first.

7.

To reduce the risk of fire in the oven cavity:

Do not store flammable materials in the oven

Remove wire twist ties from paper or plastic bags

Do not use your microwave oven to dry newspapers.

If smoke is observed, keep the oven door closed and switch off or 
disconnect the oven from the power supply

8.

Take particular care when heating liquids and baby foods.

ALWAYS allow a standing time of at least 20 seconds after the oven has 
been switched off so that the temperature can equalize.

Stir during heating, if necessary, and ALWAYS stir after heating.

Take care when handling the container after heating. You may burn 
yourself, if the container is too hot.

A risk of delayed eruptive boiling exists.

WARNING

Ensure that the plug and power cord are not 
damaged before use.  If you have any reason to 
remove the moulded plug from this appliance, 
immediately remove the fuse and dispose of the 
plug. Do not connect the plug to a mains socket 
under any circumstances as there is a danger of 
electric shock.

CIRCUITS

Your microwave oven should be operated on a 
separate circuit from other appliances. Failure 
to do this may cause the circuit breaker to trip, 
the fuse to blow, or the food to cook more 
slowly.

jtXW\`†l|TWZZW`h†luU”GGwˆŽŒG[GGt–•‹ˆ SGzŒ—›Œ”‰Œ™GXXSGYWW]GG_a\[Ght

Содержание CM1059

Страница 1: ...iones 4 Installing Your Microwave Oven 6 What to Do if You are in Doubt or Have a Problem 6 Checking that Your Oven is Operating Correctly 7 Cooking Reheating 7 Power Levels 8 Stopping the Cooking 8 Adjusting the Cooking Time 8 Manual Defrosting Food 8 Cookware Guide 9 Cooking Guide 10 Cleaning Your Microwave Oven 12 Storing and Repairing Your Microwave Oven 12 Technical Specifications 13 jtXW l T...

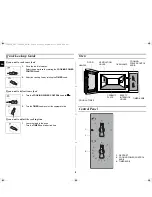
Страница 2: ...Select the cooking time by rotating the TIMER knob 1 Turn the COOKING POWER CONTROL knob to 2 Turn the TIMER knob to select the appropriate time 1 Leave the food in the oven Turn the TIMER knob to desired time VENTILATION HOLES DOOR LATCHES HANDLE DOOR OVEN LAMP COOKING POWERCONTOL KNOB SAFETY INTERLOCK HOLES TIMER KNOB CERAMIC PLATE 1 2 3 1 DEFROST 2 COOKING POWER CONTROL KNOB 3 TIMER KNOB jtXW l...

Страница 3: ...ve service technician trained by the manufacturer It is particularly important that the oven door closes properly and that there is no damage to the 1 Door door seals and sealing surfaces 2 Door hinges broken or loose 3 Power cable d The oven should not be adjusted or repaired by anyone other than a properly qualified microwave service technician trained by the manufacturer Installation Wiring Ins...

Страница 4: ...Reason The increase in pressure may cause them to explode Tip Remove lids and pierce skins bags etc 3 DO NOT operate the microwave oven when it is empty Reason The oven walls may be damaged Tip Leave a glass of water inside the oven at all times The water will absorb the microwaves if you accidentally set the oven going when it is empty 4 DO NOT cover the rear ventilation slots with cloths or pape...

Страница 5: ...rowave oven is operating without any load the power will be cut off automatically for safety You can operate the oven normally after letting it stand for over 30 minutes 14 Failure to maintain the oven in a clean condition could lead to deterioration of the surface that could adversely affect the life of the appliance and possibly result in a hazardous situation 15 The appliance should not be clea...

Страница 6: ...ou call a service engineer your oven check this list of possible problems and solutions Neither the oven s display nor the oven operate Properly insert the plug into a grounded outlet If the outlet is controlled by a wall switch make sure the wall switch is turned on Remove the plug from the outlet wait ten seconds then plug it in again Reset the circuit breaker or replace any blown fuse Plug anot...

Страница 7: ...od ALWAYS check your cooking settings before leaving the oven unattended First place the food in the centre of the turntable Then close the door Never switch the microwave oven on when it is empty You can change the power level during cooking by turning the COOKING POWER CONTROL knob 1 Set the power level to maximum by turning COOKING POWER CONTROL knob MAXIMUM POWER 1100 W 2 Set the time 4 to 5 m...

Страница 8: ... only recipients that are microwave safe Power Level Percentage Output HIGH MEDIUM HIGH MEDIUM MEDIUM LOW DEFROST 100 70 50 30 15 1100 W 770 W 550 W 330 W 170 W 1 To stop temporarily Open the door Result Cooking stops To resume cooking close the door 2 To stop completely Turn the TIMER knob to 0 Adjust the remaining cooking time by rotating the TIMER knob 1 Turn the COOKING POWER CONTROL knob to 2...

Страница 9: ...er bags or newspaper Recycled paper or metal trims Can be used to warm food Overheating may cause the polystyrene to melt May catch fire May cause arcing Glassware Oven to table ware Fine glassware Glass jars Can be used unless decorated with a metal trim Can be used to warm foods or liquids Delicate glass may break or crack if heated suddenly Must remove the lid Suitable for warming only Metal Di...

Страница 10: ...ed Stir occasionally during reheating MEDIUM 4 5 3 Lasagne chilled 400 g Put the chilled lasagne pre cooked product widthways in the centre of table Reheat covered HIGH 4 5 3 Bechamel Potatoes chilled 400 g Put bechamel potatoes pre cooked product widthways in the centre of table Reheat covered MEDIUM 5 6 3 Baked Potatoes ready cooked and chilled 500 g 2x250 g Pierce film and put potatoes on a fla...

Страница 11: ...s directly after warming MEDIUM 1 Food Portion Method Power Time min Standing Time min Bacon chilled 2 slices à 20 g Put bacon slices on kitchen paper on a flat ceramic plate HIGH ca 1 1 Scrambled Eggs 2 eggs Beat eggs add salt and 2 tbsp milk Put in a deep ceramic plate Stir several times during cooking MEDIUM ca 2 1 Baked Beans canned 250 g Put the beans in a deep ceramic plate Reheat covered St...

Страница 12: ... abrasive products or chemical solvents Take particular care when cleaning the door seals to ensure that no particles Accumulate Prevent the door from closing correctly Clean the microwave oven cavity right after each use with a mild detergent solution but let the microwave oven cool down before cleaning in order to avoid injury Storing and Repairing Your Microwave Oven A few simple precautions sh...

Страница 13: ...CM1059 Power source 230V 50 Hz Power consumption Microwave 1600 W 7 A Output power 230V 1050 W IEC 705 240V 1100 W IEC 705 5 power levels including defrost Operating frequency 2450 MHz Cooling method Cooling fan motor Dimensions W x H x D Outside Oven cavity 517 x 297 x 412 mm 336 x 225 x 349 mm Volume 26 liter Weight Net Gross 17 5 kg 19 0 kg jtXW l TWZZW h luU GGw GXZGGt SGz GXXSGYWW GG_a Ght ...

Страница 14: ...EN 14 Note jtXW l TWZZW h luU GGw GX GGt SGz GXXSGYWW GG_a Ght ...

Страница 15: ...EN 15 Note jtXW l TWZZW h luU GGw GX GGt SGz GXXSGYWW GG_a Ght ...

Страница 16: ...jtXW l TWZZW h luU GGw GX GGt SGz GXXSGYWW GG_a Ght ...

Отзывы: