


13
.5
<Maintenance>
4
Grasp the toner cartridge and align it with the corresponding slot
inside the machine. Insert it back into its slot until it clicks into place.
5
Close the front cover. Make sure that the cover is securely closed.
Replacing the toner cartridge
The machine uses four colors and has a different toner cartridge for each
one: yellow (Y), magenta (M), cyan (C), and black (K).
When the toner cartridge is completely empty:
•
Toner Empty
appears on the display.
• The
Status
LED lights red.
• The machine stops printing. For the CLX-3160FN, incoming faxes are
saved in memory.
At this stage, the toner cartridge needs to be replaced. For order
information for toner cartridges, see page 12.1.
1
Turn the machine off, then wait a few minutes for the machine to
cool.
2
Open the front cover.
Note
• If toner gets on your clothing, wipe it off with a dry cloth
and wash clothing in cold water. Hot water sets toner into
fabric.
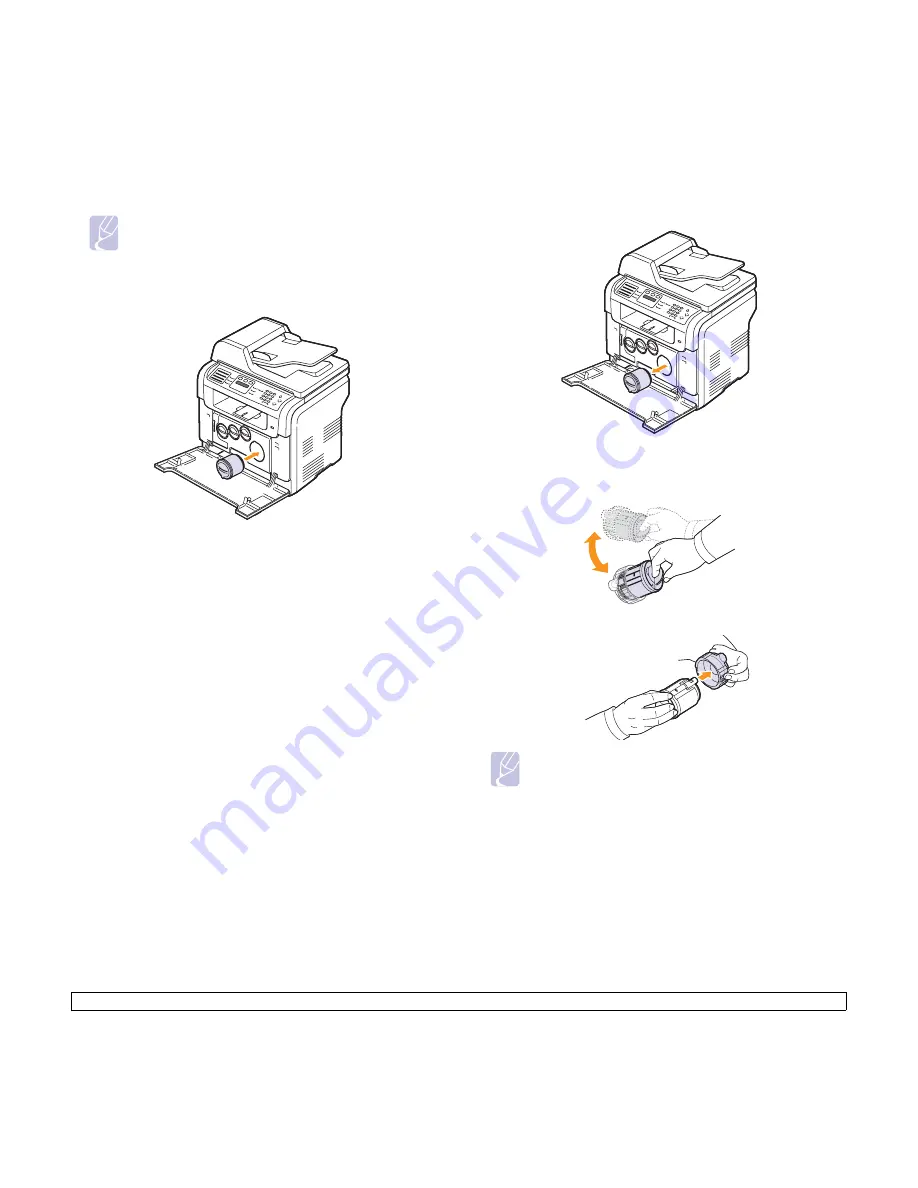
3
Pull the corresponding toner cartridge out.
4
Take a new toner cartridge out of its package.
5
Holding the toner cartridge, thoroughly roll it 5 or 6 times to
distribute the toner evenly inside the cartridge.
6
Remove the cartridge cap.
Note
• If toner gets on your clothing, wipe it off with a dry cloth and
wash clothing in cold water. Hot water sets toner into fabric.
Содержание CLX-3160 Series
Страница 1: ......
Страница 10: ...xii...
Страница 95: ...Samsung Printer Software section...
Страница 139: ...Ver 1 07...


