background image

7

GB

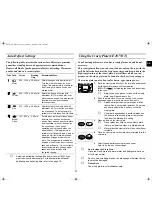
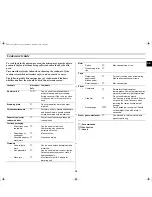
Checking that Your Oven is Operating Correctly

The following simple procedure enables you to check that your oven is
working correctly at all times.

Open the oven door by pulling the handle on the right side of the door.
Place a glass of water on the turntable. Then, close the door.

The oven must be plugged into an appropriate wall socket. The
turntable must be in position in the oven. If a power level other
than the maximum is used, the water takes longer to boil.

What to Do if You are in Doubt or Have a

Problem

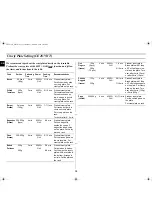
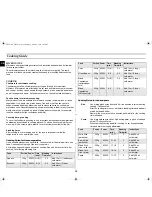
If you have any of the problems listed below try the solutions given.

This is normal.

Condensation inside the oven

Air flow around the door and outer casing

Light reflection around the door and outer casing

Steam escaping from around the door or vents

The oven does not start when you press the

button.

Is the door completely closed?

The food is not cooked at all

Have you set the timer correctly and/or pressed the

button?

Is the door closed?

Have you overloaded the electric circuit and caused a fuse to blow or a
breaker to be triggered?

The food is either overcooked or undercooked

Was the appropriate cooking length set for the type of food?

Was an appropriate power level chosen?

Sparking and cracking occur inside the oven (arcing)

Have you used a dish with metal trimmings?

Have you left a fork or other metal utensil inside the oven?

Is aluminium foil too close to the inside walls?

The oven causes interference with radios or televisions

Slight interference may be observed on televisions or radios when the
oven is operating. This is normal.To solve this problem, install the oven
away from televisions, radios and aerials.

If interference is detected by the oven’s microprocessor, the display may
be reset.To solve this problem, disconnect the power plug and reconnect
it. Reset the time.

If the above guidelines do not enable you to solve the problem,
contact your local dealer or SAMSUNG after-sales service.

1.

Press the

button.

2.

Set the time to 4-5 minutes by turning the dial knob as
requried.

3.

Press the

button.

Result :

The oven heats the water for 4 to 5 minutes.
The water should then be boiling.

CE2875N_GB.fm Page 7 Monday, March 4, 2002 1:02 PM

Содержание CE2875N-S

Страница 1: ...e Auto Reheat Cook Feature 9 Auto Reheat Cook Settings 10 Using the Auto Defrost Feature 10 Auto Defrost Settings 11 Using the Crusty Plate CE2875NT 11 Crusty Plate Setting CE2875NT 12 Choosing the Heating Element Position 13 Choosing the Accessories 13 Grilling 13 Combining Microwave and the Grill 14 Switching the Beeper Off 14 Safety Locking Your Microwave Oven 14 Cookware Guide 15 Cooking Guide...

Страница 2: ... cooking is over 1 Place the frozen food in the oven Press the Auto button once or more times according to the type of food to be defrosted 2 Select the weight by turning the dial knob as required 3 Press the button Leave the food in the oven Press 30s one or more times for each extra 30 seconds that you wish to add 1 Press the button 2 Select the cooking time by turning the dial knob 3 Press the ...

Страница 3: ...ed over the motor shaft in the base of the oven Purpose The coupler rotates the turntable 2 Roller ring to be placed in the centre of the oven Purpose The roller ring supports the turntable 3 Turntable to be placed on the roller ring with the centre fitting to the coupler Purpose The turntable serves as the main cooking surface it can be easily removed for cleaning 4 Metal rack to be placed on the...

Страница 4: ... that the following safety precautions are taken 1 DO NOT use any metallic cookware in the microwave oven Metallic containers Dinnerware with gold or silver trimmings Skewers forks etc Reason Electric arcing or sparking may occur and may damage the oven 2 DO NOT heat Airtight or vacuum sealed bottles jars containers Ex Baby food jars Airtight food Ex Eggs nuts in shells tomatoes Reason The increas...

Страница 5: ...y after letting it stand for over 30 minutes IMPORTANT SAFETY INSTRUCTIONS During cooking you should look into the oven from time to time when food is being heated or cooked in disposable containers of plastic paper or other combustible materials IMPORTANT Young children should NEVER be allowed to use or play with the microwave oven Nor should they be left unattended near the microwave oven when i...

Страница 6: ...food out of the oven Standing times specified in recipes and in this booklet must therefore be respected to ensure Even cooking of the food right to the centre The same temperature throughout the food 1 To display the time Then press the in the button 24 hour notation Once 12 hour notation Twice 2 Turn the dial knob to set hour 3 Press the button 4 Turn the dial knob to set minute 5 Press the butt...

Страница 7: ...e electric circuit and caused a fuse to blow or a breaker to be triggered The food is either overcooked or undercooked Was the appropriate cooking length set for the type of food Was an appropriate power level chosen Sparking and cracking occur inside the oven arcing Have you used a dish with metal trimmings Have you left a fork or other metal utensil inside the oven Is aluminium foil too close to...

Страница 8: ...esult The 850W maximum cooking power indications are displayed Select the appropriate power level by pressing the button again until the corresponding wattage is displayed Refer to the power level table 2 Set the cooking time by turning the dial knob 3 Press the button Result The oven light comes on and the turntable starts rotating 1 Cooking starts and when it has finished the oven beeps four tim...

Страница 9: ... Use only recipients that are microwave safe 1 To stop temporarily Open the door Result Cooking stops To resume cooking close the door and press again 2 To stop completely Press the button Result The cooking stops If you wish to cancel the cooking settings press the Cancel button again Press the 30s button once for each 30 seconds to be added During the cooking to increase or decrease the cooking ...

Страница 10: ...ith sauce vegetables and a side dish like potatoes rice or pasta 2 Drinks Coffee milk tea water with room temperature 150 ml 1 cup 250 ml 1 mug 1 2 min Pour in to a ceramic cup and reheat uncovered Place cup 150ml or mug 250ml in the centre of turntable Stir carefully before and after standing time 3 Pasta Gratin frozen 200 g 400 g 2 3 min Put the frozen pasta gratin into a suitable sized glass py...

Страница 11: ...ield the tail of the whole fish with aluminium foil Turn the fish over when the oven beeps This programme is suitable for whole fishes and fish fillets Bread Cake 125 625 g 5 20 min Put bread on a piece of kitchen paper and turn over as soon as the oven beeps Place cake on a ceramic plate and if possible turn over as soon as the oven beeps Oven keeps operating and is stopped when you open the door...

Страница 12: ...te beside the centre 2 baguettes side by side on the plate Put crusty plate on rack Pizza frozen 300 350 g 4 min 600W Grill 9 10 min Preheat crusty plate Put the frozen pizza on the crusty plate Put crusty plate on the rack Baked Potatoes 250 g 500 g 3 min 600W Grill 5 6 min 8 9 min Preheat crusty plate Cut potatoes in halves Put them on the crusty plate with the cut side to the bottom Arrange in ...

Страница 13: ...ry hot Check that the heating element is in the horizontal position If you wish to select the combined cooking mode grill and microwave use only dishes that are microwave safe and oven proof Metallic cookware or utensils may damage your oven To set the heating element to the Then Horizontal position grill or combined microwave grill Pull the heating element towards you Push it upwards until it is ...

Страница 14: ...se the door 3 Press the Combi button Result The following indications are displayed microwave and grill mode 600W out power Select the appropriate power level by pressing the Combi button again until the corresponding power level is displayed You cannot set the temperature of the grill 4 Set the cooking time by turning the dial knob as required The maximum cooking time is 60 minutes 5 Press the bu...

Страница 15: ...olystyrene cups containers Paper bags or newspaper Recycled paper or metal trims Can be used to warm food Overheating may cause the polystyrene to melt May catch fire May cause arcing Glassware Oven to table ware Fine glassware Glass jars Can be used unless decorated with a metal trim Can be used to warm foods or liquids Delicate glass may break or crack if heated suddenly Must remove the lid Suit...

Страница 16: ...uide for frozen vegetables Use a suitable glass pyrex bowl with lid Cook covered for the minimum time see table Continue cooking to get the result you prefer Stir twice during cooking and once after cooking Add salt herbs or butter after cooking Cover during standing time Cooking Guide for rice and pasta Rice Use a large glass pyrex bowl with lid rice doubles in volume during cooking Cook covered ...

Страница 17: ... food It is preferable to underestimate cooking time and add extra heating time if necessary Heating and standing times When reheating food for the first time it is helpful to make a note of the time taken for future reference Always make sure that the reheated food is piping hot throughout Allow food to stand for a short time after reheating to let the temperature even out The recommended standin...

Страница 18: ...ok covered Stir after cooking time Stand for 2 3 minutes Before serving stir well and check the temperature carefully Baby milk 100ml 200ml 300W 30 40sec 50 sec to 1min 2 3 Stir or shake well and pour into a sterilised glass bottle Place into the centre of turn table Cook uncovered Shake well and stand for at least 3 minutes Before serving shake well and check the temperature carefully Food Portio...

Страница 19: ...t while freezing and defrosting food For defrosting of frozen food with a temperature of about 18 to 20 C use the following table as a guide All frozen food should be defrosted using defrosting power level 180 W Food Portion Time min Standing Time min Instructions Meat Minced beef Pork steaks 250g 500g 250g 6 7 13 14 7 8 5 25 Place the meat on a flat ceramic plate Shield thinner edges with alumini...

Страница 20: ...uire a short cooking time to brown the top of the food Also this mode can be used for thick food portions that benefit from a browned and crispy top e g chicken pieces turning them over half way through cooking Please refer to the grill table for further details IMPORTANT REMARK Whenever the combination mode microwave grill is used make sure that the grill heating element is under the ceiling in t...

Страница 21: ...2 3 minutes Baked Potatoes 250 g 500 g 600 W Grill 4 5 8 9 Cut potatoes into halves Put them in a circle on the rack with the cut side to the grill Chicken Pieces 450 500 g 2 pcs 300 W Grill 8 9 9 10 Prepare chicken pieces with oil and spices Put them in a circle with the bones to the middle Put one chicken piece not into the centre of the rack Stand for 2 3 minutes Lamb Chops medium 400 g 4pcs Gr...

Страница 22: ... sized glass pyrex bowl with lid Cook covered for 6 to 7 minutes using 850 W Stir several times well during cooking BROWNING ALMOND SLICES Spread 30 g sliced almonds evenly on a medium sized ceramic plate Stir several times during browning for 3 to 4 minutes using 600 W Let it stand for 2 3 minutes in the oven Use oven gloves while taking out Cleaning Your Microwave Oven The following parts of you...

Страница 23: ...PPLIANCE MUST BE EARTHED This appliance must be earthed In the event of an electrical short circuit earthing reduces the risk of electric shock providing an escape wire for the electric current The appliance is equipped with a mains lead which includes an earth wire for connecting to the earth terminal of your mains plug The plug must be plugged into a socket that is properly installed and earthed...

Страница 24: ...cuum sealed for long life Increasingly heating times for such ready meals are being based on the Heating Categories A B C D and E On this instance simply match the heating category of your oven to the instructions on the food package and set your timer accordingly For example If the heating instructions are 3 minutes on HIGH for a D category oven then you will need to set your timer for less than ...

Отзывы: