background image

GB

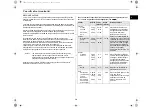
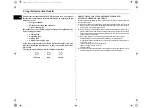
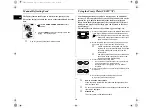
Using this Instruction Booklet

You have just purchased a SAMSUNG microwave oven. Your Owner’s 
Instructions contain much valuable information on cooking with your 
microwave oven:

Safety precautions

Suitable accessories and cookware

Useful cooking tips 

Inside the cover you will find a quick look-up guide explaining four 
basic cooking operations:

Cooking food

Defrosting food

Grilling food

Adding extra cooking time

At the front of the booklet you will find illustrations of the oven, and 
more importantly the control panel,  so that you can find the buttons 
more easily.

The step-by-step procedures use three different symbols. 

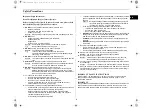
PRECAUTIONS TO AVOID POSSIBLE EXPOSURE TO 
EXCESSIVE MICROWAVE ENERGY

Failure to observe the following safety precautions may result in harmful exposure 
to microwave energy.
(a) Under no circumstances should any attempt be made to operate the oven with 

the door open or to tamper with the safety interlocks (door latches) or to insert 
anything into the safety interlock holes.

(b) Do not place any object between the oven door and front face or allow food or 

cleaner residues to accumulate on sealing surfaces. Ensure that the door and 
door sealing surfaces are kept clean by wiping after use first with a damp cloth 
and then with a soft dry cloth.

(c) Do not operate the oven if it is damaged until it has been repaired by a 

qualified microwave service technician trained by the manufacturer. 
It is particularly important that the oven door closes properly and that there is 
no damage to the:
(1) Door, door seals and sealing surfaces
(2) Door hinges (broken or loose)
(3) Power cable

(d) The oven should not be adjusted or repaired by anyone other than a properly 

qualified microwave service technician trained by the manufacturer.

Important

Note

Caution

jlY_X^uTniU”GGwˆŽŒG[GGm™‹ˆ SGvŠ›–‰Œ™GXXSGYWWYGGXXaX^Ght

Содержание CE2817N

Страница 1: ...uisson 9 Ajustez le temps de cuisson 9 Décongelez un plat manuellement 9 Cuisez ou réchauffez un plat en mode instantané 9 Temps pour le réchauffage ou la cuisson en mode instantané 9 Utilisez un plat croustilleur CE2817NT 10 Conseils de cuisson pour le plat croustilleur CE2817NT 11 Choisissez la position de l élément chauffant 12 Choisissez les accessoires 12 Cuisez un plat au gril 13 Combinez la...

Страница 2: ...ur 180W 2 Choisissez le temps de décongélation en tournant le bouton de sélection du temps Laissez le plat dans le four Ajustez le temps de cuisson en tournant le bouton de sélection du temps 1 Positionnez le bouton de sélection du niveau de puissance sur l icône gril 2 Réglez le temps de cuisson en tournant le bouton de sélection du temps BOUTON DE SÉLECTION DU NIVEAU DE PUISSANCE BOUTON DE SÉLEC...

Страница 3: ...idage à placer au centre du plancher du four Objet l anneau de guidage supporte le plateau 3 Plateau à placer sur l anneau de guidage en adaptant le centre sur le coupleur Objet ce plateau constitue la principale surface de cuisson il est facile de le retirer pour le nettoyer 4 Grille métallique à placer sur le plateau Objet la grille métallique peut être utilisée en mode gril et en mode combiné m...

Страница 4: ...loi Précautions d emploi Lisez attentivement ce manuel et conservez le précieusement pour vous y reporter ultérieurement Avant de cuire des aliments ou des liquides dans votre four à micro ondes vous devez prendre les précautions suivantes 1 N utilisez AUCUN récipient ou ustensile métallique dans le four à micro ondes plats métalliques assiettes avec décorations dorées ou argentées brochettes four...

Страница 5: ...MAIS complètement le récipient Choisissez un récipient évasé pour prévenir tout débordement de liquide Des bouteilles à goulot étroit peuvent exploser en cas de surchauffe Vérifiez TOUJOURS la température du lait ou des aliments pour bébé avant de les servir NE chauffez JAMAIS un biberon avec la tétine car il pourrait exploser en cas de surchauffe 10 Veillez à ne pas endommager le cordon d aliment...

Страница 6: ...nstantané cuire Principe de cuisson Le centre des aliments étant cuit par diffusion de la chaleur la cuisson se poursuit même lorsque les aliments sont sortis du four Les temps de repos spécifiés dans les recettes et dans ce mode d emploi doivent donc être respectés pour assurer la cuisson homogène des aliments jusqu au centre une température uniforme 1 Prévoyez un dégagement d au moins 10 cm auto...

Страница 7: ...r a t elle disjoncté ou le fusible a t il fondu à la suite d une surcharge de votre prise électriqu Les aliments sont trop ou pas assez cuits Avez vous indiqué un temps de cuisson correct en fonction du type d aliments Avez vous choisi le niveau de puissance approprié Des étincelles et craquements se produisent à l intérieur du four arcs électriques Avez vous utilisé un plat avec des décorations m...

Страница 8: ...ance indiqués ci dessus Si vous sélectionnez un niveau de puissance plus élevé le temps de cuisson sera plus court En revanche si vous sélectionnez un niveau de puissance moins élevé le temps de cuisson sera plus long 1 Sélectionnez la puissance de cuisson maximale en tournant le bouton de sélection du niveau de puissance PUISSANCE DE CUISSON MAXIMALE 850W 2 Indiquez le temps de cuisson en tournan...

Страница 9: ...emporairement ouvrez la porte Résultat la cuisson s arrête Pour redémarrer la cuisson refermez la porte 2 Pour arrêter la cuisson complètement positionnez le bouton de sélection du temps de cuisson sur 0 Ajustez le temps de cuisson restant en tournant le bouton de sélection du temps 1 Positionnez le bouton de sélection du niveau de puissance sur 180W 2 Réglez le temps de décongélation en tournant ...

Страница 10: ...ce de cuisson de 600 W gril Respectez les temps et les recommandations du tableau de la page suivante Utilisez toujours des gants isolants car le plat croustilleur sera très chaud 2 Pour donner un bel aspect doré aux aliments tels que le bacon et les œufs enduisez le plat d huile Votre plat croustilleur est recouvert d un revêtement anti adhésif matière très sensible aux rayures Ne coupez jamais l...

Страница 11: ...lat pour une seule baguette côte à côte pour deux Mettez le plat sur la grille Pizza congelée 300 350 g 4 min 600W Gril 9 10 min Préchauffez le plat croustilleur Mettez la pizza congelée dans le plat croustilleur puis placez ce dernier sur la grille Pommes au four 250 g 500 g 3 min 600W Gril 5 6 min 8 9 min Préchauffez le plat croustilleur Coupez les pommes de terre en deux Disposez les en cercle ...

Страница 12: ...ts en carton de serviettes en papier etc Pour plus de renseignements sur les récipients et ustensiles garantis micro ondes reportez vous à la section Guide des récipients page 14 Pour mettre l élément chauffant alors en position horizontale mode gril ou mode combiné micro ondes gril tirez l élément chauffant vers vous poussez le vers le haut jusqu à ce qu il soit parallèle à la voûte du four Pour ...

Страница 13: ...ants isolants car les plats sortant du four sont très chauds La puissance de cuisson maximale pour le mode combiné micro ondes gril est de 600 W 1 Préchauffez le gril à la température appropriée en positionnant le bouton de sélection du niveau de puissance sur l icône gril et en sélectionnant le temps de préchauffe à l aide du bouton de sélection du temps 2 Ouvrez la porte et placez la nourriture ...

Страница 14: ...is risquent de se déformer en cas de surchauffe Risquent de brûler Risquent de provoquer des arcs électriques étincelles Verre Résistant à la chaleur Verres de table Bocaux Utilisable à condition de ne pas présenter de décorations métalliques Utilisables pour réchauffer des aliments ou des liquides Du verre fin peut cependant être fêlé ou brisé par un changement soudain de température Retirez le c...

Страница 15: ... micro ondes pour plus de renseignements voir la section sur les astuces micro ondes Couvrir les aliments pendant la cuisson Couvrir les aliments pendant la cuisson permet à l eau de se transformer en vapeur ce qui contribue alors au processus de cuisson Vous pouvez couvrir les aliments de différentes façons à l aide d une assiette en céramique d un couvercle en plastique ou d un film plastique ga...

Страница 16: ...tes Recommandations Riz blanc pré cuit 250g 850W 16 17 5 Ajoutez 500 ml d eau froide Riz brun pré cuit 250g 850W 21 22 5 Ajoutez 500 ml d eau froide Mélange de riz riz ordinaire riz sauvage 250g 850W 17 18 5 Ajoutez 500 ml d eau froide Mélange de céréales riz blé 250g 850W 18 19 5 Ajoutez 400 ml d eau froide Pâtes 250g 850W 11 12 5 Ajoutez 1 l d eau chaude Aliment Quan tité Cuisson minutes Repos m...

Страница 17: ...et laisser reposer Lorsque vous réchauffez des aliments pour la première fois nous vous conseillons de noter les temps de cuisson pour référence ultérieure Veillez toujours à ce que les aliments réchauffés soient chauds à l extérieur et à l intérieur Lorsque le réchauffage est terminé laissez les aliments reposer pendant un court instant afin que la température se répartisse uniformément Le temps ...

Страница 18: ...es Recommandations Boissons café lait thé eau à température ambiante 150 ml 1 tasse 250 ml 1 bol 850W 1 1 1 2 1 2 Versez la boisson dans une tasse ou un bol en céramique sans recouvrir Placez la tasse ou le bol au centre du plateau Remuez avant et après le temps de repos Soupe réfrigérée 250g 850W 3 3 2 3 Versez la soupe dans une assiette creuse en céramique Recouvrez d un film ou d un couvercle e...

Страница 19: ...st rapide N oubliez pas cette astuce lorsque vous congelez ou décongelez des aliments Reportez vous au tableau ci dessous pour décongeler des aliments dont la température est située entre 18 C et 20 C Tous les aliments congelés doivent être décongelés en réglant votre four sur le niveau de puissance de décongélation 180 W Aliment Quantité Temps minutes Repos minutes Recommandations Viande Viande h...

Страница 20: ...uisson très court pour les faire dorer sur le dessus Ce mode peut également servir pour des aliments plus gros généralement appréciés lorqu ils sont dorés et croustillants sur le dessus des morceaux de poulet par exemple Dans ce cas retournez les morceaux de poulet à mi cuisson Pour plus de renseignements reportez vous au tableau de la page suivante ATTENTION Lorsque vous utilisez le mode combiné ...

Страница 21: ...nutes Pommes de terre au four 250 g 500 g 600 W Gril 4 5 8 9 Coupez les pommes de terre en deux Disposez les en cercle sur la grille côté arrondi vers le bas Aliments frais Quantité Puissance 1er côté Temps minutes 2ène côté Temps minutes Recommandations Morceaux de poulet 400 500 g 2 morc 300 W Gril 8 9 9 10 Badigeonnez les morceaux de poulet d huile puis ajoutez des épices Disposez les morceaux ...

Страница 22: ...00 ml en suivant les instructions Utilisez un saladier en verre avec couvercle Faites cuire 6 minutes à 7 minutes à 850 W Remuez souvent pendant la cuisson FAIRE DORER DES AMANDES EFFILÉES Etalez 30 g d amandes éffilées dans une assiette en céramique de taille moyenne Faites cuire pendant 3 minutes à 4 minutes à 600 W en remuant plusieurs fois pendant l opération Laissez reposer 2 à 3 minutes dans...

Страница 23: ...re et l humidité risquent de détériorer certains éléments du four Ce four à micro ondes n est pas conçu pour utilisation commerciale Spécifications techniques Les descriptions et caractéristiques figurant dans ce mode d emploi sont données à titre d information et sans engagement Soucieux de la qualité de ses produits SAMSUNG se réserve le droit d effectuer des modifications sans préavis Modèle CE...

Страница 24: ...jlY_X u mU GGw GY GGm SGv GXXSGYWWYGGXWa Ght ...

Страница 25: ...ing Reheating 8 Power Levels 8 Stopping the Cooking 9 Adjusting the Cooking Time 9 Using the Instant Reheat Cook Feature 9 Instant Reheat Cook Setting 9 Manual Defrosting Food 10 Using the Crusty Plate CE2817NT 10 Crusty Plate Setting CE2817NT 11 Choosing the Heating Element Position 12 Choosing the Accessories 12 Grilling 13 Combining Microwaves and the Grill 13 Cookware Guide 14 Cooking Guide 15...

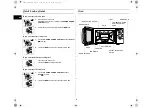
Страница 26: ...the TIMER knob 1 Turn the COOKING POWER CONTROL knob to Defrost symbol 2 Turn the TIMER knob to select the appropriate time Leave the food in the oven Turn the TIMER knob to desired time 1 Turn the COOKING POWER CONTROL knob to Grill symbol 2 Turn the TIMER knob to select the appropriate time VENTILATION HOLES DOOR LATCHES DOOR TURNTABLE COUPLER ROLLER RING SAFETY INTERLOCK HOLES LIGHT DOOR HANDLE...

Страница 27: ...tes the turntable 2 Roller ring to be placed in the centre of the oven Purpose The roller ring supports the turntable 3 Turntable to be placed on the roller ring with the centre fitting to the coupler Purpose The turntable serves as the main cooking surface it can be easily removed for cleaning 4 Metal rack to be placed on the turntable Purpose The metal rack can be used in grill and combination c...

Страница 28: ...Under no circumstances should any attempt be made to operate the oven with the door open or to tamper with the safety interlocks door latches or to insert anything into the safety interlock holes b Do not place any object between the oven door and front face or allow food or cleaner residues to accumulate on sealing surfaces Ensure that the door and door sealing surfaces are kept clean by wiping a...

Страница 29: ... yourself if the container is too hot A risk of delayed eruptive boiling exists To prevent delayed boiling and possible scalding you should put a plastic spoon or glass stick into the beverages and stir before during and after heating Reason During the heating of liquids the boiling point can be delayed this means that eruptive boiling can start after the container is removed from the oven You may...

Страница 30: ...tant Reheat Cook Cook Cooking Principle As the centre of the food is cooked by heat dissipation cooking continues even when you have taken the food out of the oven Standing times specified in recipes and in this booklet must therefore be respected to ensure Even cooking of the food right to the centre The same temperature throughout the food 1 When you install your oven make sure there is adequate...

Страница 31: ... the door completely closed The food is not cooked at all Have you set the timer correctly Is the door closed Have you overloaded the electric circuit and caused a fuse to blow or a breaker to be triggered The food is either overcooked or undercooked Was the appropriate cooking length set for the type of food Was an appropriate power level chosen Sparking and cracking occur inside the oven arcing ...

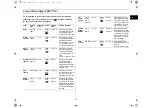
Страница 32: ...the power levels below If you select higher power level the cooking time must be decreased If you select lower power level the cooking time must be increased 1 Set the power level to maximum by turning COOKING POWER CONTROL knob MAXIMUM POWER 850 W 2 Set the time by turning TIMER knob Result The oven light comes on and the turntable starts rotating Power Level Output MWO GRILL HIGH REHEAT MEDIUM H...

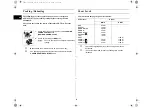
Страница 33: ...at and Cook Feature 1 To stop Timerarily Open the door Result Cooking stops To resume cooking close the door 2 To stop completely Turn the TIMER knob to 0 Adjust the remaining cooking time by rotating the TIMER knob 1 Turn the COOKING POWER CONTROL knob to Max Power 2 Turn the TIMER knob to select Instant Reheat drinks soup sauce or fresh vegetables Symbol Serving Type Power Portion Cooking Time S...

Страница 34: ... POWER CONTROL knob to 180W 2 Turn the TIMER knob to select the appropriate time Result Defrosting begins 1 Place the crusty plate directly on the turntable and preheat it with highest Microwave Grill Combination 600W Grill by following the times and instructions in the chart Always use oven gloves to take out the crusty plate as will become very hot 2 Brush the plate with oil if you are cooking f...

Страница 35: ...aguette beside the centre 2 baguettes side by side on the plate Put crusty plate on rack Pizza frozen 300 350 g 4 min 600W Grill 9 10 min Preheat crusty plate Put the frozen pizza on the crusty plate Put crusty plate on the rack Baked Potatoes 250 g 500 g 3 min 600W Grill 5 6 min 8 9 min Preheat crusty plate Cut potatoes in halves Put them on the crusty plate with the cut side to the bottom Arrang...

Страница 36: ...cups towels etc For further details on suitable cookware and utensils refer to the Cookware Guide on page 14 To set the heating element to the Then Horizontal position grill or combined microwave grill Pull the heating element towards you Push it upwards until it is parallel with the oof of the oven When cleaning the upper part inside the cavity it will be convenient to turn heater downward by 45 ...

Страница 37: ...ate the food evenly ALWAYS use oven gloves when touching the recipients in the oven as they will be very hot The maximum microwave power for the combined microwave and grill mode is 600W 1 Preheat the grill to the required temperature by turning the cooking power control knob to grill symbol and turning the timer knob to the appropriate 2 Open the door and place the food on the rack 3 Turn the Tim...

Страница 38: ...Polystyrene cups containers Paper bags or newspaper Recycled paper or metal trims Can be used to warm food Overheating may cause the polystyrene to melt May catch fire May cause arcing Glassware Oven to table ware Fine glassware Glass jars Can be used unless decorated with a metal trim Can be used to warm foods or liquids Delicate glass may break or crack if heated suddenly Must remove the lid Sui...

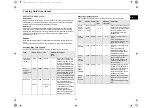
Страница 39: ... Guide for frozen vegetables Use a suitable glass pyrex bowl with lid Cook covered for the minimum time see table Continue cooking to get the result you prefer Stir twice during cooking and once after cooking Add salt herbs or butter after cooking Cover during standing time Cooking Guide for rice and pasta Rice Use a large glass pyrex bowl with lid rice doubles in volume during cooking Cook covere...

Страница 40: ...g the food It is preferable to underestimate cooking time and add extra heating time if necessary Heating and standing times When reheating food for the first time it is helpful to make a note of the time taken for future reference Always make sure that the reheated food is piping hot throughout Allow food to stand for a short time after reheating to let the temperature even out The recommended st...

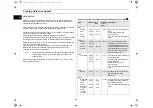
Страница 41: ... plate Cook covered Stir after cooking time Stand for 2 3 minutes Before serving stir well and check the temperature carefully Baby milk 100ml 200ml 300W 30 40sec 50 sec to 1min 2 3 Stir or shake well and pour into a sterilised glass bottle Place into the centre of turn table Cook uncovered Shake well and stand for at least 3 minutes Before serving shake well and check the temperature carefully Fo...

Страница 42: ...hint while freezing and defrosting food For defrosting of frozen food with a temperature of about 18 to 20 C use the following table as a guide All frozen food should be defrosted using defrosting power level 180W Food Portion Time min Standing Time min Instructions Meat Minced beef Pork steaks 250g 500g 250g 6 7 13 14 7 8 5 25 Place the meat on a flat ceramic plate Shield thinner edges with alumi...

Страница 43: ...require a short cooking time to brown the top of the food Also this mode can be used for thick food portions that benefit from a browned and crispy top e g chicken pieces turning them over half way through cooking Please refer to the grill table for further details IMPORTANT REMARK Whenever the combination mode microwave grill is used make sure that the grill heating element is under the ceiling i...

Страница 44: ... for 2 3 minutes Baked Potatoes 250 g 500 g 600 W Grill 4 5 8 9 Cut potatoes into halves Put them in a circle on the rack with the cut side to the grill Chicken Pieces 400 500 g 2 pcs 300 W Grill 8 9 9 10 Prepare chicken pieces with oil and spices Put them in a circle with the bones to the middle Put one chicken piece not into the centre of the rack Stand for 2 3 minutes Lamb Chops medium 400 g 4p...

Страница 45: ...le sized glass pyrex bowl with lid Cook covered for 6 to 7 minutes using 850 W Stir several times well during cooking BROWNING ALMOND SLICES Spread 30 g sliced almonds evenly on a medium sized ceramic plate Stir several times during browning for 3 to 4 minutes using 600 W Let it stand for 2 3 minutes in the oven Use oven gloves while taking out Cleaning Your Microwave Oven The following parts of y...

Страница 46: ...e your oven away temporarily choose a dry dust free place Reason Dust and damp may adversely affect the working parts in the oven This microwave oven is not intended for commercial use Technical Specifications SAMSUNG strives to improve its products at all times Both the design specifications and these user instructions are thus subject to change without notice Model CE2817N CE2817NT Power source ...

Страница 47: ...23 GB Note jlY_X uTniU GGw GYZGGm SGv GXXSGYWWYGGXXaX Ght ...

Страница 48: ...Printed in Korea jlY_X uTniU GGw GY GGm SGv GXXSGYWWYGGXXaX Ght ...

Отзывы: