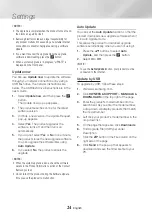
background image

21

  English

04
Settings


Ğ

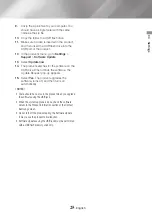
Wired - Manual

If you have a static IP address or the Automatic 

procedure does not work, you'll need to set the 

Network Settings

 values manually.

Follow Steps 1 and 2 in Wired - Automatic, and 

then follow these steps:

1. 

Select 

Network Status

. The product 

searches for a network, and then displays the 

connection failed message.

2. 

On the bottom of the screen, select 

IP 

Settings

, and then press the 

v

 button.  

The 

IP Settings

 screen appears.

3. 

Select the 

IP Settings

 field, and then press 

the 

v

 button.

4. 

Select 

Enter manually

 in the 

IP Settings


field, and then press the 

v

 button.

5. 

Select a parameter to enter (

IP Address

, for 

example), and then press the 

v

 button.  

Use the number keypad on your remote 

control to enter the numbers for the 

parameter. You can also enter numbers using 

the ▲▼ buttons. Use the ◄► buttons on 

the remote control to move from entry field 

to entry field within a parameter. When done 

with one parameter, press the 

v

 button.

6. 

Press the ▲ or ▼ button to move to another 

parameter, and then enter the numbers for 

that parameter following the instructions in 

Step 5. 

7. 

Repeat Steps 5 and 6 until you have filled in 

all parameters.

 |NOTE |


\

You can get the Network parameters from your Internet 

provider.

8. 

When finished entering all the parameters, 

select 

OK

, and then press the 

v

 button. 

The product verifies the network connection, 

and then connects to the network.

Wireless Network

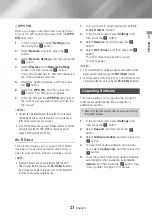
You can set up a wireless network connection in 

four ways: 

 - Wireless Automatic 

 - Wireless Manual 

 - WPS(PBC)

 - WPS PIN

When you configure the wireless network 

connection, any wireless network devices currently 

connected through the product or, if applicable, 

the product's current wired connection, will be 

disconnected.


Ğ

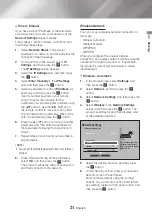
Wireless - Automatic

1. 

In the Home screen, select 

Settings

, and 

then press the 

v

 button.

2. 

Select 

Network

, and then press the 

v


button.

3. 

Select 

Network Settings

, and then press the 

v

 button.

4. 

Select 

Wireless

 in the 

Network Settings


screen, and then press the 

v

 button. The 

product searches for and then displays a list 

of the available networks.

Network Settings

Select your network type.

Wireless network

iptime23

iptime
solugen_edu#2

Network type

Wireless

Refresh

WPS(PBC)

You can connect your Blu- 

ray player to the internet. 

Please select which wireless 

network to use.

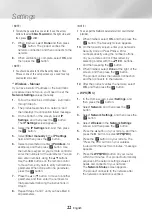
5. 

Select the desired network, and then press 

the 

v

 button.

6. 

On the Security screen, enter your network's 

Security Code or Pass Phrase. 

Enter numbers directly using the number 

buttons on your remote control. Enter letters 

by selecting a letter with an arrow button, and 

then pressing 

v

 button.

Содержание BD-JM63

Страница 1: ...he possibilities Thank you for purchasing this Samsung product To receive more complete service please register your product at www samsung com register Blu ray Disc Player user manual BD JM63 BD JM63C BD J6300 ...

Страница 2: ...ey exit from the apparatus To protect this apparatus from a lightning storm or when it is left unattended and unused for long periods of time unplug it from the wall outlet and disconnect the antenna or cable system This will prevent damage to the set due to lightning and power line surges Before connecting the AC power cord to the DC adaptor outlet make sure the voltage designation of the DC adap...

Страница 3: ...uct If the product is damaged disconnect the power cord and contact a service center To clean this apparatus unplug the power cord from the wall outlet and wipe the product using a soft dry cloth Do not use any chemicals such as wax benzene alcohol thinners insecticide air fresheners lubricants or detergent These chemicals can damage the appearance of the product or erase the printing on the produ...

Страница 4: ...OF CONTROLS OR ADJUSTMENTS OR PERFORMANCE OF PROCEDURES OTHER THAN THOSE SPECIFIED HEREIN MAY RESULT IN HAZARDOUS RADIATION EXPOSURE DO NOT OPEN THE COVER DO NOT REPAIR THE PRODUCT YOURSELF REFER SERVICING TO QUALIFIED PERSONNEL CLASS 1 LASER PRODUCT KLASSE 1 LASER PRODUKT LUOKAN 1 LASER LAITE KLASS 1 LASER APPARAT PRODUCTO LÁSER CLASE 1 NOTE If the Region number of a Blu ray Disc DVDs does not co...

Страница 5: ...es and rest A responsible adult should frequently check on children who are using the 3D function If there are any reports of tired eyes headaches dizziness or nausea have the child stop viewing 3D TV and rest Do not use the 3D Active Glasses for other purposes such as general eyeglasses sunglasses protective goggles etc Do not use the 3D function or 3D Active Glasses while walking or moving aroun...

Страница 6: ...n 15 Accessing the Settings Screen 15 Buttons on the Remote Control Used for the Settings Menu 16 Settings Menu Functions 16 Picture 17 Sound 17 Network 18 Smart Hub 18 System 20 Support 20 Networks and the Internet 20 Configuring Your Network Connection 23 Wi Fi Direct 23 Upgrading Software 24 Update now 24 Auto Update Media Play 26 Playing Commercial Discs 26 Disc Storage Management 26 Playing P...

Страница 7: ... Samsung Apps 38 Using Samsung Apps 38 The Samsung Apps Screen at a Glance 39 Starting an Application 40 Screen Mirroring 41 Using the Web Browser 41 Link Browsing and Pointer Browsing 41 The Control Panel at a Glance 43 Using the Setting Menu 44 Linking Your Internet Service Accounts to the Product 44 BD LIVE Appendix 45 Additional Information 45 Notes 47 Resolution according to the contents type...

Страница 8: ...trol AAA Size 4301 000121 User Manual APPS PANDORA DIGITAL SUBTITLE INPUT HOME 1 4 7 VOL 2 5 8 0 VOL 3 6 9 SOURCE DISC MENU SMART TITLE MENU VOL VOL POPUP A B C D SEARCH FULL SUBTITLE SCREEN SAMSUNG TV INFO TOOLS RETURN EXIT HOME AUDIO REPEAT HUB HDMI cable BD JM63C only BN39 01583A Remote Control AK59 00167A ...

Страница 9: ...ct s software through the USB HOST jack you must use a USB memory stick When the product displays the Blu ray Disc s menu you cannot start the movie by pressing the Play button on the product or the remote control To play the movie you must select Play Movie or Start in the disc s menu and then press the v button on the remote control Rear Panel HDMI OUT LAN DIGITAL AUDIO OUT ...

Страница 10: ...the disc tray Press the number buttons to operate options Use to enter the disc menu Press to skip backwards or forwards Press to stop a disc Press to use Apps Press to move to the Home screen Press to use the Tools menu Return to the previous menu Press to search contents Use to access various audio functions on a disc These buttons are used both for menus on the player and also several Blu ray D...

Страница 11: ...l video and audio so you don t need to connect an audio cable Depending on your TV certain HDMI output resolutions may not work Please refer to the user manual of your TV When you connect the product to your TV using an HDMI cable or to a new TV and then turn it on for the first time the product automatically sets the HDMI output resolution to the highest supported by the TV A long HDMI cable may ...

Страница 12: ...I OUT jack on the back of the product to the HDMI IN jack on your receiver Best quality Recommended Method 2 Connecting to an AV receiver with a Digital Optical Cable Using a digital Optical cable not supplied connect the OPTICAL DIGITAL AUDIO OUT jack on the product to the DIGITAL OPTICAL IN jack of the receiver Good quality You will hear sound only through the front two speakers with Digital Out...

Страница 13: ...f your wireless router supports DHCP this product can use a DHCP or static IP address to connect to the wireless network Set your wireless router to Infrastructure mode Ad hoc mode is not supported The product supports only the following wireless security key protocols WEP OPEN SHARED WPA PSK TKIP AES WPA2 PSK TKIP AES Select a channel on the wireless router that is not currently being used If the...

Страница 14: ...ings System Setup in the Home screen or select the Reset option See page 20 If you want to use the Anynet HDMI CEC function please follow the instructions below 1 Connect the product to an Anynet HDMI CEC compliant Samsung TV using an HDMI Cable 2 Set the Anynet HDMI CEC feature to On in both the TV and the product 3 Set the TV to the Initial Settings Procedure The Home Screen WebBrowser 2 3 SAMSU...

Страница 15: ... the Settings Menu APPS PANDORA DIGITAL SUBTITLE INPUT HOME 1 4 7 VOL 2 5 8 0 VOL 3 6 9 DISC MENU SMART TITLE MENU VOL VOL POPUP A B C D SEARCH FULL SUBTITLE SCREEN SAMSUNG TV INFO TOOLS RETURN EXIT HOME AUDIO REPEAT HUB 1 2 4 3 1 HOME button Press to move to the Home screen 2 RETURN button Press to return to the previous menu 3 v Enter DIRECTION buttons Press to move the cursor or select an item ...

Страница 16: ...he video resolution and frame rate of the Blu ray Disc DVD Resolution Set the output resolution of the HDMI video signal to BD Wise Auto 1080p 1080i 720p or 480p The number indicates the number of lines of video per frame The i and p indicate interlaced and progressive scan respectively Generally the more lines the higher quality Movie Frame 24Fs If the product is connected to a 24Fs compatible TV...

Страница 17: ...gital Plus Off Leaves the dynamic range uncompressed letting you hear the original sound On Turns dynamic range control on for all three Dolby formats Quieter sounds are made louder and the volume of loud sounds is reduced Downmixing Mode Lets you select the multi channel downmix method that is compatible with your stereo system You can choose to have the product downmix to normal stereo or to sur...

Страница 18: ...rom a BD Live service or Blu ray Disc Smart Hub Caption The function is used for VOD playback that supports closed caption display Use it to change the displayed caption s font color and size NOTES This function does not work with VOD services that don t support closed caption display For certain VOD services the function s settings may not be applied Terms Policy You must review and agree to both...

Страница 19: ...Security The default security PIN is 0000 Enter the default PIN to access the security function if you haven t created your own PIN After you have accessed the security function for the first time change the PIN using the Change PIN function BD Parental Rating Prevents playback of Blu ray Discs with a rating equal to or above a specific age rating you have set unless you enter the PIN DVD Parental...

Страница 20: ...s and functions such as Smart Hub and BD LIVE and upgrade the product s software through the network connection For more information about accessing and using Internet services see the Network Services chapter of this manual on pages 37 44 Instructions for configuring the network connection start below Configuring Your Network Connection Before you begin contact your ISP to find out if your IP add...

Страница 21: ...parameters from your Internet provider 8 When finished entering all the parameters select OK and then press the v button The product verifies the network connection and then connects to the network Wireless Network You can set up a wireless network connection in four ways Wireless Automatic Wireless Manual WPS PBC WPS PIN When you configure the wireless network connection any wireless network devi...

Страница 22: ...e v button 7 Press the or button to move to another parameter and then enter the numbers for that parameter following the instructions in Step 6 8 Repeat Steps 6 and 7 until you have filled in all parameters NOTE You can get the Network parameters from your Internet provider 9 When finished select OK and then press the v button The Security Screen appears 10 On the Security screen enter your netwo...

Страница 23: ...er NOTE Bluetooth transmissions can interfere with the Wi Fi Direct signal Before you use the Wi Fi Direct function we strongly recommend that you turn off the Bluetooth function of any active mobile device 1 Turn on the Wi Fi direct device and activate its Wi Fi Direct function 2 In the Home screen select Settings and then press the v button 3 Select Network and then press the v button 4 Select W...

Страница 24: ...to Update 6 If you select No the product cancels the upgrade NOTES When the system upgrade is done check the software details in the Product Information section of the Contact Samsung screen Do not turn off the product during the Software Update It may cause the product to malfunction Auto Update You can set the Auto Update function so that the product downloads new upgrade software when it is in ...

Страница 25: ...rches for the software on the USB drive When it finds the software the Update Request pop up appears 15 Select Yes The product upgrades the software turns off and then turns on automatically NOTES There should be no disc in the product when you upgrade the software using the USB jack When the system upgrade is done check the software details in the Product Information section of the Contact Samsun...

Страница 26: ...e surface Do not stick paper or tape on the disc Cleaning Discs If you get fingerprints or dirt on a disc clean it with a mild detergent diluted in water and wipe with a soft cloth When cleaning wipe gently from the inside to the outside of the disc Disc Storage Do not keep in direct sunlight Keep in a cool ventilated area Keep in a clean protective jacket and store vertically Playing Photos Video...

Страница 27: ...vely select the Media Type you want to play Videos for example select the file you want to play and then press the 6 button to play the content 5 To exit press the 5 button or RETURN button Allowing a Connection with a Mobile Device HOME Settings Network Multimedia Device Settings To play the media content stored on a mobile device you must allow the connection between the mobile device and the pr...

Страница 28: ...contents of the disc Depending on how the contents are arranged you will see either folders individual files or both 4 If necessary use the buttons to select a folder and then press the v button 5 Use the buttons to select a file to view or play and then press the v button 6 Press the RETURN button one or more times to exit a current screen exit a folder or to return to the Home screen Press the E...

Страница 29: ...sc or device select to start a different title 1 Select Search Titles and then press the v button 2 Use the buttons to select a title and then press the v button NOTE When searching DVD title in stop mode enter the INFO button and title number 01 02 you want Playback related buttons The product does not play sound in Search Slow or Step mode To return to normal speed playback press the 6 button 6 ...

Страница 30: ...ove to the Home or Smart Hub Home screen while in 3D mode the product will switch to 2D automatically Search Search Scene You can use the Search Scene function during playback to view or start a movie from the scene of your choice Search Titles If there is more than one movie on the disc or device select to start a different title Search Time Bar Select to play the movie from a selected time point...

Страница 31: ...cebook etc or device To use this menu you need to establish an account with the on line site and then log in using the Log In function See Using the Send Function on page 36 Controlling Music Playback You can control the playback of music content located on a Disc USB mobile device or PC Depending on the disc or contents some of the functions described in this manual may not be available Buttons o...

Страница 32: ...n press the v button Track Displays all the music tracks on the media or storage device in alphabetical order Album Displays all music on the media or storage device by album Artist Displays all the the music files on the media or storage device by artis Genre Displays all the music on the media or storage device by genre Folder Displays all the folders on the media or storage device NOTE Dependin...

Страница 33: ...ove a track from the list move to the track and then press the v button again The check on the track is removed 6 When done press the button to select Play and then press the v button The Music Playback screen reappears listing only the tracks you checked The selected tracks play automatically NOTES You can create a playlist with up to 99 tracks on Audio CDs CD DA On the Selection Play screen you ...

Страница 34: ...cks and press the v button This cancels your individual track selections Use Clear All to deselect all selected tracks at once Playing Photo Contents You can play photo contents located on a DVD USB mobile device or PC Using the Tools Menu During Playback During playback or in pause mode press the TOOLS button Use the buttons to select the and then press the v button Slideshow Settings Select to c...

Страница 35: ...device by title Folder Displays all the folders on the media or storage device NOTE Depending on the disc or storage device the menu may differ Using the Options Menu On a file screen containing photo files select the and then press the v button Slide Show Starts the slide show Shows all the files in the current folder one after another If you want to create a slide show with a selected group of p...

Страница 36: ...nd then press the v button 3 Use the buttons to select a file and then press the v button A check appears to the left of the file 4 Repeat Step 3 to select and check additional files 5 To remove a file from the list move to the file and then press the v button again The check on the file is removed 6 When done press the button to select Send and then press the v button The Send pop up appears list...

Страница 37: ... then press the v button The keyboard pop up appears 5 Enter your e mail address using the keyboard Use the arrow buttons to move from character to character Press v to select a character Select the Caps on the left to enter capitals Select the 123 to select additional symbols 6 When finished select the Done on the keyboard and then press the v button The Create Account screen reappears 7 Enter a ...

Страница 38: ...ton Using Samsung Apps You can download applications from the Internet and access various application and view them on your TV To access some applications you need to have a Samsung account The Samsung Apps Screen at a Glance Most Popular What s New Categories SAMSUNG APPS 2 2 3 3 4 4 5 5 6 7 9 8 10 1 WebBrowser MY APPS RECOMMENDED 1 2 3 1 RECOMMENDED Displays recommended contents managed by Samsu...

Страница 39: ...torage device and try again Starting an Application 1 Select SAMSUNG APPS on the Home screen and then press the v button 2 On the SAMSUNG APPS screen use the buttons to select an app and then press the v button The app starts The Options Menu Move 1 On the MY APPS screen select the app you want to move and then press the v button for 3 seconds 2 Select Move and then press the v button 3 Use the bu...

Страница 40: ...ear next to all the apps you selected NOTE You can also select Cancel Select All or Deselect All at the bottom of the screen To unlock apps follow essentially the same directions but select apps that have locks When you select Save and then press the v button the locks are removed Update Apps 1 On the MY APPS screen select any app and then press the v button for 3 seconds 2 Select Update Apps and ...

Страница 41: ...veX is not supported Access may be blocked to some websites or to web browsers operated by certain businesses Playing Flash videos is not supported Link Browsing and Pointer Browsing The Web Browser provides two types of browsing Pointer Browsing and Link Browsing When you launch the browser for the first time Pointer Browsing is active If you are using a mouse to navigate in the Web Browser we re...

Страница 42: ...com _ New Tab http www samsung com http www samsung com 100 New Tab http www samsung com 1 Use the buttons on your remote to move the highlight to a letter or number of your choice 2 Press the v button to enter the letter or number into the entry field 3 To access capital letters move the highlight to the Caps key on the top left and then press the v button Press the v button again with the Caps k...

Страница 43: ...the scroll bar The Grabber function is only available in Pointer Browsing Approved Sites Lets you restrict your children s access to inappropriate web pages by allowing access only to the web sites you have registered Every time you access this function the PIN screen appears The first time you access this function enter the default PIN 0000 using the number buttons on your remote You can change t...

Страница 44: ...tivated are greyed out and cannot be used Linking Your Internet Service Accounts to the Product The Link Service Accounts function lets you link your product to your accounts with Internet services such as Pandora so that the product can log you in to the service automatically when you start the app for that service Register your account by going to HOME Sign In Create with Facebook BD LIVE Once t...

Страница 45: ...does not support BD Wise you cannot use the BD Wise function For the proper operation of BD Wise set the BD Wise option of both the product and the TV to On Digital Output Be sure to select the correct Digital Output or you will hear no sound or just loud noise If the HDMI device AV receiver TV is not compatible with compressed formats Dolby Digital DTS the audio signal outputs as PCM Regular DVDs...

Страница 46: ... the HDMI cable does not support CEC If your Samsung TV has an Anynet logo then it supports the Anynet function Media Play Selecting the Audio Language The indicator will not appear on the screen if the BONUSVIEW section does not contain any BONUSVIEW audio settings The languages available through the Audio Language function depend on the languages that are encoded on the disc This function or cer...

Страница 47: ...tures are shown after selecting Yes please wait for 15 seconds to return to the previous resolution Do you want to change the resolution appears If you select Yes the TV s screen will go blank for 15 seconds and then the resolution will revert to the previous resolution automatically If the screen stays blank after you have changed the resolution remove all discs and then press and hold the button...

Страница 48: ...PCM 2ch PCM 2ch PCM 2ch PCM 2ch Dolby Digital Up to PCM 5 1ch PCM 2ch Dolby Digital Dolby Digital Dolby Digital Dolby Digital DTS Up to PCM 6 1ch PCM 2ch DTS DTS DTS DTS Definition for Blu ray Disc Any Decodes the main feature audio and BONUSVIEW audio stream together into PCM audio and adds Navigation Sound Effects Outputs only the main feature audio stream so that your AV receiver can decode the...

Страница 49: ...disc menus The prohibition message appears on the screen This message appears when an invalid button is pressed The Blu ray Disc DVD s software doesn t support the feature e g angles You ve requested a title or chapter number or search time that is out of range Play mode differs from the Setup Menu selection Some of the functions selected in the Setup Menu may not work properly if the disc is not ...

Страница 50: ...rotection If you experience other problems Go to the table of contents and find the section of the user manual that contains information about the feature you are having the problem with and then follow the procedure again If you still cannot resolve the problem please contact your nearest Samsung authorized service center Play Multimedia on network devices You can see folders shared on network de...

Страница 51: ...IVE service You can check the available size in BD Data Management See page 18 See if the BD LIVE Internet Connection option is set to Allow All If all above fails contact the content provider or update the product to the latest firmware When using the BD LIVE service an error occurs The memory device must have at least 1GB of free space to accommodate the BD LIVE service You can check the availab...

Страница 52: ... the disc type or recording conditions If a DVD RW R has not been recorded properly in DVD video format it will not be playable Your product will not play content that has been recorded on a DVD R at a bit rate that exceeds 10 Mbps Your product will not play content that has been recorded on a BD R or USB device at a bitrate that exceeds 25 Mbps Playback may not work for some types of discs or whe...

Страница 53: ...Kong and South East Asia b Europe Greenland French territories Middle East Africa Australia and New Zealand C India China Russia Central and South Asia DVD VIDEO 1 The U S U S territories and Canada 2 Europe Japan the Middle East Egypt Africa Greenland 3 Taiwan Korea the Philippines Indonesia Hong Kong 4 Mexico South America Central America Australia New Zealand Pacific Islands Caribbean 5 Russia ...

Страница 54: ...0 RealAudio 6 Limitations Even when a file is encoded by a supported codec listed in the Video File Support table the file might not play if its content has a problem Normal playback is not guaranteed if the file s container information is wrong or the file itself is corrupted Files having a higher Bit rate frame rate than indicated in the Video File Support table may stutter when played back The ...

Страница 55: ...and MP4 format discs may not play depending on their video resolution and frame rate Supported Subtitle File Formats Name File Extension External MPEG 4 Timed text ttxt SAMI smi SubRip srt SubViewer sub Micro DVD sub or txt SubStation Alpha ssa Advanced SubStation Alpha ass Powerdivx psb SMPTE TT Text xml Name File Extension Internal Xsub AVI SubStation Alpha MKV Advanced SubStation Alpha MKV SubR...

Страница 56: ...humb drives and USB HDD HUB is not supported Certain USB HDD Devices multi card readers and thumb drives may not be compatible with this player If some USB devices require excessive power they may be limited by the circuit safety device If playback from a USB HDD is unstable provide additional power by plugging the HDD into a wall socket If the problem continues contact the USB HDD manufacturer SA...

Страница 57: ...ific or limited operation and feature during playback some features may be optional additional features may have been added after the production of this player or certain available features may be subject to delayed availability some discs bearing the BD ROM BD RE R DVD VIDEO DVD RW R DVD RW R and CD RW R logos may still be non standardized discs some discs may not be played depending on their phy...

Страница 58: ...rcially produced film and videos and their soundtracks When a prohibited use of an unauthorized copy is detected a message will be displayed and playback or copying will be interrupted More information about Cinavia technology is provided at the Cinavia Online Consumer Information Center at http www cinavia com To request additional information about Cinavia by mail send a postcard with your maili...

Страница 59: ... Samsung has no control Without limiting the generality of this disclaimer Samsung expressly disclaims any responsibility or liability for any interruption or suspension of any content or service made available through this device Samsung is neither responsible nor liable for customer service related to the content and services Any question or request for service relating to the content or service...

Страница 60: ...tput Optical Network Ethernet 100BASE TX Terminal Wireless LAN Built in Security WEP OPEN SHARED WPA PSK TKIP AES WPA2 PSK TKIP AES WPS PBC Supported Network speeds equal to or below 10Mbps are not supported Design and specifications are subject to change without prior notice For the power supply and power consumption refer to the label attached to the product Weight and dimensions are approximate...

Страница 61: ...problems incorrect electrical line voltage fluctuations and surges customer adjustments and failure to follow operating instructions cleaning maintenance and environmental instructions that are covered and prescribed in the instruction book product removal or reinstallation reception problems and distortion related to noise echo interference or other signal transmission and delivery problems SAMSU...

Страница 62: ...ONLINE AT WRITE IN THE US 1 800 SAMSUNG 726 7864 www samsung com us support Samsung Electronics America Inc 85 Challenger Road Ridgefield Park NJ 07660 The party responsible for product compliance Samsung Electronics Co LTD America QA lab of Samsung 19 Chapin Rd Building D Pine Brook New Jersey 07058 ...

Отзывы: