background image

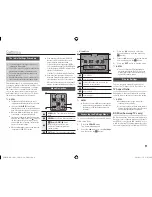
Network Settings

Please contact your ISP to find out if your IP 

address is static or dynamic. If it is dynamic 

- and most are - we recommend using the 

Auto procedure for network setup. This is 

easiest and will work in the majority of cases. 

If it is static, you must use the manual set up 

procedure.

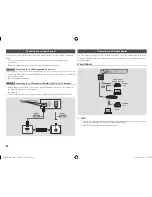
Network setup directions start below.


NOTES


`

This unit can only be connected to a Network 

via a wired connection.

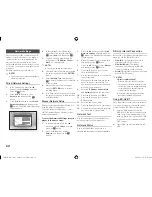
Wired Network Settings

1. 

In the Home menu, press the ◄► 

buttons to select 

Settings

, and then 

press the 

v

 button.

2. 

Press the ▲▼ buttons to select 

Network

, and then press the 

v


button.

3. 

Press the ▲▼ buttons to select 

Wired 

Network Settings

, and then press the 

v

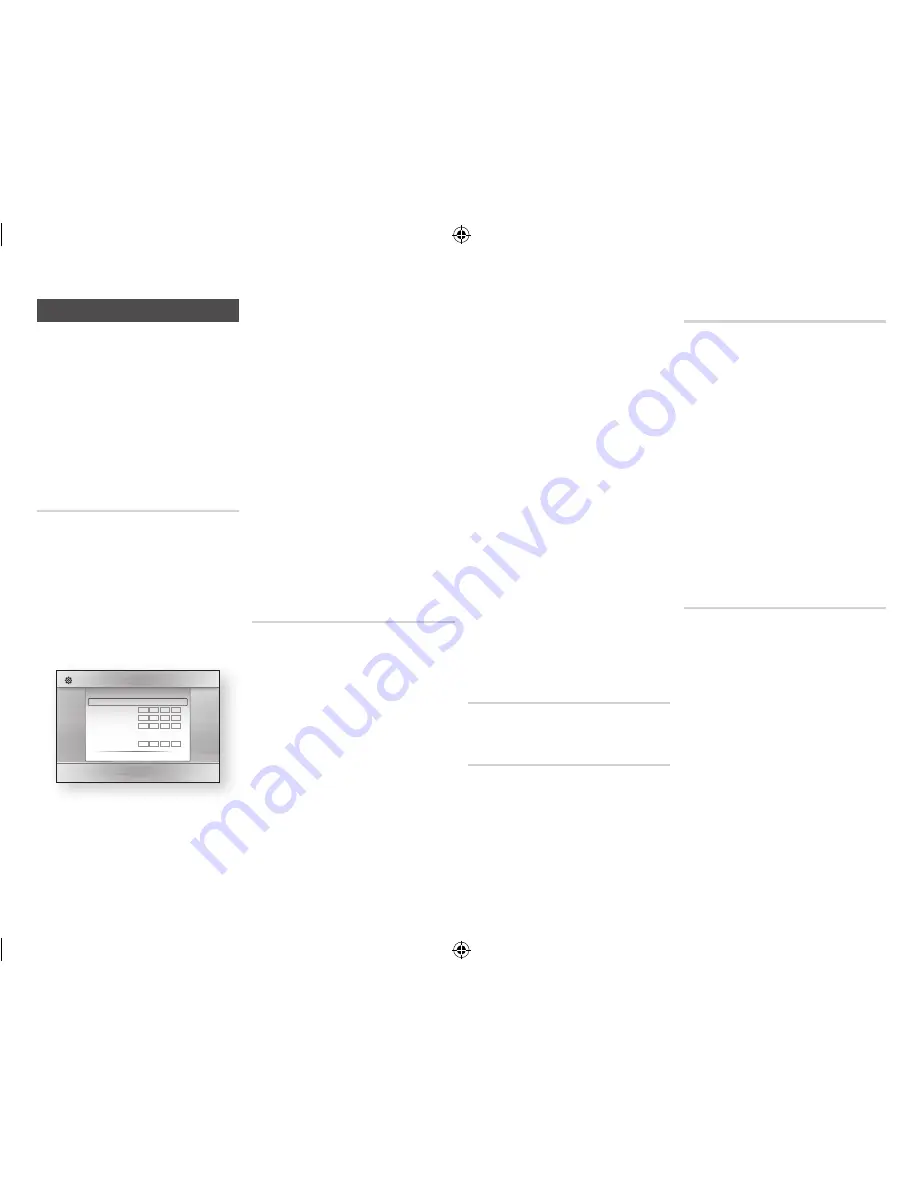
 button. The Wired Network Settings 

screen appears.

4. 

In the Internet Protocol Setup field, 

select Auto if it is not selected. (Press 

v

 select 

Auto

, and then press 

v

.)

5. 

The Auto Function acquires and fills 

in the values for 

Ip Address

Subnet 

mask

, etc., automatically.


NOTES


`

This process can take up to five minutes.

6. 

After the Network Function has acquired 

the network values, press the 

RETURN


button.

7. 

Select 

Network Test

, and then press 

v

 to ensure the player has connected 

to your network.

8. 

When the Network Test is complete, 

press the 

RETURN

 twice to return to 

the Main Menu.

9. 

If the Network Function does not acquire 

the network values, go to the directions 

for Manual Setup.

manual Network Setup

Before you start manual network setup, you 

need the network setting values.

To get the network setting values, contact 

your ISP (Internet Service Provider) or your 

network administrator. 

To enter the Network Settings into your 

player, follow these steps:

1. 

In the Home menu, press the ◄► 

buttons to select 

Settings

, and then 

press the 

v

 button.

2. 

Press the ▲▼ buttons to select 

Network

, and then press the 

v


button.

3. 

Press the ▲▼ buttons to select 

Wired 

Network Settings

, and then press the 

v

 button. The Wired Network Settings 

screen appears. 

4. 

Select the Internet Protocol Setup field, 

and then press the 

v

 button.

5. 

Press the ▲▼ buttons to select 

manual

and then press the 

v

 button.

6. 

Press the ▼ button to go to the first 

entry field (IP Address).

7. 

Use the number buttons on your remote 

to enter numbers.

8. 

When done with each field, use the ► 

button to move to the next field. You 

can also use the other arrow buttons to 

move up, down, and back.

9. 

Enter the 

Ip Address

Subnet mask

and 

Gateway

 values in the same way.

10. 

Press the ▼ button to go to 

dNS

.

11. 

Press the ▼ button to go to the first 

DNS entry field. 

12. 

Enter the numbers as above.

13. 

Press the Return button on your remote.

14. 

Run a Network Test to ensure the player 

has connected to your network.

Network Test

Use this menu item to check whether your 

network connection is working or not.

Network Status

Use to check whether a connection to a 

network and the Internet has been established.

Bd-Live Internet Connection

Set to allow or prohibit an Internet connection 

when you use the BD-LIVE service.

• 

Allow (All)

 : The Internet connection is 

allowed for all BD-LIVE contents.

• 

Allow (Valid Only)

 : The Internet 

connection is allowed only for BD-LIVE 

contents containing a valid certificate.

• 

prohibit

 : No Internet connection is allowed 

for any BD-LIVE content.


NOTES


`

What is a valid certificate?


When the player uses BD-LIVE to send the 

disc data and a request to the server to certify 

the disc, the server uses the transmitted data 

to check if the disc is valid and sends the 

certificate back to the player.


`

The Internet connection may be restricted 

while you are using BD-LIVE contents.

Using Bd-LIVE™

Once the player is connected to the network, 

you can enjoy various movie-related service 

contents using a BD-LIVE compliant disc.

1. 

Attach a USB memory stick to the 

USB jack on the front of the player, and 

then check its remaining memory. The 

memory device must have at least 1GB 

of free space to accommodate the BD-

LIVE services.

2. 

Insert a Blu-ray Disc that supports BD-

LIVE.

Display
Audio

Network

System
Language
Security
General
Support

Settings 

Wired Network Settings

Internet Protocol Setup  : Auto 

\

IP Address 

:  0


0


0


0  

Subnet Mask 

:  0


0


0


0

Gateway : 

0


0


0


0


DNS 

: Auto

DNS Server 

:


0


0


0


0


>

 Move  

"

 Select  

'

 Return

12

02355B-BD-FM51,FM51C-ZA-ENG.indd   12

2013-01-15   오후 5:03:05

Содержание BD-FM51

Страница 1: ... for purchasing this Samsung product To receive more complete service please register your product at www samsung com register Blu ray Disc Player user manual BD FM51 BD FM51C ENGLISH 02355B BD FM51 FM51C ZA ENG indd 1 2013 01 15 오후 5 02 ...

Страница 2: ...nt of cable entry as practical CLASS 1 LASER product This Compact Disc player is classified as a CLASS 1 LASER product Use of controls adjustments or performance of procedures other than those specified herein may result in hazardous radiation exposure Complies with 21CFR 1040 10 except for deviations pursuant to Laser Notice No 50 dated June 24 2007 DANGER VISIBLE AND INVISIBLE LASER RADIATION WH...

Страница 3: ...ket can cause it to overheat resulting in a fire Before connecting other components to this player be sure to turn them off If you move your player suddenly from a cold place to a warm place condensation may occur on the operating parts and lens and cause abnormal disc playback If this occurs unplug the player wait for two hours and then connect the plug to the power outlet Then insert the disc an...

Страница 4: ...iscs are coded by region These regional codes must match for a disc to play If the codes do not match the disc will not play The Region Code for this player is displayed on the rear panel of the player Disc Type Region Code Area Blu ray Disc a North America Central America South America Korea Japan Taiwan Hong Kong and South East Asia DVD VIDEO 1 The U S U S territories and Canada Logos of Discs t...

Страница 5: ...TS 1920x1080 MPEG2 1920x1080 H 264 BP MP HP 1920x1080 Limitations Even when a file is encoded by a supported codec listed above the file might not be played if its content has a problem Normal playback is not guaranteed if the file s container information is wrong or the file itself is corrupted Files having a higher Bit rate frame rate than standard may stutter during sound video playback The See...

Страница 6: ...mpresses images with greater efficiency than the conventional image compressing format Some AVCHD discs use the x v Color format This player can play back AVCHD discs that use x v Color format x v Color is a trademark of Sony Corporation AVCHD and the AVCHD logo are trademarks of Matsushita Electronic Industrial Co Ltd and Sony Corporation NOTES Some AVCHD format discs may not play depending on th...

Страница 7: ...emote sensor is blocked by obstacles Check if there is any fluorescent lighting nearby CAUTION Dispose of batteries according to local environmental regulations Do not put them in the household trash Connections Connecting to a TV Connect an HDMI cable not supplied from the HDMI OUT jack on the back of the product to the HDMI IN jack on your TV Do not connect the power cord to the wall outlet unti...

Страница 8: ...uct to the Digital Coaxial In jack of the receiver Good quality You will hear sound only through the front two speakers with Digital Output set to PCM Audio Audio Method 2 Method 1 Connecting to a Network Router You can connect your player to your network router using one of the methods illustrated below To use the DLNA network functionality you must connect your PC to your network as shown in the...

Страница 9: ...n Press to move to the Home menu 2 RETURN Button Return to the previous menu 3 v Enter DIRECTION Button Move the cursor or select an item Activate the currently selected item Confirm a setting 4 EXIT Button Press to exit the current menu Home Menu 1 Selects Music 2 Selects Settings 3 Displays the buttons you can use on the remote to access functions 4 Selects applications 5 Selects Videos 6 Select...

Страница 10: ...for 15 seconds to return to the previous resolution Do you want to change the resolution appears If you select Yes the TV s screen will go blank for 15 seconds and then the resolution will revert to the previous resolution automatically If the screen stays blank after you have changed the resolution remove all discs and then press and hold the button on the front of the player for more than 5 seco...

Страница 11: ...lu ray Discs may include three audio streams Main Feature Audio The audio soundtrack of the main feature BONUSVIEW audio An additional soundtrack such as the director or actor s commentary Navigation Sound Effects When you choose a menu navigation selection a Navigation Sound Effect may sound Navigation Sound Effects are different on each Blu ray Disc NOTES Be sure to select the correct Digital Ou...

Страница 12: ...ons to select Manual and then press the v button 6 Press the button to go to the first entry field IP Address 7 Use the number buttons on your remote to enter numbers 8 When done with each field use the button to move to the next field You can also use the other arrow buttons to move up down and back 9 Enter the IP Address Subnet Mask and Gateway values in the same way 10 Press the button to go to...

Страница 13: ... automatically to re establish the Anynet connection After about 15 seconds it turns off again automatically Some Samsung TVs when connected to this product using the Anynet function will when you turn them on display a warning popup message saying no connection has been found Never the less the Anynet connection is properly established and available to use BD Data Management Enables you to manage...

Страница 14: ... archive to your computer You should have a single RUF file with the same name as the zip file 4 Copy the RUF file to a USB flash drive 5 Make sure there is no disc in the player and then insert the USB flash drive into the USB port of the player 6 In the player s menu go to Settings Support Software Upgrade 7 Select By USB NOTES No disc should be in the product when you upgrade the software using...

Страница 15: ...to the Home Screen 11 The controls and tools you use to control and play videos music and pictures located on a USB device are identical to those you use to play videos music and pictures on a disc Go to pages 16 17 for instructions NOTES You must remove the USB storage device safely by performing the Safely Remove USB function in order to prevent possible damage to the USB memory Press the MENU b...

Страница 16: ... not operate Buttons on the Remote Control used for Video Playback q q Playback related buttons The player does not play sound in Search Slow or Step mode To return to normal speed playback press the 6 button 6 button Starts playback 5 button Stops playback 7 button Pauses playback Fast Motion Play During playback press the 3 or 4 button Each time you press the 3 or 4 button the playback speed wil...

Страница 17: ...ying Photo Contents You can control the playback of photo content located on a Blu ray disc DVD CD USB device or your computer Using the Tools Menu During playback press the TOOLS button Start Slide Show Stop Slide Show Select to start or stop the slide show Slide Show Speed Select to set a slide show s speed Background Music Select to listen to music while viewing a slide show Zoom Select to enla...

Страница 18: ... revert to the factory settings When the factory default settings are restored all stored user BD data is deleted PROBLEM SOLUTION Forgot password Press the button on front panel for more than 5 seconds with no disc inside All settings including the password will revert to the factory settings Don t use this unless absolutely necessary When the factory default settings are restored all stored user...

Страница 19: ...the product 2 You bring the unit to a repair center and there is no defect in the product We will provide you with the amount of the administration fee before we make a home visit or begin any work on your player We recommend you read this manually thoroughly search for a solution on line at www samsung com or contact Samsung Customer Care at 1 800 SAMSUNG 726 7864 before seeking to repair your pl...

Страница 20: ...Y COMPATIBLE WITH THIS product AND MAY CAUSE ARTIFACTS TO BE DISPLAYED IN THE PICTURE IN CASE OF PROGRESSIVE SCAN PICTURE PROBLEMS IT IS RECOMMENDED THAT THE USER SWITCH THE CONNECTION TO THE STANDARD DEFINITION OUTPUT IF THERE ARE QUESTIONS REGARDING OUR TV SET COMPATIBILITY WITH THIS product PLEASE CONTACT OUR CUSTOMER SERVICE CENTER Copy Protection Because AACS Advanced Access Content System is...

Страница 21: ...makes no representation or warranty that any content or service will remain available for any period of time Content and services are transmitted by third parties by means of networks and transmission facilities over which Samsung has no control Without limiting the generality of this disclaimer Samsung expressly disclaims any responsibility or liability for any interruption or suspension of any c...

Страница 22: ...s parts supplies accessories applications installations repairs external wiring or connectors not supplied and authorized by SAMSUNG or which damage this product or result in service problems incorrect electrical line voltage fluctuations and surges customer adjustments and failure to follow operating instructions cleaning maintenance and environmental instructions that are covered and prescribed ...

Страница 23: ...R VISIT US ONLINE AT WRITE IN THE US 1 800 SAMSUNG 726 7864 www samsung com Samsung Electronics America Inc 85 Challenger Road Ridgefield Park NJ 07660 2112 AK68 02355B 00 AK68 02355B 02355B BD FM51 FM51C ZA ENG indd 23 2013 01 15 오후 5 03 ...

Отзывы: