background image


Good visual ergonomics and image quality in order to improve the working environment for the 
user and to reduce sight and strain problems. Important parameters are luminance, contrast, 
resolution, reflectance, colour rendition and image stability. 

Energy


z

Energy-saving mode after a certain time-beneficial both for the user and the environment 

z

Electrical safety 

Emissions


z

Electromagnetic fields 

z

Noise emissions 

Ecology


z

The product must be prepared for recycling and the manufacturer must have a certified 

    environmental management system such as EMAS or ISO 14 000 

z

Restrictions on 

    o chlorinated and brominated flame retardants and polymers 
    o heavy metals such as cadmium, mercury and lead.  
 
The requirements included in this label have been developed by TCO Development in cooperation 
with scientists, experts, users as well as manufacturers all over the world. Since the end of the 
1980s TCO has been involved in influencing the development of IT equipment in a more user-
friendly direction. Our labelling system started with displays in 1992 and is now requested by 
users and IT-manufacturers all over the world. 

For more information, Please visit 

www.tcodevelopment.com


Содержание 955DF - SyncMaster 955 DF

Страница 1: ...SyncMaster 955DF ...

Страница 2: ...A Installation Self Test Feature Check Cleaning Other Introduction Specifications Unpacking General Specifications Front Preset Timing Modes Rear PowerSaver Bottom Setup Information Connecting Your Monitor Service Installing the Monitor Driver Terms Automatic Regulatory Manual Natural Color Base Installation Authority ...

Страница 3: ... follow directions noted by this symbol could result in bodily harm or damage to equipment Prohibited Important to read and understand at all times Do not disassemble Disconnect the plug from the outlet Do not touch Grounding to prevent an electric shock ...

Страница 4: ...not pull the plug out by the wire nor touch the plug with wet hands z This may cause an electric shock or fire Use only a properly grounded plug and recepticle z An improper ground may cause electric shock or equipment damage Do not excessively bend the plug and wire nor place heavy objects upon them which could cause damage z Failure to do so may cause an electric shock or fire Disconnect the plu...

Страница 5: ...hen moving it z This may cause damage to the product or human body Place the monitor on a flat and stable surface z The monitor can cause injury by falling Set down the monitor carefully z It could be damaged or broken Do not place the monitor face down z The CDT surface may be damaged Do not use the monitor without the monitor stand z It could break down or cause a fire due to bad ventilation z I...

Страница 6: ...g Do not spray detergent directly on the monitor Use the recommended detergent with a smooth cloth z You can prevent the coated CDT from being damaged or the monitor cabinet from being dissolved cracked or discolored z You can buy a recommended detergent at any Samsung Service Center If the connector between the plug and the pin is dusty or dirty clean it properly with a dry cloth z A dirty connec...

Страница 7: ...may cause an electric shock or a fire For each hour of looking at the monitor you should let your eyes rest for 5 minutes z This will reduce eye fatigue Do not use or store inflammable substances near the monitor z This may cause an explosion or fire Do not try to move the monitor by pulling on the wire or the signal cable z This may cause a breakdown electric shock or a fire due to damage to the ...

Страница 8: ...Keep the monitor away from any magnetic substances z This may cause discoloring or distortion of the image ...

Страница 9: ... include a stand attached Please make sure the following items are included with your monitor If any items are missing contact your dealer Power Cord Stand Quick Setup Guide Warranty Card Not available in all locations User s Guide and Driver Installation CD ...

Страница 10: ...t items in the menu 4 Menu button Use this button to open the OSD and activate a highlighted menu item 5 Power indicator This light glows green during normal operation and blinks green once as the monitor saves your adjustments 6 Power button Use this button to turn the monitor on and off Note See PowerSaver described in the manual for further information regarding power saving functions For energ...

Страница 11: ...duct 1 Power port Connect the power cord for your monitor to the power port on the back of the monitor 2 Signal Cable Connect the signal cable to the video port on your computer video board video card or graphics card Note See Connecting Your Monitor for further information regarding cable connections ...

Страница 12: ... the signal cable to the video port on your computer video board video card or graphics card 2 Power port Connect the power cord for your monitor to the power port on the back of the monitor 3 Tilt Swivel Base You can separate the base from the monitor ...

Страница 13: ...o a nearby outlet 2 Connect the signal cable to the video port on your computer video board video card or graphics card 3 If you are using a Macintosh computer connect the cable to a Macintosh adapter and set the pins on your adapter Adapter not included A PC compatible computer does not need an adapter 4 Turn on your computer and monitor If your monitor displays an image installation is complete ...

Страница 14: ...am file at the Internet web site shown here z Internet web site http www samsung monitor com WorldWide http www samsungusa com monitor USA http www sec co kr monitor Korea http www samsungmonitor com cn China Windows ME 1 Insert CD into the CD ROM driver 2 Click Windows ME Driver 3 Choose your monitor model in the model list then click the OK button 4 Click the Install button in the Warning window...

Страница 15: ...w then click the Continue Anyway button Then click OK button This monitor driver is under certifying MS logo and this installation don t damage your system The certified driver will be posted on Samsung Monitor Homepage http www samsung monitor com 6 Monitor driver installation is completed ...

Страница 16: ...he operating system you have Prepare a blank disk and download the driver program file at the Internet web site shown here z Internet web site http www samsung monitor com WorldWide http www samsungusa com monitor USA http www sec co kr monitor Korea http www samsungmonitor com cn China Microsoft Windows XP Operating System 1 Insert CD into the CD ROM driver 2 Click Start Control Panel then click ...

Страница 17: ... your monitor model in the model list and click the Next button 8 If you can see following Message window then click the Continue Anyway button Then click OK button This monitor driver is under certifying MS logo and this installation don t damage your system The certified driver will be posted on Samsung Monitor Homepage http www samsung monitor com 9 Click the Close button then click OK button c...

Страница 18: ... button If you can see the Digital Signature Not Found window then click the Yes button And click the Finish button then the Close button Case1 If the Properties button is inactive it means your monitor is properly configured Please stop installation Case2 If the Properties button is active click the Properties button then follow next steps continually Microsoft Windows Millennium Operating System...

Страница 19: ...e Preset Display Modes in the user guide Linux Operating System To execute X Window you need to make the X86Config file which is a type of system setting file 1 Press Enter at the first and the second screen after executing the X86Config file 2 The third screen is for setting your mouse 3 Set a mouse for your computer 4 The next screen is for selecting a keyboard 5 Set a Keyboard for your computer...

Страница 20: ... most comfortable viewing angle Note The base is detachable Attaching the Base 1 Place the monitor upside down on a flat work surface 2 Align the tabs on the base with the corresponding slots on the bottom of the monitor 3 Press the base onto the monitor until the tabs are fully engaged in the slots 4 Push the base toward the front of the monitor until the release latch clicks into the locked ...

Страница 21: ... snap Removing the Base 5 Squeeze and pull up on the release latch on the base 6 Push the base toward the back of the monitor and lift up to remove the base Note The base will align with the monitor slots in only one position ...

Страница 22: ...ncing systems or photos by emphasizing a certain area on the screen 2 Exit button Use this button to Exit the active menu or the OSD 3 Adjust buttons These buttons allow you to highlight and adjust items in the menu 4 Menu button Use this button to open the OSD and activate a highlighted menu item ...

Страница 23: ... the brightness Push the button to increase the contrast or the button to decrease the contrast 1 Push and hold in the Menu button for 10 seconds or more to Lock the OSD In this case even if you click the Menu button the control screen will not be printed 2 Push and hold in the Menu button for 10 seconds or more to UnLock the OSD Menu How to adjust Brightness Contrast OSD lock unlock ...

Страница 24: ...ontal position of the monitor s viewing area Follow these instructions to change the size of the monitor s entire display 1 Push the Menu button 2 Push the button or button until the Position Size screen is displayed push the button or button to select Size 3 Push the Menu button to open the Size adjustment screen 4 Use the and buttons to change the vertical size of the monitor s viewing area use ...

Страница 25: ... screen viewing area Use the button to enlarge the screen viewing area Adjust the parallelogram setting when the display is leaning left or right adjust the rotation setting when the entire display is tilted left or right 1 Push the Menu button 2 Push the button or button until the Geometry screen is displayed 3 Push the Menu button to open the Parallel Rotation adjustment screen 4 Use the button ...

Страница 26: ...en the Pincushion Trapezoid adjustment screen 4 Use the button or button to adjust the pincushion setting Use the button or button to adjust the trapezoid setting Adjust the pinbalance setting when the sides of the display are bowed towards the left or right 1 Push the Menu button 2 Push the button or button until the Geometry screen is displayed Push the button or button to select Pinbalance 3 Pu...

Страница 27: ... or top bottom 1 Push the Menu button 2 Push the button or button until the Geometry screen is displayed Push the button or button to select Linearity 3 Push the Menu button to open the Linearity adjustment screen 4 Use the button or button to adjust the vertical Linearity Menu How to adjust Linearity ...

Страница 28: ... or 6500K Reddish colors A moiré pattern can appear on your screen looking like a series of concentric circles or arcs To eliminate this pattern use the clear moiré adjustments 1 Push the Menu button 2 Push the button or button until the Screen OSD is displayed 3 Push the Menu button to open the Clear Moire adjustment screen 4 Use the button or button to adjust horizontal moiré Use the button or b...

Страница 29: ...een will appear After a few seconds the degauss main menu will return Use the recall feature to reset these monitor settings to their original levels Position Size Pincushion Trapezoid Parallelogram Pinbalance Rotation Clear Moire Note If you have selected Yes all settings listed above will be reset All other settings will remain the same 1 Push the Menu button 2 Push the button or button until th...

Страница 30: ...Use the or buttons to select 0 7 V or 1 0 V You can see the frequency user control mode used by the user the polarity of the operational signals the default frequency default mode set when you buy the monitor and the resolution level Note These screens do not allow any changes to the settings they are for information only 1 Push the Menu button 2 Push the button or button until the Menu screen is ...

Страница 31: ...ts Note The language chosen affects only the language of the OSD It has no effect on any software running on the computer 1 Push the Menu button 2 Push the button or button until the Menu screen is displayed Push the button or button to select Languages 3 Push the Menu button to open the Languages selection screen 4 Use the button or button to select the language you would like to use Language On ...

Страница 32: ...tire screen This function is to move the Highlight Zone horizontally or vertically 1 Push the Highlight button 2 Push the button or button to select the Screen Position Adjustment and then push the Menu button 3 Push the button or button to move the position of the Highlight Zone horizontally and use the push the button or button to move it vertically Menu How to adjust Highlight Position ...

Страница 33: ...utton or button to move the size of the Highlight Zone horizontally and use the push the button or button to move it vertically This function is to use the Contrast of the Highlight Zone 1 Push the Highlight button 2 Push the button or button to select the Contrast Adjustment and then push the Menu button 3 Push the button or button to adjust the Contrast of the Highlight Zone Menu How to adjust S...

Страница 34: ...n or button to select a color from R G or B Push the button or button to adjust the R G or B color of the Highlight Zone This function is to enlarge or reduce the Highlight Zone 1 Push the Highlight button 2 Push the button or button to select theEnlargement and Reduction Adjustment and then push the Menu button 3 Push the button or button to enlarge or reduce the Highlight Zone Menu How to adjust...

Страница 35: ...arpness of the Highlight Zone 1 Push the Highlight button 2 Push the button or button to select the Sharpness Adjustment and then push the Menu button 3 Push the button or button to adjust the sharpness of the Highlight Zone Menu How to adjust Sharpness ...

Страница 36: ...the video card exceeds the maximum resolution and frequency that the monitor can properly handle Adjust the maximum resolution and frequency that the monitor can properly handle There is no image on the screen Is the power indicator on the monitor blinking at 1 second intervals The monitor is in PowerSaver mode Press a key on the keyboard or move the mouse to activate the monitor and restore the i...

Страница 37: ...frequency properly by referring to the video card manual and the Preset Timing Modes The maximum frequency per resolution may differ from product to product There are only 16 colors shown on the screen The screen colors have changed after changing the video card Have the Windows colors been set properly For Windows ME XP 2000 Set the colors properly at the Control Panel Display Settings Has the vi...

Страница 38: ...can t select any of the other menus within the Hightlight Zone 3 When the Highlight Zone function is operated the surrounding brightness of screen may become dark 4 Depending on the video card you use a color saturation phenomenon may occur in the Highlight Zone In this case slightly lower the contrast of the Highlight Zone and the color saturation will be reduced Note If problems repeatedly occur...

Страница 39: ... can I set the Power Saving function Windows ME XP 2000 Set the function at BIOS SETUP of the computer or the screen saver Refer to Windows Computer Manual The monitor makes a sound when it is turned on This is normal as some sound may be generated when the metal case and the electromagnet which are installed to block any electromagnetic waves interact with each other How can I clean the outer cas...

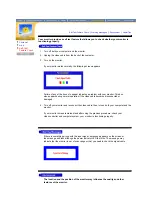
Страница 40: ... during normal operation if the video cable becomes disconnected or damaged 4 Turn off your monitor and reconnect the video cable then turn on both your computer and the monitor If your monitor screen remains blank after using the previous procedure check your video controller and computer system your monitor is functioning properly If there is something wrong with the input signal a message appea...

Страница 41: ...monitor to become blank have poor coloring noise Sync Out of Range etc In this case first check the source of the problem and then contact a service center or your dealer z Judging the monitor s working condition If there is no image on the screen or an Sync Out of Range message comes up disconnect the cable from the computer while the monitor is still powered on If there is a message coming up on...

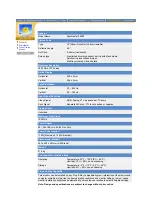
Страница 42: ...ositive or negative Display Color Unlimited Maximum Pixel Clock 185 MHz Power Supply 90 264VAC rms 60 50 Hz 3Hz Power Consumption 110W Maximum 100W Nominal Dimensions WxDxH 440 x 460 x 461mm with Stand Weight 21 0 kg Environmental considerations Operating Temperature 32 F 104 F 0 C 40 C Humidity 10 80 non condensing Storage Temperature 4 F 113 F 20 C 45 C Humidity 5 95 non condensing Plug and Play...

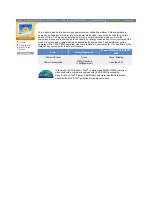
Страница 43: ...eded or when leaving it unattended for long periods The PowerSaver system operates with a VESA DPMS compliant video card installed in your computer Use a software utility installed on your computer to set up this feature State Normal Operation Power off Mode EPA ENERGY 2000 Power Indicator Green Green Blinking Power Consumption 100W Nominal 110W Maximum Less than 2W This monitor is EPA ENERGY STAR...

Страница 44: ...ecting the right edge to the left edge of the screen horizontally is called Horizontal Cycle and the inverse number of the Horizontal Cycle is called Horizontal Frequency Unit kHz Vertical Frequency Like a fluorescent lamp the screen has to repeat the same image many times per second to display an image to the user The frequency of this repetition is called Vertical Frequency or Refresh Rate Unit ...

Страница 45: ...ta Colombia Tel 9 800 112 112 Fax 571 618 2068 http www samsung latin com e mail soporte samsung latin com PANAMA Samsung Electronics Latinoamerica Z L S A Calle 50 Edificio Plaza Credicorp Planta Baja Panama Tel 507 210 1122 210 1133 Tel 800 3278 FAST http www samsung latin com PERU Servicio Integral Samsung Av Argentina 1790 Lima1 Peru Tel 51 1 336 8686 Fax 51 1 336 8551 http www samsungperu com...

Страница 46: ...samsung co za UKRAINE SAMSUNG ELECTRONICS REPRESENTATIVE OFFICE IN UKRAINE 4 Glybochitska str Kiev Ukraine Tel 8 044 4906878 Fax 8 044 4906887 Toll free 8 800 502 0000 http www samsung com ua SWEDEN DENMARK NORWAY FINLAND Samsung Electronics AB Box 713 S 194 27 UPPLANDS VÄSBY SVERIGE Besöksadress Johanneslundsvägen 4 Samsung support Sverige 020 46 46 46 Samsung support Danmark 8088 4646 Samsung su...

Страница 47: ...ttp www sonda com http www samsung cl MEXICO Samsung Electronics Mexico S A de C V Saturno 44 Col Nueva Industrial Vallejo Del Gustavo A Madero C P 07700 Mexico D F Tel 01 57 47 51 00 Fax 01 57 47 52 02 RFC SEM950215S98 http www samsung com mx IMPORTADO POR SAMSUNG ELECTRONICS MEXICO S A DE C V SATURNO 44 COL NVA INDUSTRIAL VALLEJO DEL GUSTAVO A MADERO C P 07700 MEXICO D F TEL 5747 5100 RFC SEM950...

Страница 48: ... Methods Showing the horizontal lines of the screen from the top to the bottom in order is called the Non Interlace method while showing odd lines and then even lines in turn is called the Interlace method The Non Interlace method is used for the majority of monitors to ensure a clear image The Interlace method is the same as that used in TVs Plug Play This is a function that provides the best qua...

Страница 49: ...ty to operate the equipment If necessary consult your dealer or an experienced radio television technician for additional suggestions You may find the booklet called How to Identify and Resolve Radio TV Interference Problems helpful This booklet was prepared by the Federal Communications Commission It is available from the U S Government Printing Office Washington DC 20402 Stock Number 004 000 003...

Страница 50: ...ion Technology Equipment VCCI If this is used near a radio or television receiver in a domestic environment it may cause radio interference Install and use the equipment according to the instruction manual TCO 95 Ecological requirements for personal computers TCO 95 applied model only AB general requirements AB2 Written Eco document acompanying the products Congratulations You have just purchased ...

Страница 51: ...oducts must meet strict environmental demands for example in respect of the reduction of electric and magnetic fields along with physical and visual ergonomics and good usability TCO Development Unit 1996 11 29 On the page this folder you will find a brief summary of the environmental requirements met by this product The complere environmental criteria document may be ordered from TCO Development ...

Страница 52: ...ling has become an established method for encouraging the adaptation of goods and services to the environment The main problem as far as computers and other electronics equipment are concerned is that environmentally harmful substances are used both in the products and during their manufacture Since it is not so far possible to satisfactorily recycle the majority of electronics equipment most of t...

Страница 53: ...nd is toxic in high doses The relevant TCO 99 requirement states that batteries may not contain any mercury It also demands that mercury is not present in any of the electrical or electronics components associated with the labelled unit There is however one exception Mercury is for the time being permitted in the back light system of flat panel monitors as today there is no commercially available ...

Страница 54: ...rer must have a certified environmental management system such as EMAS or ISO 14 000 z Restrictions on o chlorinated and brominated flame retardants and polymers o heavy metals such as cadmium mercury and lead The requirements included in this label have been developed by TCO Development in cooperation with scientists experts users as well as manufacturers all over the world Since the end of the 1...

Страница 55: ...nned images For more information refer to Help F1 in the software program How to install the Natural Color software Insert the CD included with the Samsung monitor into the CD ROM Drive Then the initial screen of the program installation will be executed Click Natural Color on the initial screen to install the Natural Color software To install the program manually insert the CD included with the S...

Страница 56: ...hing performance or use of this material Samsung is the registered trademark of Samsung Electronics Co Ltd Microsoft Windows and Windows NT are registered trademarks of Microsoft Corporation VESA DPMS and DDC are registered trademarks of Video Electronics Standard Association the ENERGY STAR name and logo are registered trademarks of the U S Environmental Protection Agency EPA As an ENERGY STAR Pa...

Отзывы: