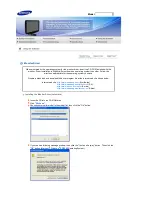


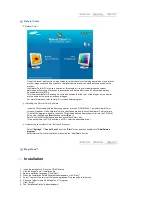


9. Click "Finish."
10. When the installation is complete, the MagicTune™ executable icon appears on your desktop.
Double-click the icon to start the program.
MagicTune™ execution icon may not appear depending on specification
of computer system or monitor.
If that happens, press F5 Key.
Installation Problems (MagicTune™)
The installation of MagicTune™ can be affected by such factors as the video card, motherboard and the
network environment.
System Requirements
OS
z
Windows 2000
z
Windows XP Home Edition
z
Windows XP Professional
z
Windows Vista™
Hardware
z
32MB Memory above
z
60MB Hard disk space above
* For more information, visit the MagicTune™
website
.
It is recommended using MagicTune™ in Windows™ 2000
or later.
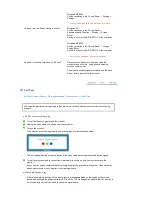
Uninstall
The MagicTune™ program can be removed only by using the "Add or Remove Programs" option of the
Windows™ Control Panel.
Perform the following steps remove MagicTune™.
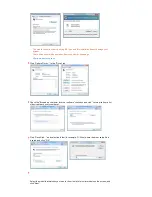
1. Go to [Task Tray] ' [Start] ' [Settings] and select [Control Panel] in the menu. If the program runs on
Windows™ XP, go to [Control Panel] in the [Start] menu.
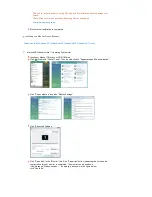
2. Click the "Add or Remove Programs" icon in Control Panel.
3. In the "Add or Remove Programs" screen, scroll down to find "MagicTune™". Click on it to highlight it.
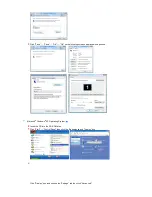
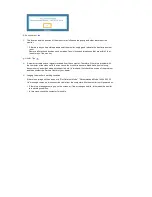
4. Click the "Change/Remove" button to remove the program.
5. Click "Yes" to begin the uninstall process.
6. Wait until the "Uninstall Complete" dialog box appears.
Visit the MagicTune™
website
for technical support for MagicTune™, FAQs (questions and answers) and
software upgrades.
Содержание 932BW - SyncMaster - 19" LCD Monitor
Страница 1: ...SyncMaster 932BW...
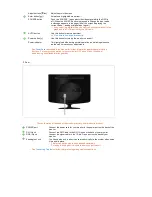
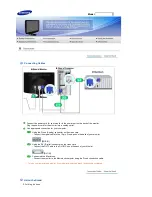
Страница 18: ...You can tilt the monitor upwards at an angle of 0 to18...
Страница 46: ...repetition is called the Vertical Frequency or Refresh Rate Unit Hz...


