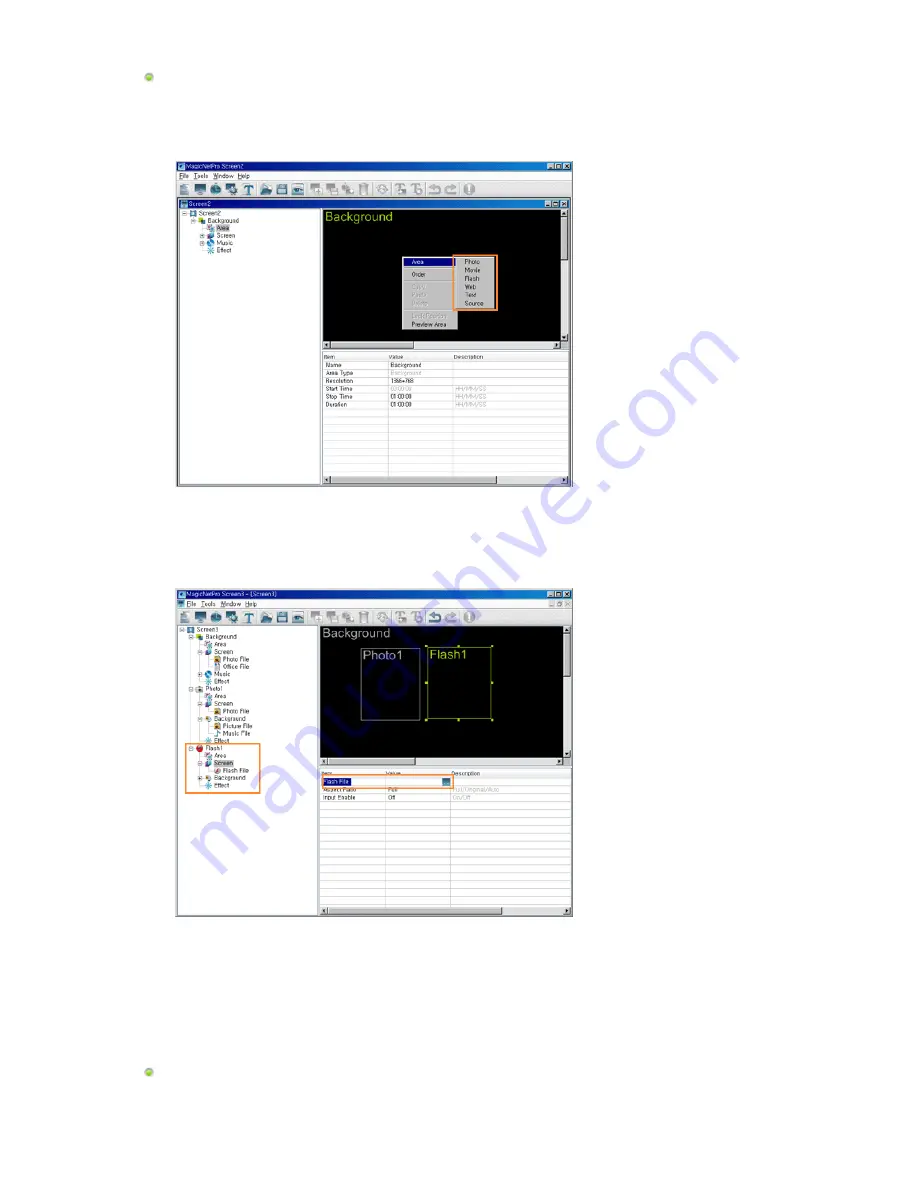
Registering a Screen
1. Select Screen from the File menu to open a Screen View.
2. Right-click on the background view. Click on the Area and click either Photo, Movie, Flash, Web, Text,
or Source from the displayed menu.
3. When the mouse pointer changes to the crosshair (+) icon, drag it to the Edit View to set the area for
the file to be displayed.
4. When an area is set, tree items are added to the Tree View in the same order as shown under the
Background item. The added tree items differ depending on the file type selected in step 2. You can
select a file by selecting a screen item and then selecting an item below the Background item.
5. Repeat steps 2 to 4 to register other areas on a screen.
6. After finishing registering areas, select Save from the File menu to save the screen.
7. Register a schedule to display the saved screen on a monitor(s).
Registering a Schedule
1. Select Schedule from the File menu to open the Schedule View.
Содержание 400DX - SyncMaster - 40" LCD Flat Panel Display
Страница 21: ...4 Speaker ...
Страница 28: ...4 Speaker ...
Страница 44: ...6 Choose a folder to install the MagicNet program 7 Click Install 8 The Installation Status window appears ...


