English
5
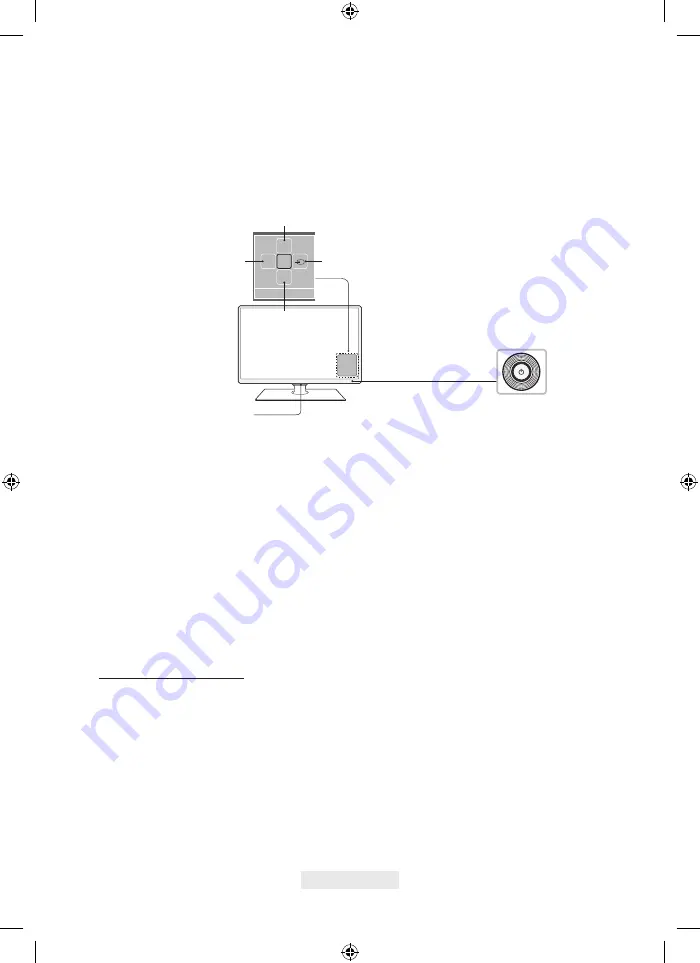
Turning on the TV
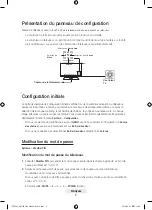
Turn on the TV using the
P
button on the remote control or TV panel.
- The product colour and shape may vary depending on the model.
- The TV’s Controller, a small joystick-like button at the right back of the TV, lets you control the TV
without the remote control.
m
R
P
TV Controller
Selecting a
Source
Selecting the
Menu
Selecting the
Smart Hub
Return
Power off
Function menu
Remote control sensor
™
Initial setup
The initial setup dialogue box appears when the TV is first activated. Follow the on-screen instructions
to finish the initial setup process, including the selecting the menu language, scanning channels,
connecting to the network, and more. During each step, either make a choice or skip the step. You
can manually perform this process at a later time in the
System
>
Setup
menu.
- If you connect any device to
HDMI1
before starting the installation, the
Channel Source
will be
changed to
Set-top box
automatically.
- If you do not want to select
Set-top box
, please select
Aerial
.
Password Change
System
>
Change PIN
Changing the TV’s password.
1.
Run
Change PIN
and then enter the current password in the password field. The default password
is “0-0-0-0”.
2.
Enter a new password and then enter it again to confirm it. The password change is complete.
- If you forgot your PIN code, press the buttons in the following sequence to reset the PIN to “0-0-
0-0”:
In Standby mode:
MUTE
→
8
→
2
→
4
→
POWER
(On)
[TD390S_QSG]BN68-06690A-02L18.indb 5
2014-08-29 1:12:38
Содержание 3 TD390S Series
Страница 9: ...This page is intentionally left blank TD390S_QSG BN68 06690A 02L18 indb 9 2014 08 29 1 12 38 ...
Страница 17: ...This page is intentionally left blank TD390S_QSG BN68 06690A 02L18 indb 9 2014 08 29 1 12 41 ...
Страница 25: ...This page is intentionally left blank TD390S_QSG BN68 06690A 02L18 indb 9 2014 08 29 1 12 44 ...
Страница 33: ...This page is intentionally left blank TD390S_QSG BN68 06690A 02L18 indb 9 2014 08 29 1 12 46 ...
Страница 41: ...This page is intentionally left blank TD390S_QSG BN68 06690A 02L18 indb 9 2014 08 29 1 12 49 ...
Страница 49: ...This page is intentionally left blank TD390S_QSG BN68 06690A 02L18 indb 9 2014 08 29 1 12 52 ...
Страница 57: ...This page is intentionally left blank TD390S_QSG BN68 06690A 02L18 indb 9 2014 08 29 1 12 54 ...
Страница 65: ...This page is intentionally left blank TD390S_QSG BN68 06690A 02L18 indb 9 2014 08 29 1 12 57 ...
Страница 73: ...This page is intentionally left blank TD390S_QSG BN68 06690A 02L18 indb 9 2014 08 29 1 13 00 ...
Страница 81: ...This page is intentionally left blank TD390S_QSG BN68 06690A 02L18 indb 9 2014 08 29 1 13 02 ...
Страница 89: ...This page is intentionally left blank TD390S_QSG BN68 06690A 02L18 indb 9 2014 08 29 1 13 05 ...
Страница 97: ...This page is intentionally left blank TD390S_QSG BN68 06690A 02L18 indb 9 2014 08 29 1 13 08 ...
Страница 105: ...This page is intentionally left blank TD390S_QSG BN68 06690A 02L18 indb 9 2014 08 29 1 13 10 ...
Страница 113: ...This page is intentionally left blank TD390S_QSG BN68 06690A 02L18 indb 9 2014 08 29 1 13 13 ...
Страница 121: ...This page is intentionally left blank TD390S_QSG BN68 06690A 02L18 indb 9 2014 08 29 1 13 16 ...
Страница 129: ...This page is intentionally left blank TD390S_QSG BN68 06690A 02L18 indb 9 2014 08 29 1 13 18 ...
Страница 137: ...This page is intentionally left blank TD390S_QSG BN68 06690A 02L18 indb 9 2014 08 29 1 13 21 ...
Страница 145: ...This page is intentionally left blank TD390S_QSG BN68 06690A 02L18 indb 9 2014 08 29 1 13 24 ...


