background image

Содержание Expeditionn XP150

Страница 1: ......

Страница 2: ...NS 1 THIS DEVICE MUST NOT CAUSE HARMFUL INTERFERENCE AND 2 THIS DEVICE MUST ACCEPT ANY INTERFERENCE RECEIVED INCLUDING INTERFERENCE THAT MAY CAUSE UNDESIRED OPERATION SUITABLE FOR HOME OR OFFICE USE a...

Страница 3: ...us 13 Use only with the cart stand tripod bracket or table specified by the manufacture or sold with the ap paratus When a cart is used utilize caution when moving the cart ap paratus combination to a...

Страница 4: ...on 5 Features 6 Setting Up the XP150 7 XP1 SO Quick Start 9 Configuring the XP1 SO for Transport 11 4 XP1 SO Mixer Layout 12 XP1 SO Connections 14 XP1 SO Wiring Guide 15 Specifications 16 Block Diagra...

Страница 5: ...light weight In this manual you ll find a detailed description of the features of the XP150 PA system as well as a description of its front and rear panels step by step instructions for its setup and...

Страница 6: ...P1 SO speaker cabinets feature a tilt back monitor position for use without speaker stands or as a performance monitor The internal2 x 75 watt lightweight Class D power amplifier produces a powerful s...

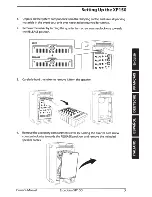
Страница 7: ...ng the quarter turn screw counterclockwise towards the RELEASE position LOCK 111111m Wf 111111111 RELEASE 111111ifil 111111111 3 Carefully hold the mixer to remove it from the speaker 0 0 o o oEi o o...

Страница 8: ...e the panel and turn the quarter turn screw clockwise to LOCK 6 Position the speakers on the floor or on stands 7 Using one of the included speaker cables connect the mixer s LEFT SPEAKER OUT to the l...

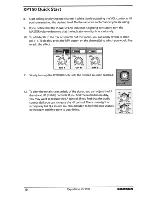
Страница 9: ...one side of the included power cable to the XP150 mixer s power inlet and the other to a grounded AC power outlet 5 Connect your microphones using standard XLR cables instruments using W phone cables...

Страница 10: ...apply reverb to chan nel 1 3 To do this press the REV button on the channel s to which you would like to add the effect 11 Slowly turn up the REVERB knob until the desired sound is reached 12 To alter...

Страница 11: ...Place one speaker on the floor and set it on its side 2 Position the second speaker above the first speaker and line up the Slide and Lock tracks and grooves so that they are parallel to the speaker...

Страница 12: ...e players or any other line level device 4 Stereo 3 5mm Input Connector channels 4 5 Use this input to connect a stereo line level device such as an an MP3 CD or tape player 5 High Frequency HF The HF...

Страница 13: ...response curve If your application is mainly for speech leave the switch up to select the SPEECH response curve 12 REVERB Control Knob The REVERB control knob is used to adjust the total amount of rev...

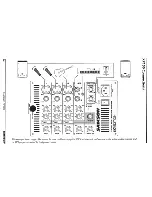
Страница 14: ...1 CH2 CH3 c J o II 1 f IRimiWimiRIIIWIIIWIIIRI I 11 HF o 10K sQX t _ a 1o__tffi __o 18 CH 4115 A 8PIIIICH MUSIC D 0 1 f o u MASTER JJ 1 1 I Ul z i l i ol Dei C a w li a x w ciJ This example shows a t...

Страница 15: ...Ground Sleeve ground Stereo TRS 3 5mm Connector Right Signal ring Tip left signal Left Signal tip Right Signal ring Ground XLR Balanced Wiring Guide Hot Common ground Left Signal tip Ring rig t signal...

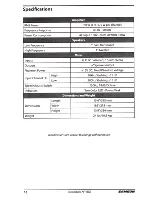
Страница 16: ...Weight Amplil1e1 150 W 80 75 W per channel 40Hz 20kHz AC Input 100V 240V 50 60Hz 180W 6 bass transducer 1 tweeter XLR balanced 3 5 mm stereo 114 Speaker output 15V DC Fixed Phantom Voltage 1OkHz Shel...

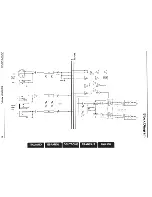
Страница 17: ...en JO O s Q J c Q I 32dBu I LEVEL HIGH LOW Inputs CH1 3 REVERB II I I OdBu I 0 CD a a 0 JI n BA I EQ X o I I w GH I LEVEL I I I Inputs CH4 5 OdBu I L ta 0 n c AI Q IIIII AI I 3 ITALIANO ESPANOL DEUTSC...

Страница 18: ......

Отзывы: