background image

Ulbo Machinery B.V. 

  www.samac.nl 

Pag 7   


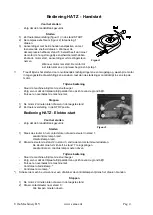
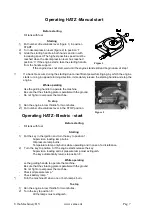
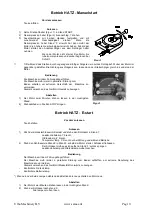
Figure 2 


Figure 1 


Operating HATZ -Manual start 


Before starting 

-


Fill tank with fuel. 

Starting 

1)  Put number of revolutions lever (figure 1) in position 

START. 

2) 

Turn decompression lever (figure 2) to position ‘1’. 

3)  Grab the starting handle in both hands and turn with 

increasing speed. The highest possible speed must be 
reached when the decompression lever has reached 
position ‘0’. If the engine starts, take the starting handle 
from the handle support. 

If the engine does not start, wait until the engine stands still and begin anew at step 1.  

 
!! 

If a back fire occurs during the starting due to insufficient powerful slinging, by which the engine 
starts running in opposite turning direction, immediately release the starting handle and stop the 
engine. 

While operating 


Use the guiding handle to operate the machine. 

-


Be sure that the vibrating plate is parallel with the ground. 

-


Do not fight or overpower the machine. 

To stop 

1)  Run the engine in low throttle for two minutes. 

2) 

Put number of revolutions lever in the STOP position.


Operating HATZ -Electric - start 

Before starting 

-


Fill tank with fuel. 

Starting 

1)  Put the key in the ignition and turn the key to position 1. 

Supervision loading lamp burns. 
Oil pressure lamp burns. 
Temperature lamp only burns while operating and in case of a disturbance. 

2)   Turn the key to position 3, if the engine starts release the key. 

Supervision loading and oil pressure lamp must extinguish. 
The key automatically returns to position ‘0’.  

While operating 

-


se the guiding handle to operate the machine. 

-


Be sure that the vibrating plate is parallel with the ground. 

-


Do not fight or overpower the machine. 

-


Check oil pressure lamp. * 

-


Check battery lamp. * 

*) 

Turn the machine off when one or both lamp’s burn. 

To stop 

1)  Run the engine in low throttle for two minutes. 
2)  Turn 

the key to position ‘0’. 

All the lamps must extinguish.


Содержание TR45

Страница 1: ...TR45 TR55 INSTRUKTIEHANDLEIDING OWNER S MANUAL BEDIENUNGSANLEITUNG...

Страница 2: ...h Deutsch 1 Slinger Tank Handle Fuel tank Kurbel Kraftstofftank 2 Hijsbeugel Lifting handle Schutzb gel 3 Accu Type plaatje Battery Type plate Batterie Typenschild 4 Stuurbeugel Guiding handle F hrung...

Страница 3: ...ftstoffe Motorolie Oil Ol Diesel 15W40 1 2L Zie tevens handleiding motor Also see engine manual Sie auch Motor Handbuch Technische gegevens Technical data Technischen Daten Machine Maschine Type Typ T...

Страница 4: ...lijden of kantelen Werk altijd met een noodplan Het vullen van de brandstoftank Nooit roken tijdens het vullen Nooit vullen in nabijheid van een open vuur of gloeiende voorwerpen Nooit morsen tijdens...

Страница 5: ...beugel Zorg ervoor dat de trilplaat altijd parallel ten opzichte van de grond blijft Forceer en overbelast de machine niet Stoppen 1 De motor 2 minuten laten draaien in de laagste stand 2 Zet toerenve...

Страница 6: ...andstoffilter vervuild Onjuiste klepspeling Decompressie inrichting verkeerd ingesteld Versleten kleppen en of zuigerveren Motor is moeilijk te starten accelereert niet of loopt onregelmatig Luchtfilt...

Страница 7: ...hine will not tip over slide roll or fall Always use an emergency plan when operating the machine Refuelling Never smoke while refuelling Never refuel near open fire Never spill while refuelling Never...

Страница 8: ...he machine Be sure that the vibrating plate is parallel with the ground Do not fight or overpower the machine To stop 1 Run the engine in low throttle for two minutes 2 Put number of revolutions lever...

Страница 9: ...toring Reasons Engine does not start or stalls No fuel in tank Air filter polluted Wrong valve margin Wrong adjustment decompression system Worn out valves or piston springs Engine does not accelerate...

Страница 10: ...der Unmittelbaren Umgebung dieses Ger tes ist der Umgang mit offenen Feuer VERBOTEN Beim nachtanken von Kraftstoff darf dieser NICHT an heisse Motorteile gelangen Das Bef llen des Kraftstofftanks dar...

Страница 11: ...Verschlie der Maschine zu vermeiden Niemals versuchen das Ger t mit Gewalt zu bewegen Abstellen 1 Der Motor zwei Minuten drehen lassen in der niedrigsten Stand 2 Drehzahlhebel in Position STOP bringen...

Страница 12: ...t ab Luft filter verschmutzt Kein Kraftstof im Tank Unrichtige Ventilspielraum Dekompressie verkehrt eingestellt Verschlissen Ventil und oder kolbenfeder Motor beschleunigt nicht springt schlecht an o...

Страница 13: ...Ulbo Machinery B V www samac nl Pag 12 ONDERDELEN PARTS ERSATZTEILEN Tr60 E...

Страница 14: ...alans Exciter Unwucht TR45 84120 2 Onbalans Exciter Unwucht 19 87194 4 Inbusbout Screw Schraube TR45 87193 4 Inbusbout Screw Schraube 20 87146 1 Sch tandwiel Adjustmentgear Verstellrad 21 10088 5 Zesk...

Страница 15: ...Ulbo Machinery B V www samac nl Pag 14...

Страница 16: ...ch Kupplung 1 10016 3 Bout Screw Schraube 2 10024 3 Schijf Washer Scheibe 3 87408 1 Strip Holder Halter 4 87410 1 Dekplaat Rubber cover Deckblech 6 10024 3 Schijf Washer Scheibe 7 10015 3 Moer Nut Mut...

Страница 17: ...Ulbo Machinery B V www samac nl Pag 16...

Страница 18: ...ring Lockwasher Spanring 51 10078 4 Schijf Washer Scheibe 52 10073 4 Veerring Lockwasher Spanring 53 10071 4 Moer Nut Mutter 54 87198 2 Bout Screw Schraube 55 87199 6 Bout Screw Schraube 56 87197 4 Bo...

Страница 19: ...Ulbo Machinery B V www samac nl Pag 18...

Страница 20: ...11 10032 2 Bout Screw Schraube 12 10043 2 Schijf Washer Scheibe 13 40420 1 Gashendel Control Regulierhebel 14 82356 1 Gaskabel Casing Bowdenzug 15 10056 2 Bout Screw Schraube 16 10024 2 Schijf Washer...

Страница 21: ...Ulbo Machinery B V www samac nl Pag 20...

Страница 22: ...het Seal Dichtung 11 40230 1 Afstrijker Seal Dichtung 12 40400 1 Plunjer Piston Kolben 13 40445 1 Flens Flange Flansch 14 40443 2 Gasveer Gas pressure spring Gasdruck feder 15 10118 2 Imbusbout Screw...

Страница 23: ...Ulbo Machinery B V www samac nl Pag 22...

Страница 24: ...heibe 6 10031 4 Moer Nut Mutter 7 10082 2 Bout Screw Schraube 8 10095 2 Schijf Washer Scheibe 9 10061 2 Moer Nut Mutter 10 10061 2 Moer Nut Mutter 11 43210 2 Slang Tube Schlauch 12 50404900 1 Sleutel...

Отзывы:

Похожие инструкции для TR45