8
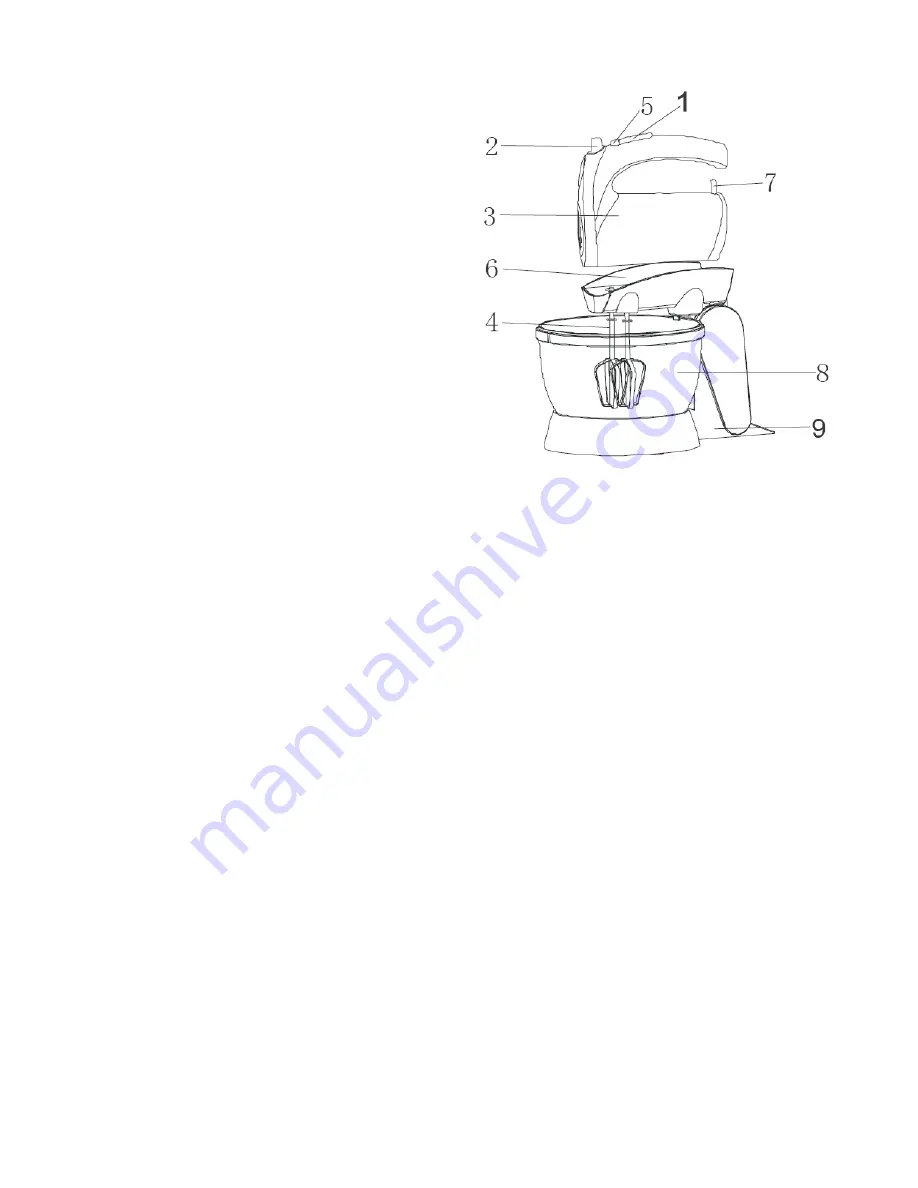
PARTS DIAGRAM
1. Speed control
2. Eject button
3. Motor housing
4. Beaters / Dough hooks
5. Turbo control
6. Hand Mixer housing
7. Cord
8. Bowl
9. Stand
Along the back of the stand are two release flaps. The top button (the smaller button)
releases the hand mixer when pressed. The bottom button (the larger button) allows the
hand mixer to lift while still attached to the stand, giving better access to the bowl.
OPERATING INSTRUCTIONS
•
Ensure the unit is not connected to the power supply
•
Insert the hand mixer into the hand mixer housing and press down gently.
•
Press down on the bottom button and gently pull up the hand mixer, this will open up
the bowl.
•
Insert either the dough hooks or the beaters into the accessory holes in the bottom of
the unit. Slowly turn them until the cross section slides into the holes and clips into
place. Do not mix accessories. Only use the dough hooks or the beaters, do not use
one dough hook and one beater at the same time.
•
Tip the hand mixer forwards again until it clips into place over the bowl.
•
Plug the unit into the power supply, and turn the power supply on.
•
Switch on the mixer by sliding the Speed control down the handle of the unit until the
desired speed is reached, 1 being the slowest speed and 5 being the fastest speed.
•
Stop the mixer by sliding the Speed control back up the unit until it reaches “0” for off.
•
To briefly increase speed while mixing, press the Turbo control, and release when
you wish to return to the selected speed.
4


