background image

English

   - 85 -

Mobil TV Instructi

ons

Switching the TV On Using 12 Volt
1. 

Connect the cigarette lighter plug cable into the cigarette lighter socket of your car.

2. 

Plug the other side of 12 volt cable into DC 12 socket on the back side of the TV. Then the standby LED 

will light up.

3. 

Press the 

Standby

 button, 

Pro/- 

buttons or a numeric button on the remote control or press the 

middle of the control switch on the TV in. The TV will then switch on.

4. 

Adjust the antenna position for better reception or reinstall TV channels if necessary.

Switching the TV Off
1. 

Press the 

Standby 

button on the remote control or press the middle of the control switch on the TV in and 

hold it down for a few seconds, so the TV will switch into standby mode.

2. 

Unplug cable connectors and power plugs.


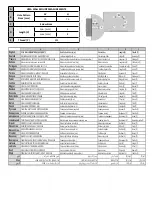
ATTENTION: 12 V Input : 

V+

V+

V-

V-

Содержание 24LED9109CTS2DVD

Страница 1: ...ERATING INSTRUCTIONS MODE D EMPLOI GEBRUIKSAANWIJZING COLOUR TELEVISION WITH REMOTE CONTROL TELEVISEUR COULEUR A TELECOMMANDE KLEURENTELEVISIE MET AFSTANDSBEDIENING BEDIENUNGSANLEITUNG FARBFERNSEHGER...

Страница 2: ...50432048...

Страница 3: ...ding a Programme 68 Timeshift Recording 68 Instant Recording 69 Watching Recorded Programmes 69 Recording Configuration 69 Media Browser Menu 69 CEC and CEC RC Passthrough 69 TV Menu Contents 71 Gener...

Страница 4: ...ripping or splashing of liquids and do not place objects filled with liquids such as vases cups etc on or over the TV e g on shelves above the unit Do not expose the TV to direct sunlight or do not pl...

Страница 5: ...n inclined wall Use the specified wall mounting screws and other accessories Tighten the wall mounting screws firmly to prevent the TV from fall Do not over tighten the screws WARNING Apparatus connec...

Страница 6: ...itch Operation 1 Up direction 2 Down direction 3 Volume Info Sources List selection and Standby On switch The Control button allows you to control the Volume Programme Source and Standby On functions...

Страница 7: ...provided plug does not fit your outlet consult an electrician for replacement of the obsolete outlet Surely connect the ground wire Antenna Connection Connect the aerial or cable TV plug to the AERIA...

Страница 8: ...nt Number of Preset Channels 8 000 Channel Indicator On Screen Display RF Aerial Input 75 Ohm unbalanced Operating Voltage 100 240V AC 50Hz Audio German Nicam Stereo Audio Output Power WRMS 10 THD 2 x...

Страница 9: ...dia browser Opens the media browsing screen 11 Info Displays information about on screen content shows hidden information reveal in TXT mode 12 My button 1 13 Coloured Buttons Follow the on screen ins...

Страница 10: ...ection If an external device is connected via the SCART socket the TV will automatically switch to AV mode When receiving DTV channels Mpeg4 H 264 or while in Media Browser mode output will not be ava...

Страница 11: ...displayed where you can select to start an M7 operator installation or a standard installation To start an M7 operator installation set the Install Type as Operator and the Satellite Operator as the...

Страница 12: ...d the USB device itself Do not pull out your drive while playing a file You can use USB hubs with your TV s USB inputs External power supplied USB hubs are recommended in such a case It is recommended...

Страница 13: ...data If USB disk writing speed too slow to record message is displayed on the screen while starting a recording try restarting the recording If you still get the same error it is possible that your US...

Страница 14: ...rted only via the HDMI1 input System Audio Control Allows an Audio Amplifier Receiver to be used with the TV The volume can be controlled using the remote control of the TV To activate this feature se...

Страница 15: ...ss of the picture by pressing Left or Right buttons Picture Zoom Sets the desired image size format Film Mode Films are recorded at a different number of frames per second to normal television program...

Страница 16: ...rts AVL Automatic Volume Limiting Sets the sound to obtain fixed output level between programmes Headphone Lineout When you connect an external amplifier to your TV using the headphone jack you can se...

Страница 17: ...nu Timeout Changes timeout duration for menu screens Software Upgrade Ensures that your TV has the latest firmware Press OK to see the menu options Application Version Displays current software versio...

Страница 18: ...menu Standby Search Your TV will search for new or missing channels while in standby Any new found broadcasts will be shown Dynamic Channel Update If this option is set as Enabled the changes on the b...

Страница 19: ...menus or installation menus of the TV Maturity Lock If this option is set TV gets the maturity information from the broadcast and if this maturity level is disabled disables access to the broadcast N...

Страница 20: ...cancelled Set Timer on Event Delete Timer on Event After you have selected an event in the EPG menu press the OK button Select Set Timer on Event option and press the OK button You can set a timer for...

Страница 21: ...B is too slow If a USB disk writing speed too slow to record message is displayed on the screen while starting a recording try restarting the recording If you still get the same error it is possible t...

Страница 22: ...5kHz 24kHz 8kHz 11 025kHz 12kHz Sampling rate works only with video files AC3 32Kbps 640Kbps Bit rate 32kHz 44 1kHz 48kHz Sampling rate AAC 16Kbps 576Kbps Bit rate 48kHz 44 1kHz 32kHz 24kHz 22 05kHz 1...

Страница 23: ...using DVI converter cable DVI to HDMI cable not supplied you can refer to the following resolution information 56Hz 60Hz 66Hz 70Hz 72Hz 75Hz 640x400 640x480 800x600 832x624 1024x768 1152x864 1152x870...

Страница 24: ...r out Do not use solvents such as benzine thinner commercially available cleaners or anti static spray intended for vinyl LPs Licence Notification This product incorporates copyright protection techno...

Страница 25: ...ot recorded on the disc only the available language on the disc will be heard 10 Some DVDs may not contain root and or title menus 11 Reverse stepping is not available 12 For your convenience If you a...

Страница 26: ...MP3 is recorded as a Digital Signal with better audio quality less distortion and less deterioration of audio quality over time PICTURE CD Video still picture 12 cm It depends on JPEG quality JPEG is...

Страница 27: ...buttons 3 TV Menu 4 Navigation buttons 5 OK Select 6 Back 7 Angle 8 Info 9 Display DVD Menu 10 Zoom 11 Language selection 12 Subtitle 13 Rapid reverse 14 Play 15 Stop 16 Rapid advance 17 Pause 18 Root...

Страница 28: ...uring playback Press repeatedly to switch between modes LANGUAGE Auto language X X MENU Displays TV menu OK Enter View Play GREEN BUTTON Displays repeat options RETURN BACK Returns back to the previou...

Страница 29: ...Programme buttons or a numeric button on the remote control or press the middle of the control switch on the TV in The TV will then switch on 4 Adjust the antenna position for better reception or rein...

Страница 30: ...Tr d Y Nederlands VESAWANDMONTAGEMETINGEN Groottebooropening mm Schroefgroote Lengte X Draad Y Suomi VESA SEIN ASENNUKSEN MITAT Reik kuvionkoot mm Ruuvinkoot Pituus x Kierre Y Norsk VESAVEGGMONTERINGS...

Страница 31: ...sk Produktinformasjon Kommersiell merkevare Produkt nr Modell nr Energieffektivitet klasse Synlig skjermst rrelse diagonal ca tommer cm Portugu s Ficha do produto Marca Comercial Produto N Modelo N Cl...

Страница 32: ...y czonym Wat w Rozdzielczo obrazu pikseli Magyar Energiafogyaszt s bekapcsolva hagyott zemm dban Watt ves energiafogyaszt s kWh ves Energiafogyaszt s standby zemm dban Watt Energiafogyaszt s kikapcsol...

Страница 33: ...TFT IDTV t pus r di berendez s megfelel a 2014 53 EU ir nyelvnek Az EU megfelel s gi nyilatkozat teljes sz vege el rhet a k vetkez internetes c men doc vosshub com IT Il fabbricante VESTEL Elektronik...

Отзывы: