background image


21 

WHITE BALANCE MENU 


The 

‘White Balance’ feature allows your camcorder to adjust the coloring of the captured images 

depending on the type of light source in the current environment.   

Properly adjusting the White Balance setting to match your current environment will allow the 

camcorder to properly balance the colors in the images that are taken with your camcorder. 

1)  Press the 

OK/SET

 button to open the menus for the current mode. 

2)  Press the 

LEFT

 or 

RIGHT

 button to scroll and select the 

‘White Balance’ menu.   

3)  Press the 

UP

 or 

DOWN

 button to highlight the desired menu option. 

4)  Press the 

OK/SET

 button to select and confirm the highlighted menu option. 

  selected option icon will appear on the selected item. 

5)  To continue within the menus and select a different menu option: 

Press the 

LEFT

 or 

RIGHT

 button to select the next menu item. 

6)  To exit the menu view: 

Press the 

MODE

 button to exit the menu and return to your previous mode. 

An icon reflecting your selection will display on the LCD screen. 


COLOR EFFECT MENU 


You can choose to add a color effect to the images taken with your camcorder.   

1)  Press the 

OK/SET

 button to open the menus for the current mode. 

2)  Press the 

LEFT

 or 

RIGHT

 button to scroll and select the 

‘Color Effect’ menu.   

3)  Press the 

UP

 or 

DOWN

 button to highlight the desired menu option. 

4)  Press the 

OK/SET

 button to select and confirm the highlighted menu option. 

  selected option icon will appear on the selected item. 

5)  To continue within the menus and select a different menu option: 

Press the 

LEFT

 or 

RIGHT

 button to select the next menu item. 

6)  To exit the menu view: 

Press the 

MODE

 button to exit the menu and return to your previous mode. 


All manuals and user guides at all-guides.com

Содержание VIVITAR 808HD

Страница 1: ...2016 Sakar International Inc All rights reserved Windows and the Windows logo are registered trademarks of Microsoft Corporation All other trademarks are the property of their respective companies Al...

Страница 2: ...hanging Camcorder Mode 13 Navigating the Menus 14 Camera Features ViviLink LED Flash 15 ViviLink Feature 15 LED Flash 15 Video Capture Mode 16 Taking a Video 16 Video Capture Mode Quick Function Butto...

Страница 3: ...Connecting the Camcorder to the Computer 58 Getting Photos and Videos from the Camcorder to the Computer 59 Getting Started 60 Transferring Images from the Camcorder to the Computer Manually 60 Transf...

Страница 4: ...a plug and play device You can download the pictures and videos captured by your digital camcorder without the software by directly accessing the camcorder s memory card from your computer It is recom...

Страница 5: ...15 OK Set Menu Button 5 USB Interface 16 Down ViviLink Button 6 Hand Strap Attachment Post 17 Mode Button 7 Lens 18 Left Scene Button 8 LED Indicator Light 19 Battery Compartment 9 Self Timer LED Indi...

Страница 6: ...the Memory Card Slide open the battery compartment cover Insert 3 AAA 1 5V batteries Alkaline batteries recommended Batteries not included Class 4 or higher SD Memory Card up to 32 GB needed for norma...

Страница 7: ...e camcorder automatically turns off a few seconds later The energy status of the power is displayed on LCD as shown below Full battery power Medium battery power Low battery power INSTALLING THE SD ME...

Страница 8: ...ETTING THE LANGUAGE You will first be prompted to select a language for the digital camcorder The Language selection menu appears 1 Press the UP or DOWN button to select the language of your choice 2...

Страница 9: ...rience Image Manager application 1 First you will be asked to choose the default ViviLink social network for Videos Use the UP and DOWN buttons to highlight the desired default social network and pres...

Страница 10: ...in the Video Capture mode PHOTO CAPTURE MODE Use this mode to capture pictures with your digital camcorder After turning on your camcorder press the MODE button once to open the Photo Capture mode To...

Страница 11: ...uorescent ISO Auto 100 200 400 Scene Auto Scenery Portrait Night Scenery Night Portrait High Sensitivity Sport Beach Party Language English French Dutch Spanish Portuguese German Italian Greek Polish...

Страница 12: ...ce 16 bit Color monitor 1024 X 768 recommended screen resolution CD ROM Drive QuickTime 6 or higher MICROSOFT Internet Explorer 7 or higher Windows Media Player 10 or higher DirectX 9 or higher Intern...

Страница 13: ...corder ON The camcorder will be in Video Capture mode to start POWERING THE DIGITAL CAMCORDER OFF While the camcorder is on you can press the Power button again at any point to turn your camcorder OFF...

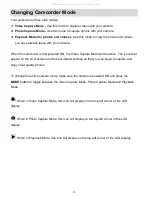
Страница 14: ...at appear on the LCD screen are the best default settings so that you can begin to capture and enjoy clear quality photos To change the active camera mode make sure the camera is powered ON and press...

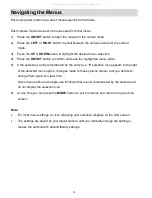
Страница 15: ...remembered by the camera a selection icon appears to the right of the selected menu option Changes made to these options remain until you decide to change them again at a later time Some menu options...

Страница 16: ...eady to capture your photo or video with the selected ViviLink destination Note The ViviLink feature is deactivated by default and needs to be activated prior to capturing each photo or video VIVILINK...

Страница 17: ...card 2 Zoom Options You can magnify your subject up to 4 times using the digital zoom while capturing your photos and recording your videos The zoom buttons are located by the LCD screen Press the ZOO...

Страница 18: ...ing RIGHT DELETE Opens the Delete This File option and allows you to view and delete the last captured image video photo DOWN VIVILINK Opens the ViviLink for Videos menu Other Shutter STARTS STOPS Sta...

Страница 19: ...your camcorder s Video Capture Mode The selection icon appears by the default settings Once you change a setting the setting is saved until you manually change the setting or restore the camcorder s...

Страница 20: ...and return to your previous mode An icon reflecting your selection will display on the LCD screen RESOLUTION MENU The Resolution menu allows you to choose the desired size of the images taken by your...

Страница 21: ...ton to exit the menu and return to your previous mode An icon reflecting your selection will display on the LCD screen ANTI SHAKE MENU The Anti Shake feature reduces image corruption that can be cause...

Страница 22: ...a different menu option Press the LEFT or RIGHT button to select the next menu item 6 To exit the menu view Press the MODE button to exit the menu and return to your previous mode An icon reflecting y...

Страница 23: ...lens This setting should be adjusted when the environment is lighter or darker than normal When the environment has more light than is needed reduce the exposure setting by using the negative count to...

Страница 24: ...ss the LEFT or RIGHT button to select the next menu item 6 To exit the menu view Press the MODE button to exit the menu and return to your previous mode An icon reflecting your selection will display...

Страница 25: ...or DOWN button to highlight the desired menu option 4 Press the OK SET button to select and confirm the highlighted menu option A selected option icon will appear on the selected item 5 To continue wi...

Страница 26: ...and time menus with the RIGHT and LEFT direction buttons 5 For each field in the menu use the UP and DOWN direction buttons to set the specific date and time 6 When you have finished setting the date...

Страница 27: ...ff menu 3 Press the UP or DOWN button to highlight the desired menu option 4 Press the OK SET button to select and confirm the highlighted menu option A selected option icon will appear on the selecte...

Страница 28: ...open the menus for the current mode 2 Press the LEFT or RIGHT button to scroll and select the Format SD menu 3 Press the UP or DOWN button to highlight the desired menu option CANCEL To exit without f...

Страница 29: ...SET button to open the menus for the current mode 2 Press the LEFT or RIGHT button to scroll and select the Firmware menu 3 The Set Defaults option is automatically selected 4 Press the OK SET button...

Страница 30: ...e video you would like to view Press the LEFT button to display the previous image Press the RIGHT button to display the next image Videos appear with an AVI icon on the top left of the LCD screen 2 P...

Страница 31: ...view 4 Press the OK SET button to enlarge the image full size 5 Once the selected video is full size you can play and view the video VIDEO PLAYBACK MODE QUICK FUNCTION BUTTONS Your digital camcorder h...

Страница 32: ...video or all images from your digital camcorder through the Delete menu 1 Select the video you would like to delete 2 Press the OK SET button to open the menus for the current mode 3 Press the LEFT or...

Страница 33: ...d press the OK SET button All images will remain on your SD card and you will exit the menu and return to the Playback mode PROTECT LOCK MENU Pictures and videos taken with your camcorder can be prote...

Страница 34: ...ViviLink technology allows you to quickly and easily upload your camcorder s photos and videos to the social networks of your choice with the accompanying Vivitar Experience Image Manager application...

Страница 35: ...to direct the camcorder at the scene you would like to capture 2 Zoom Options You can magnify your subject up to 4 times using the digital zoom while capturing your photos and recording your videos T...

Страница 36: ...u to view and delete the last captured image video photo DOWN VIVILINK Opens the ViviLink for Photos menu Other Shutter PHOTO CAPTURE Captures your photo OK SET MENU Opens the menu options for Video C...

Страница 37: ...your camcorder s Photo Capture Mode The selection icon appears by the default settings Once you change a setting the setting is saved until you manually change the setting or restore the camcorder s...

Страница 38: ...eturn to your previous mode An icon reflecting your selection will display on the LCD screen RESOLUTION MENU The Resolution menu allows you to choose the desired size of the images taken by your camco...

Страница 39: ...Self Timer menu allows you to set a delay between the time that the camcorder s Shutter button is pressed and the actual capture of the picture This is an optimal feature if you don t just want to ta...

Страница 40: ...e feature allows your camcorder to adjust the coloring of the captured images depending on the type of light source in the current environment Properly adjusting the White Balance setting to match you...

Страница 41: ...i Shot feature allows you to take three rapid snapshots in a row with a single click of the Shutter button This feature can be effective when trying to capture a particular moment in a sporting event...

Страница 42: ...setting helps you control the amount of light that enters your camcorder s lens This setting should be adjusted when the environment is lighter or darker than normal When the environment has more ligh...

Страница 43: ...ired menu option 4 Press the OK SET button to select and confirm the highlighted menu option A selected option icon will appear on the selected item 5 To continue within the menus and select a differe...

Страница 44: ...order s language setting by selecting the desired language from the Language menu 1 Press the OK SET button to open the menus for the current mode 2 Press the LEFT or RIGHT button to scroll and select...

Страница 45: ...utton to open the menus for the current mode 2 Press the LEFT or RIGHT button to scroll and select the Date Time menu 3 Press the UP or DOWN button to highlight the Date Setup menu option and then pre...

Страница 46: ...rder will automatically power off When the camcorder sits idle for the designated period of time the camcorder will shut off completely and will need to be turned on again with the Power button before...

Страница 47: ...all of the content that is currently on your camcorder s memory card Keep in mind that formatting the memory card will permanently delete all of the content on your camcorder s memory card This optio...

Страница 48: ...Firmware menu to view the Firmware version on your camcorder or to reset your camcorder settings to the Factory Default Settings 1 Press the OK SET button to open the menus for the current mode 2 Pre...

Страница 49: ...your camcorder s memory card until you find the photo you would like to view Press the LEFT button to display the previous image Press the RIGHT button to display the next image Photos appear with a J...

Страница 50: ...k Function Button Function LEFT PREVIOUS Displays the PREVIOUS image UP SLIDE SHOW Views all the Photos as a Slide Show with 3 5 or 10 second intervals Press the UP button to start and pause the Slide...

Страница 51: ...in the Playback Mode you can select to delete a single photo or all images from your digital camcorder through the Delete menu 1 Select the photo you would like to delete 2 Press the OK SET button to...

Страница 52: ...r All images will be deleted except images that are Protected Locked To delete a locked image first unlock the image then select delete If you do not want to delete all of your videos and photos selec...

Страница 53: ...k Photo and then press the OK SET button The unlocked image now appears in Playback Mode without the lock icon Lock All Images To lock all captured videos and photos use the UP or DOWN button to highl...

Страница 54: ...want to print the photo select the Cancel option to exit the menu and return to the previous mode SLIDE SHOW MENU You can view a Slide Show of all the pictures taken with your camcorder by pressing th...

Страница 55: ...and select the ViviLink menu 4 Press the UP or DOWN button to highlight a specific option 5 Press the OK SET button to confirm and select the highlighted menu option A selected option icon appears on...

Страница 56: ...e digital video camera s AV slot Connect the yellow jack into the TV Video port Connect the white jack into the TV Audio port 2 Power on the TV and the camcorder 3 Set the TV to AV mode 4 Set the TV f...

Страница 57: ...screen should automatically open 2 On WINDOWS OS The Vivitar Experience Image Manager Installer window appears If the window does not appear open the application s CD DVD drive and click on Setup exe...

Страница 58: ...en click Next to continue 10 On WINDOWS OS only Let the Vivitar Experience Image Manager installer create the folder to where the program will be installed and then click Install 11 Please wait while...

Страница 59: ...once the download is complete On WINDOWS OS the file name is vivitargeneric_win exe ON MAC OS in file name is vivitargeneric_mac pkg 4 Double click on the downloaded application file to install the Vi...

Страница 60: ...cted then it will be selected automatically 5 Select a location on the computer where to place the new photo and video files 6 Add the new photo and video files to albums if desired 7 Select to remove...

Страница 61: ...ges from the Camcorder to the Computer Manually TRANSFERRING PHOTOS AND VIDEOS WINDOWS 1 Use the USB cable that came with your camera to connect your camera to your computer 2 MSDC appears on the LCD...

Страница 62: ...the iPad Apple iPad Camcorder Connection For models that are compatible with the iPad photos and videos can be imported from your digital camcorder to your iPad by following either one of the options...

Страница 63: ...s in material or workmanship and damages or malfunctions from other than normal use including but not limited to repair by unauthorized parties tampering modification or accident What To Do When Servi...

Страница 64: ...d then try downloading them again With test photos if the camera powers off before you upload them to the computer the photos are not stored in the camera s memory These photos should be uploaded quic...

Отзывы: