background image


35 

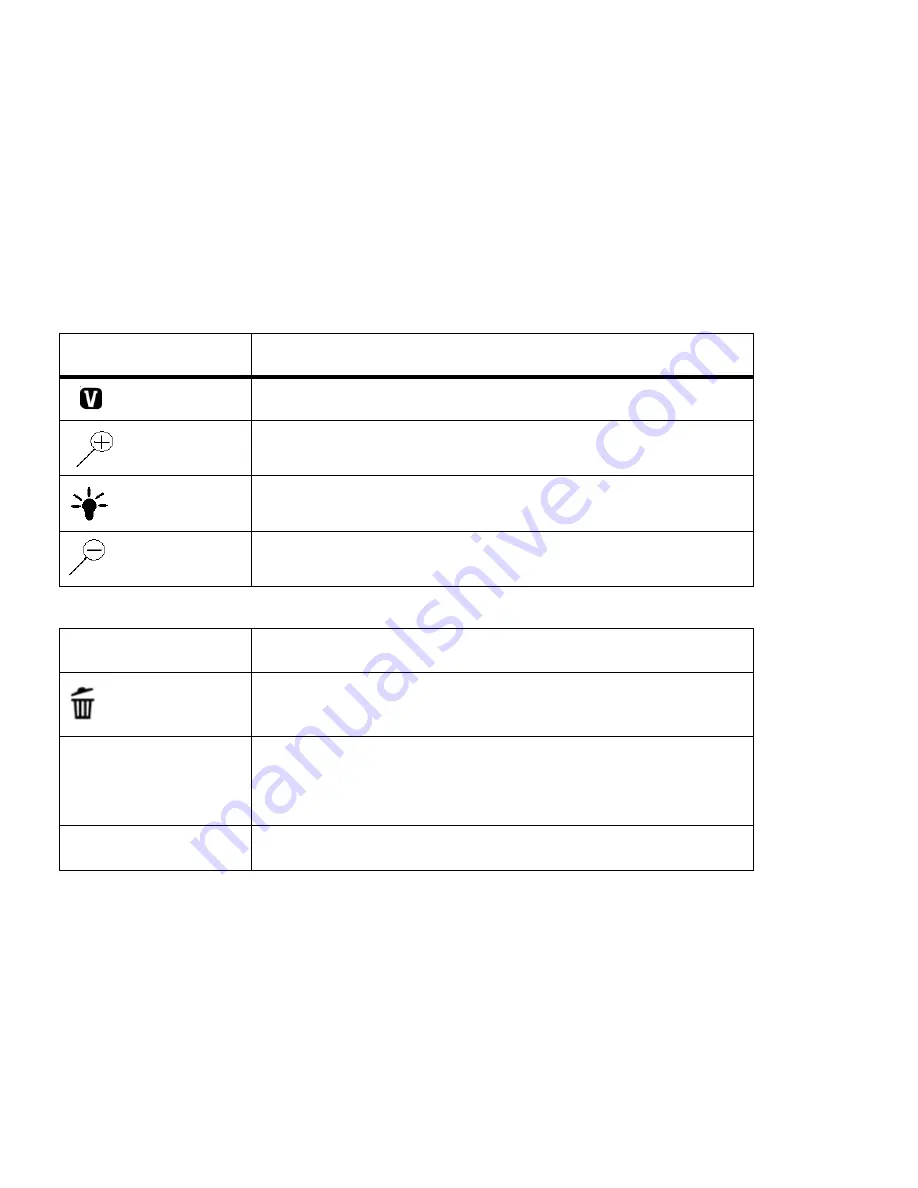
Photo Capture Mode Quick Function Buttons 

Your digital camcorder has a four-directional pad that functions as Quick Function buttons:   

Quick Function Button 

Function 


LEFT


Opens the ViviLink for Photos Menu 


UP


Zooms In


RIGHT


Turns LED Light Off/On 


DOWN


Zooms Out


Other 


      Shutter/OK 


Captures your photo 


Confirms and saves your selected menu option 

Delete 


Allows you to delete last photo taken 

      MENU 


Opens the menu options for Photo Capture Mode 


Exits the menu screen 

Note:

 To navigate through the Menus, use the 

UP/DOWN/LEFT/RIGHT

 direction control buttons. 

      MODE 


Toggles between the Photo Capture Mode, Video Capture Mode and 

Playback Mode 

Содержание 38056v2

Страница 1: ... with Camera User Manual 2009 2012 Sakar International Inc All rights reserved Windows and the Windows logo are registered trademarks of Microsoft Corporation All other trademarks are the property of their respective companies ...

Страница 2: ... Changing the Camcorder Mode 13 Navigating the Menus 14 Video Capture Mode 15 Video Playback Mode 29 Photo Capture Mode 34 Photo Playback Mode 49 Connecting the Camcorder to a TV 56 Installing the Software 57 Connecting the Camcorder to the Computer 59 Getting Videos and Photos from Your Camcorder to Your Computer 59 Get started 60 Transferring Images from the Camcorder to Your Computer Manually 6...

Страница 3: ...Note Your digital camcorder requires an SD Memory card for normal use SDHC memory card up to 32GB SD memory cards are not included and need to be purchased separately Please read this manual carefully first in order to get the most out of your digital camcorder What s Included 1 Digital Camcorder with built in USB Connector 2 AV Cable 3 Vivitar Experience Image Manager Installation CD 4 Neck Strap...

Страница 4: ...4 Parts of the Camcorder ...

Страница 5: ...0 Down Zoom Out Thumbnail View 18 SD Memory Card Slot 3 Power Button 11 LED Light 19 Wrist Strap Connector 4 Left ViviLink 12 Microphone 20 AV Out Port 5 LCD Screen 13 Self Timer LED 6 Shutter OK Button 14 Digital Lens 7 MENU Button 15 Speaker 8 Delete Button 16 USB Lever ...

Страница 6: ...Initial Camcorder Setup Installing the Batteries Installing the Memory Card Insert 3 x AAA batteries Alkaline batteries recommended not included Install SDHC Memory card up to 32GB before use not included ...

Страница 7: ...ment Use 3 x AAA 1 5V batteries Alkaline batteries are recommended Batteries not included Note Remove the batteries from the camcorder when not in use for an extended period Do not mix alkaline and non alkaline batteries The energy status of the power is displayed on LCD as shown below Full battery power Medium battery power Low battery power 2 SD Memory Card Make sure an SDHC memory card has been...

Страница 8: ... the camcorder from saving captured photos to the SD card 3 Power On Press the POWER button to turn on the camcorder Setting the Camcorder Language You will first be prompted to select a language for the camcorder The Language selection menu will appear Select the language of your choice and press the OK button to confirm the selection Setting the Date and Time The next step in the initial setup i...

Страница 9: ...utton while in the Video Capture mode Photo Capture Mode Use this mode to capture pictures with your camcorder After turning on your camcorder press the MODE button once to open the Photo Capture mode To take a picture aim your camcorder as desired and press the Shutter button The picture will be automatically saved to your camcorder s memory card To access the various menus for the Photo Capture ...

Страница 10: ...20x240 pixels File Format JPEG photos AVI videos External Memory SD MMC SDHC up to 32G SD Card not included LCD Display 1 8 Inch TFT LCD Lens f 3 6mm F2 6 Zoom 4X Digital Zoom Scene Auto Scenery Portrait Night Scene Night Portrait Sensitive Sport Beach Party Image Quality Normal Fine Super Fine White Balance Auto Daylight Cloudy Incandescent Fluorescent Anti Shake Yes ISO Auto 100 200 400 Frequenc...

Страница 11: ... able to download photos and videos to your PC you will need the following minimum configuration Microsoft Windows XP with Service Pack 3 Windows Vista with Service Pack 1 or Windows 7 Pentium 4 processor or above 1 GB of RAM with 250 MB of free hard disk space 16 bit Color monitor 1024 X 768 recommended screen resolution CD ROM Drive QuickTime 6 or higher Microsoft Internet Explorer 7 or higher W...

Страница 12: ...1024 x 768 or higher resolution monitor QuickTime 6 or higher Internet connection required Powering ON OFF Your Digital Camcorder Make sure the batteries have been inserted properly into your digital camcorder Make sure an SD card has been inserted properly into your camcorder SDHC card up to32 SD Card not included Powering the camcorder ON Press the Power button to turn your camcorder ON The camc...

Страница 13: ...ower Off settings can be set from the Auto Off settings menu in either Photo Capture Mode or Video Capture Mode Changing the Camcorder Mode Your camcorder has three main modes 1 Video Capture Mode Use this mode to capture videos with your camcorder 2 Photo Capture Mode Use this mode to capture photos with your camcorder 3 Playback Mode for photos and videos Use this mode to view the photos and vid...

Страница 14: ...on to scroll between the various menus for the current mode 3 Press the UP or DOWN direction control button to highlight the desired menu selection 4 Press the OK button to confirm and save the highlighted menu option 5 If the selection can be remembered by the camcorder a selection icon will appear to the right of the selected menu option Changes made to these options will remain as is until you ...

Страница 15: ...Press the Shutter button to START the video capture 4 The elapsed time appears on the top right corner of the LCD screen and a red icon blinks on the screen indicating that the video capture is in progress 5 To PAUSE and then BEGIN recording again press the LEFT direction control button 6 To STOP the video record press the Shutter button again 7 The video will automatically be saved to the camcord...

Страница 16: ...and continues your video capture UP Zooms In RIGHT Turns LED Light Off On DOWN Zooms Out Other Shutter OK Starts and stops your video capture Confirms and saves your selected menu option Delete Deletes last video taken MENU Opens the menu options for Video Capture Mode Exits the menu screen Note To navigate through the Menus use the UP DOWN LEFT RIGHT direction control buttons MODE Toggles between...

Страница 17: ...17 Video Capture Mode Menus The following are the menus that appear in your camcorder s Video Capture Mode ...

Страница 18: ...hat this setting will be saved by your camcorder until you manually change the setting or restore the camcorder s default factory settings Resolution Menu The Resolution menu allows you to choose the desired size of the images taken by your camcorder Keep in mind that images with a larger size will also take up more of your camcorder s memory 1 Press the MENU button to open the menus for the curre...

Страница 19: ...sired option 5 A selected option icon will appear on the selected item 6 Press the LEFT or RIGHT button to select the next menu item 7 Press the MENU button to exit the menu and return to your previous mode 8 An icon reflecting your selection will display on the LCD screen 9 Remember that this setting will be saved by your camcorder until you manually change the setting or restore the camcorder s ...

Страница 20: ...h your current environment will allow the camcorder to properly balance the colors in the images that are taken with your camcorder 1 Press the MENU button to open the menus for the current mode 2 Press the LEFT or RIGHT direction control buttons to scroll and select the White Balance menu 3 Press the UP or DOWN direction control buttons to scroll through the menu options 4 Press the OK button to ...

Страница 21: ...s default factory settings Sharpness Menu You can set the level of sharpness in the images taken with your camcorder The sharpness level dictates if the edges of objects in the image are more or less distinct 1 Press the MENU button to open the menus for the current mode 2 Press the LEFT or RIGHT direction control buttons to scroll and select the Sharpness menu 3 Press the UP or DOWN direction con...

Страница 22: ...r DOWN direction control buttons to scroll through the menu options 4 Press the OK button to select and save the desired option 5 A selected option icon will appear on the selected item 6 Press the LEFT or RIGHT button to select the next menu item 7 Press the MENU button to exit the menu and return to your previous mode 8 An icon reflecting your selection will display on the LCD screen 9 Remember ...

Страница 23: ... the menu and return to your previous mode 8 An icon reflecting your selection will display on the LCD screen 9 Remember that this setting will be saved by your camcorder until you manually change the setting or restore the camcorder s default factory settings Language Menu You can select your camcorder s language setting by selecting the desired language from the Language menu 1 Press the MENU bu...

Страница 24: ...will appear on the selected item 6 Press the LEFT or RIGHT button to select the next menu item 7 Press the MENU button to exit the menu and return to your previous mode 8 Remember that this setting will be saved by your camcorder until you manually change the setting or restore the camcorder s default factory settings To Set the Date and Time 1 Press the MENU button to open the menus for the curre...

Страница 25: ...saved by your camcorder until you manually change the setting or restore the camcorder s default factory settings Auto Off Menu You can use the Auto Power Off feature in order to conserve you camcorder s battery life The designated time represents when your camcorder will automatically power off When the camcorder sits idle for the designated period of time the camcorder will shut off completely a...

Страница 26: ...ntrol buttons to scroll through the menu options 4 Press the OK button to select and save the desired option 5 A selected option icon will appear on the selected item 6 Press the LEFT or RIGHT button to select the next menu item 7 Press the MENU button to exit the menu and return to your previous mode 8 Remember that this setting will be saved by your camcorder until you manually change the settin...

Страница 27: ...your captured images on your television NTSC television and video standard used in America Canada PAL television and video standard used in Europe 1 Press the MENU button to open the menus for the current mode 2 Press the LEFT or RIGHT direction control buttons to scroll and select the TV Setup menu 3 Press the UP or DOWN direction control buttons to scroll through the menu options 4 Press the OK ...

Страница 28: ...actory default settings 5 You will be asked to confirm the resetting to the factory default settings Select No to exit the menu and return to the previous mode without resetting to the default settings Select Yes and press the OK button to proceed with the reset You will then automatically exit the menu and return to the previous mode with the digital camcorder settings set to the Factory Default ...

Страница 29: ...y card until you find the video you would like to view Each captured image video and photo is displayed on the LCD screen Videos appear with an AVI icon on the top left of the LCD screen 2 Play your Selected Video Press the Shutter button to START playing the video Press the Shutter button again to PAUSE the video and to continue playing and pausing as needed To fully STOP the video and restore th...

Страница 30: ...ize 4 Once the selected video is full size you can play and view the video Video Playback Mode Quick Function Buttons Your digital camcorder has a four directional pad that functions as Quick Function buttons Quick Function Button Function LEFT Displays the PREVIOUS image UP Stops the selected Video Playback RIGHT Displays the NEXT image DOWN Opens Thumbnail View Note To Navigate in the Thumbnail ...

Страница 31: ...selected image MENU Opens the menu options for Video Capture Mode Note To navigate through the Menus use the UP DOWN LEFT RIGHT direction control buttons Exits the menu screen MODE Toggles between the Photo Capture Mode Video Capture Mode and Playback Mode Video Playback Mode Menus The following are the menus that appear in your camcorder s Video Playback Mode ...

Страница 32: ... window appears Select Yes to delete the selected video and then press OK to confirm Select No to exit without deleting the selected video and then press OK to confirm 6 DELETE ALL To delete all the images including all unlocked photos and videos on your camcorder s memory card select Delete All and then press OK A confirmation window appears Select Yes to delete the all the images and then press ...

Страница 33: ...he LCD screen when viewing that image in the Playback mode Videos that are not locked will not display the lock symbol 7 Remember that you cannot delete locked videos ViviLink Menu The ViviLink technology allows you to quickly and easily upload your camera s photos and videos to the social networks of your choice with the accompanying Vivitar Experience Image Manager application 1 Press the MENU b...

Страница 34: ...isplay on the back of the camcorder to direct the camcorder at the scene you would like to capture 2 Press the UP Zoom In and DOWN Zoom Out buttons to zoom in out if desired 3 Press the Shutter button to take the picture 4 The picture will automatically be saved to the camcorder s memory card LED Flash Light To add more light in a dark situation the camera has an LED flash light 1 Press the RIGHT ...

Страница 35: ... In RIGHT Turns LED Light Off On DOWN Zooms Out Other Shutter OK Captures your photo Confirms and saves your selected menu option Delete Allows you to delete last photo taken MENU Opens the menu options for Photo Capture Mode Exits the menu screen Note To navigate through the Menus use the UP DOWN LEFT RIGHT direction control buttons MODE Toggles between the Photo Capture Mode Video Capture Mode a...

Страница 36: ...36 Photo Capture Mode Menus The following are the menus that appear in your camcorder s Photo Capture Mode ...

Страница 37: ...hat this setting will be saved by your camcorder until you manually change the setting or restore the camcorder s default factory settings Resolution Menu The Resolution menu allows you to choose the desired size of the images taken by your camcorder Keep in mind that images with a larger size will also take up more of your camcorder s memory 1 Press the MENU button to open the menus for the curre...

Страница 38: ... the desired option 5 A selected option icon will appear on the selected item 6 Press the LEFT or RIGHT button to select the next menu item 7 Press the MENU button to exit the menu and return to your previous mode 8 An icon reflecting your selection will display on the LCD screen 9 Remember that this setting will be saved by your camcorder until you manually change the setting or restore the camco...

Страница 39: ...corder s default factory settings Anti Shake Menu The Anti Shake feature reduces image distortion that can be caused by movement of the camcorder while capturing the image 1 Press the MENU button to open the menus for the current mode 2 Press the LEFT or RIGHT direction control buttons to scroll and select the Anti Shake menu 3 Press the UP or DOWN direction control buttons to scroll through the m...

Страница 40: ...the LEFT or RIGHT button to select the next menu item 7 Press the MENU button to exit the menu and return to your previous mode 8 An icon reflecting your selection will display on the LCD screen 9 Remember that this setting will be saved by your camcorder until you manually change the setting or restore the camcorder s default factory settings Color Effect Menu You can choose to add a color effect...

Страница 41: ... the UP or DOWN direction control buttons to scroll through the menu options 4 Press the OK button to select and save the desired option 5 A selected option icon will appear on the selected item 6 Press the LEFT or RIGHT button to select the next menu item 7 Press the MENU button to exit the menu and return to your previous mode 8 An icon reflecting your selection will display on the LCD screen 9 ...

Страница 42: ...ronment When the ISO level is increased the image sensor in your camcorder will be more sensitive to light and allow you to capture images in lower light situations The higher sensitivity to light however may reduce the quality of the images that are taken When the ISO is reduced the image sensor in your camcorder will be less sensitive to light and will optimize the image quality in environments ...

Страница 43: ...f subject brightness background direct light and scenes Spot Meters the area within the spot point frame at the center of the LCD to set the exposure on the subject in the center of the monitor 1 Press the MENU button to open the menus for the current mode 2 Press the LEFT or RIGHT direction control buttons to scroll and select the Metering menu 3 Press the UP or DOWN direction control buttons to ...

Страница 44: ...aved by your camcorder until you manually change the setting or restore the camcorder s default factory settings Date Time Menu When you capture an image with your camcorder the image will include a time stamp with the date and time that the image was taken The Date Time menu allows you to set your camcorder s date and time as desired You can also disable the timestamp for future images that will ...

Страница 45: ...pen 5 Scroll through the window with the RIGHT and LEFT direction control buttons 6 For each field in the menu use the UP and DOWN direction control buttons to set the date and time 7 When you have finished setting the date and time press the OK button to save your settings and return to the previous mode Silent Mode Menu You have the option of activating the camcorder s Silent mode to disable all...

Страница 46: ...er will shut off completely and will need to be turned on again with the power button before the next use 1 Press the MENU button to open the menus for the current mode 2 Press the LEFT or RIGHT direction control buttons to scroll and select the Auto Off menu 3 Press the UP or DOWN direction control buttons to scroll through the menu options 4 Press the OK button to select and save the desired opt...

Страница 47: ... option icon will appear on the selected item 6 Press the LEFT or RIGHT button to select the next menu item 7 Press the MENU button to exit the menu and return to your previous mode 8 Remember that this setting will be saved by your camcorder until you manually change the setting or restore the camcorder s default factory settings Format SD Menu You can use the Format SD menu to delete all of the ...

Страница 48: ...elevision and video standard used in America Canada PAL television and video standard used in Europe 1 Press the MENU button to open the menus for the current mode 2 Press the LEFT or RIGHT direction control buttons to scroll and select the TV Setup menu 3 Press the UP or DOWN direction control buttons to scroll through the menu options 4 Press the OK button to select and save the desired option 5...

Страница 49: ...settings Select Yes and press the OK button to proceed with the reset You will then automatically exit the menu and return to the previous mode with the digital camcorder settings set to the Factory Default Settings Note After RESETTING to the default settings it is recommended to select your system Language and Date Time If you do not the next time your camcorder is powered on you will be prompte...

Страница 50: ...ton to Zoom Out of the selected photo Press the OK button once to view the magnified image without the display of the icons on the screen Press the OK button again to return to the original unmagnified image Thumbnail View Easily navigate and select the image you wish to view by using the Thumbnail View The images on your camcorder will be displayed in a 3 X 3 matrix where you can use the directio...

Страница 51: ...ess the UP DOWN LEFT RIGHT direction buttons To view the selected thumbnail image press the OK button Other Shutter OK Photos that are zoomed Hides the display icons and returns to the original sized photo Confirms and saves your selected menu option Delete Opens the Delete Menu and allows you to delete the selected image MENU Opens the menu options for Photo Capture Mode Note To navigate through ...

Страница 52: ...would like to delete 2 Press the MENU button to open the menus for the current mode 3 Press the LEFT or RIGHT direction control buttons to scroll and select the Delete menu 4 Press the UP or DOWN direction control buttons to scroll through the menu options 5 DELETE PHOTO To delete the selected photo select Delete Photo and then press OK A confirmation window appears Select Yes to delete the select...

Страница 53: ...uld like to rotate 2 Press the MENU button to open the menus for the current mode 3 Press the LEFT or RIGHT direction control buttons to scroll and select the Rotate menu 4 Press the UP or DOWN direction control buttons to scroll through the menu options 5 Press the OK button to select and save the desired option 6 Press the LEFT or RIGHT button to select the next menu item 7 Press the MENU button...

Страница 54: ...Print Image Menu You can use the Print Image menu to print the photos that are on your camcorder directly to a Pictbridge compatible printer 1 Scroll through your pictures and find the one you would like to print 2 Press the MENU button to open the menus for the current mode 3 Press the LEFT or RIGHT direction control buttons to scroll and select the Print Image menu 4 Press the UP or DOWN directi...

Страница 55: ...e Slide Show 4 Press the LEFT or RIGHT button to select the next menu item if you wish to view other menus without viewing the Slide Show 5 Press the MENU button to exit the menu and return to your previous mode ViviLink Menu The ViviLink technology allows you to quickly and easily upload your camera s photos and videos to the social networks of your choice with the accompanying Vivitar Experience...

Страница 56: ...ort 2 Turn On the TV and the camcorder and then set the TV to AV mode 3 You will need to set the TV format on the camcorder to suit the TV format of your TV set 4 Make sure the camcorder is set to the correct TV Output setting On plugging in the TV out cable a message will appear on the LCD screen to select NTSC or PAL for the type of TV you are using 5 Select the option as per the format NTSC or ...

Страница 57: ...perience Image Manager Installer window appears If the window does not appear open the application s CD DVD drive and click on Setup exe to launch the installer 3 On Macintosh Click the icon that appears on the desktop to install the Vivitar Experience Image Manager 4 If you do not have internet access at the time of inserting the CD ROM connect to the internet and then click the Install Vivitar E...

Страница 58: ... terms On PC and Macintosh Click the I accept the terms of this license agreement and then click Next to continue 10 On PC only Let the Vivitar Experience Image Manager installer create the folder to where the program will be installed and then click Install 11 Please wait while the application continues the installation process on your computer 12 On PC Click the Close button when the installatio...

Страница 59: ...o make the connection 4 The first time you connect the device to the computer you may have to wait a few seconds until the computer recognizes the device Getting Videos and Photos from Your Camcorder to Your Computer An SD card needs to be inserted in your camera Do not disconnect the built in USB connector during transfer Doing so will cancel the transfer of any files on their way to your compute...

Страница 60: ...of media files downloading to your computer A message appears when the download is complete 10 The photo and video files that you selected are now downloaded to your computer to the selected folder and albums ready for your use Get started Using the Vivitar Experience Image Manager you can Upload and manage photos and videos to and from the most popular photo sharing and social networking sites Fa...

Страница 61: ...Videos My Videos folder 9 Do not disconnect the USB connector during transfer Doing so will cancel the transfer of any files on their way to your computer MACINTOSH 1 Push open the USB cover on the side of the camcorder up to reveal the retractable built in USB connector 2 Plug the USB connector into an available USB port on your computer 3 Power the camcorder ON 4 MSDC appears on the LCD 5 The ca...

Страница 62: ...nnector NOTE iPad Camera Connector not included This may be purchased separately 2 Using an iPad SD Card Reader Connect the SD Card Reader to your iPad then insert your digital camera s SD card into the slot to import photos and videos directly from your camera s SD card NOTE iPad SD Card Reader not included This may be purchased separately After you make the connection your iPad automatically ope...

Страница 63: ...e including but limited to repair by unauthorized parties tampering modification or accident What To Do When Service Is Required When returning your defective product postage pre paid for service your package should include 1 Copy of original bill of sale 2 A detailed written description of the problem 3 Your return address and telephone number Daytime MAIL TO ADDRESS BELOW Sakar US Sakar Internat...

Страница 64: ... some sample photos and then try downloading them again With test photos if the camcorder powers off before you upload them to the computer the photos are not stored in the camcorder s memory These photos should be uploaded quickly before the camcorder powers off If the photos are saved to the SD memory card then all the photos should appear Q How do I make sure I don t lose important pictures Thi...

Отзывы: