CHS2 Series
21
22
bedroom, lounge, living room, study, toilet, bathroom, theater and attic.
•
When installing the device at the garage, please keep it away from drive way.
•
Keep the device from water sources such as taps, sewer pipes and sprinklers to prevent water seepage.
•
The product is to be installed in a high traffic area where the fault is likely to be seen.
Note: When installing outdoors, the height of the device from the ground should be considered to prevent the
device from soaking in water. The specific height is determined by the site environment.
4.3 Mounting Procedure
After Installation, you are suggested to tick in the right box (
□
) on the system label according to the battery
Rated Voltage/Rated Capacity/Usable Energy.
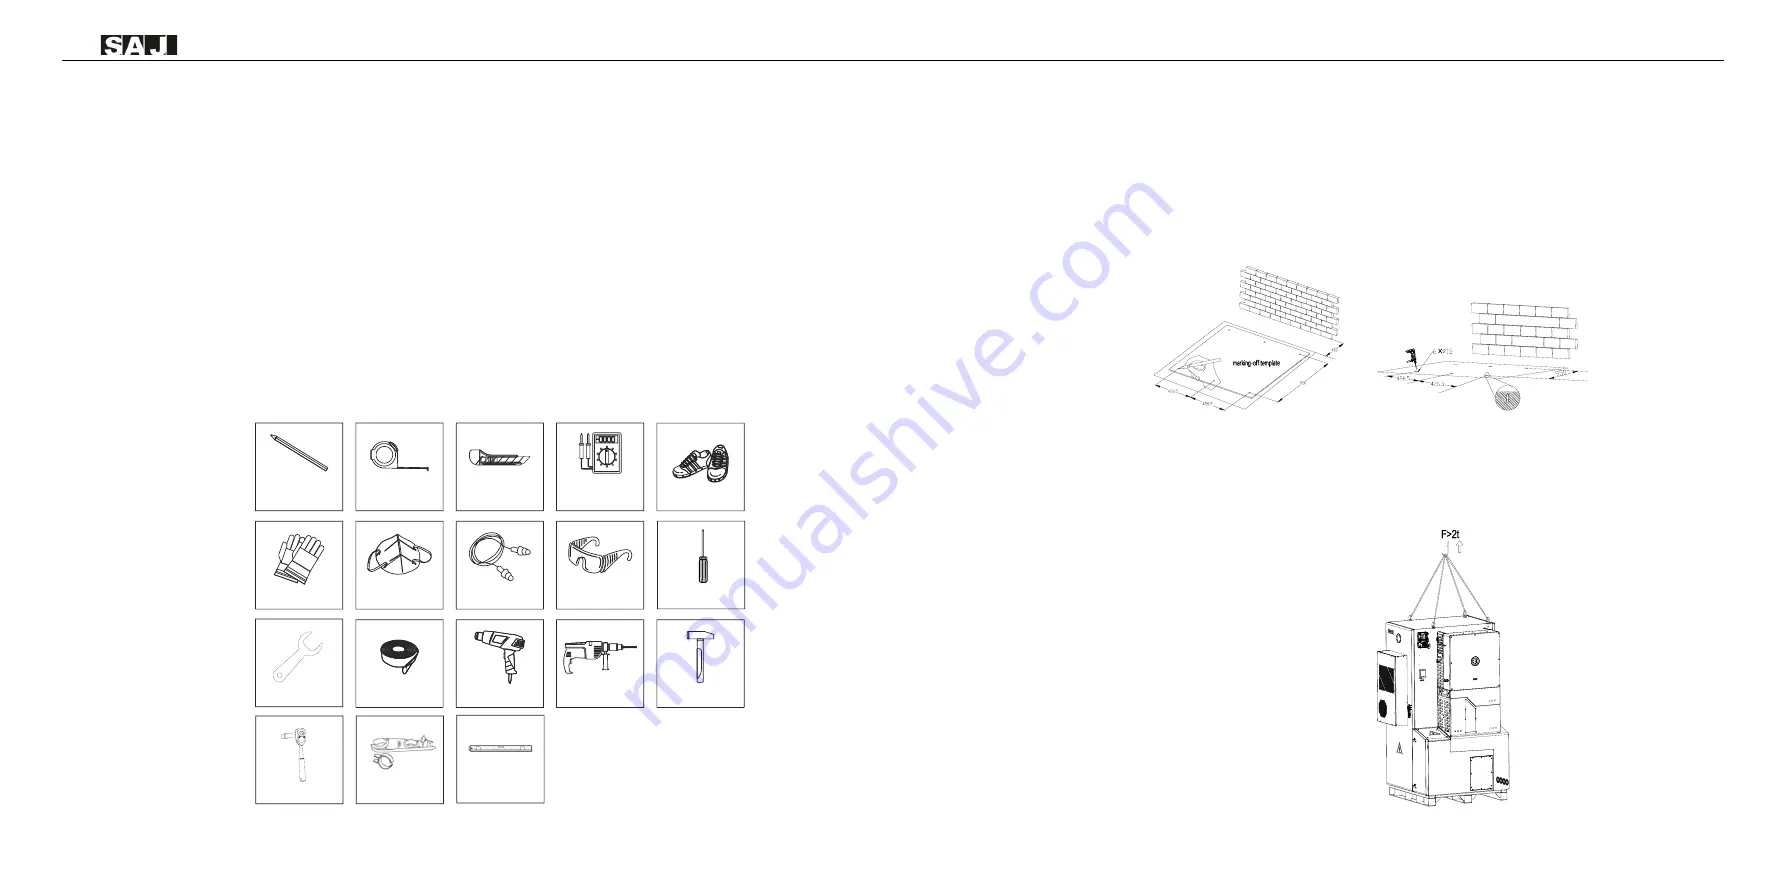
4.3.1 Installation Tools
Installation tools include but are not limited to the following recommended ones. Please use other auxiliary
tools on site if necessary.
4.3.2 Mounting Procedures
Ground Mounting
The ground should be flat and no inclination.
Step 1: Lay the marking-off template flat on the installation floor, then mark the location of the holes with a
marker, then remove the template and drill the holes with an electric drill (18mm in diameter, 80-90mm in
depth). Disassemble the M12*80 expansion screw and put the screw sleeve into the hole.
Figure 4.4
Drilling holes
Step 2: Transportation method
Crane handling:
Secure the eyebolts onto the top of the cabinet. Lift the cabinet and place it on the position of drilled holes.
Moving this device requires a force greater than 2t, and the angle between the sling and the top surface must
be greater than 60 degrees.
Figure 4.5
Placing the machine
Marker
Measuring tape
Utility knife
Multimeter
Measurement
range:
1100Vdc
Protective gloves
Dust mask
Earplugs
Goggles
Insulated shoes
Heat shrink tubing
Heat gun
Hammer drill
Rubber mallet
Phillips screwdriver
Wrench
Socket wrench
Removal tool
Gradienter
Содержание CHS2 Series
Страница 30: ...CHS2 Series 51 52...


