background image

2

QUICK-START GUIDE FOR THE P220 DIGITAL GAMEPAD

Congratulations on your purchase of the Saitek P220 Digital Gamepad—the entry level pad
with more than meets the eye! The feature set includes 6 conventionally positioned buttons, a
digital 8-way D-Pad, and 2 rapid-fire shoulder triggers for total gaming. On top of this, we’ve
also added a dual-mode digital throttle with enhanced LED indicators for superb control in the
game. Just follow the simple installation procedures below for your particular platform, and
you’re ready to go!

Installing the P220 Gamepad on Windows

®

98 (Second Edition)

1. With your computer switched on and all applications shut down, plug the Saitek P220

Digital Gamepad into one of your computer’s USB ports.

2. When the Add New Hardware Wizard appears, click Next and follow the on-screen

instructions.

3. When prompted, select Search for the best driver for your device (Recommended),

and click on Next.

4. At the following screen, select the CD-ROM drive option, insert your Windows

®

98 (SE)

CD, and click on Next.

5. Continue to follow the on-screen instructions until the installation is complete; then click

on Finish and remove your CD.

2

4

1

3

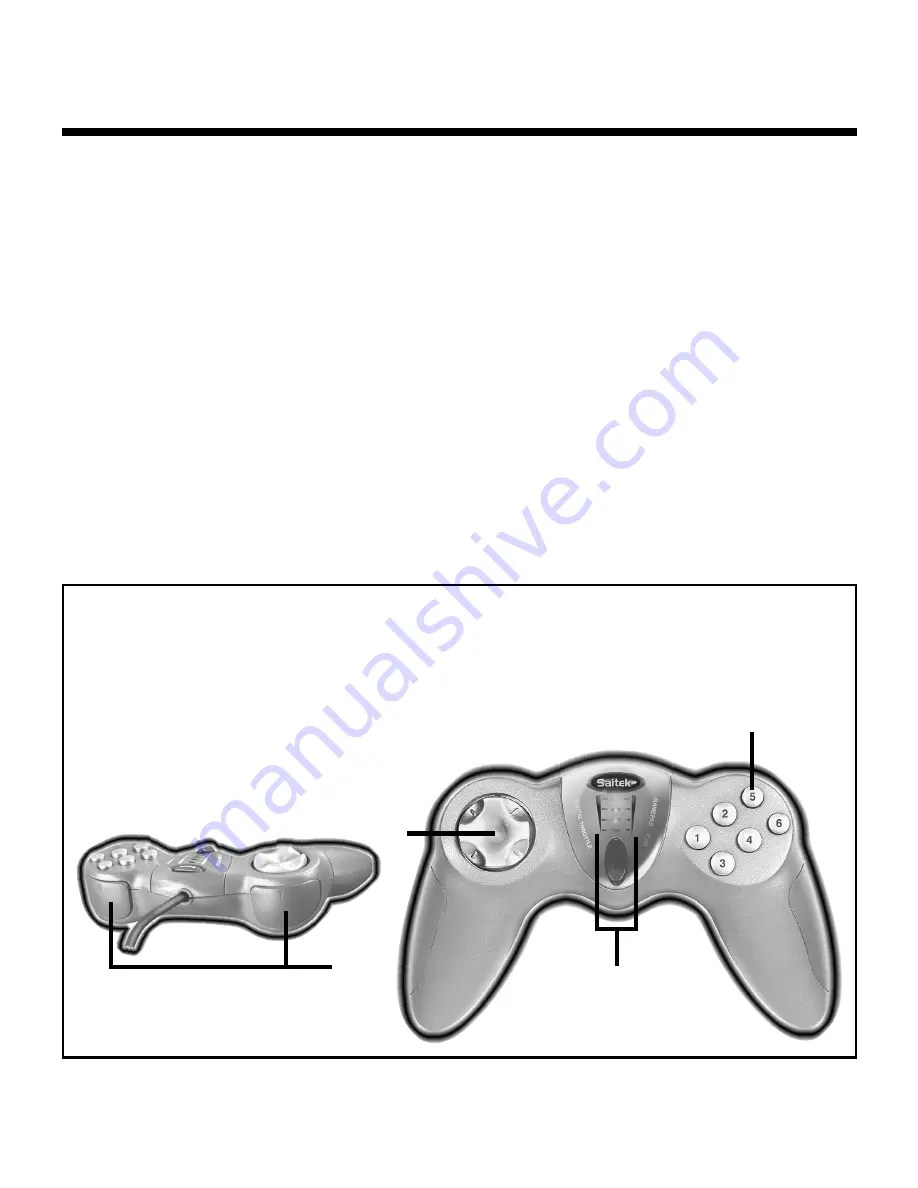
FEATURES AND CONTROLS

1. 8-way D-Pad
2. Game Buttons (6)
3. Dual-Mode Digital Throttle with LED Mode Indicators

• Mode 1: Sequential 4-step acceleration/deceleration
• Mode 2: Smooth progressive acceleration/deceleration

4. Quick-Fire Shoulder Triggers (2)

Содержание P220

Страница 1: ...USER MANUAL MANUEL D UTILISATION BEDIENUNGSANLEITUNG MANUALE D USO MANUAL DEL USUARIO P220 DIGITAL GAMEPAD...

Страница 2: ...r computer switched on and all applications shut down plug the Saitek P220 Digital Gamepad into one of your computer s USB ports 2 When the Add New Hardware Wizard appears click Next and follow the on...

Страница 3: ...P220 5 Next click on Properties to open the Gaming Options Properties window Click on the Test tab and try out the buttons and controls of your new gamepad The D Pad cursor should reach all four corn...

Страница 4: ...t Device 3 In the new screen select the Calibrate option and follow the on screen instructions 4 When the calibration is complete click on OK Your Saitek controller is now ready for action in your fav...

Страница 5: ...uct Before contacting Technical Support here are a few tips to help us in assisting you Make sure you have followed all the steps shown in this manual Check that the controller is correctly connected...

Страница 6: ...on the separate sheet packaged with this product transportation charges prepaid Any requirements that conflict with any state or Federal laws rules and or obligations shall not be enforceable in that...

Страница 7: ...s uses and can radiate radio frequency energy and if not installed and used in accordance with the instructions may cause harmful interference to radio communications However there is no guarantee tha...

Отзывы: